Cheese Balls
You guys! When my mom tasted this recipe, she said…” I think that’s one of the best things you’ve ever done”! I have to say, it’s one of my top five favorites! A Saturday afternoon experiment turned into the best Cheese Balls ever!
They have the same rich texture as a gourmet deli appetizer, but they’re made with simple ingredients, and they’re naturally gluten and egg-free. These savory bites are packed with sharp cheddar and smooth cream cheese, and their coating is loaded with crispy chopped bacon. I think you all know I’m a chocolate lover, I already tasted some sweet desserts and so many sweet treats before, I rarely love a recipe that doesn’t have chocolate in the name, but these are just to die for! If you are planning a larger party menu, you can easily pair these with my savory Party Dips to feed a hungry crowd.

The recipe makes one massive party-sized cheese ball, I typically like to make things in smaller sizes since I do so much snacking, but if you have a bigger group or want to make more, you can double the batch and make two! These savory snacks can be a party appetizer, or you can pair them with some crackers and wine for a relaxing evening. They’re also great for meal prep, if you want to make a large batch, store them in the fridge, and pull them out for easy snacking during the week!
The Science Behind It
Blending the cheeses at a soft room temperature ensures the dairy proteins combine into a perfectly smooth matrix without separating or creating unappealing lumps. Chilling the formed sphere at 37°F for two hours allows the butterfats to firm up completely so the ball holds its shape when rolled.
Finely mincing the bacon and nuts to an eighth of an inch provides a high surface-area contact with the sticky cheese base. If you love serving crowd-pleasing snacks like this, you should also try making my crispy Mozzarella Sticks for your next gathering.
This specific textural contrast between the crunchy exterior and velvety interior is what makes this appetizer irresistible.
Ingredients

- cream cheese: Two 8-ounce packages, completely softened at room temperature for smooth blending.
- sharp cheddar cheese: Finely shredded to ensure it distributes evenly throughout the cream cheese base.
- Worcestershire sauce: Adds a necessary savory depth and umami punch to the cheese mixture.
- hot sauce: Provides a subtle background warmth without making the final dish overly spicy.
- garlic powder: Introduces an essential aromatic flavor that cuts through the rich dairy notes.
- onion powder: Adds a sweet and savory background note that complements the sharp cheddar.
- cooked bacon: Fried until completely crispy, drained thoroughly, and finely crumbled for the outer crust.
- pecans: Finely chopped to provide an earthy crunch that contrasts with the creamy center.
- fresh flat-leaf parsley: Finely minced to add a vibrant green color and a clean fresh finish to the topping.
Tools You’ll Need
- Large glass mixing bowl: A spacious clear glass mixing bowl allows you to blend the thick cheeses easily without overflowing — a small or thin plastic bowl will flex too much and make thorough mixing difficult.
- Sturdy rubber spatula: A heavy-duty rubber spatula provides the necessary leverage to mash and blend the dense cream cheese paste smoothly — a flimsy spoon will bend or snap under the pressure.
- Wooden cutting board: A large flat wooden cutting board offers ample surface area to spread out your crunchy toppings so the cheese sphere can roll and coat evenly without spilling over the edges.
Method
Step 1: Blend the cheese base
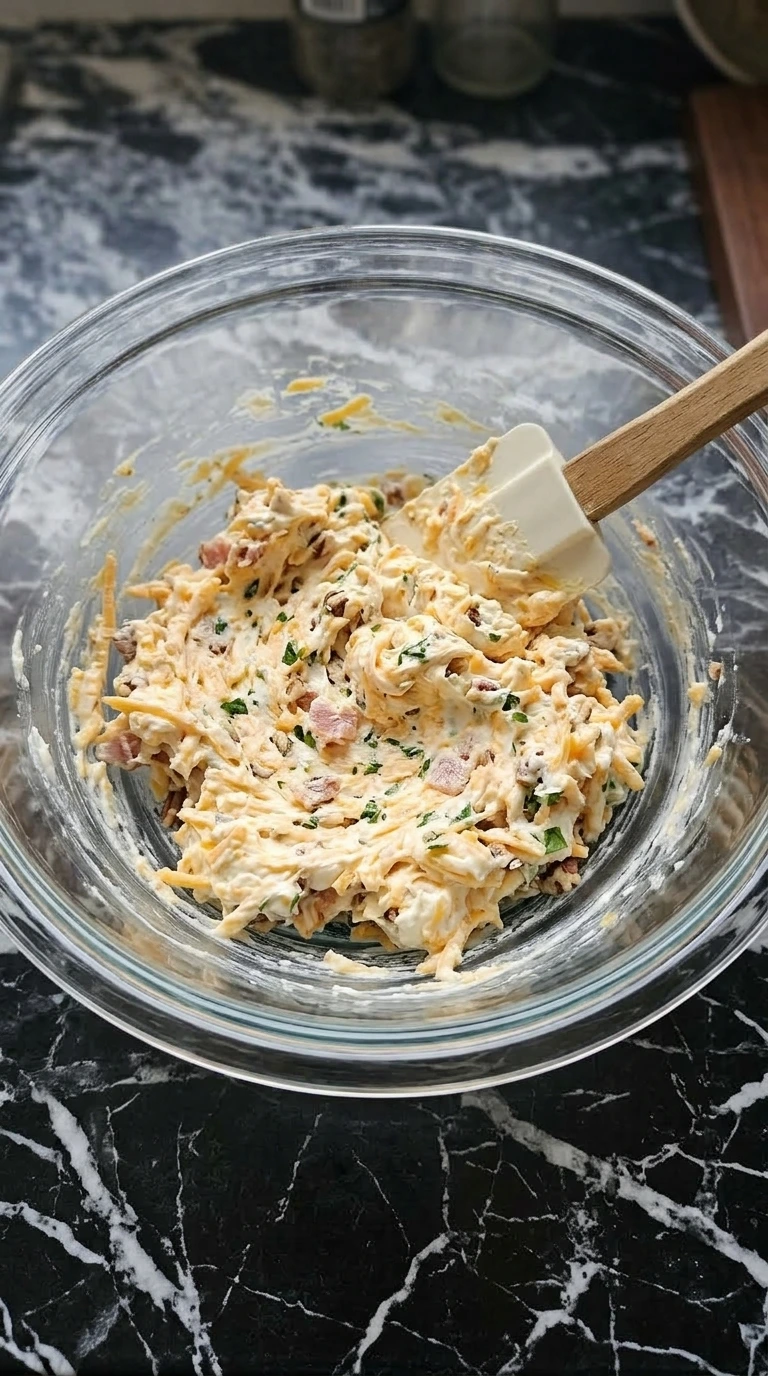
Bring the cream cheese to room temperature so it softens completely before you begin blending. Place the softened cream cheese and shredded sharp cheddar into a large clear glass mixing bowl. Add the Worcestershire sauce, hot sauce, garlic powder, and onion powder directly over the cheese components.
Use a sturdy rubber spatula to blend the cheeses together with a firm mashing and folding motion. You must mix the base thoroughly until the yellow cheddar strips are distributed evenly through the white cream cheese. Look for a thick uniform pale-orange paste with no large white pockets of plain cream cheese left.
(I tried using cold cream cheese the first time, it formed lumpy beads that refused to smooth out. Softening it on the counter for exactly 60 minutes is the necessary fix. ) Blend firmly at room temperature, the softened structure ensures the savory spices incorporate evenly without pockets of heat.
Tip: Make sure your cream cheese is truly soft to the touch. If it feels chilly or firm, it will create tiny lumps that ruin the velvety texture.
Step 2: Shape into a firm sphere

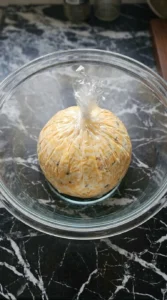
Scrape the blended cheese mixture from the sides of the bowl into the center using your spatula. Lay a sheet of plastic wrap flat on your counter surface, then scoop the entire cheese mass onto the center of the plastic. Pull the corners of the plastic wrap tightly upward and wrap the cheese completely.
Use the palms of both hands to press and mold the wrapped cheese package into a smooth round sphere shape. You’ll feel the mixture yield under your hands as you smooth out any irregular edges or sharp points. Mold it until it forms a tight uniform mound that holds its shape without flattening out on the bottom.
Chill the wrapped ball in a refrigerator set to 37°F for at least 2 hours until it feels hard. Miss this cooling window and the cheese will stick to your hands and collapse when you try to roll it later. Chill for 2 hours, the cold temperature solidifies the fats so the sphere maintains its structure during coating.
Tip: Twist the top of the plastic wrap tightly like a pouch. This forces the cheese into a more perfect sphere shape and keeps it airtight.
Step 3: Prepare the crunchy coating

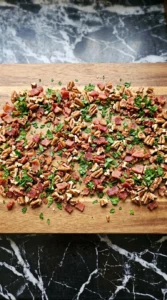
Scatter the crumbled crispy bacon, finely chopped pecans, and minced fresh flat-leaf parsley across a wide wooden cutting board. Use your hands to toss the ingredients together gently until they are thoroughly mixed on the board surface. Spread the mixture out into an uneven rectangular bed that is slightly wider than the cheese sphere.
You should see a beautiful contrasting mix of deep brick-red bacon bits, earthy brown pecans, and bright green parsley flakes. The pieces should be chopped to an even size of about an eighth of an inch so they adhere well. Avoid leaving large chunks of bacon because they will fall away from the cheese surface later.
(My first batch used large bacon pieces, they constantly tumbled off the sides and left bare white spots everywhere. Finely chopping everything solves this issue. ) Spread the coating evenly across the board, the flat surface allows the cheese sphere to collect toppings uniformly.
Tip: Dry your minced parsley thoroughly with a paper towel after chopping. Wet herbs will damp the bacon and make the outer coating lose its crunch.
Step 4: Roll and coat the sphere
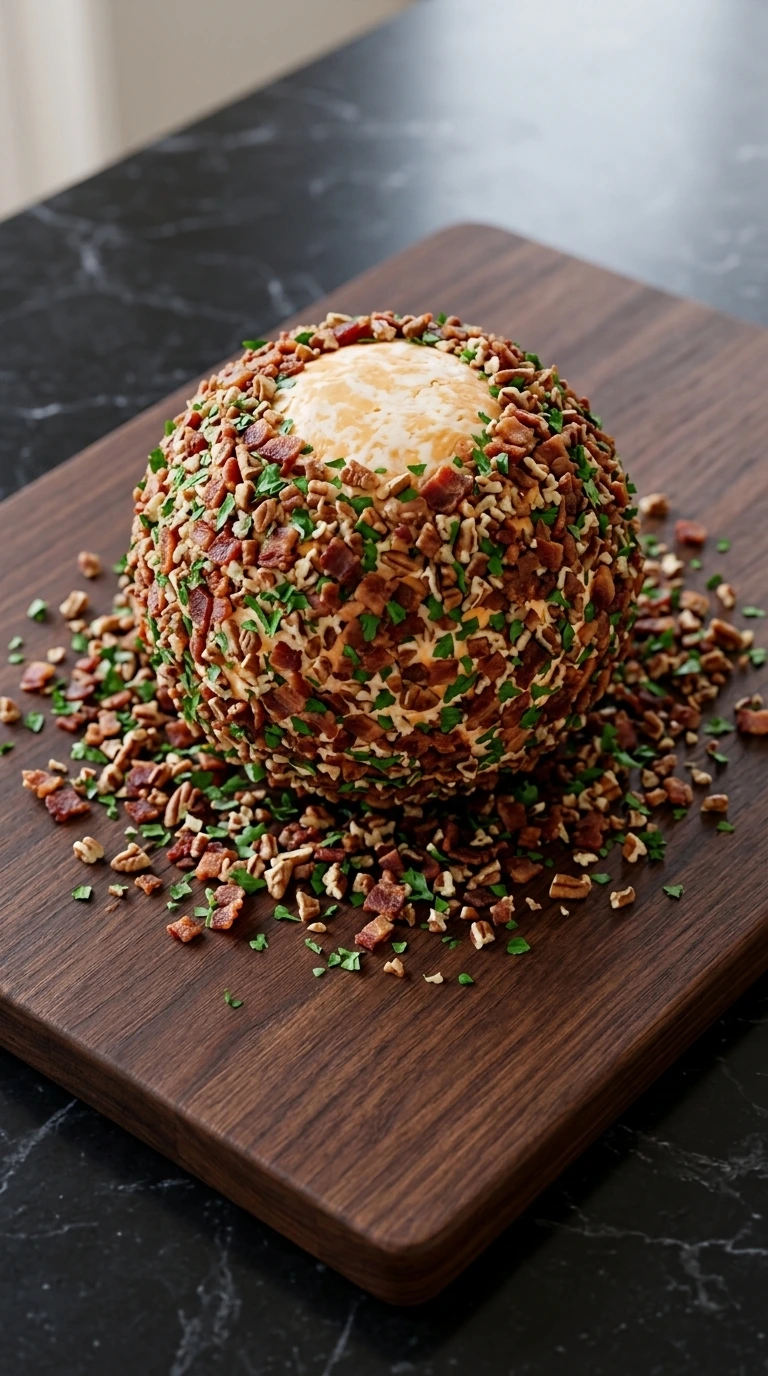
Unwrap the chilled cheese ball carefully and place it directly onto the center of the bacon and herb mixture. Roll the firm sphere slowly across the board using light pressure from your fingertips to press the toppings into the cheese. Tilt and rotate the ball in all directions until every square inch of the cheese is covered.
You will see the pale orange surface disappear completely behind a dense rustic layer of savory bacon and green herbs. The ball will gain a rough crunchy exterior texture as the nuts and meat press into the outer skin. Gentle hand pressure ensures the toppings imbed securely without flattening the round shape of your appetizer.
Press the toppings firmly but gently, the sticky outer layer of cheese acts as a natural glue for the crunchy elements. Roll until fully covered, missing any spots exposes bare cheese which dries out quickly in the fridge.
Tip: If you notice any small bare spots after rolling, simply pick up a handful of toppings and press them directly onto the open patches.
My Favorite Tips
- Grate your own sharp cheddar cheese from a block because pre-bagged shreds are coated in cellulose that prevents smooth blending.
- Drain the cooked bacon thoroughly on three layers of paper towels to remove all excess grease before chopping it.
- Toast the chopped pecans in a dry skillet over medium-low heat for exactly 3 minutes to unlock their full nutty aroma.
- Use high-quality full-fat cream cheese because light versions contain extra water that makes the final sphere weep and lose shape.
- Roll the cheese ball in a fresh sheet of plastic wrap after coating it to help press the bacon deeper into the surface.
- Let the appetizer rest on the counter for 15 minutes before serving so it softens enough for easy scooping.
- Chop the parsley using a very sharp chef knife to prevent bruising the leaves and turning the outer coating wet.
- Add 1 tablespoon of visual ranch seasoning mix and 1/4 cup of chopped dried cranberries to the cheese base for a sweet and tangy holiday twist.
- Roll the finished sphere in a blend of toasted sesame seeds, poppy seeds, dried garlic, and dried onion for an everything-bagel style appetizer.
- Mix 2 tablespoons of diced canned jalapeños into the cheese matrix to create a popper-style snack that pairs perfectly with tortilla chips.
Substitutions
- sharp cheddar cheese: shredded pepper jack cheese — Use the exact same measurement to add a spicy kick and a speckled look to the inside of your appetizer.
- pecans: chopped walnuts — Swap them out using a one-to-one ratio if you prefer a slightly more bitter and earthy nut flavor on the crust.
- cream cheese: dairy-free cream cheese alternative — Works well but the base will feel slightly softer, so you must chill the sphere for an extra hour before rolling.
- cooked bacon: toasted sunflower seeds — If you want a lighter vegetarian alternative for your party table, try swapping the meat for seeds or check out my fresh Fruit Smoothies for a totally different healthy option.
Keeping Leftovers
You can store any leftover cheese ball pieces in an airtight container in the fridge at 37°F for up to four days. Wrap the exposed edges tightly with plastic wrap before popping the lid on so the cream cheese doesn’t absorb funky fridge smells.
Don’t freeze the leftovers once they’re rolled in the toppings because the pecans get soft and the parsley turns slimy when it thaws. When you want to eat them the next day, just grab the container and let it sit on the counter for 10 minutes to take the chill off.
If the coating lost its crunch, just scatter a tablespoon of fresh crumbled bacon over the top to bring back that texture. Give it a quick sniff for any sour aroma or surface moisture before diving in, since those are dead giveaways that the dairy went bad.
Cheese Balls
Ingredients
- 16 ounces cream cheese Two 8-ounce packages, completely softened at room temperature for smooth blending.
- 2 cups sharp cheddar cheese Finely shredded to ensure it distributes evenly throughout the cream cheese base.
- 1 tablespoon Worcestershire sauce Adds a necessary savory depth and umami punch to the cheese mixture.
- 1 teaspoon hot sauce Provides a subtle background warmth without making the final dish overly spicy.
- 0.5 teaspoon garlic powder Introduces an essential aromatic flavor that cuts through the rich dairy notes.
- 0.5 teaspoon onion powder Adds a sweet and savory background note that complements the sharp cheddar.
- 6 strips cooked bacon Fried until completely crispy, drained thoroughly, and finely crumbled for the outer crust.
- 0.5 cup pecans Finely chopped to provide an earthy crunch that contrasts with the creamy center.
- 0.25 cup fresh flat-leaf parsley Finely minced to add a vibrant green color and a clean fresh finish to the topping.
Instructions
- Bring the cream cheese to room temperature so it softens completely before you begin blending. Place the softened cream cheese and shredded sharp cheddar into a large clear glass mixing bowl. Add the Worcestershire sauce, hot sauce, garlic powder, and onion powder directly over the cheese components. Use a sturdy rubber spatula to blend the cheeses together with a firm mashing and folding motion. You must mix the base thoroughly until the yellow cheddar strips are distributed evenly through the white cream cheese. Look for a thick uniform pale-orange paste with no large white pockets of plain cream cheese left. (I tried using cold cream cheese the first time, it formed lumpy beads that refused to smooth out. Softening it on the counter for exactly 60 minutes is the necessary fix.) Blend firmly at room temperature, the softened structure ensures the savory spices incorporate evenly without pockets of heat.

- Scrape the blended cheese mixture from the sides of the bowl into the center using your spatula. Lay a sheet of plastic wrap flat on your counter surface, then scoop the entire cheese mass onto the center of the plastic. Pull the corners of the plastic wrap tightly upward and wrap the cheese completely. Use the palms of both hands to press and mold the wrapped cheese package into a smooth round sphere shape. You’ll feel the mixture yield under your hands as you smooth out any irregular edges or sharp points. Mold it until it forms a tight uniform mound that holds its shape without flattening out on the bottom. Chill the wrapped ball in a refrigerator set to 37°F for at least 2 hours until it feels hard. Miss this cooling window and the cheese will stick to your hands and collapse when you try to roll it later. Chill for 2 hours, the cold temperature solidifies the fats so the sphere maintains its structure during coating.
- Scatter the crumbled crispy bacon, finely chopped pecans, and minced fresh flat-leaf parsley across a wide wooden cutting board. Use your hands to toss the ingredients together gently until they are thoroughly mixed on the board surface. Spread the mixture out into an uneven rectangular bed that is slightly wider than the cheese sphere. You should see a beautiful contrasting mix of deep brick-red bacon bits, earthy brown pecans, and bright green parsley flakes. The pieces should be chopped to an even size of about an eighth of an inch so they adhere well. Avoid leaving large chunks of bacon because they will fall away from the cheese surface later. (My first batch used large bacon pieces, they constantly tumbled off the sides and left bare white spots everywhere. Finely chopping everything solves this issue.) Spread the coating evenly across the board, the flat surface allows the cheese sphere to collect toppings uniformly.
- Unwrap the chilled cheese ball carefully and place it directly onto the center of the bacon and herb mixture. Roll the firm sphere slowly across the board using light pressure from your fingertips to press the toppings into the cheese. Tilt and rotate the ball in all directions until every square inch of the cheese is covered. You will see the pale orange surface disappear completely behind a dense rustic layer of savory bacon and green herbs. The ball will gain a rough crunchy exterior texture as the nuts and meat press into the outer skin. Gentle hand pressure ensures the toppings imbed securely without flattening the round shape of your appetizer. Press the toppings firmly but gently, the sticky outer layer of cheese acts as a natural glue for the crunchy elements. Roll until fully covered, missing any spots exposes bare cheese which dries out quickly in the fridge.

Notes
Nutrition
FAQ
Yes you can absolutely prepare this dish ahead of time. Wrap the cheese sphere tightly in plastic wrap after the shaping stage and keep it in a 37°F refrigerator for up to three days. I highly recommend waiting to roll the ball in the bacon and pecan mixture until the day you plan to serve it because this keeping technique prevents the toppings from becoming soggy.
This common problem happens when the cream cheese base is still too cold and firm from the refrigerator. If the dairy fats are chilled below 50°F, they lose their elasticity and will split apart under pressure instead of molding smoothly. Simply let the mixture sit at room temperature for 15 minutes to soften slightly, then press it firmly together again using the warmth of your hands.
You can freeze the uncoated cheese sphere but you should avoid freezing the finished version with the toppings attached. Wrap the plain cheese ball in two layers of plastic wrap and place it inside a heavy-duty freezer bag for up to one month. Thaw it completely in the refrigerator for 24 hours, then roll it in fresh bacon and herbs right before your guests arrive.
A classic assortment of round buttery crackers, wheat thins, and pretzel twists offers the best structural support for scooping. You can also surround the platter with fresh celery sticks, sliced English cucumbers, and red grapes to provide a crisp and healthy balance to the rich dairy. Avoid flimsy potato chips because they will snap instantly when dipping.
You can easily double all the ingredient measurements to create a massive centerpiece appetizer or two medium-sized spheres. If you double the recipe, I suggest forming two separate balls rather than one giant mound because smaller shapes are much easier for guests to access. Mix the entire double batch in one large bowl, then divide the paste evenly into two sheets of plastic wrap.
Before You Go
If you make this on a weekend afternoon with music playing, the way I do, you’ll understand why it’s been in our family rotation for years now. The little trick I mentioned about not rushing the final step is honestly the difference between okay and really good.
Tag me on Instagram if you make it, I love seeing what you cook. And Liam says hi (he ate almost half of this when I tested it, which is the highest endorsement you’ll get from a 5-year-old).
The modern cheese ball became an absolute legend back in 1944. That’s when a killer recipe hit the pages of a popular American cookbook, and it instantly turned this creamy party food into a total classic for casual holiday hosting.