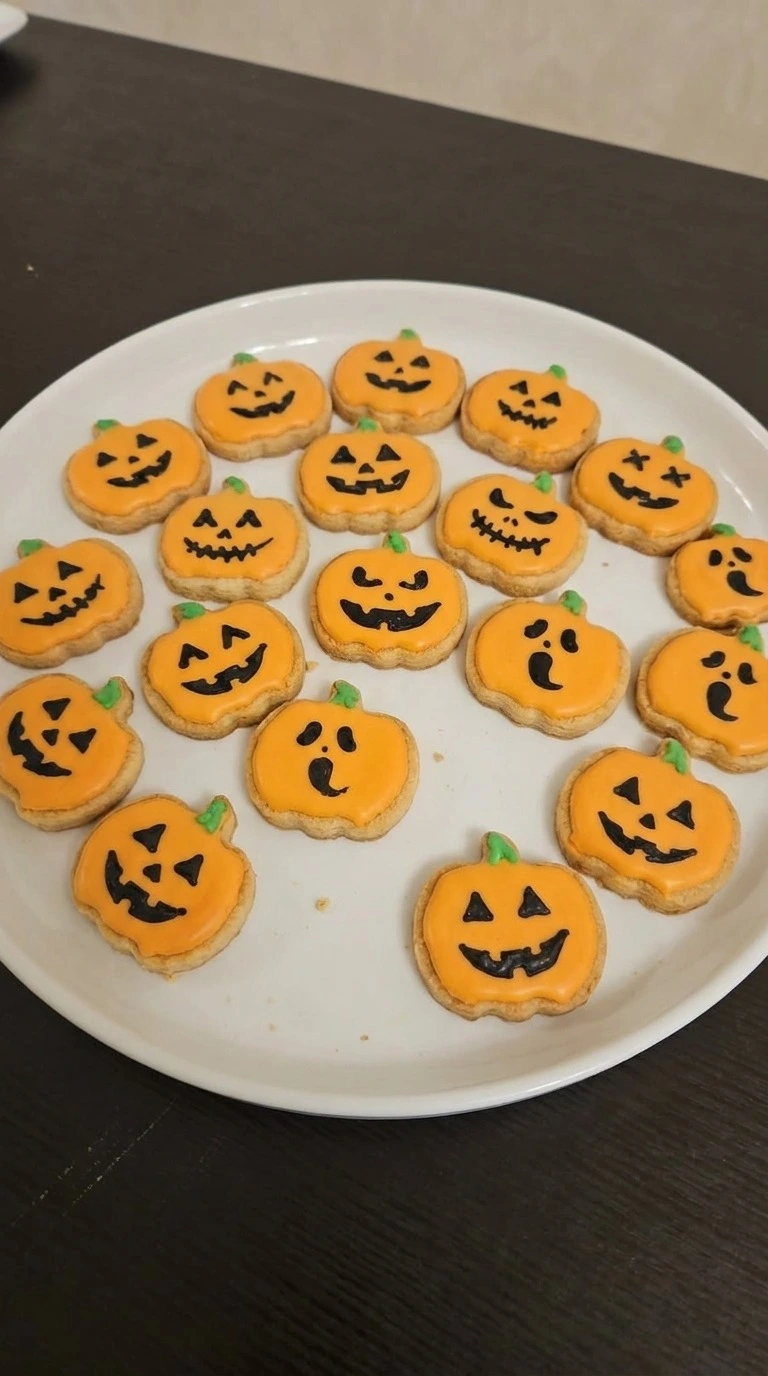
Halloween Pumpkin Painting
These painted pumpkin cookies turn a holiday craft into an easy edible project with crisp pumpkin sugar cookies and smooth royal icing. They're quick to decorate once cooled and the simple color plan keeps things manageable. The best part is the lightly spiced vanilla smell and soft snap at the edge. What makes this version different is the 350°F bake and short icing rest, which give clean shapes for a party, holiday table Search focus: halloween pumpkin painting ideas easy.
Print
Pin
Servings: 18
Ingredients
- 2 1/4 cups all-purpose flour Spoon and level it before mixing so the cutout dough stays tender but firm enough to hold pumpkin ridges.
- 1/2 teaspoon baking powder Use a small amount for a light bite without enough lift to blur the cookie shapes.
- 1/2 teaspoon fine sea salt Distribute it evenly through the dough to balance the sugar and cinnamon.
- 1 teaspoon ground cinnamon Mix it through the dry ingredients for a warm flavor and visible fine specks.
- 3/4 cup unsalted butter Soften to about 65°F before creaming so it traps air without turning greasy.
- 3/4 cup granulated sugar Cream it with the butter for sweetness and a crisp edge that still keeps a tender center.
- 1 large large egg Use at room temperature so it blends into the creamed butter without curdling the mixture.
- 2 teaspoons pure vanilla extract Add it with the egg for a clean vanilla note that supports the cinnamon.
- 4 cups powdered sugar Sift if lumpy so the royal icing dries smooth enough for painted details.
- 3 tablespoons meringue powder Whip it with powdered sugar and water to create royal icing that dries firm enough for stacking.
- 5 tablespoons plus 1 teaspoon water Use 5 tablespoons for the base icing and reserve 1 teaspoon for small consistency adjustments.
- 1/2 teaspoon orange gel food coloring Tint the largest icing portion until it reaches a vivid pumpkin orange.
- 1/4 teaspoon black gel food coloring Tint a smaller icing portion deeply enough to keep the facial details clear over orange.
- 1/8 teaspoon leaf green gel food coloring Tint a small icing portion for stem details that stay distinct from the black faces.
Instructions
- Keep the unsalted butter near 65°F and beat it with the granulated sugar for 2 to 3 minutes until the mixture looks pale and slightly fluffy. Then beat in the egg and pure vanilla extract for 30 seconds. Add the all-purpose flour, baking powder, fine sea salt and ground cinnamon and mix only until no dry streaks remain. The dough should look soft but hold a clean ridge when pressed. Stop once it gathers into thick clumps because another minute of mixing can make the cookies tougher and less tidy around the edges. Halloween Pumpkin Painting works better when the dough stays firm enough to hold its shape. Short mixing limits excess gluten.
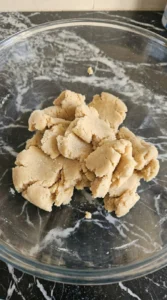
- Chill the dough at about 38°F for 30 minutes. Then roll it to an even 1/4-inch thickness and cut 18 pumpkin shapes, lifting each one straight up so the lobes don't stretch. Place the cut shapes in a single layer and chill them for another 10 minutes before baking. The chilled shapes should feel firm at the edges and stay flat when moved. If the dough bends or leaves soft fingerprints, give it 5 more minutes in the refrigerator. Go in warm and the cookies spread until the pumpkin ridges blur. Cold butter holds the silhouette through the first minutes of baking.
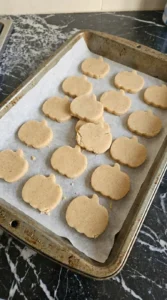
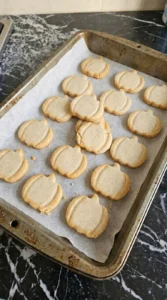
- Bake the 18 chilled pumpkin cookies at 350°F for 10 to 12 minutes and rotate the tray once at minute 6. Pull them when the centers look dry and the outer ridges turn light golden. Let them rest on the tray for 5 minutes before moving them to cool completely. You'll smell butter and cinnamon just before the edges deepen in color. The centers should stay pale and flat. (My first batch baked 14 minutes and the cookies tasted crisp all the way through. Ten to twelve gives a better bite.) Go too far and the painted surface becomes brittle. Halloween Pumpkin Painting needs a flat cookie base. Moderate heat sets the shape before the edges darken.
- Keep the water near 70°F and mix the powdered sugar with the meringue powder for 20 seconds before adding 5 tablespoons of water. Beat for 3 to 4 minutes until glossy peaks form. Then thin small portions with the remaining water until a ribbon drawn across the surface disappears in about 12 seconds. The icing should settle slowly without running like milk. Divide it into orange, black and leaf green portions and tint each one with gel food coloring. Stop once the colors look even because overmixing traps bubbles that pockmark the dry surface. Thick icing leaves ridges. Twelve-second icing levels while still holding a border.
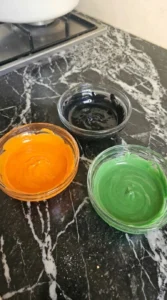
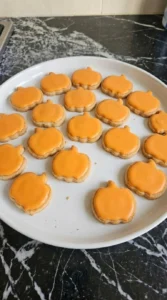
- Make sure the cookies have cooled below 80°F. Spoon or pipe orange icing onto all 18 cookies and push it toward the ridged edges in small circular motions, leaving a narrow cookie border visible. Let the orange layer rest at about 70°F for 30 to 40 minutes before adding darker details. The surface should lose its wet shine and feel set at the outer edge while staying slightly soft underneath. Halloween Pumpkin Painting gets muddy if black icing touches a wet orange base. Start too soon and the colors feather into one another. A brief surface set keeps each painted line sharp.
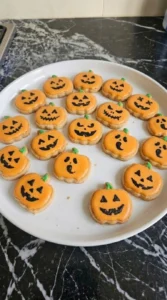
- Keep the room near 70°F and use the black icing for eyes, mouths and uneven face details on the 18 orange cookies. Add small leaf green stem marks last. Work for about 20 minutes and vary the expressions so the batch looks hand-painted instead of stamped. The black lines should sit on top of the orange layer without bleeding at the edges. Let the finished cookies dry for 45 to 60 minutes before stacking or serving. Press too soon and the details dent or smear. Halloween Pumpkin Painting looks best with small imperfections. Drying sets the sugar structure so the painted surface stays intact.
Notes
Store finished cookies in a rigid airtight container at room temperature for 4 to 5 days once the icing is completely dry. For longer storage, freeze undecorated cookies for up to 2 months with parchment between layers and wrap the container tightly. These cookies don't need reheating. If frozen, thaw them covered for about 2 hours at room temperature and decorate afterward. Discard cookies if they smell stale, develop moisture spots or the icing becomes unusually sticky.