
Ingredients
Method
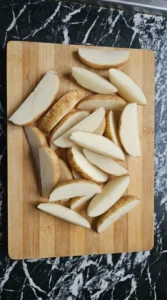
- Scrub the 4 whole unpeeled russet potatoes thoroughly under cold running water to remove any dirt. Place them on a large wooden cutting board. Cut each potato in half lengthwise, then slice each half into uniform 1/2-inch thick wedges. You should see clean white potato flesh surrounded by a thin layer of brown skin. The cuts must be uniform so everything cooks at the exact same rate. If you leave some pieces too thick, they won't cook through in time. (I tried using smaller red potatoes once, they turned out way too mushy. Stick to large russet potatoes because their high starch content yields the crispiest edges.) Cut the pieces evenly, the uniform thickness ensures even baking throughout the process.
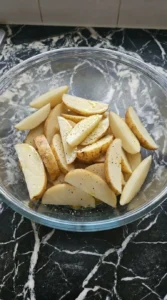
- Transfer the sliced potato wedges into a large clear glass mixing bowl. Drizzle 3 tablespoons of extra virgin olive oil over the potatoes, then sprinkle 1 teaspoon of fine sea salt and 1/2 teaspoon of black pepper evenly across the batch. Toss the wedges gently with your hands using a scooping motion from bottom to top. Every single wedge should look glossy and slick with oil. The seasoning must coat the surfaces completely without pooling at the bottom of the bowl. You'll smell the sharp aroma of the black pepper combining with the fruity olive oil notes. Miss this coating stage and the potatoes will dry out in the oven instead of crisping up beautifully. Toss thoroughly before baking, the oil barrier locks in moisture while crisping the exterior skins.
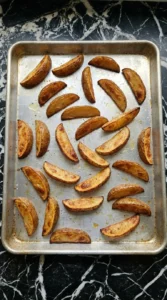
- Arrange the seasoned potato wedges on a large rimmed aluminum sheet pan in a single layer. Spread them out evenly so they aren't touching or overlapping. Bake in a 425°F preheated oven for exactly 25 to 30 minutes, flipping them once halfway through with a metal spatula. You'll hear a loud sizzling sound and the edges will turn a beautiful deep golden-brown color. The skins will look slightly wrinkled and crisp to the touch. A wonderful toasted potato aroma will fill your kitchen right when they are ready. Crowd the pan too much and the potatoes will steam instead of roast. Bake in a single layer, ample spacing allows the hot air to circulate for a perfect crunch.
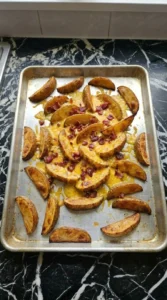
- Use the metal spatula to slide the hot baked wedges together into a tight cluster in the center of the same aluminum sheet pan. Scatter 2 cups of shredded sharp cheddar cheese evenly over the top, then sprinkle 6 strips of cooked chopped bacon over the cheese layer. Return the sheet pan to the 425°F oven for 5 minutes. Watch through the oven door as the cheese melts completely and starts to bubble around the edges. The bacon pieces will sink slightly into the molten yellow cheddar layer. You'll smell the rich smoky bacon combined with the sharp dairy aroma. Go past 6 minutes and the cheese fats will separate and turn greasy. Melt just until bubbly, quick high heat keeps the dairy smooth without breaking the texture.
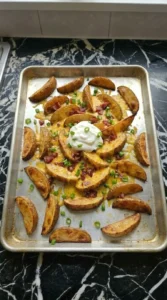
- Carefully remove the sheet pan from the oven and place it on a heat-safe surface. Add a large dollop of 1/2 cup of thick sour cream right in the center of the hot cheesy fries. Scatter 1/4 cup of finely chopped green chives across the entire dish before transferring a portion to a white plate. The cool white sour cream will contrast beautifully against the hot yellow melted cheese. The bright green chives will stand out against the smoky bacon pieces. You'll see tiny wisps of steam rising from the assembled dish. Skip the immediate serving and the hot fries will absorb the moisture from the sour cream. Serve immediately after assembling, the temperature contrast between hot cheese and cold sour cream is essential.
Notes
Store any leftovers in a sealed glass container in the refrigerator for up to 3 days. Do not freeze the fully assembled dish because the sour cream and cooked potatoes will separate and turn incredibly watery upon thawing. Keep the toppings separate if you plan on storing a large batch ahead of time. Reheat the fries on an aluminum sheet pan at 375°F for 10 minutes until the cheddar melts beautifully. You can add 2 tablespoons of fresh shredded cheese during the last minute to revive the gooey texture look. Check for any sour smells or discoloration as clear signs of spoilage before consuming.