Chicken Pot Pie Soup
Cold evenings feel better with a bowl that brings back old family meals. The first time I made Chicken Pot Pie Soup was during a rainy November week when I wanted chicken pot pie without the extra baking time. I added too many vegetables and the soup became thicker than planned, but it was still the favorite dish at the table.
That’s when I learned this chicken pot pie soup version could handle small mistakes and still taste great. Since then I’ve made it for weeknight dinners, quiet Sundays and a few gatherings where everyone wanted seconds. This recipe keeps the creamy filling, tender bites and familiar flavor people love from an easy chicken pot pie.
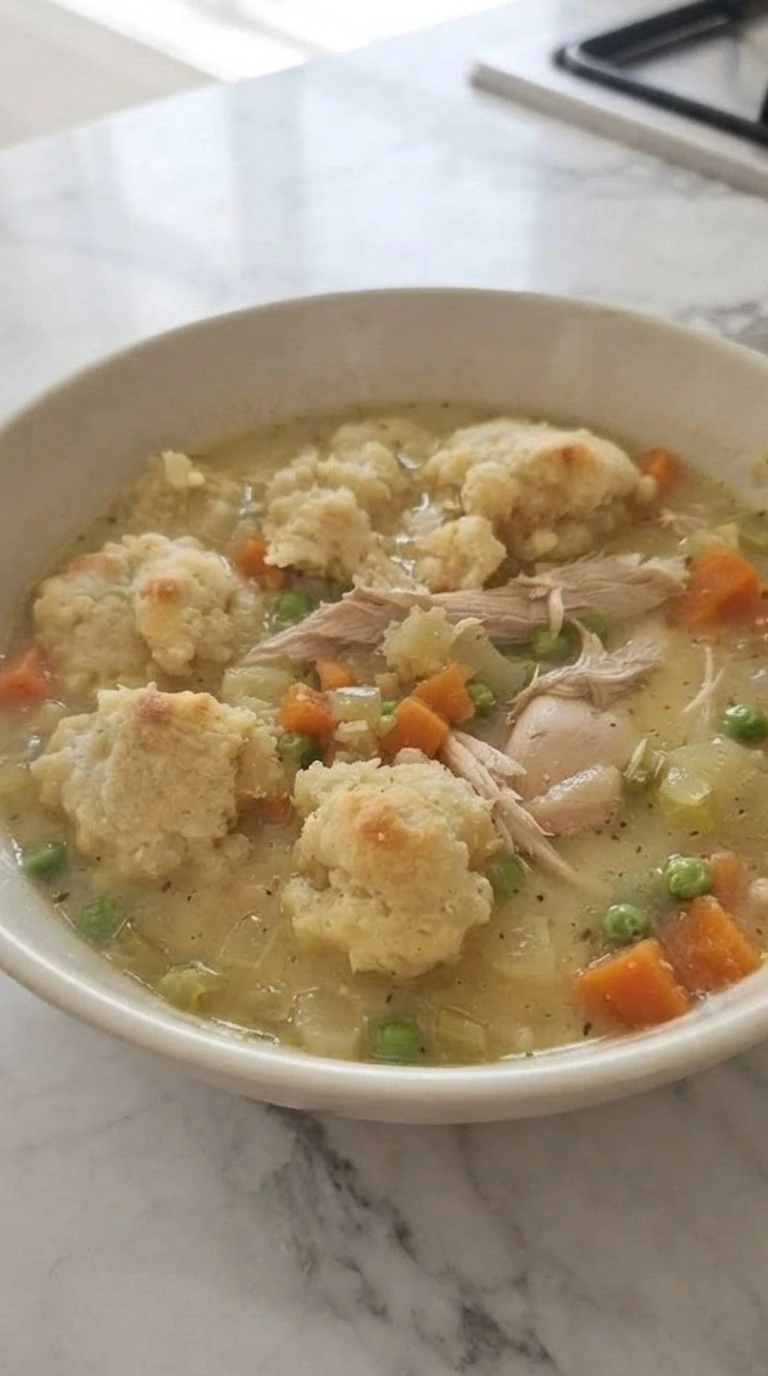
If you enjoy comforting chicken meals, you can also try our Crockpot Chicken and Rice Soup for another simple bowl packed with flavor. The best part is that this easy chicken pot pie recipe feels special without needing a complicated process. It has the same home style feeling as classic pie but works well when you need dinner on the table sooner.
Why This Recipe Works
The thick base works because flour coats the broth and creates a smooth texture when it simmers at about 190°F. Adding heavy cream during the final minutes keeps the soup rich without breaking.
The small vegetable cuts soften evenly while the chicken releases flavor into the broth. If you like similar comfort meals, our Crockpot Chicken and Wild Rice Soup uses another slow cooking method for a hearty chicken bowl.
Ingredients

- boneless chicken breast: Cut into bite-size pieces and seasoned before cooking for tender protein throughout the soup.
- carrot: Diced into small pieces to add sweetness and color as they soften.
- celery stalk: Diced evenly to bring fresh flavor and balance to the creamy base.
- yellow onion: Diced to create a savory foundation for the soup.
- frozen pea: Added near the end to keep a bright color and soft texture.
- all-purpose flour: Used to thicken the broth into a creamy pot pie style texture.
- chicken broth: Provides the savory liquid base for the soup.
- heavy cream: Added at the end for richness and a smooth finish.
- dried thyme: Adds classic herbal flavor that matches the pot pie profile.
- salt: Seasoning that balances the flavors in the finished soup.
- black pepper: Adds mild heat and depth to the creamy broth.
Kitchen Equipment
- 6-quart heavy-bottomed pot: A 6-quart heavy-bottomed pot gives enough space for the soup and spreads heat evenly so the creamy base won’t scorch like it can in a thin pot.
- Sharp chef’s knife: A sharp chef’s knife helps cut vegetables into even pieces and should feel balanced because a dull blade creates uneven cuts and extra pressure.
- Wooden spoon: A sturdy wooden spoon helps stir the thick soup base and should have a strong handle because thin spoons can flex during mixing.
How to Make It
Step 1: Dice the vegetables and season the chicken
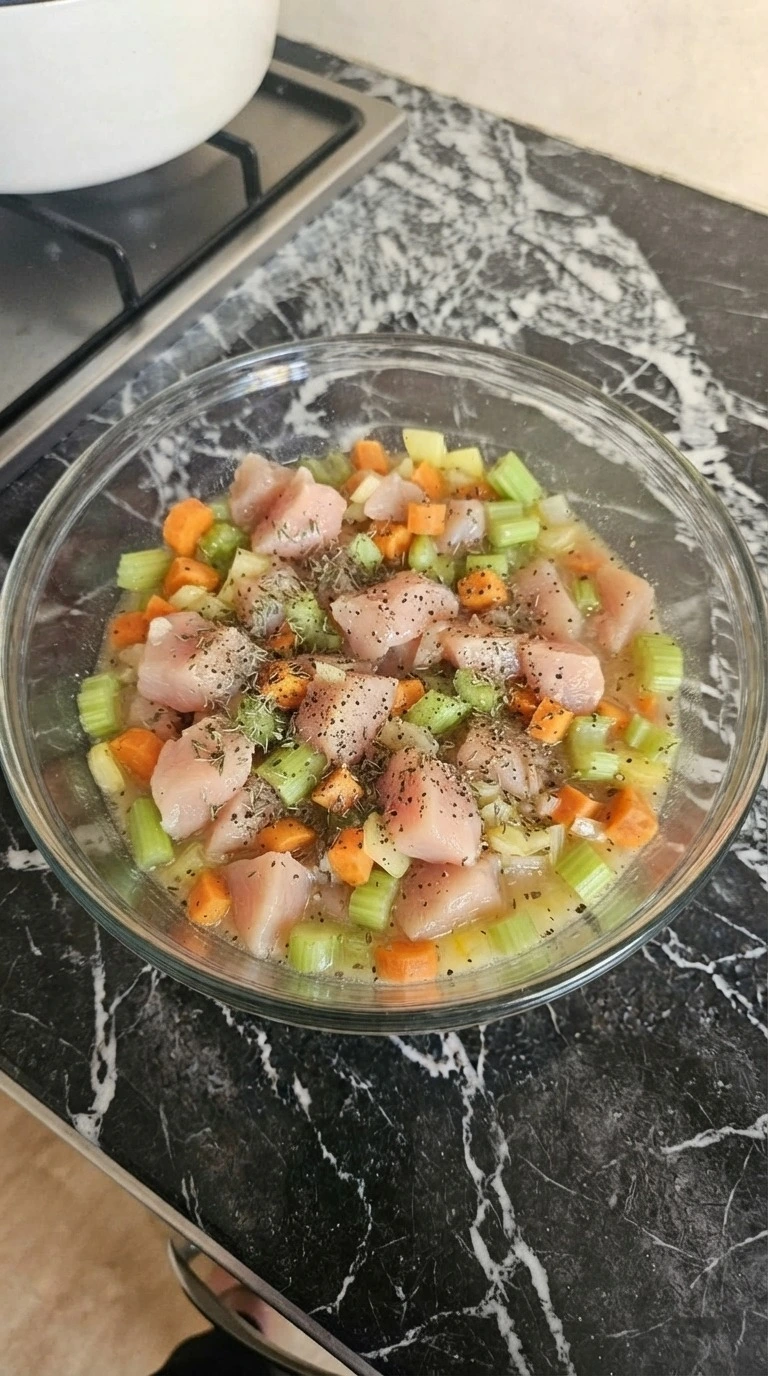
Cut 2 boneless chicken breasts into even bite-size pieces and dice the carrots celery stalk and yellow onion. Toss the pieces with salt pepper and thyme, then keep them together for 10 minutes while the flavors settle. Work at room temperature for this short rest and use a firm chopping motion with the knife.
I use 375°F as the final cooking target later, not for this prep stage. The pieces should look fresh and moist with clear vegetable colors. You’ll smell the thyme first.
Don’t skip the short seasoning window because bland meat weakens the whole soup. This early rest helps the seasoning cling before cooking.
Tip: Cut vegetables close to the same size so they soften together during the 30 minute soup cook.
Step 2: Build the creamy soup base
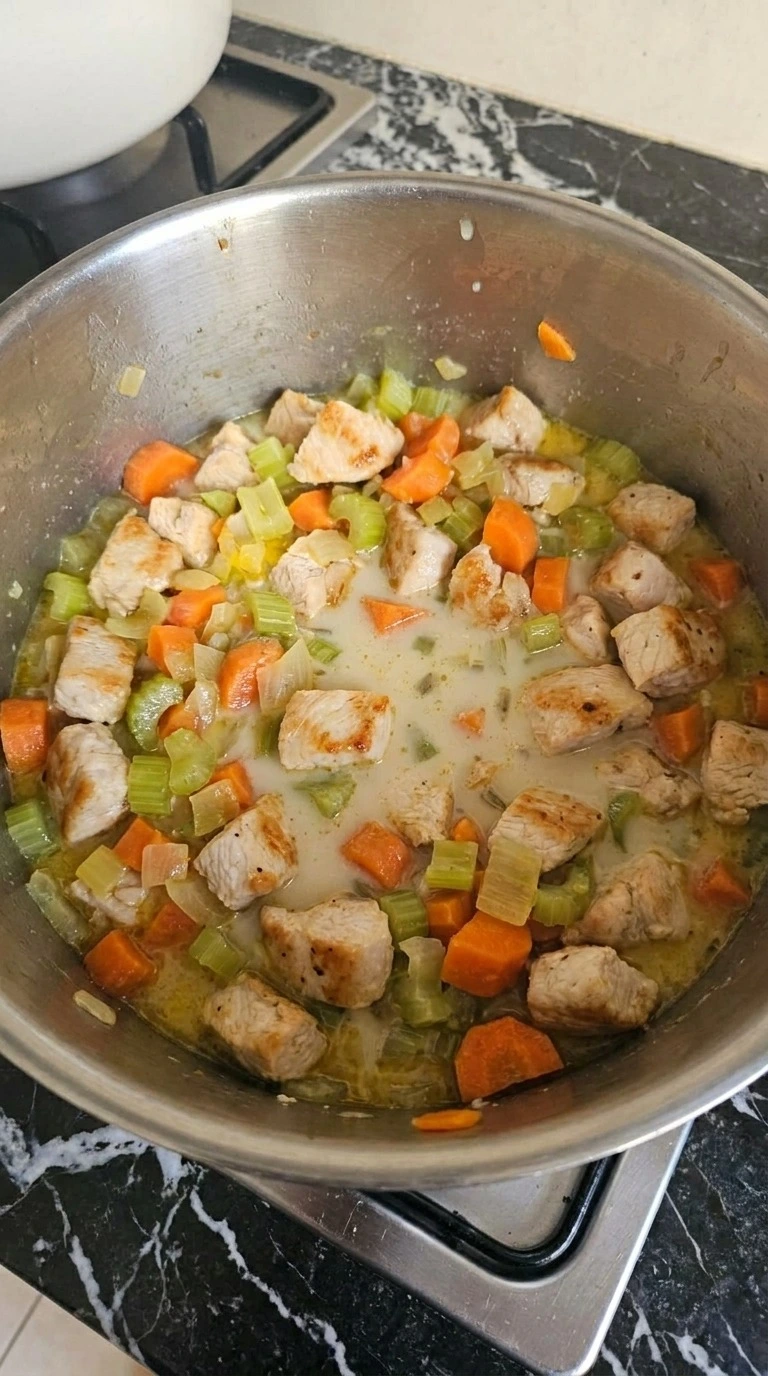
Cook the seasoned chicken pieces with the diced vegetables in a large pot over medium-high heat until the chicken edges turn golden. Add flour and broth, then stir with a wooden spoon in slow circles for 8 to 10 minutes until the mixture thickens slightly. Keep the heat controlled around 325°F equivalent while the soup simmers gently.
The first batch I made had too much flour and became heavy, so this amount keeps the texture balanced. You’ll see the broth change from thin to creamy and the vegetables soften around the edges. The smell becomes savory.
Miss this stage and the flour can taste raw. The gentle simmer builds the body of the soup without scorching the base.
Tip: Use a heavy-bottomed 6-quart pot because thin pots create hot spots that can burn the creamy base.
Step 3: Simmer the soup until thickened

Lower the soup to medium-low heat at about 4 on a 10-dial and let it simmer for 20 to 25 minutes. Stir with a spoon by scraping the bottom every few minutes so the chicken and vegetables move through the broth evenly. The target temperature stays near 190°F as the soup gently cooks.
Keep watching because boiling hard can split the creamy texture. The soup becomes thicker and the vegetables turn tender while the chicken stays juicy. You’ll notice small bubbles around the edges.
Go past this window and the vegetables lose their shape. A steady simmer keeps the starch structure smooth.
Tip: Taste after 20 minutes and adjust seasoning before adding any extra salt because the broth already carries flavor.
Step 4: Finish and serve the soup

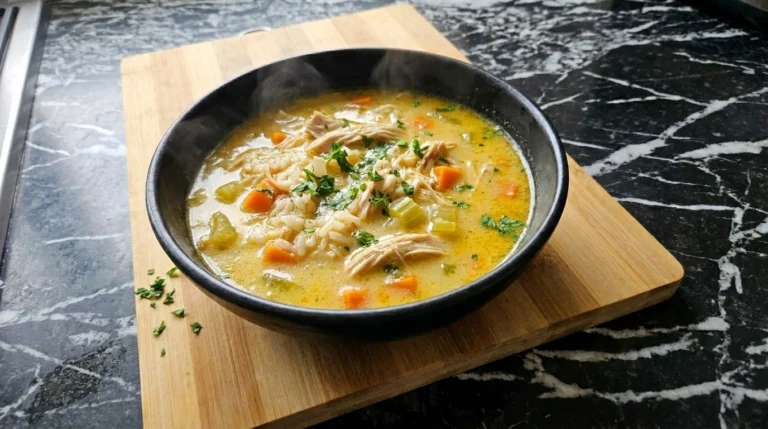
Add frozen peas and heavy cream, then fold them through the hot soup for 3 to 5 minutes over low heat around 180°F. Stir gently in one direction and stop when the cream blends into the broth. The surface should look smooth with small vegetable pieces spread naturally.
(I tested adding cream too early once, and the texture became thinner. Adding it near the end fixed it. ) The finished soup has a creamy look with tender chicken pieces and soft vegetables.
You’ll smell the herbs and see the broth coat the spoon. Don’t overheat it after adding cream because separation can happen. Adding dairy at the end protects the smooth texture.
Tip: Serve with biscuit pieces within 5 minutes of plating so they keep some texture instead of soaking completely.
Pro Tips
- Cut the carrots and celery into pieces around 1/2 inch so they soften evenly during the 20 to 25 minute simmer without turning mushy.
- Choose fresh boneless chicken breast with a firm texture because frozen meat can release extra water and thin the soup during the first 10 minutes of cooking.
- Keep the soup at a gentle 190°F simmer instead of a rolling boil because high heat can make the cream separate and the vegetables lose their shape.
- Prepare the soup up to 24 hours ahead and add the cream during reheating so the texture stays smooth when served the next day.
- Use a 6-quart heavy-bottomed pot and scrape the bottom every few minutes because flour can stick quickly during the first 8 minutes of thickening.
- Add biscuit pieces only when serving and wait no longer than 5 minutes because they keep a better soft center with a slightly firm top.
- Finish each bowl with fresh thyme leaves after reheating for 2 minutes because the herb scent becomes brighter at the final stage.
- Add 1 cup of sliced mushrooms and 1 teaspoon of rosemary for an earthy version that gives the soup a deeper fall flavor.
- Stir in 1 cup of shredded sharp cheddar during the last 3 minutes for a richer cheese style inspired by classic comfort dishes.
- Replace the biscuit topping with 1 cup of cooked pearl barley for a heartier meal that changes the texture while keeping the creamy base.
- Use 1 teaspoon of smoked paprika with the thyme for a warmer flavor twist that pairs well with roasted vegetables.
Substitutions & Variations
- heavy cream: unsweetened oat cream or full-fat coconut cream — Use 1 cup as a dairy-free swap. Oat cream keeps a neutral flavor while coconut cream adds a light sweet note and a slightly thicker texture.
- all-purpose flour: gluten-free all-purpose flour blend — Use the same 1/4 cup amount if the blend contains xanthan gum. The soup may thicken a little slower than with wheat flour.
- boneless chicken breast: boneless chicken thigh — Use 2 pounds of thigh meat for a juicier result. The darker meat adds more flavor but may need 5 extra minutes of simmering.
- frozen pea: frozen green bean pieces — Replace with 1 cup of small pieces. Green beans add more bite and a less sweet vegetable flavor.
- chicken broth: low-sodium vegetable broth — Use 4 cups for a lighter option. The flavor becomes less chicken-forward, so add extra thyme if needed. For another comforting idea, try our Healthy Soup Recipes for Crockpot Nights That Feel Cozy and Easy.
Storage Instructions
Keep Chicken Pot Pie Soup in an airtight glass or plastic container in the fridge for up to 4 days. Freeze the soup base without cream for up to 3 months in freezer-safe bags, leaving space for expansion.
Reheat on medium-low heat for 10 to 15 minutes and add 2 tablespoons of fresh cream if the texture needs help. Discard it if you notice sour smells, unusual separation or mold.
Chicken Pot Pie Soup
Ingredients
- 2 pounds boneless chicken breast Cut into bite-size pieces and seasoned before cooking for tender protein throughout the soup.
- 2 medium carrot Diced into small pieces to add sweetness and color as they soften.
- 2 stalks celery stalk Diced evenly to bring fresh flavor and balance to the creamy base.
- 1 medium yellow onion Diced to create a savory foundation for the soup.
- 1 cup frozen pea Added near the end to keep a bright color and soft texture.
- 1/4 cup all-purpose flour Used to thicken the broth into a creamy pot pie style texture.
- 4 cups chicken broth Provides the savory liquid base for the soup.
- 1 cup heavy cream Added at the end for richness and a smooth finish.
- 1 teaspoon dried thyme Adds classic herbal flavor that matches the pot pie profile.
- 1 teaspoon salt Seasoning that balances the flavors in the finished soup.
- 1/2 teaspoon black pepper Adds mild heat and depth to the creamy broth.
Instructions
- Cut 2 boneless chicken breasts into even bite-size pieces and dice the carrots celery stalk and yellow onion. Toss the pieces with salt pepper and thyme, then keep them together for 10 minutes while the flavors settle. Work at room temperature for this short rest and use a firm chopping motion with the knife. I use 375°F as the final cooking target later, not for this prep stage. The pieces should look fresh and moist with clear vegetable colors. You’ll smell the thyme first. Don’t skip the short seasoning window because bland meat weakens the whole soup. This early rest helps the seasoning cling before cooking.

- Cook the seasoned chicken pieces with the diced vegetables in a large pot over medium-high heat until the chicken edges turn golden. Add flour and broth, then stir with a wooden spoon in slow circles for 8 to 10 minutes until the mixture thickens slightly. Keep the heat controlled around 325°F equivalent while the soup simmers gently. The first batch I made had too much flour and became heavy, so this amount keeps the texture balanced. You’ll see the broth change from thin to creamy and the vegetables soften around the edges. The smell becomes savory. Miss this stage and the flour can taste raw. The gentle simmer builds the body of the soup without scorching the base.

- Lower the soup to medium-low heat at about 4 on a 10-dial and let it simmer for 20 to 25 minutes. Stir with a spoon by scraping the bottom every few minutes so the chicken and vegetables move through the broth evenly. The target temperature stays near 190°F as the soup gently cooks. Keep watching because boiling hard can split the creamy texture. The soup becomes thicker and the vegetables turn tender while the chicken stays juicy. You’ll notice small bubbles around the edges. Go past this window and the vegetables lose their shape. A steady simmer keeps the starch structure smooth.

- Add frozen peas and heavy cream, then fold them through the hot soup for 3 to 5 minutes over low heat around 180°F. Stir gently in one direction and stop when the cream blends into the broth. The surface should look smooth with small vegetable pieces spread naturally. (I tested adding cream too early once, and the texture became thinner. Adding it near the end fixed it.) The finished soup has a creamy look with tender chicken pieces and soft vegetables. You’ll smell the herbs and see the broth coat the spoon. Don’t overheat it after adding cream because separation can happen. Adding dairy at the end protects the smooth texture.

Notes
Frequently Asked Questions
Yes, you can prepare the soup base up to 2 days ahead and keep it chilled in a sealed container. Warm it slowly at 180°F for 10 to 15 minutes, then stir in the cream during the final 3 minutes so the texture stays smooth.
Store leftovers for up to 4 days in an airtight container kept below 40°F. Reheat individual portions over medium-low heat for 5 to 8 minutes and stir often to prevent the thick broth from sticking.
You can freeze the soup base for up to 3 months, but add the cream after thawing for better texture. Defrost overnight in the fridge and warm it gently at 180°F before finishing the recipe.
A watery soup usually means the flour did not cook long enough or the broth ratio was too high. Simmer uncovered for 10 minutes and stir slowly until the sauce coats the spoon.
Yes, double every ingredient and use a larger 8-quart pot so the soup has room to simmer evenly. Add about 5 extra minutes to the cooking time and check that the chicken reaches 165°F internally.
Serve it with warm biscuits, a green salad or roasted vegetables for a complete meal. For a similar chicken dinner idea, our Cream of Chicken Soup Recipes Crockpot Families Can Make on Busy Nights offers another creamy option.
Final Thoughts
After making this Chicken Pot Pie Soup many times, it became one of those recipes I return to when I want something warm and familiar. This bowl keeps the creamy filling style of chicken pot pie but uses a simple soup method with tender chicken and vegetables.
It brings the comfort of an easy chicken pot pie recipe and the flavor people love from easy chicken pot pie with biscuits. Make it for your family, share a bowl with friends and tag someone who loves homemade comfort meals.
The same batch covers easy chicken pot pie with pie crust without a single change.
Chicken pot pie started as a practical way to stretch leftover meat and vegetables. This soup version keeps those classic flavors while removing the need for a full pie crust.