White Bean Chicken Chili
Cold evenings call for a bowl that feels hearty without being too heavy, and White Bean Chicken Chili brings that balance with tender chicken, creamy beans and gentle spice. This white chicken chili has the comfort of classic chili while keeping the flavors bright and fresh.
I really thought making a crockpot white chicken chili style meal would be simple: add chicken, beans and broth then let the flavors blend. But the texture can turn thin if the beans aren’t handled well, and too much dairy can hide the fresh taste of the spices.

After testing different methods, I found that blending some beans into the broth creates the creamy white chicken chili texture I wanted. If you enjoy slow cooked meals, try our Crockpot Healthy White Chicken Chili for another comforting option.
Why This Recipe Works
White Bean Chicken Chili works because blending a portion of the cannellini beans releases starch and creates a thicker broth without adding extra cream. Cooking the chicken first at medium-high heat for 6 to 8 minutes builds flavor before the simmer begins.
I also like this method because the gentle 20-minute simmer keeps the beans tender instead of broken down. For another bean based meal, try our Crockpot Ham and Bean Soup for a different comfort food idea.
Ingredients

- boneless chicken breast: Cut into 1-inch pieces for even browning and tender bites.
- cannellini beans: Canned and rinsed to add creamy texture and hearty body.
- chicken broth: Provides the savory liquid base for the chili.
- green chiles: Diced to add mild heat and fresh chile flavor.
- yellow onion: Diced to bring sweetness as it softens.
- garlic cloves: Minced to add a warm savory aroma.
- sour cream: Stirred in at the end for a creamy finish.
- lime juice: Adds brightness that balances the rich broth.
Kitchen Equipment
- 6-quart heavy-bottomed pot: A heavy-bottomed 6-quart pot spreads heat for simmering this chili evenly, while a thin pot can create hot spots that scorch the beans.
- immersion blender: An immersion blender helps thicken part of the chili without removing the full batch, and a smaller blender may require extra batches.
How to Make It
Step 1: Season and brown the chicken pieces

Season 1 pound boneless chicken breast pieces with spices, then cook them at medium-high heat until the pan is hot but not smoking for 6 to 8 minutes, turning halfway with a spatula. Work in batches if needed so each piece touches the surface. (I tried crowding the pan once.
The chicken steamed instead of gaining color. ) You’ll see pale pink chicken change to white with light golden edges. A savory smell appears when the surface develops flavor.
Miss this window and the chicken loses texture. Medium-high heat for 8 minutes creates browned proteins that build deeper chili flavor.
Tip: Cut the chicken into even 1-inch pieces so they finish at the same time and stay tender during the simmer.
Step 2: Combine beans and chili ingredients

Add 3 cups canned cannellini beans, 4 cups chicken broth, 1 cup diced green chiles, 1 diced yellow onion and 3 minced garlic cloves to the chicken. Simmer at medium-low heat about 4 on a 10-dial for 20 minutes while stirring with a spoon every 5 minutes. Keep the beans partly intact while the flavors join.
The broth turns slightly cloudy and the onions soften. You’ll smell garlic and mild chile notes. Skip the stirring and the bottom can catch.
A gentle 20-minute simmer helps the ingredients exchange flavor without breaking the beans.
Tip: Rinse canned cannellini beans under cool water for 30 seconds to remove excess liquid and keep the chili cleaner tasting.
Step 3: Blend part of the chili broth
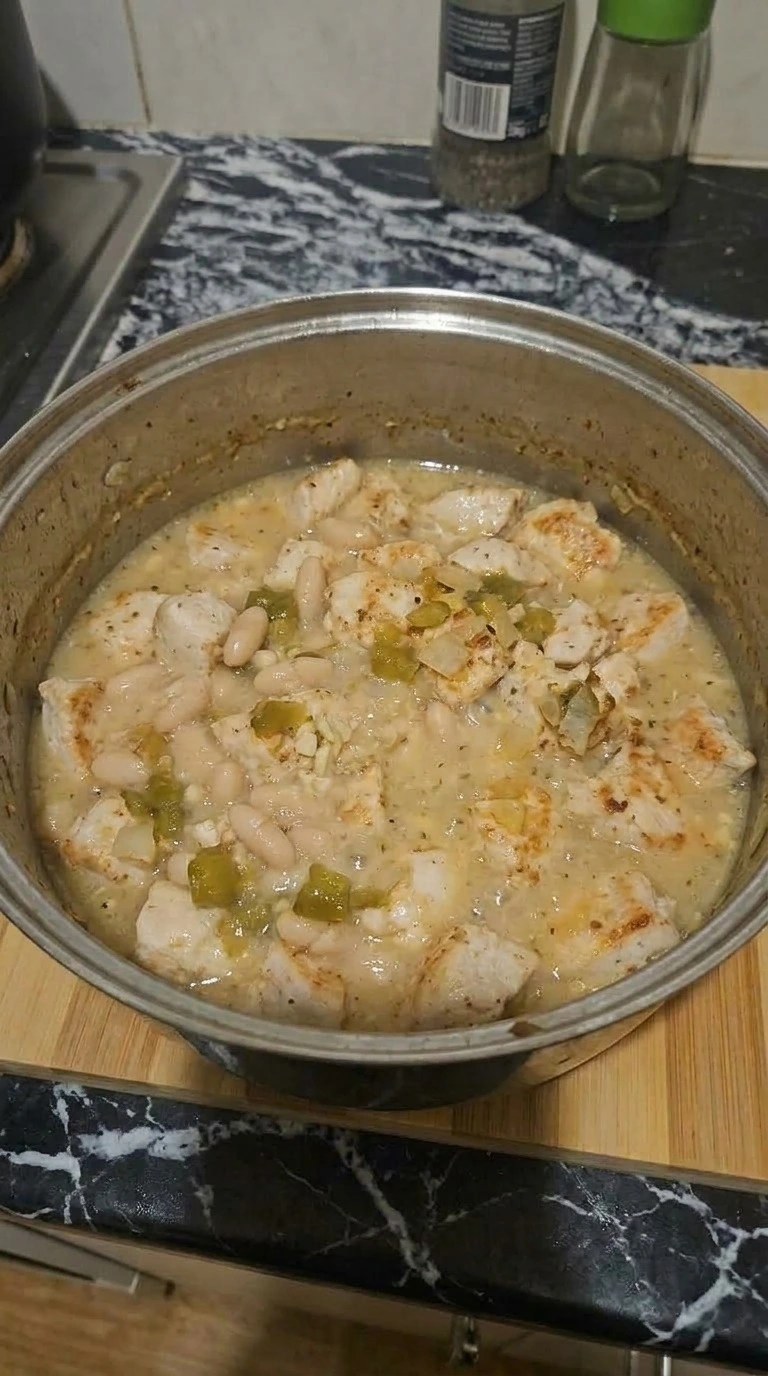
Scoop 1 cup of the bean mixture from the pot and mash it until smooth, then stir it back into the chili at medium-low heat for 5 minutes. Use a firm stirring motion around the edges so the thickened portion blends evenly with the broth.
The chili becomes thicker and the broth coats the beans and chicken. You’ll notice a creamy look without heavy cream.
Go too long and the beans can lose their shape. Blending some beans releases starch that naturally thickens the chili.
Tip: Blend only part of the beans because keeping whole beans adds a better mix of creamy and hearty textures.
Step 4: Finish and serve the chili
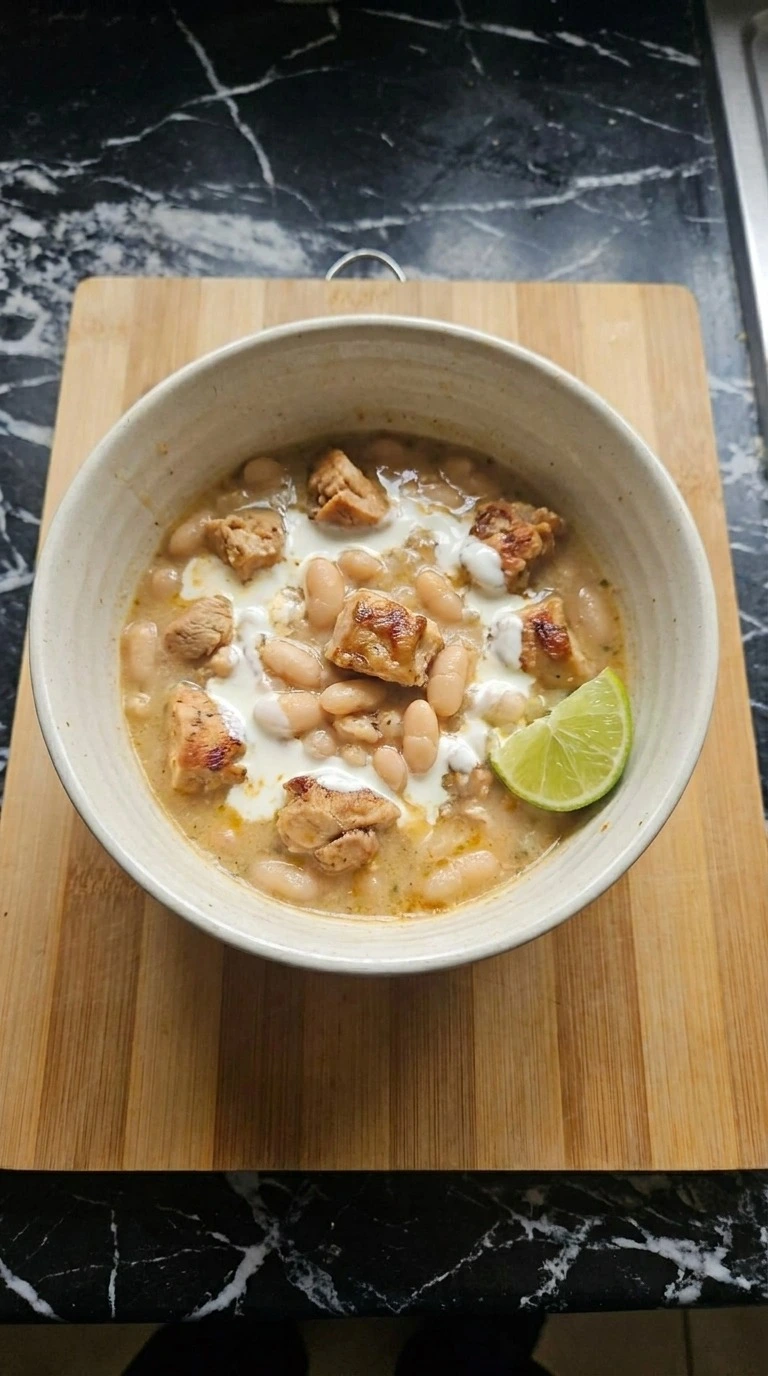
Stir in 1/2 cup sour cream and 2 tablespoons lime juice off the heat, then let the chili rest for 5 minutes before serving. Fold gently with a spoon in slow circles so the dairy stays smooth and doesn’t separate.
The surface looks creamy with uneven swirls and the smell becomes fresh from the lime. The beans stay soft while chicken pieces remain tender.
Skip the rest and the flavors won’t settle. Resting 5 minutes keeps the creamy texture stable after mixing.
Tip: Add fresh cilantro only after serving so the herb keeps its bright color and fresh taste.
Pro Tips
- Brown the chicken in small batches at medium-high heat for 6 to 8 minutes so the edges gain color instead of steaming in the pot.
- Choose canned cannellini beans with a firm shape and rinse them for 30 seconds because broken beans can make the chili thicker than expected.
- Use a 6-quart heavy-bottomed pot because even heat during a 20-minute simmer helps prevent the beans from sticking.
- Add lime juice after cooking, about 2 tablespoons at the end, because fresh acid keeps the broth bright without turning bitter.
- Avoid boiling the chili after adding sour cream. Keep the heat off for 5 minutes so the creamy texture stays smooth.
- For deeper flavor, toast 1 teaspoon cumin with the chicken spices for 30 seconds before adding broth and beans.
- Make a double batch and cool it within 2 hours before storing so the flavors develop while the texture stays safe.
- Serve with fresh cilantro added right before eating because the green color and fresh taste fade after long cooking.
- Add 1 teaspoon smoked paprika and 1/2 cup roasted corn for a smoky summer version with extra sweetness.
- Use 2 cups shredded rotisserie chicken instead of fresh chicken breast for a faster version, then simmer only 15 minutes.
- Mix in 1 cup chopped spinach during the final 3 minutes for a green vegetable boost without changing the creamy broth.
- Create a spicy version by adding 1 diced jalapeno with the onion and increasing the green chiles to 1 1/2 cups.
Substitutions & Variations
- sour cream: plain Greek yogurt — Use the same 1/2 cup amount for a lighter finish with extra tang. Add it after the heat drops because high heat can make yogurt separate.
- cannellini beans: great northern beans — Replace them cup for cup for a similar creamy texture and mild flavor. The smaller beans may soften about 5 minutes faster during simmering.
- chicken broth: low-sodium vegetable broth — Use the same 4 cups if needed, but the chili will have a slightly lighter savory taste. Add extra seasoning only after tasting.
- boneless chicken breast: boneless chicken thighs — Use 1 pound of thighs for a richer flavor and softer texture. The darker meat may need 3 to 5 extra minutes before shredding or serving.
- sour cream: dairy-free unsweetened cashew cream — Use about 1/2 cup for a dairy-free version. It keeps the creamy texture but adds a mild nutty flavor.
Storage Instructions
Keep leftover White Bean Chicken Chili in an airtight container in the fridge for up to 4 days. For freezing, cool it fully, place it in freezer containers with room for expansion and use within 3 months for the best texture.
Reheat portions at medium-low heat for 10 to 15 minutes until they reach 165°F, then stir in 1 tablespoon of broth if needed. Discard it if you notice sour smells, mold or unusual separation after storage.
White Bean Chicken Chili
Ingredients
- 1 pound boneless chicken breast Cut into 1-inch pieces for even browning and tender bites.
- 3 cups cannellini beans Canned and rinsed to add creamy texture and hearty body.
- 4 cups chicken broth Provides the savory liquid base for the chili.
- 1 cup green chiles Diced to add mild heat and fresh chile flavor.
- 1 large yellow onion Diced to bring sweetness as it softens.
- 3 garlic cloves Minced to add a warm savory aroma.
- 1/2 cup sour cream Stirred in at the end for a creamy finish.
- 2 tablespoons lime juice Adds brightness that balances the rich broth.
Instructions
- Season 1 pound boneless chicken breast pieces with spices, then cook them at medium-high heat until the pan is hot but not smoking for 6 to 8 minutes, turning halfway with a spatula. Work in batches if needed so each piece touches the surface. (I tried crowding the pan once. The chicken steamed instead of gaining color.) You’ll see pale pink chicken change to white with light golden edges. A savory smell appears when the surface develops flavor. Miss this window and the chicken loses texture. Medium-high heat for 8 minutes creates browned proteins that build deeper chili flavor.

- Add 3 cups canned cannellini beans, 4 cups chicken broth, 1 cup diced green chiles, 1 diced yellow onion and 3 minced garlic cloves to the chicken. Simmer at medium-low heat about 4 on a 10-dial for 20 minutes while stirring with a spoon every 5 minutes. Keep the beans partly intact while the flavors join. The broth turns slightly cloudy and the onions soften. You’ll smell garlic and mild chile notes. Skip the stirring and the bottom can catch. A gentle 20-minute simmer helps the ingredients exchange flavor without breaking the beans.

- Scoop 1 cup of the bean mixture from the pot and mash it until smooth, then stir it back into the chili at medium-low heat for 5 minutes. Use a firm stirring motion around the edges so the thickened portion blends evenly with the broth. The chili becomes thicker and the broth coats the beans and chicken. You’ll notice a creamy look without heavy cream. Go too long and the beans can lose their shape. Blending some beans releases starch that naturally thickens the chili.

- Stir in 1/2 cup sour cream and 2 tablespoons lime juice off the heat, then let the chili rest for 5 minutes before serving. Fold gently with a spoon in slow circles so the dairy stays smooth and doesn’t separate. The surface looks creamy with uneven swirls and the smell becomes fresh from the lime. The beans stay soft while chicken pieces remain tender. Skip the rest and the flavors won’t settle. Resting 5 minutes keeps the creamy texture stable after mixing.

Notes
Frequently Asked Questions
Yes, you can prepare this chili up to 3 days ahead and keep it chilled in a sealed container. Warm it gently at 165°F for about 10 to 15 minutes while stirring slowly, then add a small splash of broth if the texture becomes thick.
Store the chili in an airtight glass or plastic container for up to 4 days. Keep it below 40°F and reheat only the portion you plan to eat so the creamy texture stays consistent.
You can freeze the chili, but the sour cream may change texture after thawing. Freeze it without the dairy for up to 3 months, then stir in fresh sour cream after reheating at medium-low heat.
A watery chili usually needs more time or more blended beans. Simmer uncovered for 10 minutes at medium-low heat, or mash another 1/2 cup of beans to help the broth thicken naturally.
Yes, double all ingredients in an 8-quart pot and extend the simmer by about 10 minutes. Stir every few minutes because the larger amount needs more movement to heat evenly.
Serve it with warm cornbread, tortilla chips or a simple salad for a balanced meal. A spoonful of lime crema or fresh herbs added just before eating gives the bowl a fresh finish.
Final Thoughts
After many busy evenings, I finally found a bowl that makes dinner feel simple and satisfying. White Bean Chicken Chili has become one of my favorite meals because the creamy texture comes from the beans and not a heavy base.
This version brings together white chicken chili and easy white chicken chili ideas with a fresh balance of flavor. If you make it, share your bowl and leave a comment about how it turned out.
You can also try Crockpot Chicken and Rice Soup or Crockpot Healthy Chili for more comforting recipes. The same batch covers white chicken chili easy, white chicken chili instant pot and creamy white chicken chili without a single change.
White Bean Chicken Chili gets its creamy body from beans instead of relying only on dairy. The simple blending step turns part of the beans into a natural thickener while keeping whole beans for texture.