Halloween Oreo Cookies
A tray of Halloween Oreo Cookies gives you thick chewy cookies packed with crunchy Oreo pieces and bright orange candy in every bite. The centers stay soft while the edges turn lightly crisp, so these oreo halloween cookies feel playful without turning into a complicated baking project. Hi!
Meet your new friend, the most chunky, chocolatey Halloween cookie with orange creme Oreo pieces that is so fun, so party-ready, so easy and also.. seriously hard to leave alone. They’re bold enough for a Halloween dessert table but simple enough to bake with kids after school.

That’s right. We’re calling upon those seasonal Oreo cookies to impress us with their crunchy chocolate wafers and orange creme here, and they don’t disappoint. A few candy-coated chocolate pieces make the colors pop while a short chill keeps each cookie thick instead of flat.
Why This Recipe Works
A 30 minute chill at about 38°F firms the butter before baking, so Halloween Oreo Cookies keep thick centers while the edges have time to set. Rough Oreo pieces also stay distinct because they’re folded in only after most flour streaks disappear.
Baking at 350°F for 11 to 13 minutes lets the outside turn lightly crisp before the soft center dries out. The brown sugar holds more moisture than granulated sugar, which gives these cookies their chewy middle without making the dough overly loose.
Ingredients
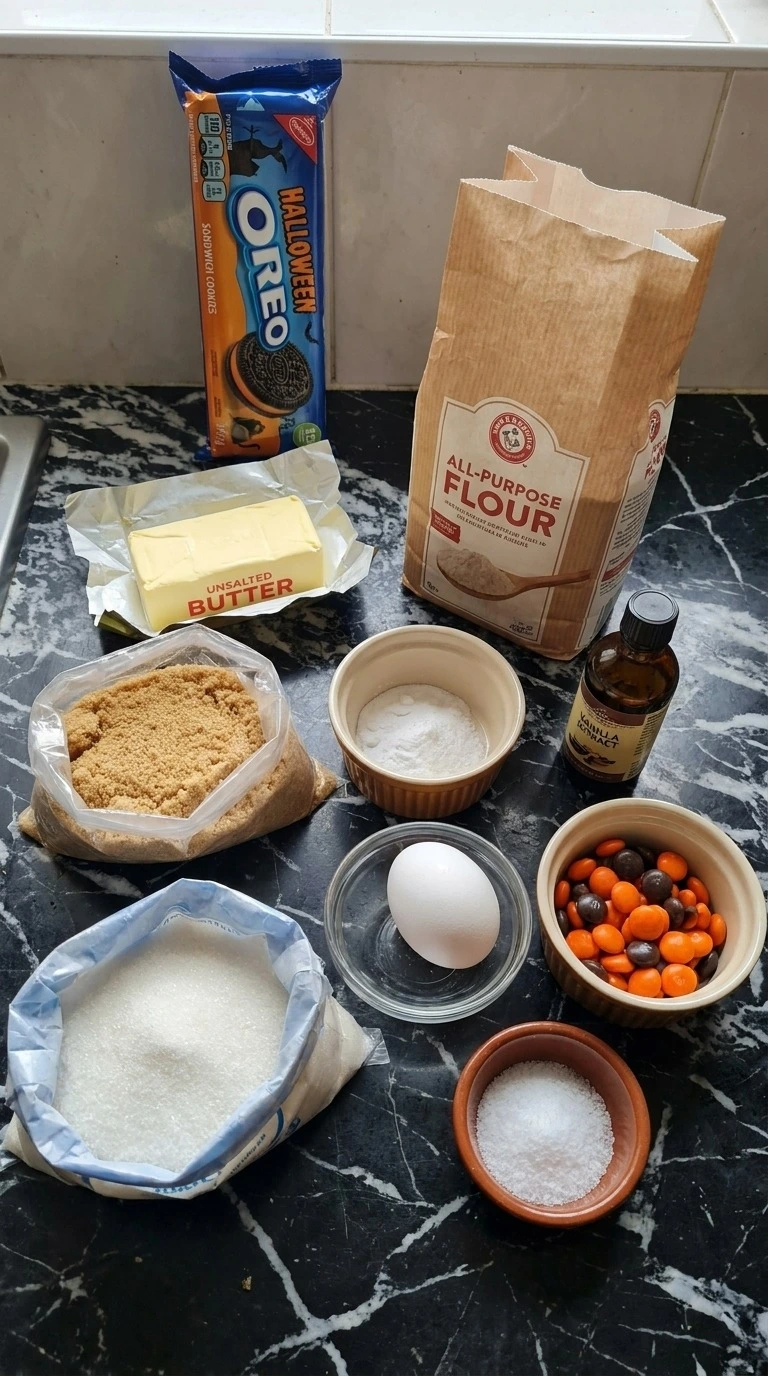
- unsalted butter: Softened to about 65°F so it can trap air without turning greasy.
- light brown sugar: Packed firmly to add moisture, caramel flavor and a chewy center.
- granulated cane sugar: Helps the cookie edges spread slightly and bake crisp.
- large egg: Brought close to 68°F so it blends smoothly with the butter mixture.
- pure vanilla extract: Adds a warm vanilla note that rounds out the chocolate wafer flavor.
- all-purpose flour: Spoon into the measuring cup and level it so the dough doesn’t become overly dry.
- baking soda: Provides enough lift and spread for thick cookies without making them cakey.
- fine sea salt: Balances the sugars and sharpens the chocolate and vanilla flavors.
- Halloween Oreo sandwich cookies: Roughly broken into 5 or 6 pieces each so bold black wafer chunks and orange creme remain visible.
- orange and dark candy-coated chocolate pieces: Reserve about 1/4 cup for pressing onto the shaped dough before baking.
Kitchen Equipment
- Electric hand mixer or stand mixer: Use a mixer with medium speed control to cream the butter evenly, because a weak single-speed mixer can warm the dough before enough air is incorporated.
- Large mixing bowl: Choose a bowl around 4 to 5 quarts so thick dough can be folded without spilling, because a smaller bowl makes Oreo chunks break down during mixing.
- Rubber spatula: Use a firm flexible spatula about 10 to 12 inches long for broad folding motions, because a very soft spatula struggles with this thick cookie dough.
- Large baking sheet: Use a flat 13 by 18 inch baking sheet so the cookies have about 2 inches of space, because a crowded smaller pan causes uneven spreading and browning.
- Cookie scoop: A 3 tablespoon cookie scoop keeps the 12 portions close in size so they bake together, while smaller scoops will need a shorter bake time.
How to Make It
Step 1: Cream the butter and sugars
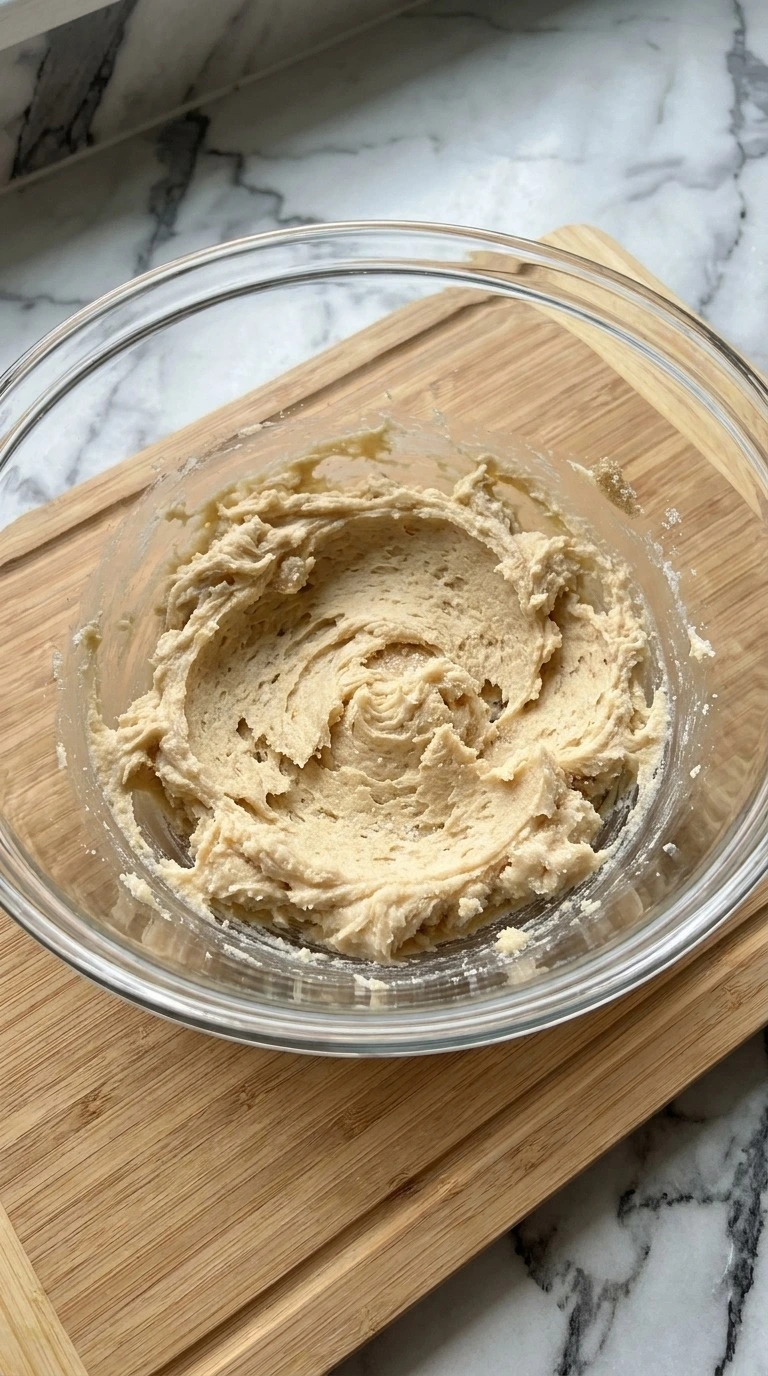
Set 1/2 cup unsalted butter out until it reaches about 65°F, then beat it with 3/4 cup light brown sugar and 1/4 cup granulated cane sugar for 2 to 3 minutes. Scrape the mixture once halfway through so no dense butter hides near the bottom. Keep mixing until the color turns one shade lighter and the texture looks fluffy rather than greasy.
Don’t keep going once it loosens too much. Next, look for soft ridges that hold for a few seconds after mixing. The mixture should smell buttery and lightly caramel-like.
If the butter gets above about 72°F, the dough can spread too fast later. Cream at 65°F for 2 to 3 minutes because trapped air helps the cookies rise before they spread.
Tip: If your kitchen is above 75°F, chill the butter and sugar mixture for 5 minutes before adding the egg.
Step 2: Mix in the egg and vanilla
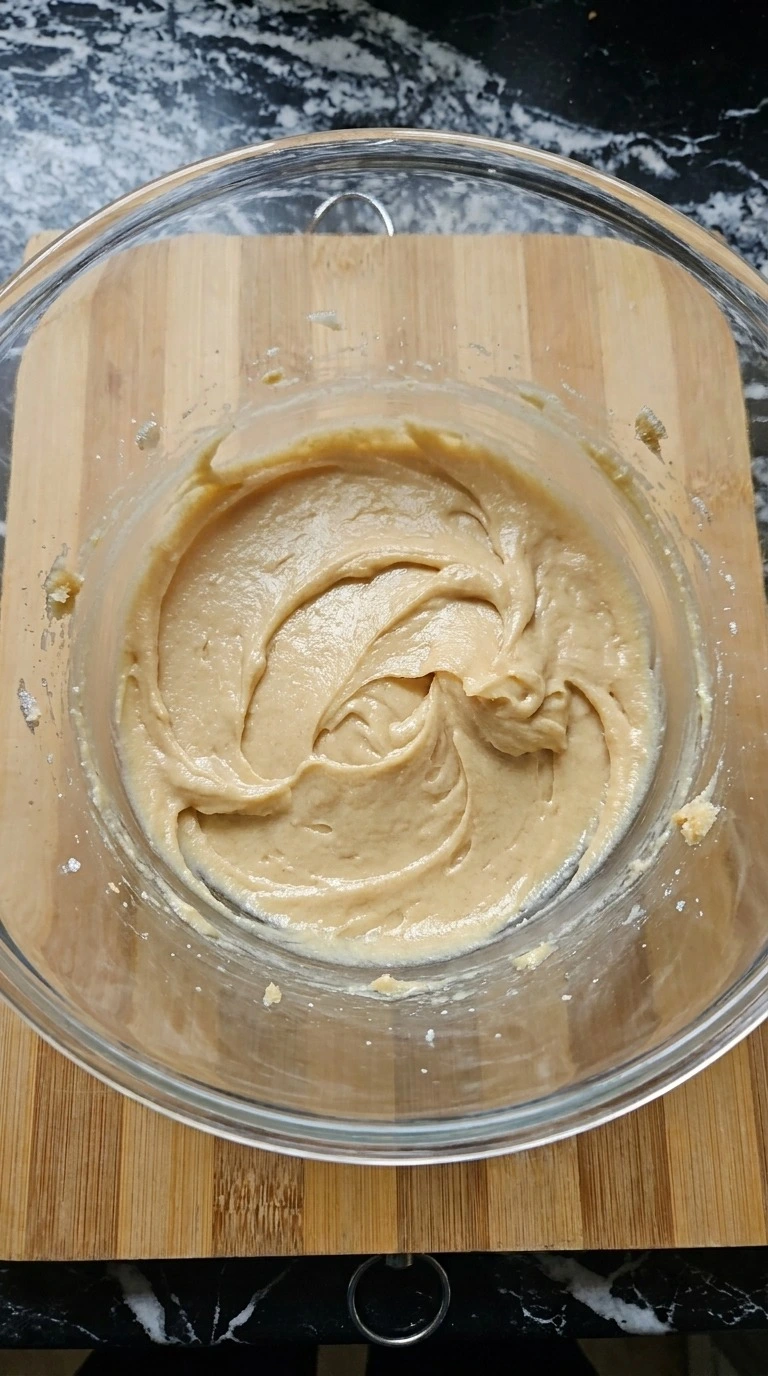
Add 1 large egg and 2 teaspoons pure vanilla extract to the creamed mixture. Beat for 45 to 60 seconds at medium speed and scrape the sides after about 30 seconds. The mixture may look loose at first, but keep mixing until it turns smooth and slightly glossy.
Stop as soon as the egg disappears because extra beating can warm the butter and weaken the dough. Then watch for a thick batter-like texture with no streaks of egg white. You should smell vanilla clearly, and the mixture should fall from the beater in heavy ribbons.
If it looks oily or separated, chill it for 5 minutes before continuing. Mix only until emulsified because a stable butter and egg mixture keeps the crumb even.
Tip: Use an egg close to 68°F so it blends smoothly instead of making the softened butter seize into small lumps.
Step 3: Fold in the flour and Oreo chunks
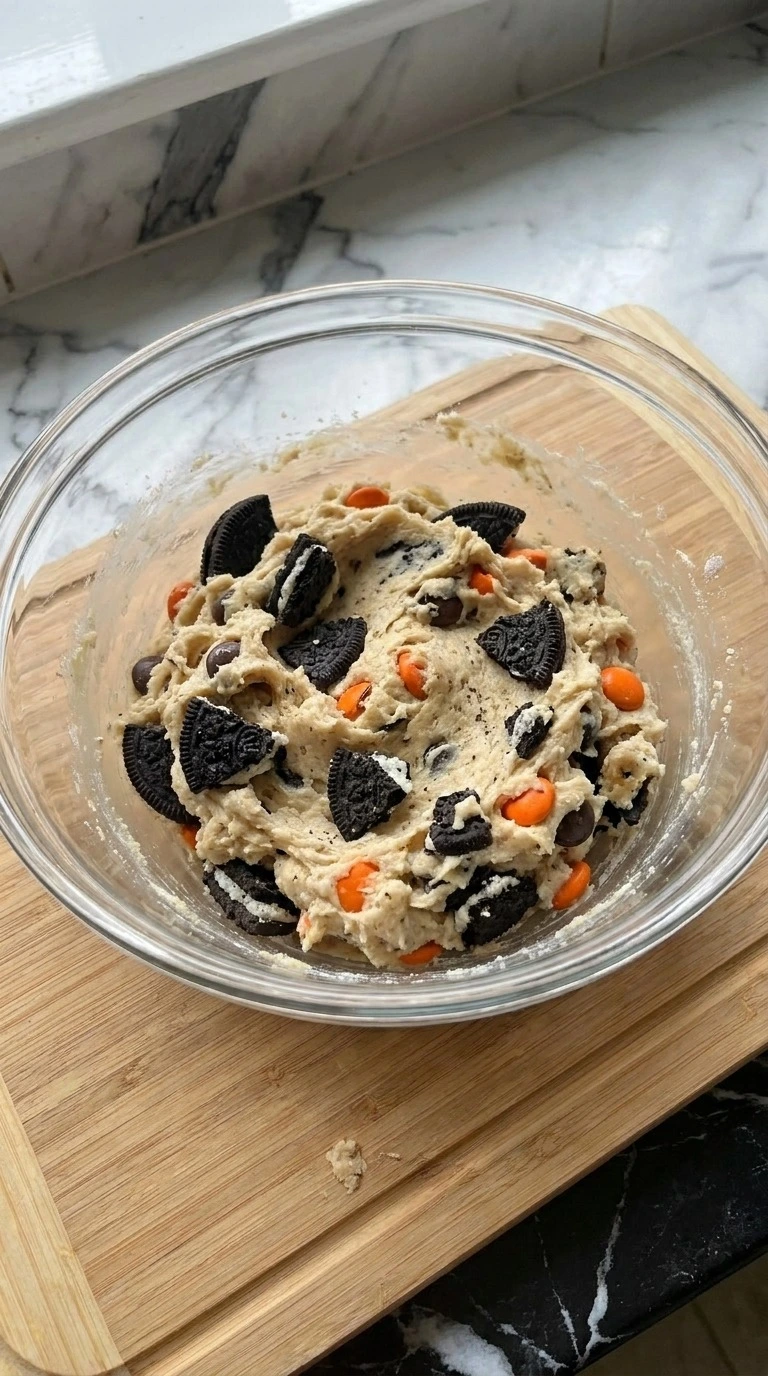
Whisk 1 3/4 cups all-purpose flour with 1/2 teaspoon baking soda and 1/2 teaspoon fine sea salt, then add the dry mix to the wet base. Fold with a rubber spatula using broad scooping turns for about 45 to 60 seconds. When only a few flour streaks remain, fold in 8 roughly broken Halloween Oreo sandwich cookies and 1/2 cup orange and dark candy-coated chocolate pieces. Stop after 8 to 10 folds.
(I tested a batch with much finer Oreo crumbs, but they disappeared into the dough. Rough chunks give better pockets. ) The dough should look thick and slightly rough with clear black cookie pieces and flashes of orange throughout. A few dry specks can vanish during the last folds.
But if you keep stirring after the flour disappears, the baked cookies can turn firm instead of tender. Fold briefly because less mixing limits gluten development and keeps Halloween Oreo Cookies soft.
Tip: Break each Oreo into about 5 or 6 pieces so the chunks stay visible after baking instead of dissolving into crumbs.
Step 4: Shape and chill the cookie dough

Divide the dough into 12 portions of about 3 tablespoons each, then roll each portion loosely without pressing it smooth. Push the remaining 4 roughly broken Halloween Oreo sandwich cookies into the tops and add 1/4 cup orange and dark candy-coated chocolate pieces so the pieces stay visible. Chill the shaped dough at 38°F for 30 minutes.
Space the portions apart while they chill so cold air reaches each mound evenly. After 30 minutes, the dough should feel firm around the edges but still yield slightly when pressed. The Oreo chunks will look embedded rather than buried.
Skip the chill and warm butter can melt before the cookie structure sets, which causes wide flat edges. Chill at 38°F because firm butter delays spreading until the flour and egg structure begins to set.
Tip: For taller cookies, shape each 3 tablespoon portion slightly higher than it is wide before the 30 minute chill.
Step 5: Bake until the edges set
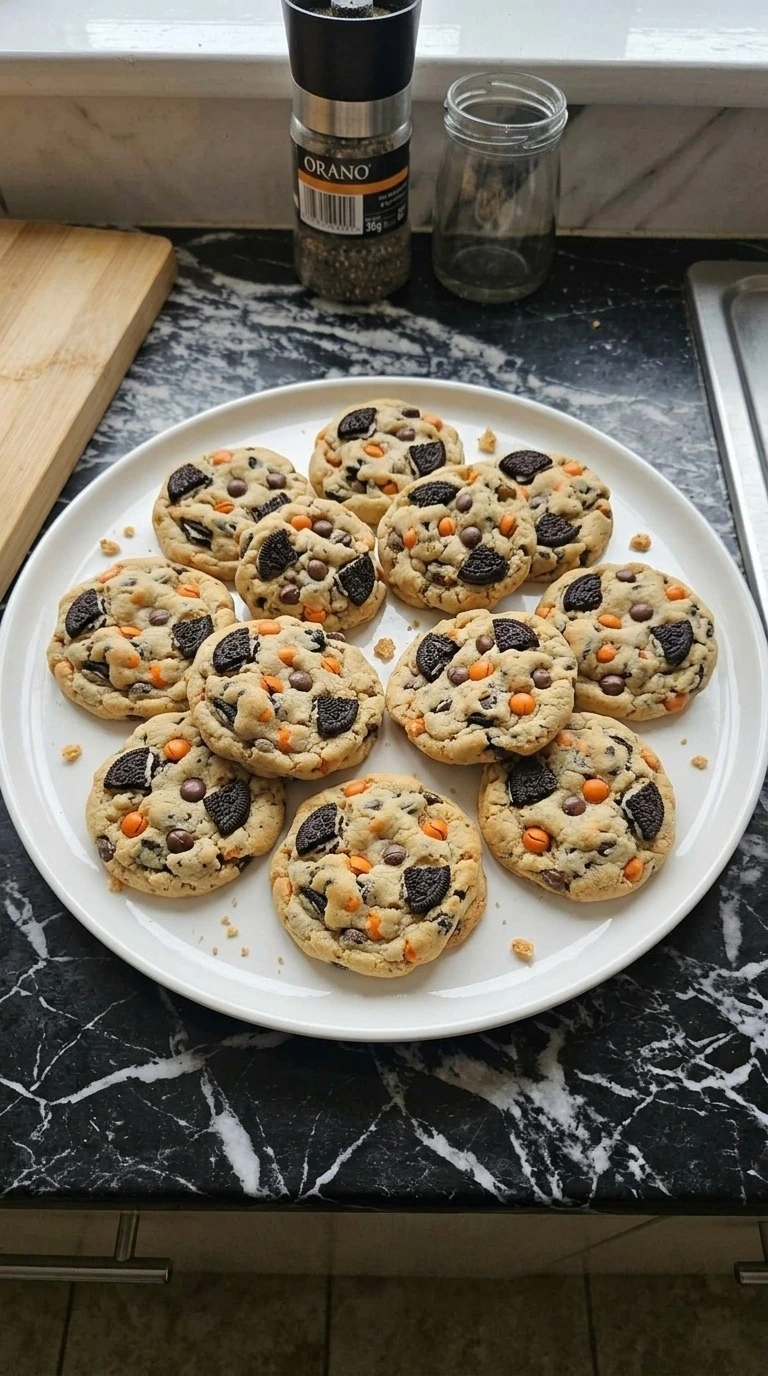
Heat the oven to 350°F and arrange the 12 chilled dough portions with at least 2 inches between them. Bake for 11 to 13 minutes and rotate the tray once at minute 7 if your oven browns unevenly. Pull the cookies when the edges look set and lightly golden but the centers still look soft and slightly puffed.
Let them stand on the hot tray for exactly 8 minutes before moving them so the centers finish setting without drying out. Finally, look for cracked tops, soft centers and crisp-looking edges with orange creme and candy still visible. The cookies should smell like vanilla and toasted chocolate wafers.
Go past 13 minutes and the centers lose their chewy texture. Bake at 350°F until the edges set because carryover heat finishes the middle gently.
Tip: Press 2 or 3 extra visible candy pieces into each warm cookie within 1 minute of baking for a brighter Halloween finish.
Pro Tips
- Keep the butter near 65°F before creaming. If it looks shiny or begins pooling around the bowl, chill it for 5 minutes before continuing.
- Break each Oreo into about 5 or 6 rough pieces instead of crushing it. Bigger chunks stay visible after 11 to 13 minutes at 350°F.
- Weigh each dough mound at about 55 to 60 grams if you want all 12 cookies to finish baking within the same two-minute window.
- Leave at least 2 inches between portions on the baking sheet. Crowding traps heat between the cookies and can make the centers spread into each other.
- Chill shaped dough for 30 minutes at about 38°F. If your kitchen is over 75°F, extend that rest to 40 minutes for thicker centers.
- Pull the tray when the centers still look slightly soft at minute 11 to 13. The cookies keep setting during the 8-minute rest on the hot sheet.
- Press 2 or 3 reserved candy pieces into each cookie within 1 minute of leaving the oven. They’ll stick without sinking into the warm center.
- Use a light-colored 13 by 18 inch baking sheet when possible. Very dark pans brown the bottoms faster and may require checking at minute 10.
- Add 1/2 teaspoon ground cinnamon and 1/8 teaspoon ground nutmeg to the flour for a warmer Halloween spice version without changing the bake time.
- Swap 1/2 cup of the candy-coated chocolate pieces for 1/2 cup white chocolate chips to add pale melted pockets against the dark Oreo chunks.
- Fold in 1/3 cup roasted chopped peanuts with the Oreo pieces for a salty crunch, but reduce the candy-coated chocolate pieces by the same 1/3 cup.
- Make smaller party cookies by portioning 24 mounds of about 1 1/2 tablespoons each and bake them at 350°F for about 8 to 10 minutes.
Substitutions & Variations
- Halloween Oreo sandwich cookies: regular Oreo sandwich cookies plus orange candy-coated chocolate pieces — Use the same 12-cookie amount. You’ll lose the orange creme center, but the added candy keeps the Halloween color and the cookie texture stays nearly the same.
- unsalted butter: plant-based baking butter — Use a 1 to 1 swap with 1/2 cup plant-based baking butter. Choose a firm baking stick rather than a soft tub spread because the softer type can make the cookies spread more.
- all-purpose flour: 1 to 1 gluten-free baking flour with xanthan gum — Replace the 1 3/4 cups flour measure for measure. The centers may be a little more tender and crumbly, so let the cookies cool for the full 8 minutes before moving them.
- large egg: 3 tablespoons aquafaba — Use 3 tablespoons drained chickpea liquid in place of the egg. The cookies will spread a little more and taste slightly less rich, so chill the shaped dough for 45 minutes instead of 30.
- orange and dark candy-coated chocolate pieces: orange and dark chocolate chips — Use the same 3/4 cup amount. Chocolate chips melt more and won’t hold such sharp color spots, but they give softer chocolate pockets throughout each cookie.
Storage Instructions
Keep fully cooled Halloween Oreo Cookies in an airtight container at room temperature for 3 to 4 days. For longer storage, freeze individual cookies between sheets of parchment in a sealed container for up to 2 months so the Oreo chunks don’t stick together.
To warm one cookie, heat it at 300°F for 4 to 5 minutes or microwave it for about 10 seconds. Discard cookies that develop a sour smell, damp sticky patches or visible mold, since those signs mean they’re no longer safe to eat.
Halloween Oreo Cookies
Ingredients
- 1/2 cup unsalted butter Softened to about 65°F so it can trap air without turning greasy.
- 3/4 cup light brown sugar Packed firmly to add moisture, caramel flavor and a chewy center.
- 1/4 cup granulated cane sugar Helps the cookie edges spread slightly and bake crisp.
- 1 large large egg Brought close to 68°F so it blends smoothly with the butter mixture.
- 2 teaspoons pure vanilla extract Adds a warm vanilla note that rounds out the chocolate wafer flavor.
- 1 3/4 cups all-purpose flour Spoon into the measuring cup and level it so the dough doesn’t become overly dry.
- 1/2 teaspoon baking soda Provides enough lift and spread for thick cookies without making them cakey.
- 1/2 teaspoon fine sea salt Balances the sugars and sharpens the chocolate and vanilla flavors.
- 12 cookies Halloween Oreo sandwich cookies Roughly broken into 5 or 6 pieces each so bold black wafer chunks and orange creme remain visible.
- 3/4 cup orange and dark candy-coated chocolate pieces Reserve about 1/4 cup for pressing onto the shaped dough before baking.
Instructions
- Set 1/2 cup unsalted butter out until it reaches about 65°F, then beat it with 3/4 cup light brown sugar and 1/4 cup granulated cane sugar for 2 to 3 minutes. Scrape the mixture once halfway through so no dense butter hides near the bottom. Keep mixing until the color turns one shade lighter and the texture looks fluffy rather than greasy. Don’t keep going once it loosens too much. Next, look for soft ridges that hold for a few seconds after mixing. The mixture should smell buttery and lightly caramel-like. If the butter gets above about 72°F, the dough can spread too fast later. Cream at 65°F for 2 to 3 minutes because trapped air helps the cookies rise before they spread.

- Add 1 large egg and 2 teaspoons pure vanilla extract to the creamed mixture. Beat for 45 to 60 seconds at medium speed and scrape the sides after about 30 seconds. The mixture may look loose at first, but keep mixing until it turns smooth and slightly glossy. Stop as soon as the egg disappears because extra beating can warm the butter and weaken the dough. Then watch for a thick batter-like texture with no streaks of egg white. You should smell vanilla clearly, and the mixture should fall from the beater in heavy ribbons. If it looks oily or separated, chill it for 5 minutes before continuing. Mix only until emulsified because a stable butter and egg mixture keeps the crumb even.

- Whisk 1 3/4 cups all-purpose flour with 1/2 teaspoon baking soda and 1/2 teaspoon fine sea salt, then add the dry mix to the wet base. Fold with a rubber spatula using broad scooping turns for about 45 to 60 seconds. When only a few flour streaks remain, fold in 8 roughly broken Halloween Oreo sandwich cookies and 1/2 cup orange and dark candy-coated chocolate pieces. Stop after 8 to 10 folds. (I tested a batch with much finer Oreo crumbs, but they disappeared into the dough. Rough chunks give better pockets.) The dough should look thick and slightly rough with clear black cookie pieces and flashes of orange throughout. A few dry specks can vanish during the last folds. But if you keep stirring after the flour disappears, the baked cookies can turn firm instead of tender. Fold briefly because less mixing limits gluten development and keeps Halloween Oreo Cookies soft.
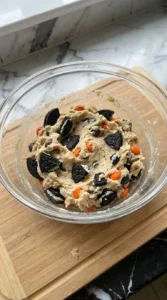
- Divide the dough into 12 portions of about 3 tablespoons each, then roll each portion loosely without pressing it smooth. Push the remaining 4 roughly broken Halloween Oreo sandwich cookies into the tops and add 1/4 cup orange and dark candy-coated chocolate pieces so the pieces stay visible. Chill the shaped dough at 38°F for 30 minutes. Space the portions apart while they chill so cold air reaches each mound evenly. After 30 minutes, the dough should feel firm around the edges but still yield slightly when pressed. The Oreo chunks will look embedded rather than buried. Skip the chill and warm butter can melt before the cookie structure sets, which causes wide flat edges. Chill at 38°F because firm butter delays spreading until the flour and egg structure begins to set.

- Heat the oven to 350°F and arrange the 12 chilled dough portions with at least 2 inches between them. Bake for 11 to 13 minutes and rotate the tray once at minute 7 if your oven browns unevenly. Pull the cookies when the edges look set and lightly golden but the centers still look soft and slightly puffed. Let them stand on the hot tray for exactly 8 minutes before moving them so the centers finish setting without drying out. Finally, look for cracked tops, soft centers and crisp-looking edges with orange creme and candy still visible. The cookies should smell like vanilla and toasted chocolate wafers. Go past 13 minutes and the centers lose their chewy texture. Bake at 350°F until the edges set because carryover heat finishes the middle gently.

Notes
Frequently Asked Questions
Yes. Shape the dough into 12 portions and keep them covered in the refrigerator for up to 48 hours before baking. Let very cold dough sit out for 5 minutes, then bake at 350°F for 12 to 14 minutes because chilled centers need slightly more time.
Keep cooled cookies in an airtight container at room temperature for 3 to 4 days. Add a small piece of sandwich bread to the container if you want softer centers, but replace it after 24 hours so it doesn’t become stale or damp.
Use 1 3/4 cups of a cup-for-cup gluten-free baking flour that already contains xanthan gum and choose certified gluten-free chocolate sandwich cookies. Chill the dough for 40 minutes and let the baked cookies sit for 10 minutes before moving them because gluten-free cookies can be fragile while hot.
Warm butter is usually the first cause. Keep it near 65°F and chill shaped dough for at least 30 minutes before baking at 350°F. Also measure the flour carefully because even 2 to 3 tablespoons too little can make the dough flatten quickly.
Yes. Double every ingredient and portion 24 cookies, but bake one sheet at a time for the most even heat. Keep unbaked portions chilled while the first tray bakes, then give each batch about 11 to 13 minutes at 350°F.
Freeze shaped dough mounds on a tray until firm for about 1 hour, then transfer them to an airtight freezer bag for up to 2 months. Bake from frozen at 350°F for about 14 to 16 minutes and look for set edges with soft centers.
Serve them with cold milk, hot cocoa or vanilla ice cream about 10 minutes after baking when the centers are still soft. For a party tray, allow 2 cookies per guest and mix them with plain chocolate treats so the orange pieces stand out.
Final Thoughts
Some Halloween bakes just earn a repeat spot, and Halloween Oreo Cookies became one of those recipes for me after the first warm tray. They would have saved me from plenty of last-minute party dessert runs, but now that I have this thick chewy version, I think you’ll keep it close too.
If you enjoyed these oreo halloween cookies, try making them for your next Halloween party and share how your batch turns out. And leave a comment if you try the oreo cookies halloween twist, because I read every one and it really makes my day.
But now that I have it, I make it all the time and I think you will too. If you enjoyed this, check out some of my other popular recipes on the blog.
Oreo began selling seasonal orange creme versions for Halloween decades after the original cookie launched, and the bright filling turned the familiar black sandwich cookie into an easy holiday baking shortcut.