Halloween Fruit Pizza
After seeing so many spooky dessert boards, I wanted a Halloween Fruit Pizza that still tasted fresh instead of mostly candy. I kept finding halloween fruit pizza and fruit pizza halloween ideas with thick frosting and wet fruit, so I tested a thinner cookie crust and drier toppings instead. This version takes its cue from the classic American fruit pizza and keeps the sweet cream cheese layer light.
The crust bakes just until the edge turns gold, which gives you enough structure for slicing while the middle stays soft under the cold topping. People sometimes skip fruit pizza because they expect the top to slide or the base to go soggy. That part matters.
Drying the fruit well and cooling the crust all the way fixes both problems without making the recipe fussy. It’s colorful, quick to decorate and easy to change with whatever fruit looks best at the store. So if you want a Halloween dessert that kids can help decorate and adults will still want a second slice of, this one is worth making.
Why This Recipe Works
Keeping the sugar cookie crust about 1/4 inch thick and baking it at 350°F lets the center set before the edge hardens, while a 45-minute cool protects the topping. Dry fruit matters too.
For Halloween Fruit Pizza, patting berries and citrus dry stops free water from thinning the frosting and making the surface slippery. The chilled frosting then grips the fruit, so finished slices hold their shape without gelatin or glaze.
Ingredients
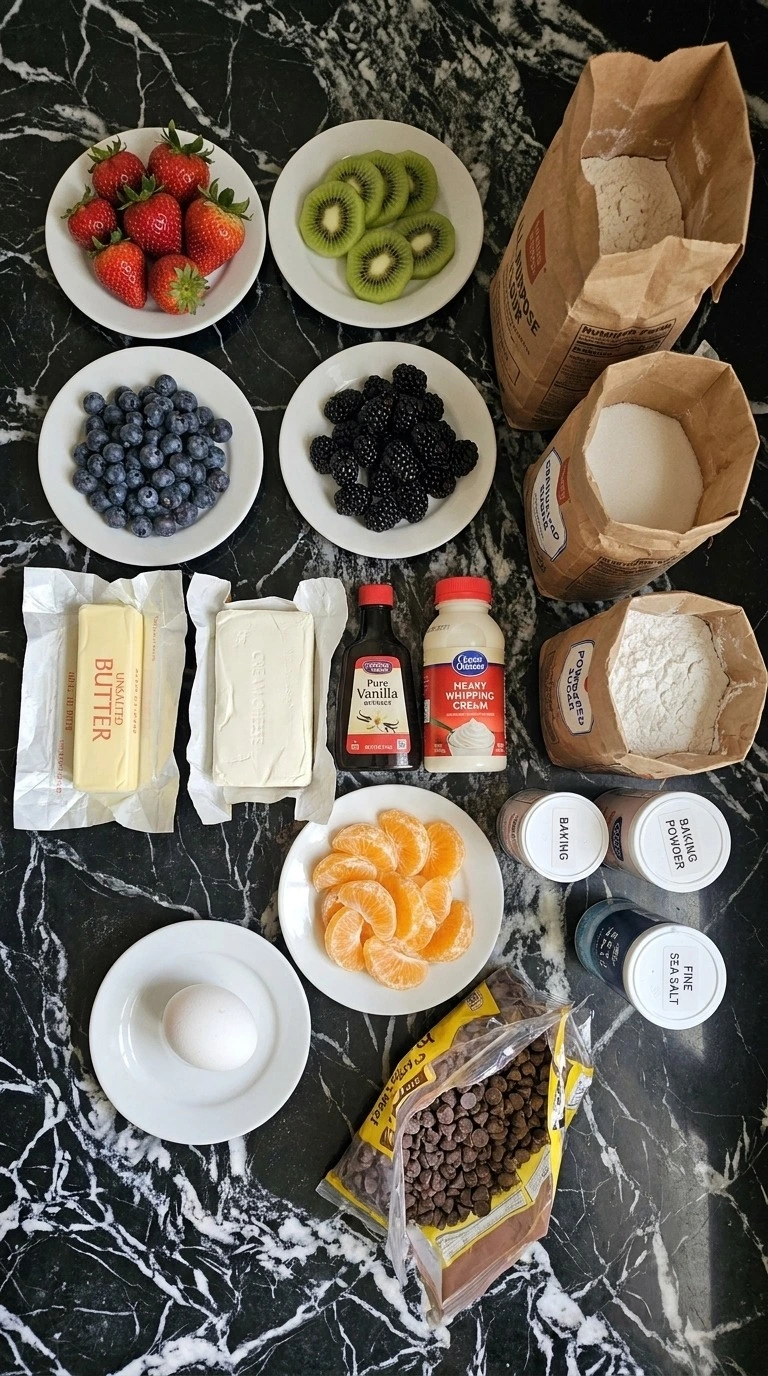
- unsalted butter: Softened to about 68°F so it creams smoothly with the sugar without turning greasy.
- granulated sugar: Sweetens the cookie crust and helps the outer edge turn lightly golden.
- large egg: Adds moisture and structure so the cookie base slices without crumbling.
- pure vanilla extract: Divided between the cookie dough and cream cheese frosting for a warm vanilla note.
- all-purpose flour: Measured by spooning and leveling so the crust stays tender instead of dense.
- baking powder: Adds a small lift so the cookie base stays soft through the center.
- fine sea salt: Balances the sweet crust and frosting without adding coarse salty pockets.
- full-fat cream cheese: Softened to about 65°F so the frosting blends smooth and holds the fruit in place.
- powdered sugar: Sweetens and thickens the cream cheese layer without a gritty texture.
- heavy whipping cream: Loosens the frosting just enough for a smooth spread while keeping it stable.
- strawberries: Hulled, dried well and sliced into uneven 1/4-inch pieces for bright red accents.
- mandarin oranges: Peeled, separated into segments and patted dry so the citrus doesn’t water down the frosting.
- green kiwifruit: Peeled, dried and sliced no thicker than 1/4 inch for flat green arcs.
- blueberries: Kept whole and dried well so they add dark blue pops without leaking much juice.
- blackberries: Kept whole when small or halved when large so the topping stays easy to slice.
- semisweet chocolate chips: Melted gently for thin spiderweb lines that set without becoming brittle.
Kitchen Equipment
- 12-inch round pizza pan: A light-colored 12-inch round pizza pan gives the cookie crust room to spread and brown gently, while a dark pan can overcolor the edge before the center sets.
- large mixing bowl: A 4-quart mixing bowl gives the cookie dough enough space for folding, while a smaller bowl makes flour spill and encourages overmixing.
- medium mixing bowl: A 2-quart bowl holds the cream cheese frosting without crowding, and a deep-sided substitute helps prevent powdered sugar from puffing out.
- electric hand mixer: A mixer with at least five speeds creams the butter and smooths the frosting, while a single-speed model can beat too hard and loosen the topping.
- rubber spatula: A flexible medium spatula folds flour without overworking the dough and scrapes frosting cleanly, while a stiff spoon can leave dry pockets.
- offset spatula: A 6 to 8-inch offset spatula spreads an even 1/4-inch frosting layer, while a straight knife can dig into the soft cookie surface.
- microwave-safe small bowl: A 1-cup microwave-safe bowl melts the semisweet chocolate in shallow bursts, while a large cold bowl can cool the small amount too quickly.
- small piping bag: A small piping bag with a narrow cut tip keeps the chocolate web thin, while a wide opening makes heavy lines that can drag through the fruit.
How to Make It
Step 1: Mix the sugar cookie dough
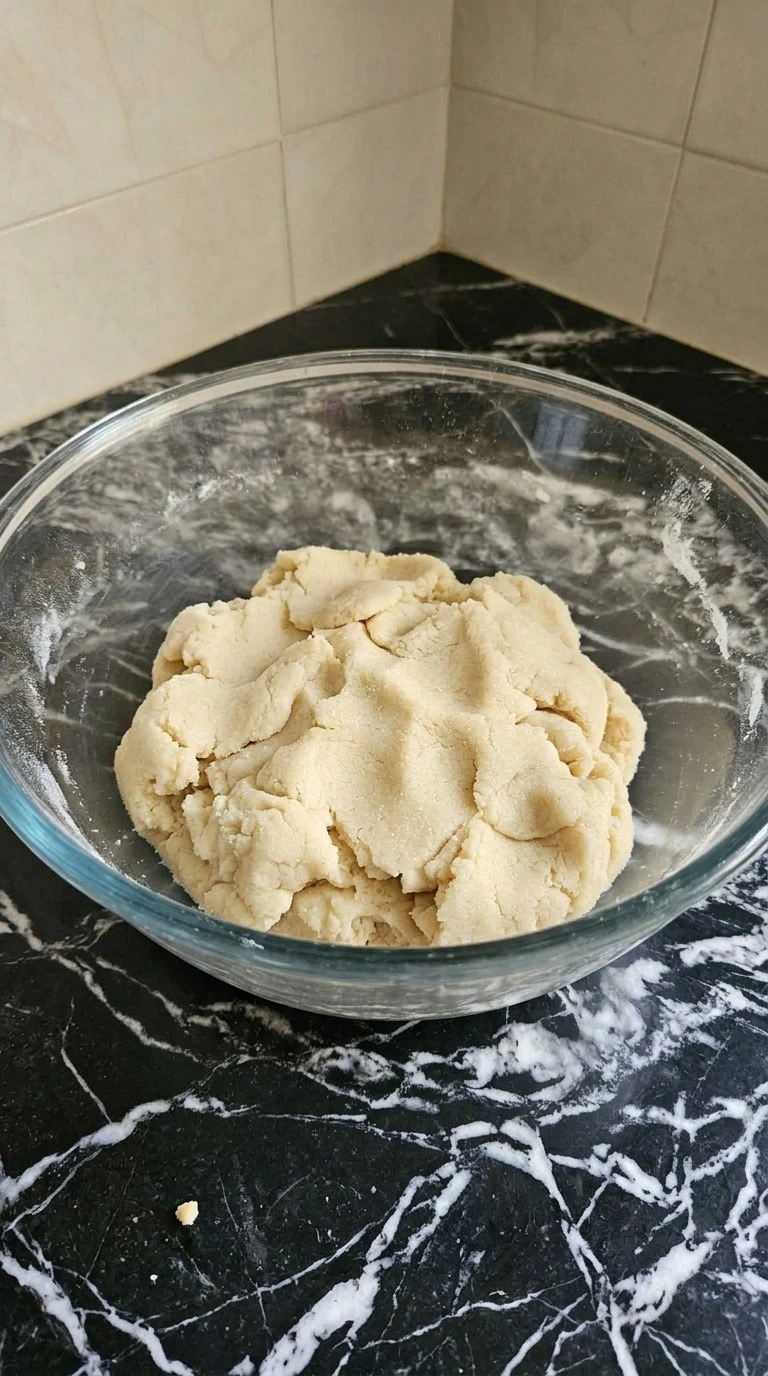
Set the unsalted butter out until it reaches about 68°F, then beat it with the granulated sugar for 2 minutes until pale and a little fluffy. Add the large egg and 1 teaspoon pure vanilla extract, then mix for 30 seconds so the wet base looks smooth instead of curdled. In a second bowl combine the all-purpose flour, baking powder and fine sea salt, then fold the dry mix into the butter base with a rubber spatula using broad turns.
No dry streaks should remain. Stop mixing now. Go longer and the crust can turn firm.
The dough should look soft and matte with a few tiny sugar crystals still visible, and it should hold together when pressed. Chill it for 10 minutes at 40°F. The short chill limits spread because the butter firms before baking.
Tip: If your kitchen is above 75°F, chill the dough 15 minutes so the butter stays firm before baking.
Step 2: Press and bake the cookie crust
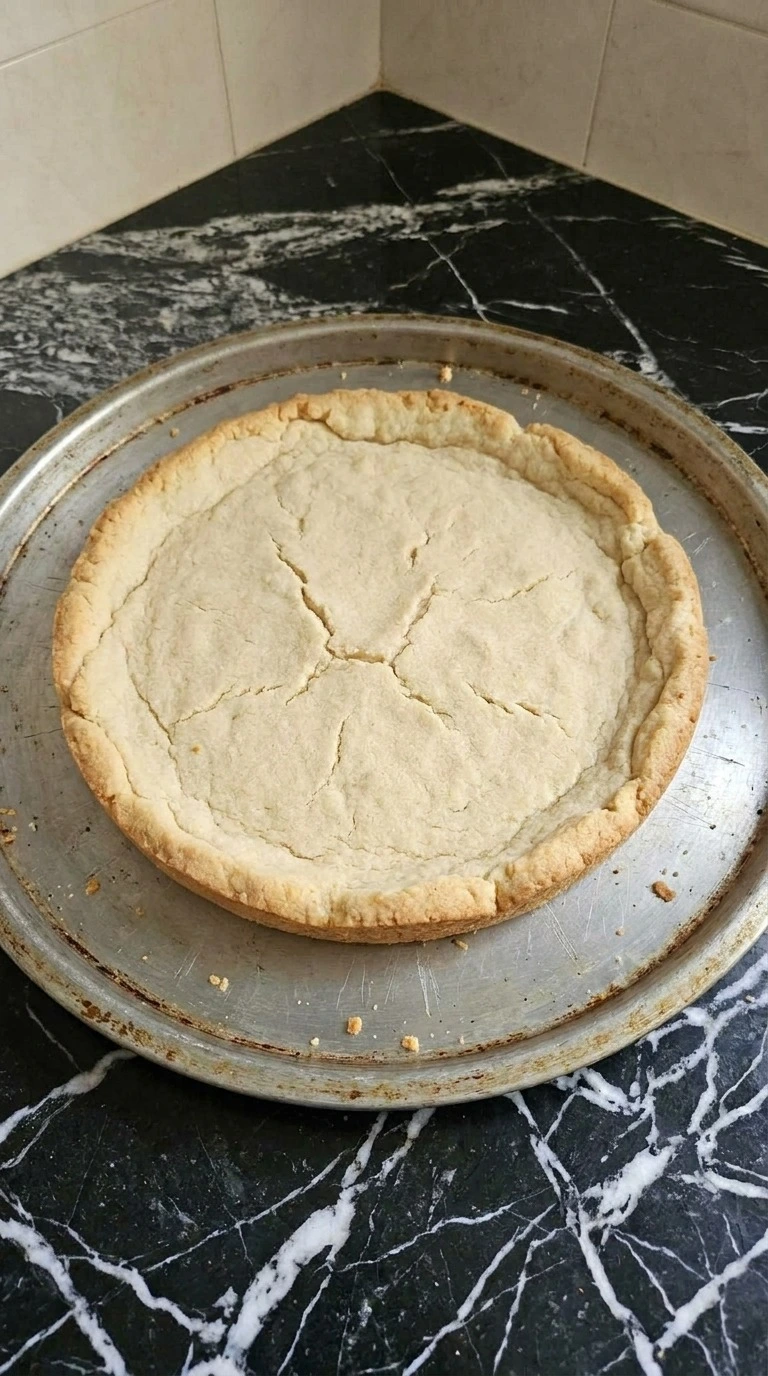
Press the chilled dough into an even 12-inch round on a 12-inch pizza pan, keeping the center about 1/4 inch thick and the edge only slightly thicker. Bake at 350°F for 14 to 16 minutes, rotating the pan 180 degrees at minute 8 so the rim colors evenly without drying the center. Pull it when the outer 1/2 inch is light golden and the middle is set but still pale.
Go past 16 minutes and the base turns hard once chilled. I baked my first batch for 18 minutes. It snapped instead of bending.
Cool the Halloween Fruit Pizza crust for 45 minutes until the pan feels neutral, not warm, and the center firms without darkening. Don’t frost early. Cool fully because warmth loosens the topping.
Tip: Line the pan with parchment if it tends to stick, and leave a 1-inch paper overhang for easier lifting after cooling.
Step 3: Whip the cream cheese frosting

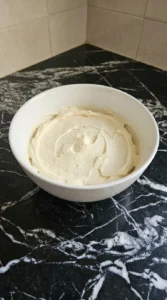
Let the full-fat cream cheese reach about 65°F, then beat it for 45 seconds until smooth before adding the powdered sugar and remaining 1 teaspoon pure vanilla extract. Add the heavy whipping cream, then beat for 60 to 90 seconds at medium speed and scrape the bowl once halfway through so no dense pockets remain. The frosting should hold a soft ridge and look satiny, not loose.
If the cream cheese stays fridge-cold, small lumps survive and tear the crust later. Chill the frosting for 10 minutes at 40°F if it feels slack. It should spread without running.
Keep it cool because warm frosting slides off the crust.
Tip: Use full-fat block cream cheese, not whipped tub style, because the tub version makes 8 ounces of topping softer.
Step 4: Frost the crust and arrange the fruit
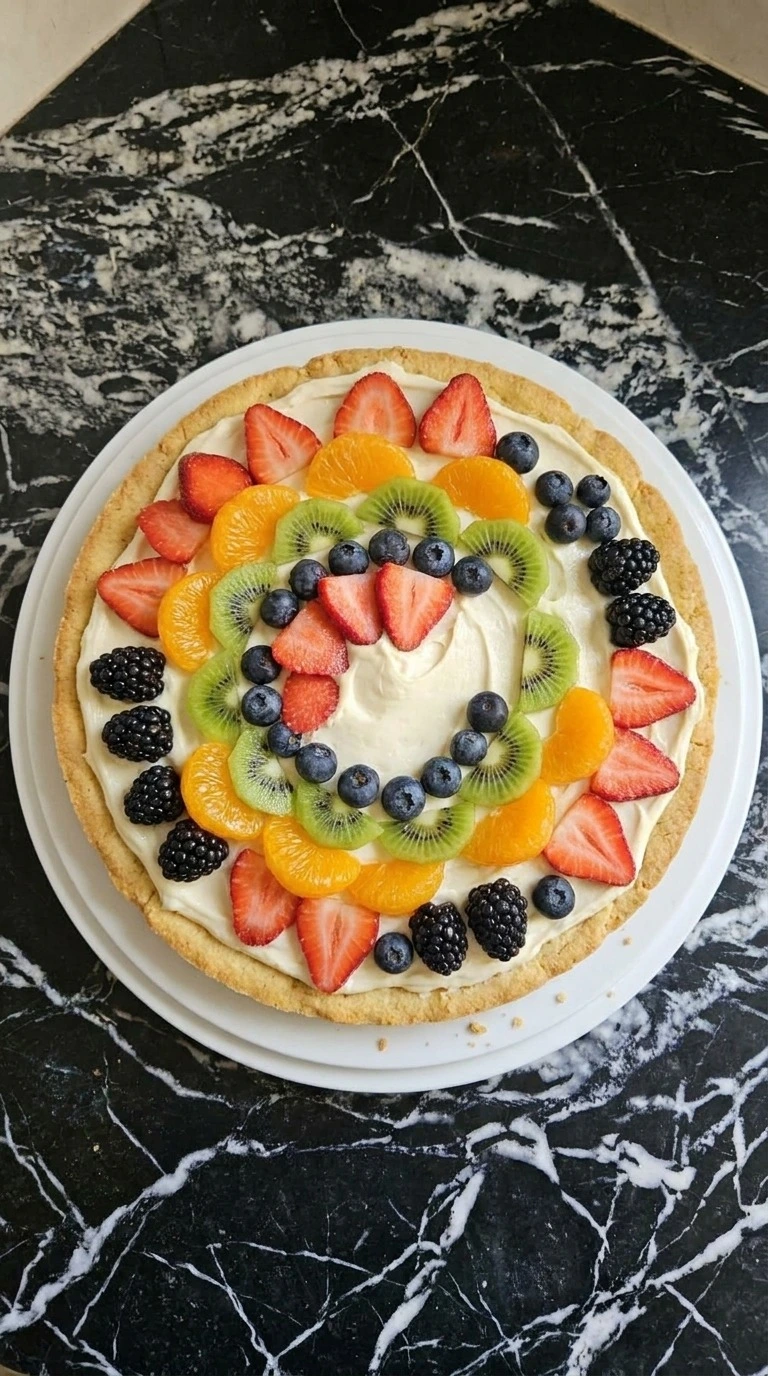
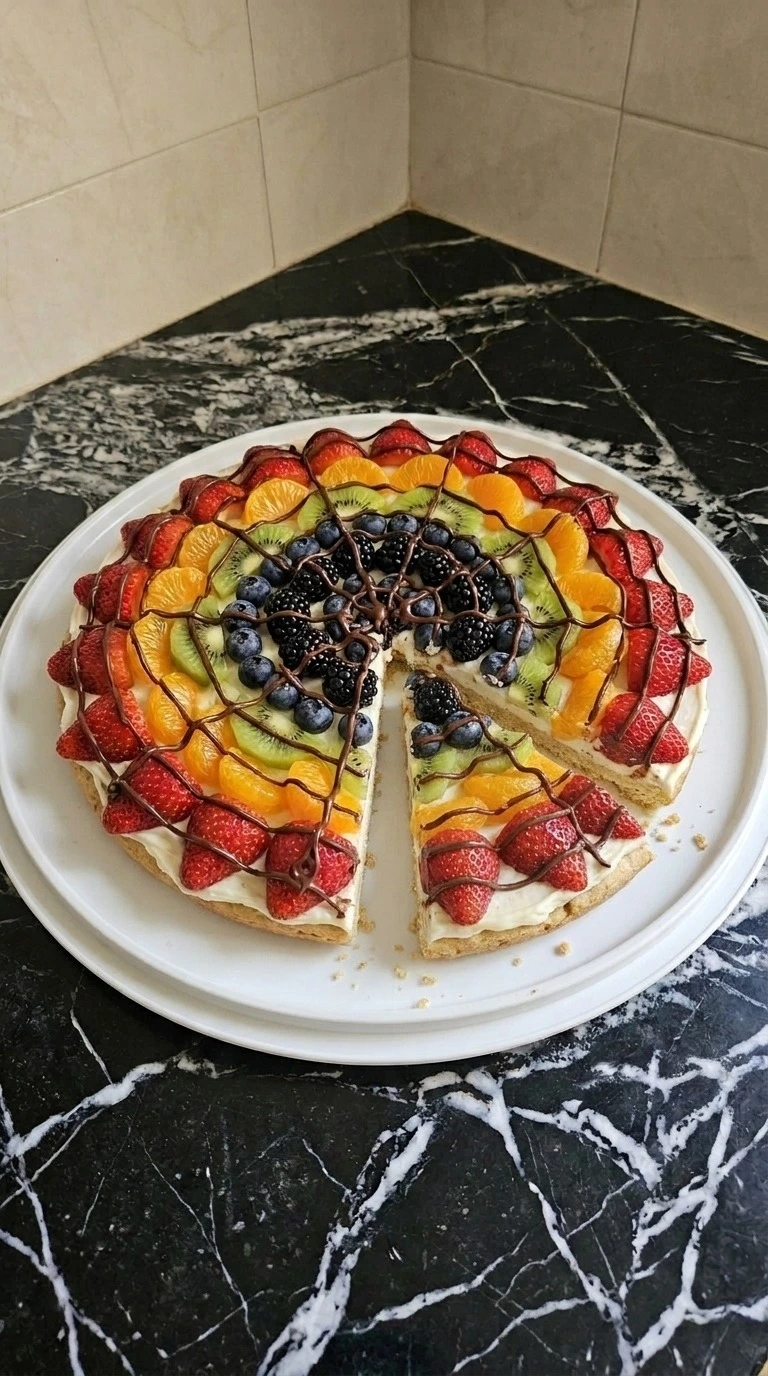
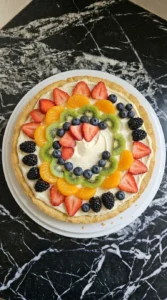
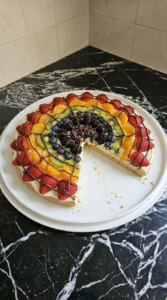
Keep the strawberries, mandarin orange segments, green kiwifruit, blueberries and blackberries near 40°F, then pat every piece dry before it touches the frosting. Lift the cooled crust onto a round serving plate, then spread the cream cheese mixture about 1/4 inch thick and leave a 1/2 inch golden border. Over 8 to 10 minutes, arrange the fruit in loose uneven arcs with slight overlaps so the Halloween Fruit Pizza feels playful rather than patterned like a store display.
Press each piece only enough to grip. You should still see white frosting between the fruit and no juice should pool around the berries. Wet fruit bleeds color within minutes and makes the top slick.
Dry fruit matters because surface water loosens the frosting.
Tip: Slice green kiwifruit no thicker than 1/4 inch so each piece stays flat and doesn’t pull frosting when moved.
Step 5: Pipe the chocolate web and slice
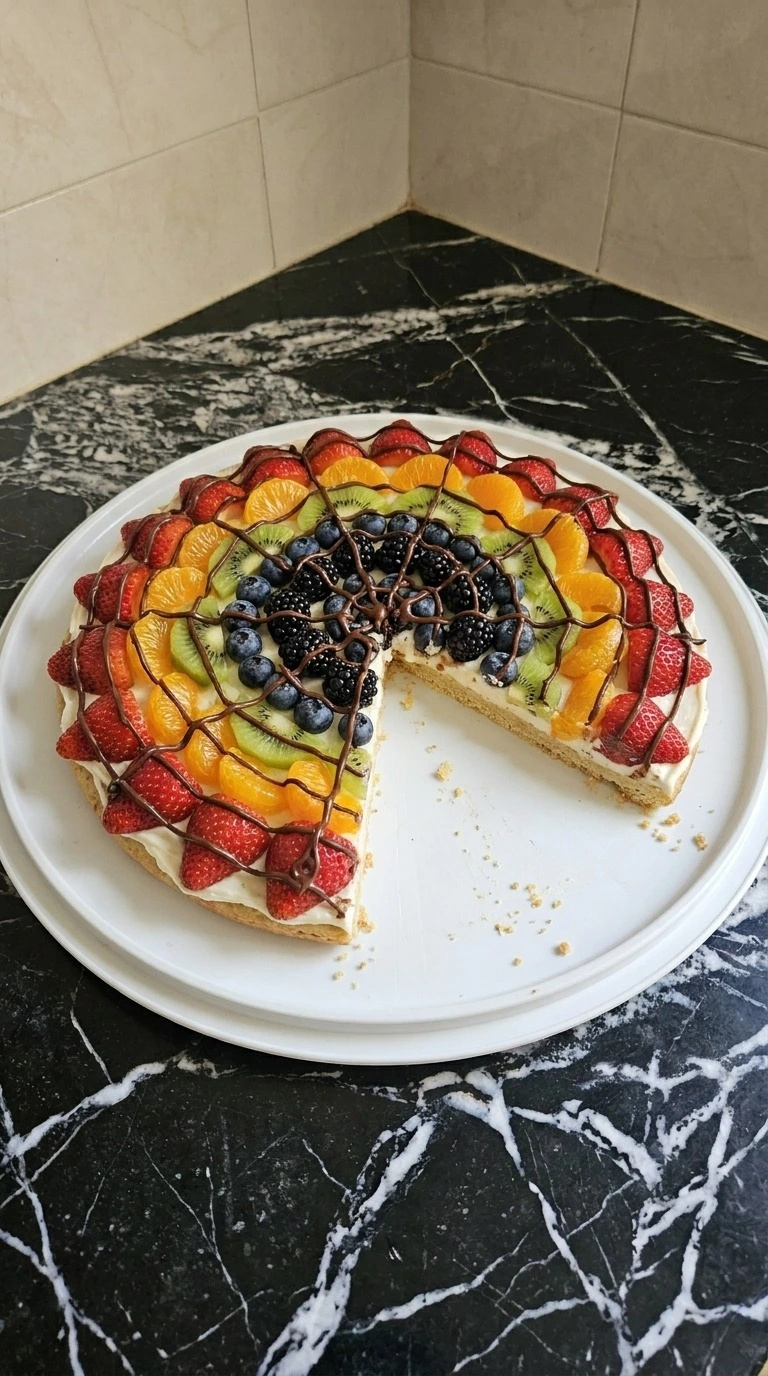
Melt the semisweet chocolate chips at 50 percent microwave power in 20-second bursts for 60 to 80 seconds total. Stir after each burst until the chocolate reaches about 90°F and flows in a thin ribbon. Let it stand for 2 minutes, then pipe three loose circles over the fruit and drag eight short lines from the center outward to make a web.
Keep the lines irregular. If the chocolate climbs above 100°F, it can soften the frosting and smear the fruit. Let the chocolate set for 8 to 10 minutes, then cut the Halloween Fruit Pizza into 10 wedges with one clean downward press per slice.
The lines should turn from shiny to softly matte. Cool chocolate matters because hot drizzle softens the frosting.
Tip: Wipe the knife after every two slices so dark chocolate and berry juice don’t streak across the pale frosting.
Pro Tips
- Pat every piece of fruit dry for at least 30 seconds with paper towels because surface moisture can loosen the frosting within an hour.
- Keep the cookie crust close to 1/4 inch thick. A thicker center can stay soft while the outer edge reaches golden brown.
- Cool the crust for the full 45 minutes before frosting. Even slight warmth can soften cream cheese and make the fruit slide.
- Use block cream cheese with at least 30 percent fat. Whipped tub cream cheese stays softer and won’t hold heavy berries as well.
- Chill the finished Halloween Fruit Pizza for 20 minutes before slicing so the frosting firms and each wedge lifts more cleanly.
- Cut green kiwifruit into slices no thicker than 1/4 inch. Thick pieces weigh down the frosting and make neat serving harder.
- Melt the chocolate in 20-second bursts at 50 percent power. Stop near 90°F so the drizzle stays fluid without warming the topping.
- For cleaner wedges, wipe the knife after every two cuts. Berry juice and chocolate otherwise streak through the pale cream layer.
- Make mini fruit pizzas by dividing the dough into eight rounds and baking them at 350°F for 10 to 12 minutes.
- Create a monster face version with blueberry eyes, strawberry mouths and thin green kiwifruit strips placed unevenly across the frosting.
- For a citrus version, replace the strawberries with 1 cup blood orange segments and add 1 teaspoon orange zest to the frosting.
- Skip the chocolate web and arrange dark berries in loose rings for a candy-free look that still feels right for Halloween.
Substitutions & Variations
- all-purpose flour: 1 to 1 gluten-free baking flour — Use the same 1 1/2 cups and choose a blend with xanthan gum. The crust turns slightly more tender and may need 2 extra baking minutes.
- large egg: 3 tablespoons aquafaba — Use 3 tablespoons aquafaba for the single egg. The crust will spread a little more, so chill the dough for 20 minutes before baking.
- unsalted butter, cream cheese and heavy whipping cream: plant-based butter, dairy-free block cream cheese and coconut cream — Replace each ingredient 1 to 1 for a dairy-free version. The frosting stays softer, so chill it for 20 minutes before spreading.
- mandarin oranges: seedless clementines — Use 1 cup of peeled clementine segments instead. They taste brighter and firmer, but remove excess white pith so each slice stays neat.
- semisweet chocolate chips: dark chocolate chips — Use the same 1/3 cup amount. Dark chocolate sets slightly firmer and adds more bitterness against the sweet cream cheese layer.
Storage Instructions
Refrigerate assembled Halloween Fruit Pizza at 40°F or colder in a shallow airtight container for up to 2 days. Don’t freeze it with the fruit and frosting attached because thawing makes both watery.
You can freeze the bare cookie crust for 1 month after wrapping it tightly in two layers. Don’t reheat assembled slices.
For a frozen plain crust, warm it at 300°F for 5 minutes and cool it fully before adding fresh frosting. Discard leftovers if the fruit smells fermented, the frosting turns watery or the berries develop fuzzy spots.
Halloween Fruit Pizza
Ingredients
- 1/2 cup unsalted butter Softened to about 68°F so it creams smoothly with the sugar without turning greasy.
- 3/4 cup granulated sugar Sweetens the cookie crust and helps the outer edge turn lightly golden.
- 1 large large egg Adds moisture and structure so the cookie base slices without crumbling.
- 2 teaspoons pure vanilla extract Divided between the cookie dough and cream cheese frosting for a warm vanilla note.
- 1 1/2 cups all-purpose flour Measured by spooning and leveling so the crust stays tender instead of dense.
- 1/2 teaspoon baking powder Adds a small lift so the cookie base stays soft through the center.
- 1/4 teaspoon fine sea salt Balances the sweet crust and frosting without adding coarse salty pockets.
- 8 ounces full-fat cream cheese Softened to about 65°F so the frosting blends smooth and holds the fruit in place.
- 1/2 cup powdered sugar Sweetens and thickens the cream cheese layer without a gritty texture.
- 1 tablespoon heavy whipping cream Loosens the frosting just enough for a smooth spread while keeping it stable.
- 1 cup strawberries Hulled, dried well and sliced into uneven 1/4-inch pieces for bright red accents.
- 1 cup mandarin oranges Peeled, separated into segments and patted dry so the citrus doesn’t water down the frosting.
- 2 medium green kiwifruit Peeled, dried and sliced no thicker than 1/4 inch for flat green arcs.
- 1/2 cup blueberries Kept whole and dried well so they add dark blue pops without leaking much juice.
- 1/2 cup blackberries Kept whole when small or halved when large so the topping stays easy to slice.
- 1/3 cup semisweet chocolate chips Melted gently for thin spiderweb lines that set without becoming brittle.
Instructions
- Set the unsalted butter out until it reaches about 68°F, then beat it with the granulated sugar for 2 minutes until pale and a little fluffy. Add the large egg and 1 teaspoon pure vanilla extract, then mix for 30 seconds so the wet base looks smooth instead of curdled. In a second bowl combine the all-purpose flour, baking powder and fine sea salt, then fold the dry mix into the butter base with a rubber spatula using broad turns. No dry streaks should remain. Stop mixing now. Go longer and the crust can turn firm. The dough should look soft and matte with a few tiny sugar crystals still visible, and it should hold together when pressed. Chill it for 10 minutes at 40°F. The short chill limits spread because the butter firms before baking.
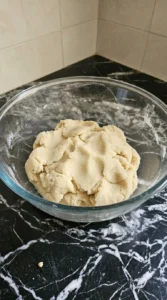
- Press the chilled dough into an even 12-inch round on a 12-inch pizza pan, keeping the center about 1/4 inch thick and the edge only slightly thicker. Bake at 350°F for 14 to 16 minutes, rotating the pan 180 degrees at minute 8 so the rim colors evenly without drying the center. Pull it when the outer 1/2 inch is light golden and the middle is set but still pale. Go past 16 minutes and the base turns hard once chilled. I baked my first batch for 18 minutes. It snapped instead of bending. Cool the Halloween Fruit Pizza crust for 45 minutes until the pan feels neutral, not warm, and the center firms without darkening. Don’t frost early. Cool fully because warmth loosens the topping.

- Let the full-fat cream cheese reach about 65°F, then beat it for 45 seconds until smooth before adding the powdered sugar and remaining 1 teaspoon pure vanilla extract. Add the heavy whipping cream, then beat for 60 to 90 seconds at medium speed and scrape the bowl once halfway through so no dense pockets remain. The frosting should hold a soft ridge and look satiny, not loose. If the cream cheese stays fridge-cold, small lumps survive and tear the crust later. Chill the frosting for 10 minutes at 40°F if it feels slack. It should spread without running. Keep it cool because warm frosting slides off the crust.
- Keep the strawberries, mandarin orange segments, green kiwifruit, blueberries and blackberries near 40°F, then pat every piece dry before it touches the frosting. Lift the cooled crust onto a round serving plate, then spread the cream cheese mixture about 1/4 inch thick and leave a 1/2 inch golden border. Over 8 to 10 minutes, arrange the fruit in loose uneven arcs with slight overlaps so the Halloween Fruit Pizza feels playful rather than patterned like a store display. Press each piece only enough to grip. You should still see white frosting between the fruit and no juice should pool around the berries. Wet fruit bleeds color within minutes and makes the top slick. Dry fruit matters because surface water loosens the frosting.
- Melt the semisweet chocolate chips at 50 percent microwave power in 20-second bursts for 60 to 80 seconds total. Stir after each burst until the chocolate reaches about 90°F and flows in a thin ribbon. Let it stand for 2 minutes, then pipe three loose circles over the fruit and drag eight short lines from the center outward to make a web. Keep the lines irregular. If the chocolate climbs above 100°F, it can soften the frosting and smear the fruit. Let the chocolate set for 8 to 10 minutes, then cut the Halloween Fruit Pizza into 10 wedges with one clean downward press per slice. The lines should turn from shiny to softly matte. Cool chocolate matters because hot drizzle softens the frosting.
Notes
Frequently Asked Questions
Yes. Bake the crust up to 24 hours ahead and keep it covered after it cools completely. Mix the frosting one day ahead too, but add fruit no more than 4 hours before serving.
Wet fruit is usually the problem, especially citrus and sliced strawberries. Pat each piece dry for 30 seconds, then chill the assembled pizza at 40°F until serving.
Store leftovers in a shallow airtight container for up to 2 days at 40°F or colder. After that, the berries soften and the cookie crust starts absorbing moisture from the frosting.
For gluten-free crust, replace the 1 1/2 cups flour with a 1 to 1 baking blend containing xanthan gum. For egg-free dough, use 3 tablespoons aquafaba and chill it 20 minutes before baking.
Yes, but bake two separate 12-inch crusts instead of one very thick crust. Keep each at 350°F for 14 to 16 minutes so the centers bake evenly.
Don’t freeze the fully assembled dessert because thawed fruit releases water and the frosting can separate. Freeze only the bare crust for up to 1 month, tightly wrapped twice after cooling.
Cut the pizza into 10 wedges and serve it chilled alongside savory bites for contrast. It works well after halloween finger food ideas or halloween dinner ideas for kids without adding another heavy dessert.
Final Thoughts
The batch I remember most is still the first one, when I baked the crust too long and expected the whole dessert to fail. This Halloween Fruit Pizza is more forgiving because the thin base and dry fruit keep every slice neat without much fuss.
It also fits halloween fruit pizza ideas and easy halloween snacks for kids when you want something playful but still fresh. If you try it, leave a comment and share your fruit design because I love seeing how each Halloween table makes it different.
The same batch covers halloween meals for kids, halloween vegetable tray and halloween finger food ideas without a single change.
Fruit pizza borrows the round shape and sliceable format of savory pizza, but its base is a sweet cookie. A chocolate spiderweb turns that familiar dessert into a Halloween centerpiece.