Baked Chicken Drumsticks
The smell coming from my oven had everyone asking when dinner would be ready! When my mom tasted these Baked Chicken Drumsticks, she said the skin was her favorite part. I have to say, they’ve become one of my favorite chicken dinners too! A simple weeknight experiment turned into a recipe I couldn’t stop making. The skin gets golden and crisp while the meat stays tender and juicy. And the best part?
You don’t need a long marinade or a cabinet full of spices to make it happen. These easy baked chicken drumsticks get their flavor from olive oil and a blend of smoked paprika, garlic powder and dried thyme. I think you all know how much I love a good chicken dinner, especially one that doesn’t leave me washing a pile of dishes afterward. I’ve made plenty of chicken recipes before, but there’s something about the crisp skin on these oven-roasted drumsticks that makes everyone reach for another piece. The recipe makes 8 drumsticks, which is enough for four people. And if you’re feeding a bigger group, you can double the batch as long as you give each piece enough room to roast.
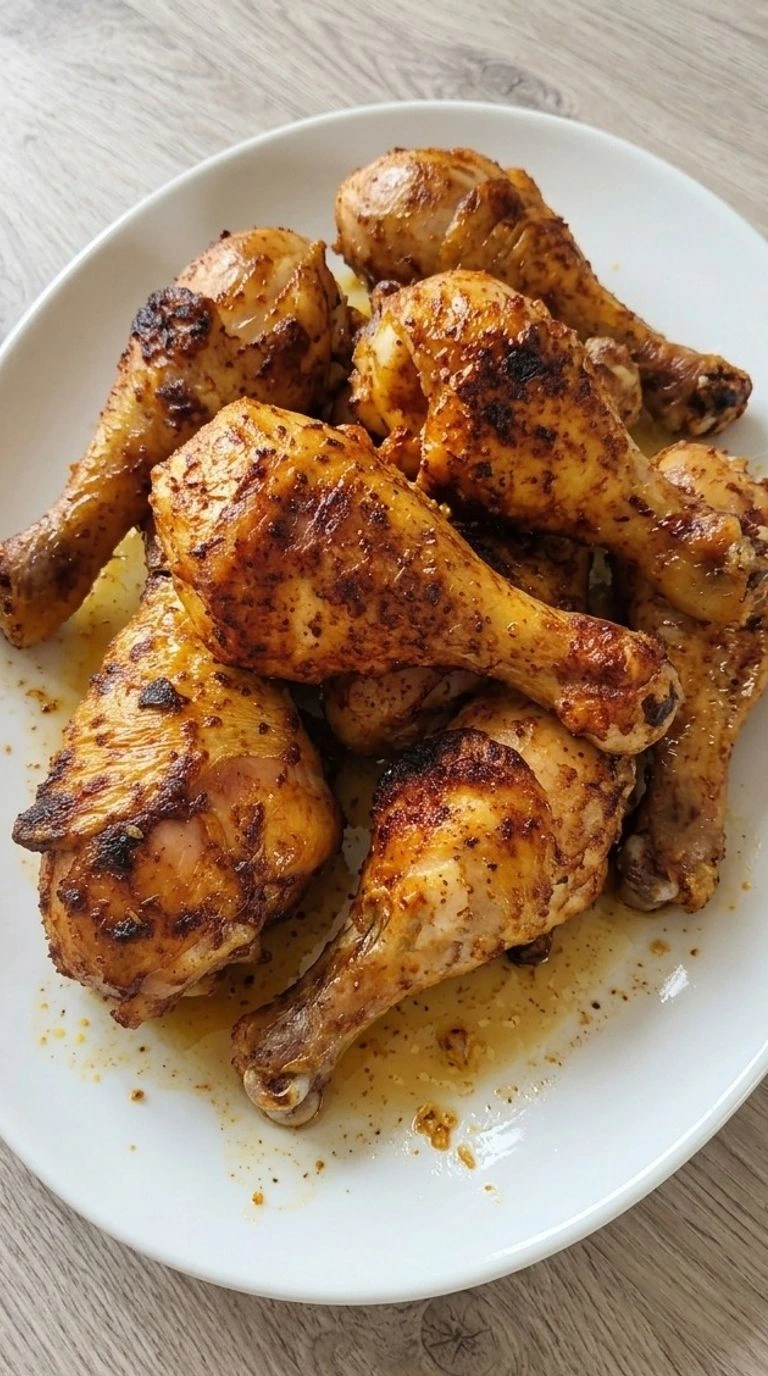
If you love simple oven dinners, you’ll also enjoy my Sheet Pan Chicken Thighs and Potatoes for an Easy Dinner. These chicken legs are great for a family dinner with mashed potatoes and vegetables. They’re also a good choice for meal prep because you can make a full batch and keep the leftovers in the fridge for busy days. I love how little work goes into them. You season the chicken and let the oven handle most of the cooking. Then dinner’s on the table with hardly any fuss.
Why This Recipe Works
The trick with Baked Chicken Drumsticks is getting the skin dry before you add the spice mix. Water on the skin has to steam away before browning can begin, so patting it dry gives the crust a head start.
Then the olive oil helps the paprika and thyme cling to every piece. Roasting at 425°F helps the skin turn crisp while the drumsticks stay juicy.
The thermometer matters more than the clock because the thickest piece must reach at least 165°F. If you enjoy this simple high-heat method, try my Sheet Pan Chicken Thighs and Veggies for Busy Weeknights for another oven dinner.
Ingredients

- Bone-in skin-on chicken drumsticks: Choose similarly sized drumsticks weighing approximately 4 to 5 ounces each. Keep the skin intact and pat dry before seasoning for better browning.
- Extra virgin olive oil: Mix with the dry seasonings to make a paste that coats the chicken and promotes golden skin.
- Smoked paprika: Adds a warm smoky flavor and a deep reddish color to the roasted skin.
- Garlic powder: Adds even garlic flavor without fresh garlic pieces burning in the hot oven.
- Onion powder: Adds a gentle savory flavor that blends smoothly into the spice coating.
- Dried thyme: Adds a light herbal note that balances the smoky paprika.
- Fine sea salt: Seasons the meat and helps bring out the flavor of the other spices.
- Freshly ground black pepper: Adds mild peppery warmth and small dark flecks to the seasoning.
Kitchen Equipment
- Large rimmed baking sheet: A heavy 18 by 13-inch rimmed baking sheet gives eight drumsticks room to roast and catches rendered juices, while a smaller crowded tray can cause steaming instead of crisping.
- Parchment paper: One 18 by 13-inch sheet of oven-safe parchment rated for at least 425°F helps prevent sticking and makes cleanup easier, but parchment with a lower heat rating shouldn’t be used.
- Small mixing bowl: A 2-cup mixing bowl holds the seasoning and olive oil while leaving room to stir, and a smaller dish may spill the paste during mixing.
- Large mixing bowl: A 5-quart mixing bowl gives all eight drumsticks enough space for even coating, while a smaller bowl can crowd the chicken and leave patches unseasoned.
- Instant-read meat thermometer: A digital instant-read thermometer with a thin probe checks the thickest drumstick without touching bone, which is more reliable than judging doneness by skin color.
- Measuring spoons: A set ranging from 1/4 teaspoon to 1 tablespoon keeps the seasoning ratios accurate, while unmarked household spoons can add too much salt or paprika.
- Paper towels: A few clean absorbent paper towels remove moisture from the raw chicken skin, while thin towels that tear can leave unwanted fibers behind.
How to Make It
Step 1: Mix the smoky paprika seasoning

Start by heating your oven to 425°F while you make the spice mix. Add the smoked paprika and garlic powder to a small mixing bowl. Then add the onion powder and dried thyme along with the sea salt and black pepper. Stir for 30 to 45 seconds until the mix looks even.
Pour in the extra virgin olive oil and stir for another 30 seconds to form a thick red paste. Scrape the sides so no dry spice stays behind. It’s a small step, but mixing the spices first helps keep the flavor even across all eight drumsticks. You’ll see a deep brick-red paste with small flecks of thyme throughout.
The mix should look thick enough to cling to the chicken without running off. Don’t add water because it thins the coating and can leave the skin damp. Mixing the oil with the spices first helps the seasoning spread evenly during roasting.
Tip: Use fresh smoked paprika with a strong smoky scent. If your jar has been open for over a year, the flavor may taste flat.
Step 2: Coat the drumsticks and arrange them for roasting

Pat all 8 bone-in skin-on chicken drumsticks dry with paper towels. Don’t rinse them. Next, place the chicken in a large mixing bowl and add the red seasoning paste. Rub the mixture over each leg for about 2 minutes.
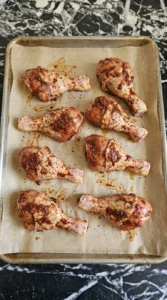
Work it into the folds of skin so every piece has a thin coat. Then move the drumsticks to a large rimmed baking sheet lined with parchment paper. Arrange them in a single layer with at least 1 inch between most pieces. Keep the skin facing up and turn the thick ends in different directions so the chicken doesn’t sit in a tight cluster.
The raw chicken should now have a thin red coating with visible specks of thyme. You’ll still see the natural folds of skin beneath the spices. Don’t pile the legs together because trapped moisture can soften the skin. Spacing the pieces apart lets hot air dry the coating and start the browning process.
Tip: Choose drumsticks weighing around 4 to 5 ounces each. Similar sizes make it easier to finish all eight pieces within the same baking window.
Step 3: Roast until the skin turns deep golden and crisp

Place the baking sheet on the middle rack of your 425°F oven. Roast the eight drumsticks for 35 to 40 minutes and check them after 20 minutes. At that point, rotate the tray 180 degrees for more even heat. Leave the chicken skin facing up so the top has time to turn crisp. Start checking the thickest pieces around minute 35 with an instant-read thermometer.
Insert the probe into the thickest part without touching the bone. The chicken must reach at least 165°F, although drumsticks often become more tender around 175°F to 185°F. If they’re below 165°F, keep roasting and check again every 3 to 5 minutes. The skin should look deep golden with darker reddish-brown patches and small crisp blisters. You’ll notice golden juices collecting beneath the legs.
(I like checking the thickest one first because smaller pieces can brown before the largest reaches the right temperature. ) Don’t judge safety by color alone. The thermometer confirms safe doneness while the high heat helps crisp the skin.
Tip: If the oven runs hot, check the skin after 30 minutes. Loosely cover darkening spots with foil if needed while the chicken finishes heating through.
Step 4: Rest the chicken and plate two golden drumsticks

Take the baking sheet out of the oven once the chicken has reached a safe internal temperature. Leave all eight drumsticks undisturbed for 5 minutes so the hot juices have time to settle. Then transfer two pieces to each of four white dinner plates. Handle them gently so the crisp skin stays in place.
For one serving, angle the two drumsticks slightly toward each other and let one overlap the other just a little. Spoon a small amount of the clear roasting juice over exposed meat if needed, but avoid soaking the crisp skin. You’ll notice the skin stays crisp while the meat beneath feels tender when pulled apart. The color should range from warm gold to darker paprika-brown with natural uneven patches.
Don’t skip the resting time or cut into the meat straight away because more juice can escape. A brief rest helps the hot juices settle before serving.
Tip: For a clean serving plate, add only 1 teaspoon of clear pan juice beneath the chicken instead of pouring it over the crisp skin.
Pro Tips
- Leave at least 1 inch between the eight drumsticks on your baking sheet. Crowding traps steam and makes the skin soft instead of crisp.
- Choose chicken drumsticks weighing around 4 to 5 ounces each. Similar sizes help all eight pieces reach a safe internal temperature without the smaller ones drying out.
- Use a heavy 18 by 13-inch rimmed baking sheet for even roasting. Thin trays can warp at 425°F and cause hot spots beneath the chicken.
- Make the dry seasoning blend up to 7 days ahead and keep it in a sealed jar. Add the olive oil only when you’re seasoning the chicken.
- Avoid brushing the chicken with extra oil halfway through roasting. The original 2 tablespoons are enough and added oil can soften the forming crust.
- For a little extra heat, add 1/4 teaspoon of cayenne pepper to the seasoning mixture. It’s enough to give the skin a gentle kick without hiding the smoky flavor.
- Use an instant-read thermometer to check the thickest part of each drumstick without touching bone. Aim for at least 165°F for food safety.
- If the skin needs a little more color after the chicken reaches 165°F, broil for 1 to 2 minutes. Watch closely because paprika can darken fast.
- For lemon pepper drumsticks, replace the smoked paprika with 2 teaspoons of lemon pepper seasoning and reduce the sea salt to 1/2 teaspoon if the blend already contains salt.
- Give the chicken a barbecue-style finish by replacing the dried thyme with 1 teaspoon of chili powder and brushing on 2 tablespoons of barbecue sauce during the final 5 minutes of roasting.
- Make a garlic herb version by using 2 teaspoons of Italian seasoning instead of smoked paprika and thyme. Add 1 teaspoon of finely grated lemon zest to the oil mixture for a fresh finish.
- For a spicy smoky variation, add 1/2 teaspoon of cayenne pepper and 1/2 teaspoon of ground cumin to the original seasoning blend. Keep the oven at 425°F and monitor the skin for darkening.
Substitutions & Variations
- Extra virgin olive oil: Avocado oil. Use 2 tablespoons of avocado oil instead of olive oil for a milder flavor. It handles the 425°F oven heat well and helps the skin turn golden without adding a strong taste. Both oils are naturally dairy-free.
- Smoked paprika: Sweet paprika. Replace the 2 teaspoons of smoked paprika with 2 teaspoons of sweet paprika. The skin will still develop a lovely red color, but you’ll lose some smoky depth. Add 1/4 teaspoon of ground cumin if you’d like a warmer flavor without extra heat.
- Dried thyme: Dried oregano. Use 1 teaspoon of dried oregano in place of the thyme for a slightly stronger herbal flavor. Oregano gives these chicken legs a Mediterranean feel and works well with the garlic and paprika. For another herb-friendly chicken dinner, try our Easy Lemon Garlic Butter Chicken Bites.
- Garlic powder: Fresh garlic cloves. Replace 1 teaspoon of garlic powder with 2 finely minced garlic cloves. Fresh garlic tastes sharper and more fragrant, but it can scorch at 425°F. Mix it into the oil and tuck most of it under the chicken skin rather than leaving large pieces exposed.
- Bone-in skin-on chicken drumsticks: Bone-in skin-on chicken thighs. Use 8 small bone-in chicken thighs weighing about 2.5 to 3 pounds total. Roast at 425°F and begin checking after 30 minutes, allowing about 35 to 45 minutes overall. The thighs may release more fat and have broader areas of crisp skin. The original seasoning is naturally gluten-free and egg-free when you use pure spices without added blends.
Storage Instructions
Once dinner’s over, let the leftovers stop steaming and transfer them to a shallow airtight container. Don’t leave cooked chicken at room temperature for more than 2 hours, or 1 hour if it’s above 90°F. Store Baked Chicken Drumsticks in the refrigerator at 40°F or below for 3 to 4 days. If you want to keep them longer, wrap each piece tightly and place them in a freezer-safe bag.
They’ll keep their best flavor and texture for about 3 months in the freezer. Label the bag with the date so you know when you made them. For reheating, place the drumsticks on a baking sheet at 350°F for about 15 to 20 minutes if chilled. Add 1 tablespoon of water to the tray if the meat seems dry, but keep it away from the skin.
Heat until the center reaches 165°F. Throw out leftovers with a sour smell, slimy surface or visible mold. Remember that harmful bacteria aren’t always easy to see or smell, so follow the storage time limits even when the chicken looks normal.
Baked Chicken Drumsticks
Ingredients
Method
- Start by heating your oven to 425°F while you make the spice mix. Add the smoked paprika and garlic powder to a small mixing bowl. Then add the onion powder and dried thyme along with the sea salt and black pepper. Stir for 30 to 45 seconds until the mix looks even. Pour in the extra virgin olive oil and stir for another 30 seconds to form a thick red paste. Scrape the sides so no dry spice stays behind. It’s a small step, but mixing the spices first helps keep the flavor even across all eight drumsticks. You’ll see a deep brick-red paste with small flecks of thyme throughout. The mix should look thick enough to cling to the chicken without running off. Don’t add water because it thins the coating and can leave the skin damp. Mixing the oil with the spices first helps the seasoning spread evenly during roasting.

- Pat all 8 bone-in skin-on chicken drumsticks dry with paper towels. Don’t rinse them. Next, place the chicken in a large mixing bowl and add the red seasoning paste. Rub the mixture over each leg for about 2 minutes. Work it into the folds of skin so every piece has a thin coat. Then move the drumsticks to a large rimmed baking sheet lined with parchment paper. Arrange them in a single layer with at least 1 inch between most pieces. Keep the skin facing up and turn the thick ends in different directions so the chicken doesn’t sit in a tight cluster. The raw chicken should now have a thin red coating with visible specks of thyme. You’ll still see the natural folds of skin beneath the spices. Don’t pile the legs together because trapped moisture can soften the skin. Spacing the pieces apart lets hot air dry the coating and start the browning process.
- Place the baking sheet on the middle rack of your 425°F oven. Roast the eight drumsticks for 35 to 40 minutes and check them after 20 minutes. At that point, rotate the tray 180 degrees for more even heat. Leave the chicken skin facing up so the top has time to turn crisp. Start checking the thickest pieces around minute 35 with an instant-read thermometer. Insert the probe into the thickest part without touching the bone. The chicken must reach at least 165°F, although drumsticks often become more tender around 175°F to 185°F. If they’re below 165°F, keep roasting and check again every 3 to 5 minutes. The skin should look deep golden with darker reddish-brown patches and small crisp blisters. You’ll notice golden juices collecting beneath the legs. (I like checking the thickest one first because smaller pieces can brown before the largest reaches the right temperature.) Don’t judge safety by color alone. The thermometer confirms safe doneness while the high heat helps crisp the skin.

- Take the baking sheet out of the oven once the chicken has reached a safe internal temperature. Leave all eight drumsticks undisturbed for 5 minutes so the hot juices have time to settle. Then transfer two pieces to each of four white dinner plates. Handle them gently so the crisp skin stays in place. For one serving, angle the two drumsticks slightly toward each other and let one overlap the other just a little. Spoon a small amount of the clear roasting juice over exposed meat if needed, but avoid soaking the crisp skin. You’ll notice the skin stays crisp while the meat beneath feels tender when pulled apart. The color should range from warm gold to darker paprika-brown with natural uneven patches. Don’t skip the resting time or cut into the meat straight away because more juice can escape. A brief rest helps the hot juices settle before serving.

Notes
Frequently Asked Questions
Yes, you can season the raw drumsticks up to 24 hours before cooking and keep them covered in the refrigerator at 40°F or below. Place them on a tray in a single layer so the coating stays even. When you’re ready for dinner, roast directly from the fridge at 425°F and check the thickest piece with a thermometer.
Store leftover chicken in a sealed container at 40°F or below for 3 to 4 days. Refrigerate it within 2 hours of cooking and use shallow containers so it cools quickly. If you won’t eat the leftovers within that time, freeze them instead. The cooked meat keeps its best texture when you avoid repeated heating and cooling.
Absolutely. Replace the 2 teaspoons of smoked paprika with the same amount of sweet paprika for a milder taste. You can also use 1 teaspoon of sweet paprika and 1 teaspoon of chili powder for a warmer spice blend. The skin will look slightly different, but the 425°F roasting method stays the same.
The most common causes are wet skin and overcrowding on the baking sheet. Dry each piece well before adding seasoning and leave enough space for air to flow around the meat. Roast at 425°F and avoid pouring extra liquid into the tray. If the chicken reaches 165°F before the skin looks crisp, a brief 1 to 2-minute broil can help.
Yes. Use 16 chicken drumsticks and double every seasoning ingredient, including the olive oil. Divide the pieces between two large baking sheets rather than crowding them onto one tray. Roast at 425°F and swap the tray positions halfway through cooking. Begin checking the thickest pieces after 35 minutes because two trays may need additional roasting time.
Mashed Yukon Gold potatoes and roasted broccoli are great choices because they balance the smoky chicken seasoning. For four servings, roast about 1 pound of broccoli with 1 tablespoon of olive oil at 425°F for 18 to 22 minutes. You can also serve the chicken with rice or a simple green salad when you want a lighter meal.
Yes. Cool the cooked chicken promptly and freeze it in airtight containers or freezer bags within 3 to 4 days of cooking. For best quality, use it within 3 months. Thaw overnight in the refrigerator and reheat at 350°F for about 15 to 20 minutes, checking that the thickest part reaches 165°F before serving.
Final Thoughts
The moment that smoky paprika smell starts filling my kitchen, I know dinner’s going to be good. These Baked Chicken Drumsticks have become one of those meals I love making with music playing and everyone wandering into the kitchen to ask when we’re eating.
The little trick of drying the skin before roasting makes all the difference between soft chicken skin and that golden crisp finish. If you’re looking for a baked chicken drumsticks recipe that’s simple enough for a Tuesday night, I hope you’ll give this one a try.
And when you do, tag me on Instagram because I love seeing your dinners! For another easy chicken night, try our Sheet Pan Chicken Thighs and Veggies for Busy Weeknights. Come back to it whenever you need easy baked chicken drumsticks.
Chicken drumsticks get their name from their shape, which resembles the stick used to play a drum. They’re made from the lower part of the chicken leg and contain dark meat, which has more fat and connective tissue than breast meat. That’s one reason drumsticks stay tender during a 35 to 40-minute roast at 425°F. And here’s something useful. While chicken is safe at 165°F, drumsticks often become even more tender around 175°F to 185°F because the connective tissue continues to soften.