Make Ahead Mashed Potatoes
The night before Thanksgiving used to be when my kitchen got completely out of hand. I’d have the oven full and three things going on the stove while someone was asking when dinner would be ready. Then I started making Make Ahead Mashed Potatoes the day before. Such a relief. It took me a couple of tries to get the texture right because my first batch dried out in the fridge and didn’t taste nearly as good the next day.
The trick turned out to be pretty simple. I started using Yukon Gold potatoes and adding a little sour cream along with the butter and warm heavy cream. Now these easy make ahead mashed potatoes taste just as rich after a night in the fridge. And they don’t need much attention while the rest of dinner gets finished. They’re especially good beside Cracker Barrel Meatloaf when we’re having a regular family dinner instead of a big holiday meal.
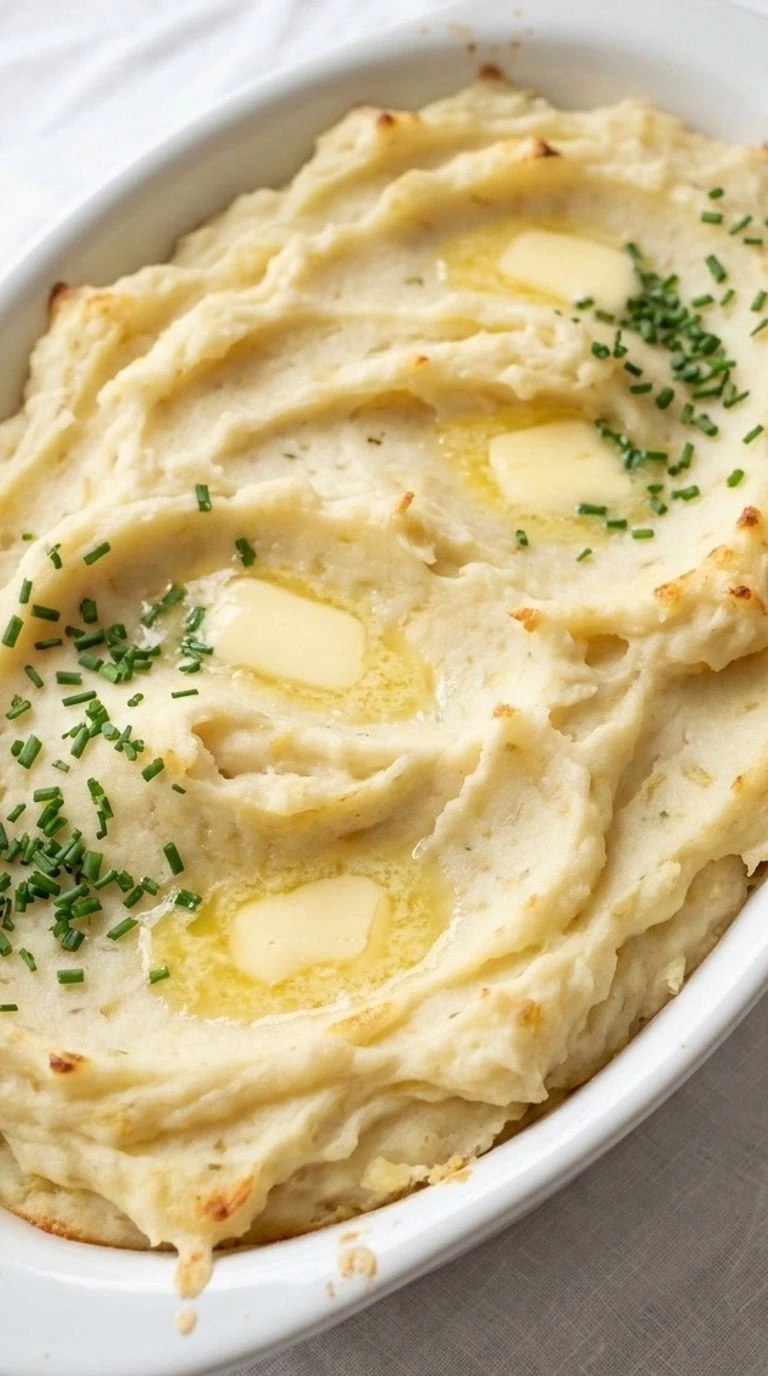
What I like most is that there’s no last-minute peeling or mashing. You do the work ahead of time and let the fridge take care of the waiting. Then the potatoes go into the oven while you finish everything else. A little extra butter melts into the top and the edges turn lightly golden. It’s one less thing to worry about when everyone’s hungry and the kitchen is already busy.
Why This Recipe Works
Make Ahead Mashed Potatoes hold their texture better when you start with Yukon Gold potatoes and fold in warm dairy instead of whipping everything together. Drying the drained potatoes for 1 minute helps remove extra water while the sour cream adds richness that survives a night in the fridge.
The result stays thick without turning heavy. Then reheating the covered dish at 350°F helps prevent dry edges while the center warms through.
That’s useful when you’re juggling dishes like Green Bean Casserole with Fresh Green Beans for a holiday meal.
Ingredients
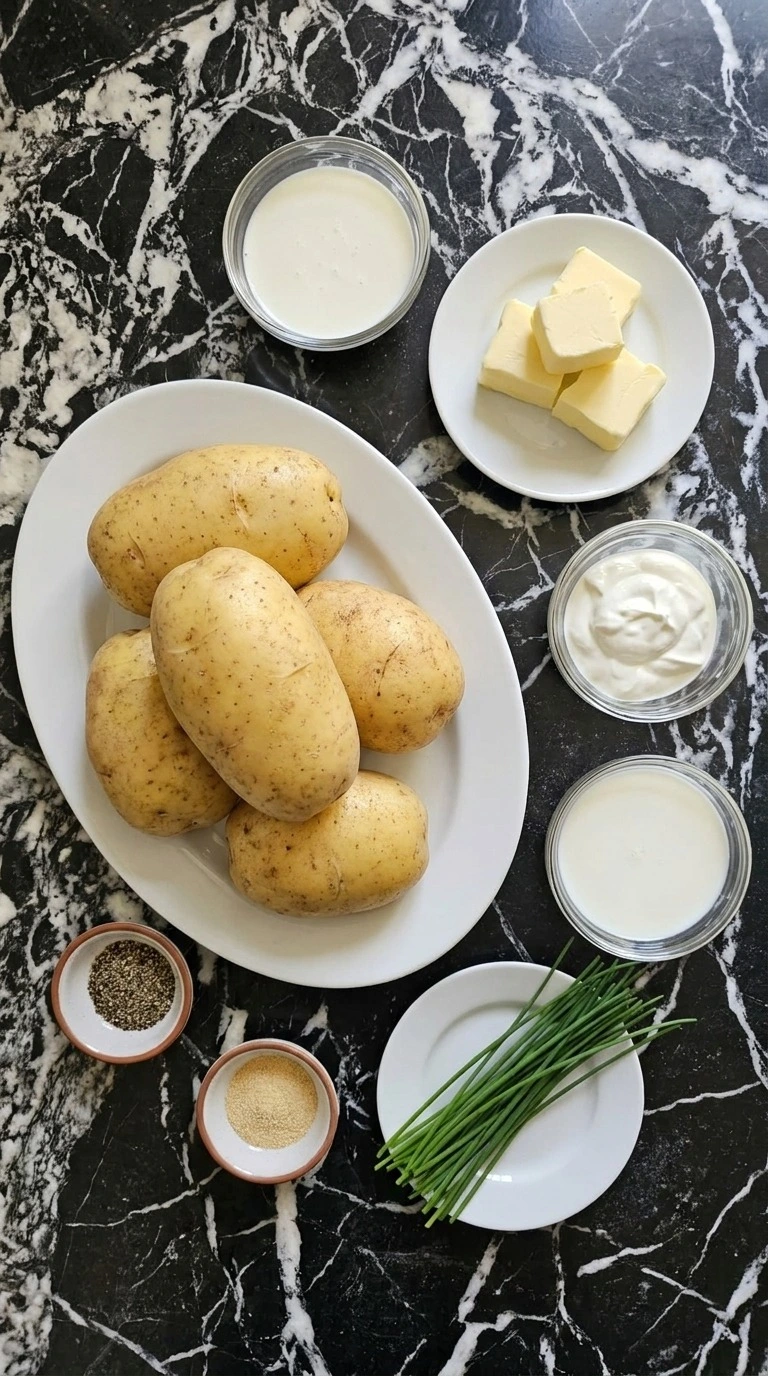
- Yukon Gold potato: Rinsed, peeled and cut into 1 1/2-inch chunks. Their naturally creamy flesh produces a rich mash without needing excessive butter.
- Water: Use cold water to cover the potato pieces before boiling so they heat and soften evenly.
- Kosher salt: Added to the cooking water to season the potatoes as they soften. Adjust the finished seasoning to taste.
- Unsalted butter: Divide into 6 tablespoons for mixing and 2 tablespoons for the topping. Adds richness and keeps the reheated potatoes moist.
- Heavy whipping cream: Warmed before folding into the potatoes. Its fat adds a rich smooth texture that holds up well during chilling and reheating.
- Whole milk: Divide into 1/4 cup for the initial mash and 1/4 cup for reheating. Loosens the mixture without making it overly rich.
- Sour cream: Folded into the warm mash to add a mild tang and help maintain a soft creamy texture after refrigeration.
- Garlic powder: Mixed into the mash for gentle savory depth without the sharp bite of raw garlic.
- Freshly ground black pepper: Stirred into the potatoes for a mild peppery finish. An additional small pinch can be added when serving if desired.
- Fresh chives: Finely chopped just before serving. Adds fresh onion flavor and little green flecks to the finished dish.
Kitchen Equipment
- Vegetable peeler: A sharp swivel peeler removes thin strips of Yukon Gold potato skin without wasting much flesh. Choose a comfortable stainless steel blade because dull peelers can slip and remove uneven chunks.
- Chef’s knife and cutting board: An 8-inch chef’s knife and a stable cutting board make it easier to cut the potatoes into similarly sized chunks. Choose a nonslip board with enough room for 3 pounds of potatoes.
- Large cooking pot: A heavy-bottomed 6-quart stainless steel pot holds the potato chunks and 2 quarts of water with room to simmer. A smaller pot may boil over and a thin base can scorch potatoes during drying.
- Large colander: A sturdy colander that holds at least 3 quarts drains the potatoes quickly so they don’t sit in hot water and turn soggy. Look for wide drainage holes and stable feet.
- Handheld potato masher: A sturdy stainless steel masher breaks the tender potatoes into soft pieces without overworking the starch. Choose a broad mashing head with comfortable handles because narrow heads take longer.
- Small saucepan: A 1-quart saucepan warms the heavy cream and milk evenly before they meet the potatoes. Pick one with a thick base because thin pans can scorch dairy over direct heat.
- Rubber spatula: A flexible heat-safe spatula folds the warm dairy into the potatoes without aggressive stirring. Choose one rated for at least 400°F so it won’t soften when it touches the hot pot.
- 9-by-13-inch baking dish: A 9-by-13-inch oven-safe baking dish holds the full batch in a fairly shallow layer for even reheating. Choose ceramic or glass that is safe at 350°F and avoid moving cold glass directly into a hot oven because thermal shock can crack it.
- Aluminum foil: Heavy-duty aluminum foil seals the baking dish during reheating and helps the potatoes retain moisture. Use a sheet wide enough to fold tightly over the rim because gaps allow steam to escape.
- Instant-read food thermometer: An instant-read thermometer checks that the center of the potatoes reaches 165°F during reheating. Choose a probe with a narrow tip because thick probes can give slower readings in dense food.
How to Make It
Step 1: Peel and Cut the Yukon Gold Potatoes
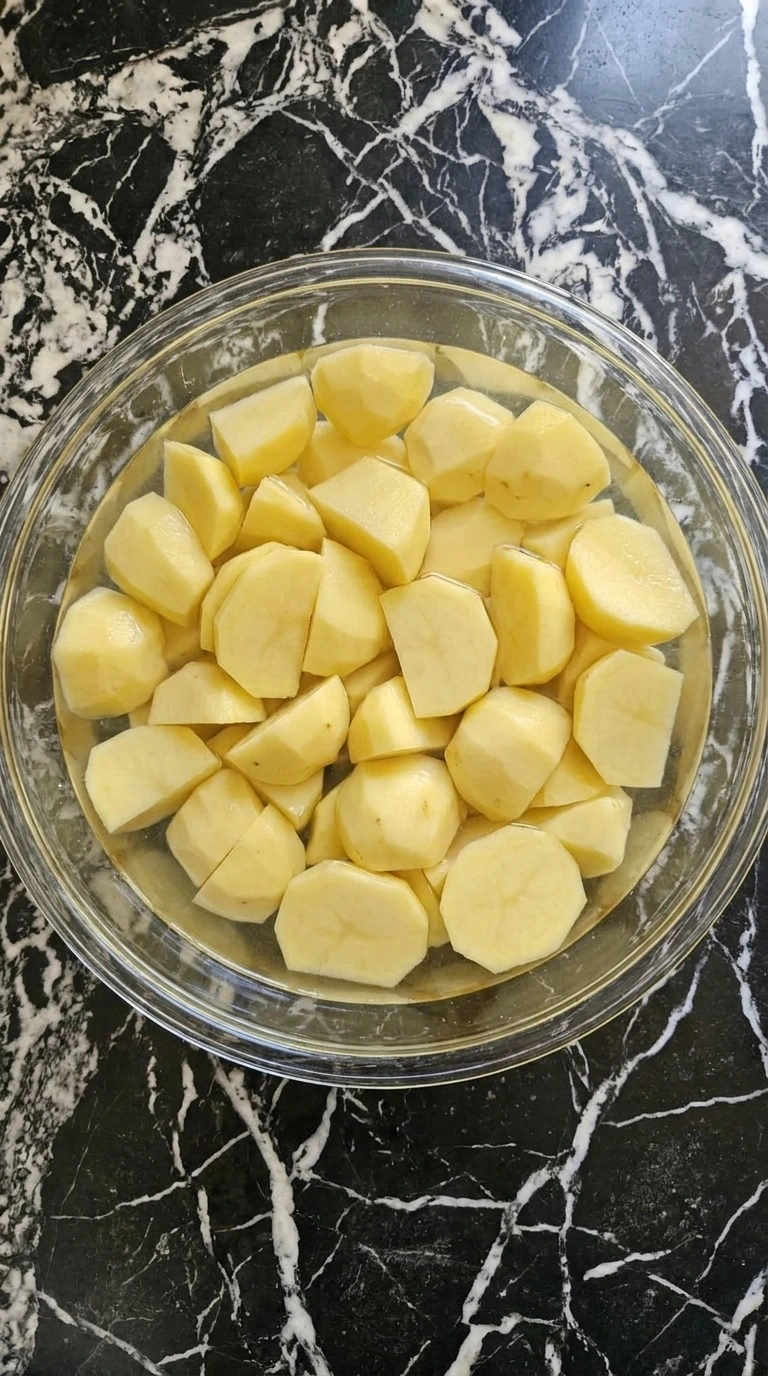
Start with 3 pounds of Yukon Gold potatoes and rinse them under cool running water for 30 to 60 seconds to remove any dirt. Peel each potato and cut it into chunks about 1 1/2 inches wide. Try to keep the pieces close in size so they soften at roughly the same rate. You don’t need perfect cubes.
In fact a few uneven edges won’t hurt anything because everything gets mashed later. Keep the pieces in cool water at about 60°F to 70°F while you finish cutting. Aim to finish this stage within 10 minutes. Next, check the pieces before they go into the pot.
They should look firm and pale yellow with no brown spots from sitting exposed to air. Don’t leave the cut potatoes uncovered for long because their surfaces can darken. Keeping them in water slows that change.
Tip: A sharp vegetable peeler wastes less flesh than a knife. For 3 pounds of potatoes, keep a wide bowl nearby to collect the skins.
Step 2: Simmer the Potatoes Until Fork Tender
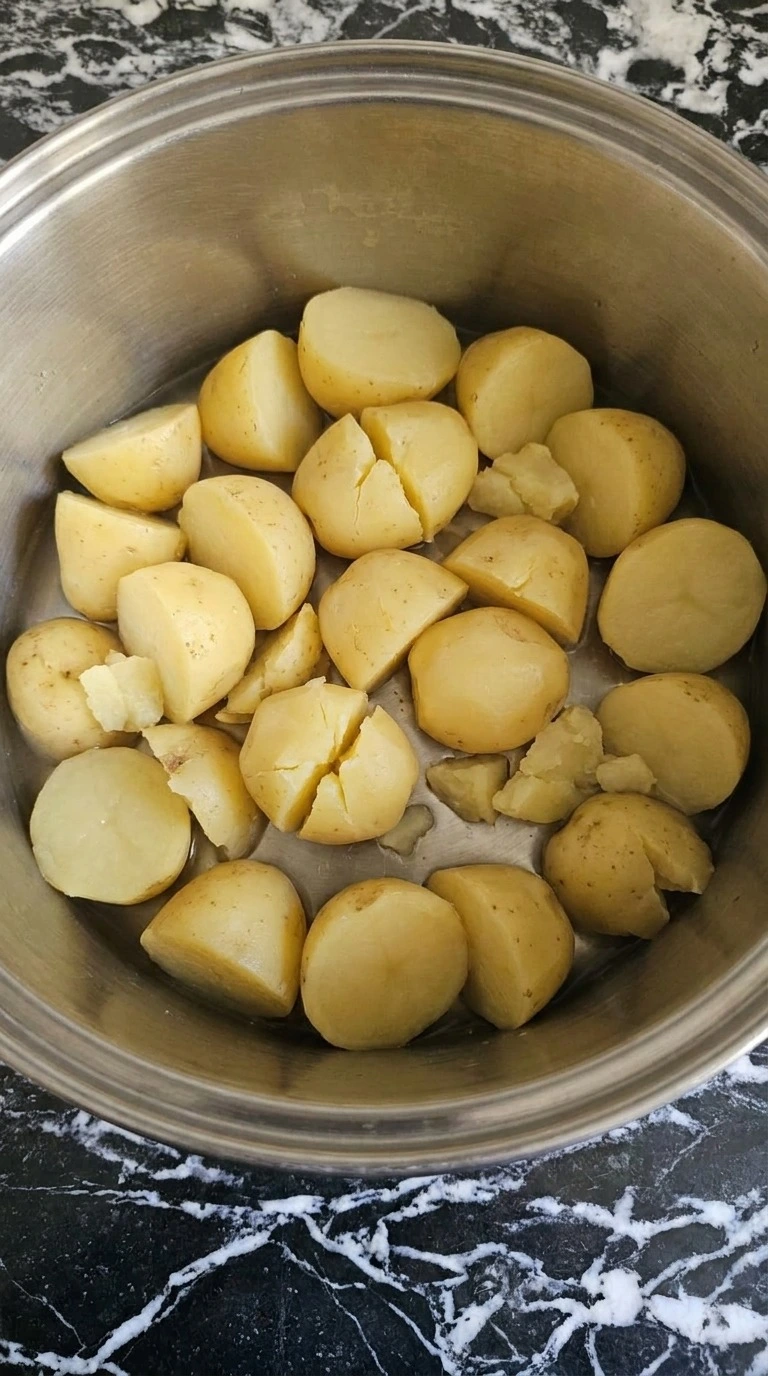
Transfer the 3 pounds of cut Yukon Gold potatoes into a large pot and add 2 quarts of cold water. Stir in 1 tablespoon of kosher salt. The water should cover the potato chunks by about 1 inch. Bring everything to a boil over high heat and then lower the burner to medium so the water holds a gentle simmer around 205°F to 212°F.
Cook for 15 to 18 minutes while checking the largest pieces with a fork. They should split apart without much pressure. Drain the potatoes thoroughly and return them to the empty pot over low heat for 1 minute. Then give the pot two gentle shakes to let the last drops evaporate.
The potato surfaces will look dull rather than wet and the edges may start breaking apart. Don’t leave them over the heat too long or the bottom can scorch. This brief drying step removes extra water that would thin the mash.
Tip: Check the largest potato chunk first rather than the smallest. One firm center can leave unwanted hard bits in an otherwise smooth batch.
Step 3: Mash the Warm Potatoes Until Fluffy
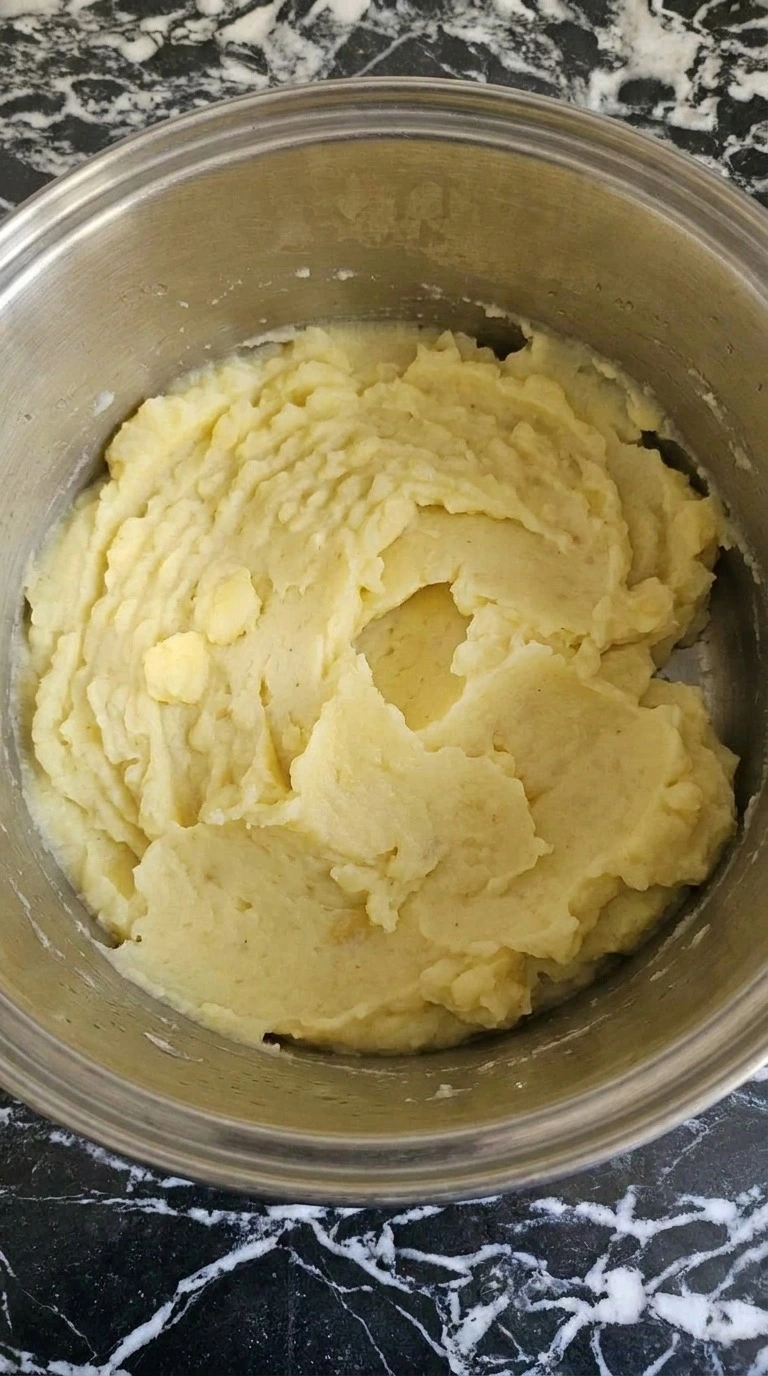
Keep the drained Yukon Gold potatoes in the warm pot and let them sit off the heat for 2 minutes. Their temperature should still be around 160°F to 180°F when you start mashing. Press a potato masher straight down through the chunks and lift it without stirring in circles. Work from one side of the pot to the other for about 2 to 3 minutes.
Break down the largest pieces first and then press through the smaller ones. Stop when the mixture looks soft with a few tiny lumps. Don’t keep beating it once the chunks disappear. You’ll see the pale yellow pieces turn into a thick and uneven mash with small ridges across the surface.
It’s fine if it isn’t completely smooth. Too much stirring can make the potatoes gluey because it releases more starch. Gentle pressing keeps the starch from turning pasty.
Tip: Use a handheld masher with broad openings instead of an electric mixer. It gives you more control when the potatoes are almost smooth.
Step 4: Fold in the Creamy Ingredients and Chill

Warm 3/4 cup of heavy whipping cream and 1/4 cup of whole milk in a small saucepan over medium-low heat for 3 to 4 minutes until they reach about 140°F. Don’t let them boil. Add 6 tablespoons of softened unsalted butter to the warm mashed potatoes and gently fold until melted. Next pour in the warm cream mixture in three additions while folding with a rubber spatula.
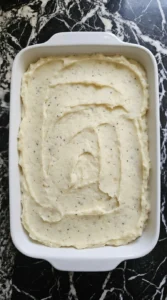
Add 1/2 cup of sour cream along with 1/2 teaspoon of garlic powder and 1/2 teaspoon of freshly ground black pepper. Fold for 60 to 90 seconds until the mixture looks creamy but still holds soft ridges. Then spread the mash into a 9-by-13-inch baking dish with shallow uneven swirls. Let it cool briefly and refrigerate within 2 hours of cooking in a shallow covered dish.
Chill at 40°F or below for up to 2 days. (I’ve found that warm dairy blends in more evenly than fridge-cold cream. ) Don’t overmix or the mash can turn sticky. Gentle folding limits excess starch release.
Tip: Taste a small spoonful before chilling and adjust the salt if needed. Cold storage can make seasoning seem less noticeable.
Step 5: Reheat the Potatoes and Melt the Butter

Take the baking dish from the fridge while the oven heats to 350°F. Remove the cover and pour 1/4 cup of whole milk evenly over the chilled potato surface. Then dot the top with the remaining 2 tablespoons of unsalted butter in small uneven pieces. Cover the dish tightly with foil and bake for 30 to 35 minutes.
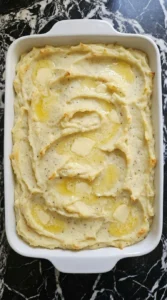
Check the center with a food thermometer and keep heating until it reaches 165°F. If the center isn’t hot enough after 35 minutes then keep the dish covered and check again every 5 minutes. Remove the foil and bake for 5 more minutes to melt the butter into the ridges. The surface should look soft and slightly glossy with pale golden edges and small pools of melted butter.
Stir gently from the edges toward the center once if needed. Don’t leave the dish uncovered for too long because the top can dry out. Covered heat warms the center without stripping away moisture.
Tip: If your baking dish is very full, allow an extra 5 to 10 minutes of covered heating and check the center temperature.
Step 6: Spoon onto Plates and Finish with Chives

Let the hot mashed potatoes rest for 3 minutes after they leave the oven. This gives the melted butter a chance to settle into the soft folds. Then scoop about 3/4 to 1 cup onto each of 8 warm serving plates. Use the back of a spoon to shape a shallow dip in each portion instead of pressing it flat.
Scatter the 2 tablespoons of finely chopped fresh chives across the portions and add a little extra freshly ground black pepper if desired. Serve while the potatoes are still around 140°F to 160°F for the best texture. Each portion should have irregular pale ivory folds with small golden buttery patches and bright green chive pieces. The potatoes will feel thick but soft when you lift a spoonful.
Don’t leave the portions uncovered for a long stretch or a skin can form. Serving hot keeps the butter soft and the mash creamy.
Tip: Warm the serving plates with hot water for 1 minute and dry them before plating. This helps each portion stay warm at the table.
Pro Tips
- Choose medium-sized Yukon Gold potatoes with smooth firm skins and no green patches. Three pounds will give you enough mash for 8 side portions.
- Cut the potatoes into pieces about 1 1/2 inches wide so they soften evenly in 15 to 18 minutes without the outsides falling apart.
- After draining, return the potatoes to the warm pot for 1 minute over low heat. This helps remove extra water before you add dairy.
- Warm the heavy cream and milk to about 140°F before adding them. Cold dairy can cool the potatoes too fast and leave uneven pockets.
- Stop mashing when only a few small lumps remain. Mixing for another 3 or 4 minutes can release too much starch and make the texture gummy.
- Spread the finished mash no deeper than about 2 inches in the baking dish so it chills and reheats more evenly. Refrigerate promptly.
- Prepare the potatoes up to 2 days ahead and keep them covered at 40°F or below. Schedule the oven reheat close to serving time.
- Scatter 2 tablespoons of finely chopped fresh chives over the potatoes after reheating. Adding them earlier can dull their color and fresh flavor.
- For roasted garlic mashed potatoes, fold in 4 soft roasted garlic cloves with the butter and reduce the garlic powder to 1/4 teaspoon for a deeper savory flavor.
- For a cheesy holiday version, mix in 3/4 cup of freshly grated sharp white cheddar before chilling and sprinkle another 1/4 cup over the dish during the final 5 minutes of reheating.
- For a fresh herb version, add 1 teaspoon of finely chopped fresh rosemary and 1 teaspoon of fresh thyme leaves to the warm dairy before mixing it into the potatoes.
- For dairy-free mashed potatoes, use 1 cup of unsweetened plain oat milk instead of the cream and milk, plus 8 tablespoons of plant-based butter and 1/2 cup of dairy-free sour cream.
Substitutions & Variations
- Yukon Gold potato: Use 3 pounds of russet potatoes instead. Russets make a lighter and fluffier mash but taste less buttery. Start with 1/2 cup of heavy cream instead of 3/4 cup because they absorb liquid differently.
- Heavy whipping cream and whole milk: Replace both with 1 cup of unsweetened plain oat milk. This reduces the richness and gives the potatoes a lighter texture. For a fully dairy-free version, also replace the butter and sour cream with plant-based alternatives.
- Unsalted butter: Use an equal amount of dairy-free butter. Choose a plant-based butter with at least 70% fat for a similar texture. Some brands contain more water and can make the potatoes slightly softer.
- Sour cream: Use 1/2 cup of plain full-fat Greek yogurt. Greek yogurt gives a sharper tang and slightly firmer texture. Fold it in after the potatoes cool below 150°F to reduce the chance of curdling.
- Garlic powder: Use 2 small roasted garlic cloves mashed into a smooth paste. Roasted garlic gives a sweeter and deeper flavor without the sharpness of raw garlic. If you enjoy savory dishes, pair these potatoes with Slow Cooker Garlic Butter Beef Bites and Potatoes.
Storage Instructions
Make Ahead Mashed Potatoes keep well in the refrigerator for 3 to 4 days from the day they’re first cooked. For the best texture, plan to serve them within 2 days. Transfer the mash to a shallow airtight container or cover the baking dish tightly. Refrigerate at 40°F or below within 2 hours of cooking.
You can also freeze portions in freezer-safe containers for up to 2 months at 0°F. Let them cool promptly before sealing and leave a little room for expansion. For reheating, thaw frozen portions overnight in the refrigerator. Cover the potatoes and warm at 350°F for about 30 to 40 minutes or until the center reaches 165°F.
Add 2 tablespoons of warm whole milk if they seem dry. Discard potatoes with mold or an unusual sour smell. Don’t taste questionable leftovers to check whether they’re safe.
Make Ahead Mashed Potatoes
Ingredients
Method
- Start with 3 pounds of Yukon Gold potatoes and rinse them under cool running water for 30 to 60 seconds to remove any dirt. Peel each potato and cut it into chunks about 1 1/2 inches wide. Try to keep the pieces close in size so they soften at roughly the same rate. You don’t need perfect cubes. In fact a few uneven edges won’t hurt anything because everything gets mashed later. Keep the pieces in cool water at about 60°F to 70°F while you finish cutting. Aim to finish this stage within 10 minutes. Next, check the pieces before they go into the pot. They should look firm and pale yellow with no brown spots from sitting exposed to air. Don’t leave the cut potatoes uncovered for long because their surfaces can darken. Keeping them in water slows that change.

- Transfer the 3 pounds of cut Yukon Gold potatoes into a large pot and add 2 quarts of cold water. Stir in 1 tablespoon of kosher salt. The water should cover the potato chunks by about 1 inch. Bring everything to a boil over high heat and then lower the burner to medium so the water holds a gentle simmer around 205°F to 212°F. Cook for 15 to 18 minutes while checking the largest pieces with a fork. They should split apart without much pressure. Drain the potatoes thoroughly and return them to the empty pot over low heat for 1 minute. Then give the pot two gentle shakes to let the last drops evaporate. The potato surfaces will look dull rather than wet and the edges may start breaking apart. Don’t leave them over the heat too long or the bottom can scorch. This brief drying step removes extra water that would thin the mash.

- Keep the drained Yukon Gold potatoes in the warm pot and let them sit off the heat for 2 minutes. Their temperature should still be around 160°F to 180°F when you start mashing. Press a potato masher straight down through the chunks and lift it without stirring in circles. Work from one side of the pot to the other for about 2 to 3 minutes. Break down the largest pieces first and then press through the smaller ones. Stop when the mixture looks soft with a few tiny lumps. Don’t keep beating it once the chunks disappear. You’ll see the pale yellow pieces turn into a thick and uneven mash with small ridges across the surface. It’s fine if it isn’t completely smooth. Too much stirring can make the potatoes gluey because it releases more starch. Gentle pressing keeps the starch from turning pasty.

- Warm 3/4 cup of heavy whipping cream and 1/4 cup of whole milk in a small saucepan over medium-low heat for 3 to 4 minutes until they reach about 140°F. Don’t let them boil. Add 6 tablespoons of softened unsalted butter to the warm mashed potatoes and gently fold until melted. Next pour in the warm cream mixture in three additions while folding with a rubber spatula. Add 1/2 cup of sour cream along with 1/2 teaspoon of garlic powder and 1/2 teaspoon of freshly ground black pepper. Fold for 60 to 90 seconds until the mixture looks creamy but still holds soft ridges. Then spread the mash into a 9-by-13-inch baking dish with shallow uneven swirls. Let it cool briefly and refrigerate within 2 hours of cooking in a shallow covered dish. Chill at 40°F or below for up to 2 days. (I’ve found that warm dairy blends in more evenly than fridge-cold cream.) Don’t overmix or the mash can turn sticky. Gentle folding limits excess starch release.
- Take the baking dish from the fridge while the oven heats to 350°F. Remove the cover and pour 1/4 cup of whole milk evenly over the chilled potato surface. Then dot the top with the remaining 2 tablespoons of unsalted butter in small uneven pieces. Cover the dish tightly with foil and bake for 30 to 35 minutes. Check the center with a food thermometer and keep heating until it reaches 165°F. If the center isn’t hot enough after 35 minutes then keep the dish covered and check again every 5 minutes. Remove the foil and bake for 5 more minutes to melt the butter into the ridges. The surface should look soft and slightly glossy with pale golden edges and small pools of melted butter. Stir gently from the edges toward the center once if needed. Don’t leave the dish uncovered for too long because the top can dry out. Covered heat warms the center without stripping away moisture.
- Let the hot mashed potatoes rest for 3 minutes after they leave the oven. This gives the melted butter a chance to settle into the soft folds. Then scoop about 3/4 to 1 cup onto each of 8 warm serving plates. Use the back of a spoon to shape a shallow dip in each portion instead of pressing it flat. Scatter the 2 tablespoons of finely chopped fresh chives across the portions and add a little extra freshly ground black pepper if desired. Serve while the potatoes are still around 140°F to 160°F for the best texture. Each portion should have irregular pale ivory folds with small golden buttery patches and bright green chive pieces. The potatoes will feel thick but soft when you lift a spoonful. Don’t leave the portions uncovered for a long stretch or a skin can form. Serving hot keeps the butter soft and the mash creamy.

Notes
Frequently Asked Questions
Yes. Make Ahead Mashed Potatoes can be prepared up to 2 days before Thanksgiving when chilled and stored properly. Spread the finished mash into a shallow baking dish and refrigerate at 40°F or below within 2 hours of cooking. On Thanksgiving Day, reheat it covered at 350°F until the center reaches 165°F. You’ll get a creamy side without peeling potatoes while dinner is underway.
Store leftover mashed potatoes in an airtight container at 40°F or below for 3 to 4 days after the original cooking date. The time doesn’t restart when you reheat them. For the best holiday texture, I prefer serving them within 2 days of preparation. Discard any batch left at room temperature for more than 2 hours.
Yes. Replace the 1/2 cup of sour cream with the same amount of plain full-fat Greek yogurt for a tangier taste and a slightly firmer finish. You can also use 4 ounces of softened cream cheese for a richer version. If using cream cheese, add 2 tablespoons of warm milk because it thickens the potatoes more than sour cream.
Gluey potatoes usually come from too much mixing after the starch has softened. Mash by hand for about 2 to 3 minutes instead of using a blender or food processor. Watery potatoes often need better draining or less added milk. If the mash seems loose, warm it over low heat for 2 to 4 minutes while gently turning it to let excess moisture escape.
Absolutely. Use 6 pounds of Yukon Gold potatoes and double the remaining ingredients to make about 16 side servings. You’ll need a large 10-quart pot or two smaller pots for boiling. Divide the mash between two 9-by-13-inch baking dishes so the layers don’t become too thick. Reheat both at 350°F and check that each center reaches 165°F before serving.
Cover the baking dish tightly with foil and warm it in a 350°F oven. Add about 1/4 cup of whole milk to the full batch before heating and check the center after 30 minutes. Continue until it reaches 165°F. If the potatoes still seem firm, fold in another 2 tablespoons of warm milk after reheating. Don’t leave the dish uncovered for long.
Yes. The butter and cream help this recipe tolerate freezing better than plain mashed potatoes. Cool the batch promptly and pack it into airtight freezer-safe containers with little empty space. Freeze at 0°F for up to 2 months for the best texture. Thaw overnight in the refrigerator and reheat until the center reaches 165°F. Stir gently to restore the creamy consistency.
Final Thoughts
By the time Thanksgiving dinner is nearly ready and the kitchen’s full of people, I’m always glad I made Make Ahead Mashed Potatoes the day before. That little trick of warming the cream first and keeping the dish covered while it reheats makes the difference between dry potatoes and the soft buttery kind everyone goes back for.
If you’re collecting thanksgiving make ahead mashed potatoes ideas, save this make ahead mashed potatoes recipe and give it a try alongside Green Bean Casserole with Fresh Green Beans. And tag me on Instagram if you make it because I love seeing how those golden buttery swirls turn out in your kitchen. Come back to it whenever you need easy make ahead mashed potatoes.
Yukon Gold potatoes were developed in Canada and released in 1980. Their naturally yellow flesh comes from carotenoid pigments. That golden color makes the finished mash look buttery even before you add the first spoonful of cream.