Pasta e Fagioli
A big pot of Pasta e Fagioli can turn a plain Tuesday into the kind of dinner everyone remembers. The first time I made it, I added the pasta too early and ended up with something closer to a thick bean stew than soup. Still good, though. That’s when I learned how much the timing matters with this dish. Since then I’ve made it on cold evenings when the fridge looked nearly empty and on busy nights when I needed dinner without much fuss.
It’s rich and filling and tastes like it took far more work than it did. The nice thing about this easy pasta e fagioli is that most of what goes into it is probably already in your kitchen. Canned beans and a handful of small pasta shapes do most of the work while the vegetables build a rich base. And you don’t need meat to make it hearty. If you enjoy meals that warm you up without a long list of steps, our Stovetop White Chicken Chili is another great one to keep around.
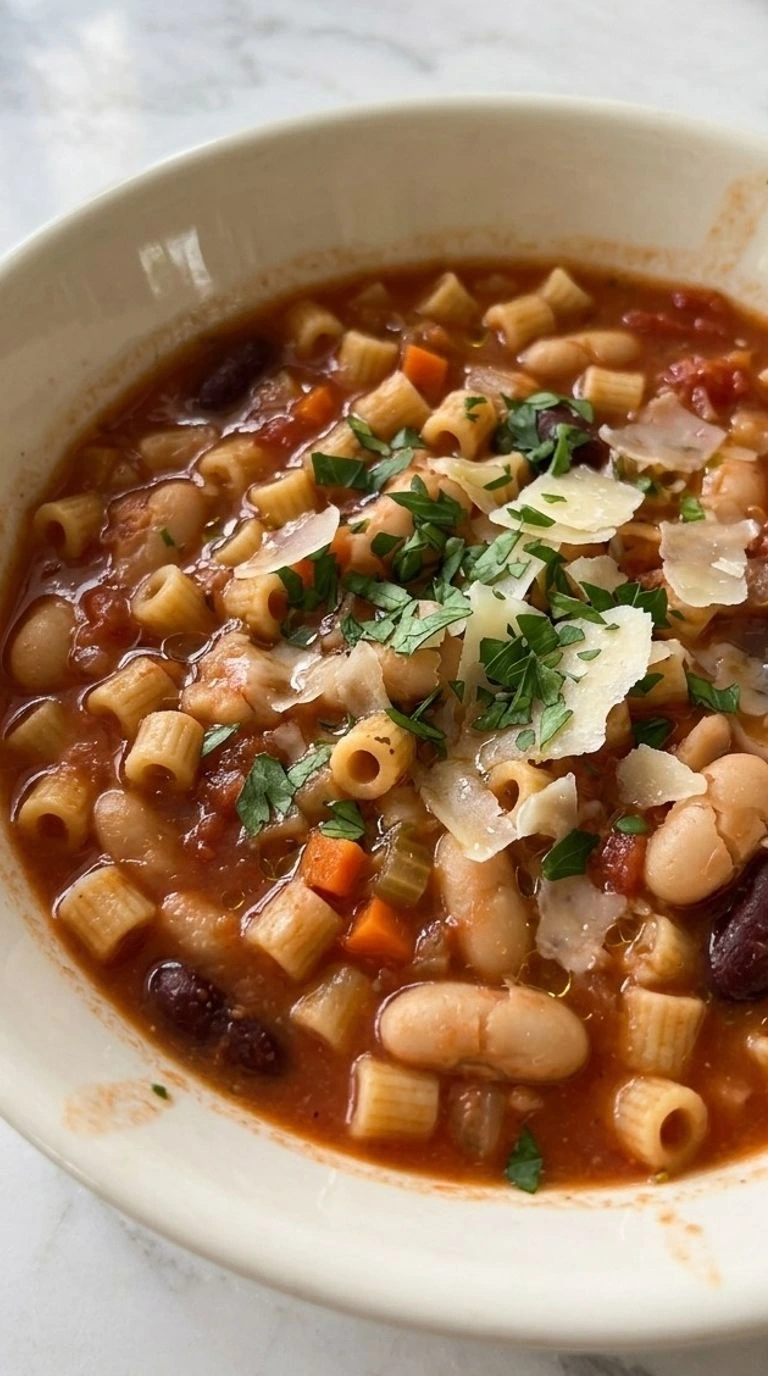
I’ve learned to hold back a little on the pasta and let the beans do some of the thickening. That one change makes the broth feel rich without adding cream or letting the noodles take over. The whole pot is ready in about 45 minutes, including chopping and a bit of stirring. And the leftovers are worth keeping. Just save a splash of broth for the next day because those little pasta pieces keep soaking it up.
Why This Recipe Works
The big difference with Pasta e Fagioli is how the beans thicken the soup without cream. Mashing about 1 cup of cannellini beans releases starch into the tomato broth, so you get a rich texture while most beans keep their shape.
Then the ditalini cooks right in that broth for 9 to 11 minutes and adds a little more body without making the pot too heavy. Keeping the liquid near 200 to 205°F helps the pasta soften without breaking apart.
It’s a handy trick for other one-pot meals too. If you like pasta with bold flavor, try our Crockpot Cajun Chicken Pasta for a different kind of easy dinner.
Ingredients
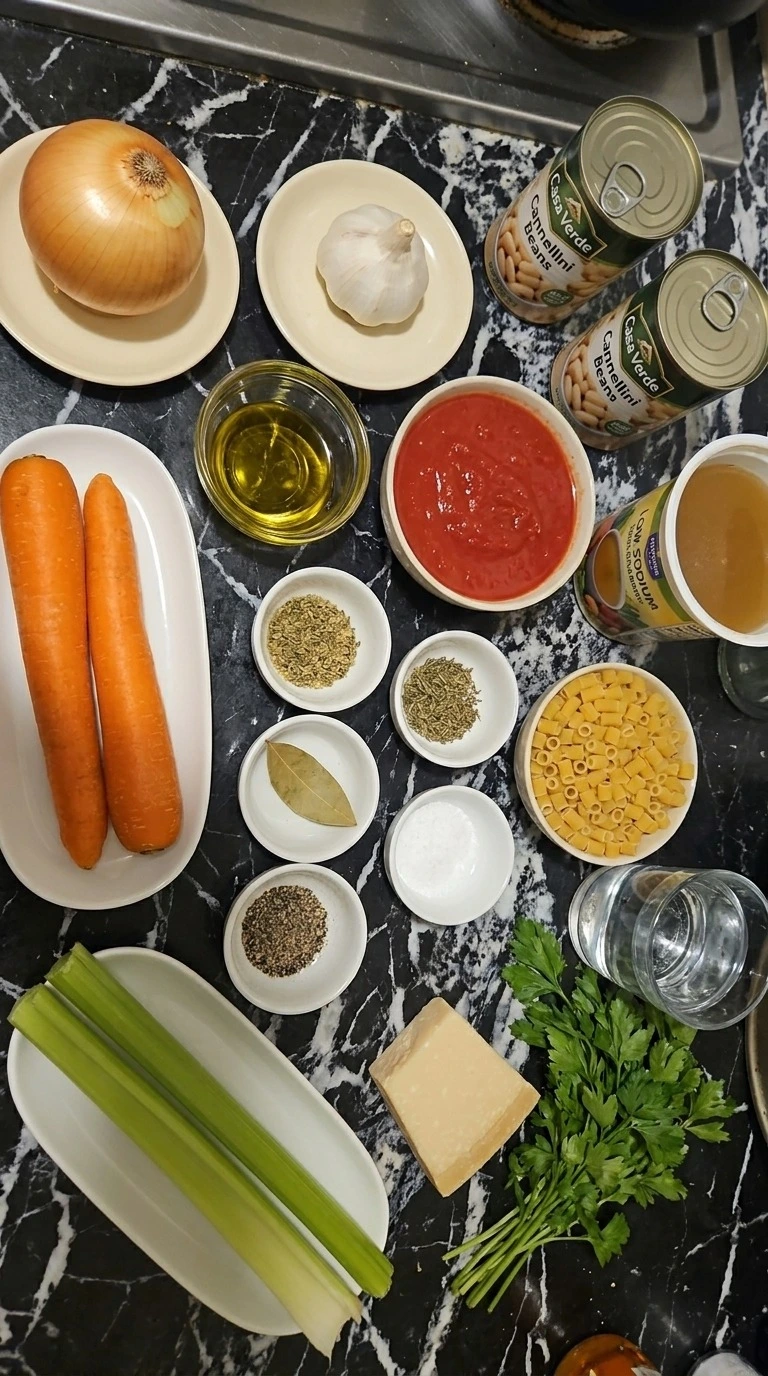
- extra virgin olive oil: Used to soften the vegetables and carry their flavor into the broth.
- yellow onion: Peeled and cut into roughly 1/4-inch pieces to form a sweet base.
- carrots: Peeled and diced into small 1/4-inch cubes for sweetness and color.
- celery stalks: Trimmed and diced into small cubes to add a mild savory flavor.
- garlic cloves: Peeled and finely minced so their flavor spreads through the vegetables.
- canned crushed San Marzano tomatoes: Added with their juices to create a bright tomato base with gentle sweetness.
- canned cannellini beans: Drained and rinsed, with about 1 cup mashed during cooking to thicken the broth.
- low-sodium vegetable broth: Forms the savory soup base and allows the salt level to be adjusted.
- dried oregano: Adds a familiar Italian herb flavor that holds up during simmering.
- dried thyme: Brings a subtle earthy note to the tomato and bean broth.
- dried bay leaf: Simmered with the beans for depth and removed before adding the pasta.
- fine sea salt: Added with the broth and adjusted at the end based on its sodium content.
- freshly ground black pepper: Adds a light peppery warmth without overpowering the vegetables.
- dry ridged ditalini pasta: Simmered directly in the broth until tender so its starch helps thicken the soup.
- water: Heated and kept nearby to loosen the broth if the ditalini absorbs too much liquid.
- fresh flat-leaf parsley: Finely chopped just before serving for a fresh green finish.
- Parmigiano Reggiano: Freshly grated over the soup so it softens against the hot broth and adds a salty finish.
Kitchen Equipment
- 5-quart heavy-bottomed soup pot: A 5-quart pot gives the beans and ditalini room to simmer without spilling, while a thick base prevents the tomato broth from scorching more easily than a thin stockpot.
- Wooden cooking spoon: A sturdy spoon with a flat edge helps stir the vegetables and mash some cannellini beans, so choose one long enough to reach the bottom of a deep pot.
- Sharp chef’s knife: An 8-inch chef’s knife makes quick work of the onion, carrots and celery, while a dull or very short knife makes even chopping harder.
- Large cutting board: A nonslip board at least 12 by 16 inches gives enough room for the vegetables and keeps pieces from falling off during chopping.
- Fine-mesh colander: A fine-mesh colander rinses the canned cannellini beans without losing any, while a wide-holed pasta strainer may let smaller beans escape.
- Liquid measuring jug: A heat-safe jug with clear cup markings makes it easier to measure the broth and hot water accurately so the soup doesn’t become too thin.
- Soup ladle: A ladle holding about 1/2 cup helps portion the beans, pasta and broth evenly, while a very shallow spoon tends to leave the solids behind.
- Instant-read kitchen thermometer: A food-safe instant-read thermometer with a probe rated for hot liquids helps check the 200 to 205°F simmer, especially when stove settings aren’t reliable.
How to Make It
Step 1: Soften the onion, carrots and celery
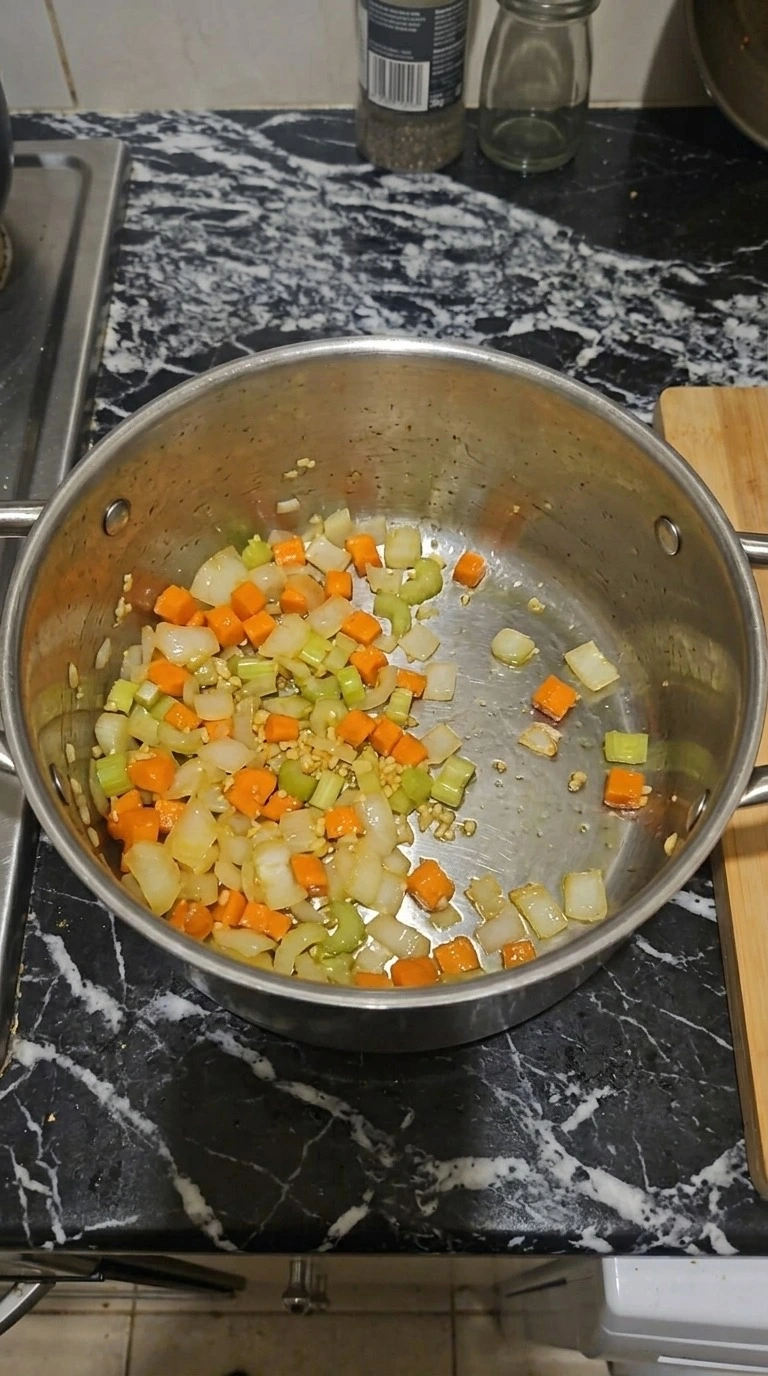
Dice the yellow onion into roughly 1/4-inch pieces and cut the carrots and celery into small cubes of a similar size. Mince the garlic cloves and set them aside. Then pour the extra virgin olive oil into a heavy pot and set the burner to medium heat (about 5 on a 10-point dial). Add the onion, carrots and celery and stir with a wooden spoon every minute for 7 to 8 minutes.
Keep the vegetables moving across the bottom so they soften without taking on much color. Add the minced garlic and stir for another 60 seconds. The onion should look soft and almost clear while the carrots stay bright orange. You’ll notice a sweet smell as the garlic warms through.
But don’t let it turn dark brown or the whole soup can taste bitter. Gentle heat builds the flavor without burning the garlic.
Tip: Cut the carrots into pieces no larger than 1/4 inch so they turn tender during the short simmer instead of staying crunchy.
Step 2: Simmer the tomatoes and cannellini beans
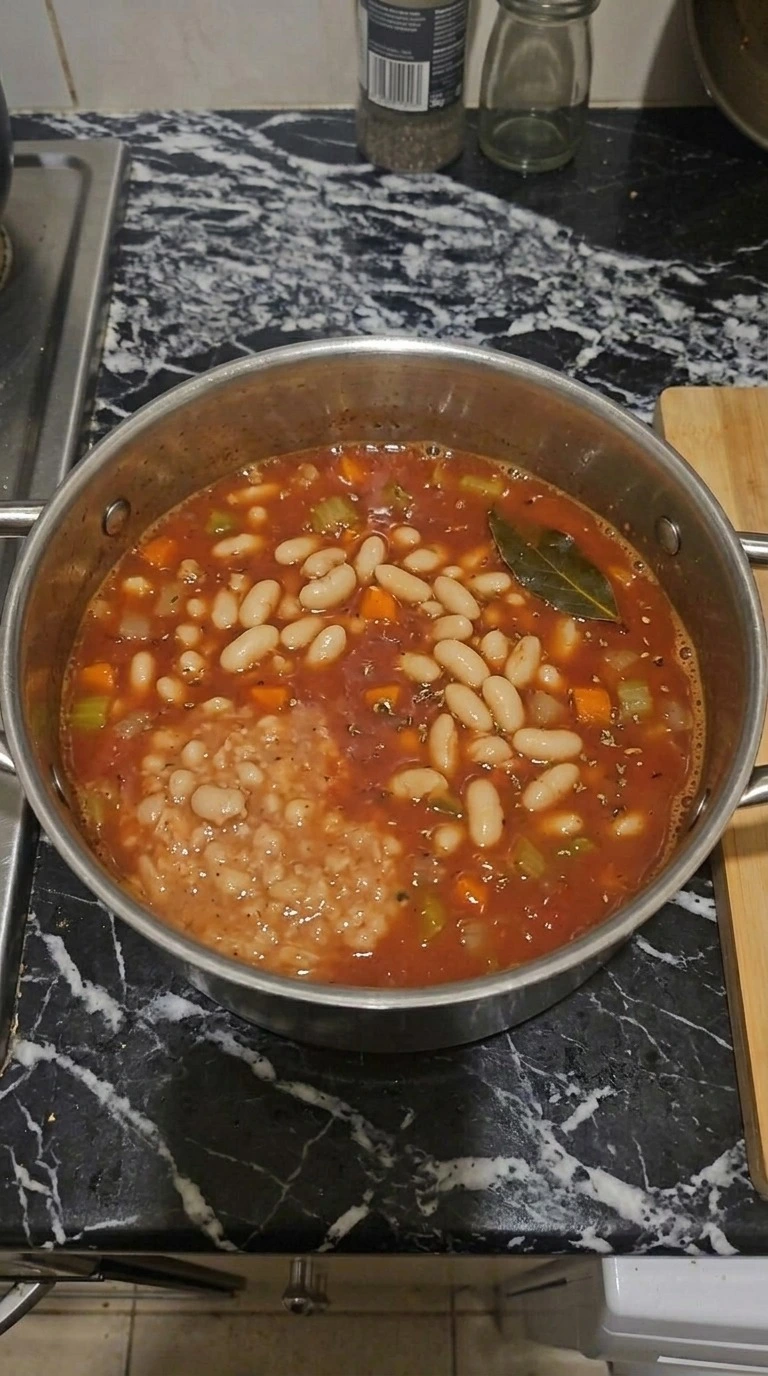
Pour the crushed San Marzano tomatoes into the pot and stir until the softened vegetables turn red. Drain and rinse both cans of cannellini beans. Add them with the low-sodium vegetable broth, dried oregano, dried thyme, dried bay leaf, fine sea salt and freshly ground black pepper. Bring the pot to a gentle simmer at about 200 to 205°F, then lower the burner to medium-low (about 3 on a 10-point dial).
Let it bubble softly for 12 minutes while you stir every 3 minutes. Keep the lid slightly open so the broth can thicken a little. Next, press about 1 cup of beans against the side of the pot with the back of your spoon. They’ll break into the broth and give it a soft creamy look.
Don’t boil hard or the beans may fall apart too much. A low simmer thickens the base while keeping most beans intact.
Tip: Choose cannellini beans packed in water with minimal added seasoning because strongly flavored canned beans can overpower the tomato and herbs.
Step 3: Cook the ditalini pasta in the soup
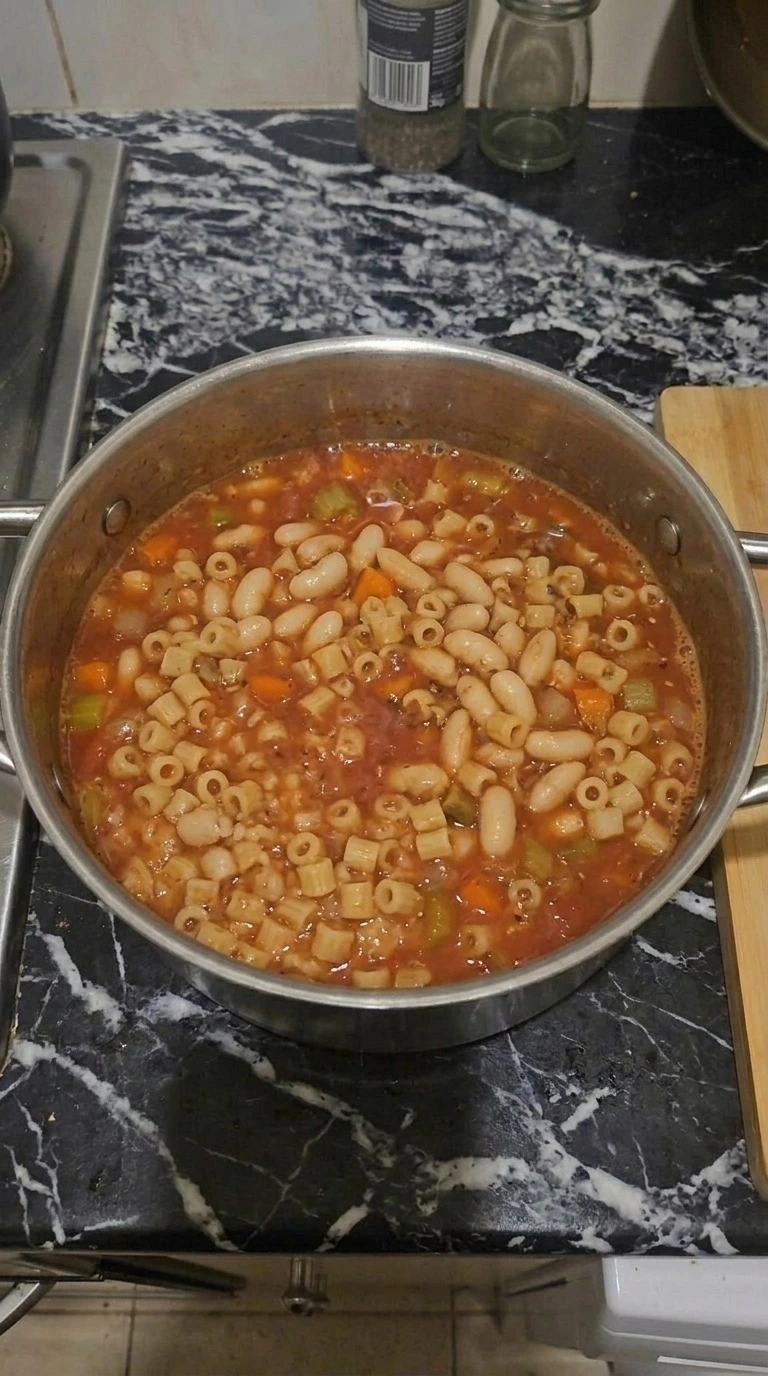
Turn the heat up until the broth returns to a steady gentle simmer between 200 and 205°F. Remove the bay leaf and stir in the dry ditalini pasta. Make sure every piece sinks below the broth so the small tubes cook at the same pace. Stir along the bottom of the pot every 2 minutes because the pasta can settle and stick as the soup thickens.
Let it simmer for 9 to 11 minutes or until the ditalini is tender with a slight bite in the center. If the broth gets too thick, stir in a little hot water from the measured amount. You’ll see the pasta swell and the broth get thicker as starch seeps out. (I once left the noodles simmering for 15 minutes and they turned far too soft.
) Check early. Going past 11 minutes can leave the small pasta tubes mushy. Gentle bubbling keeps the pasta tender without breaking it.
Tip: Check the ditalini package for its stated cooking time and begin tasting 2 minutes before that time because brands vary slightly.
Step 4: Finish with parsley and Parmesan
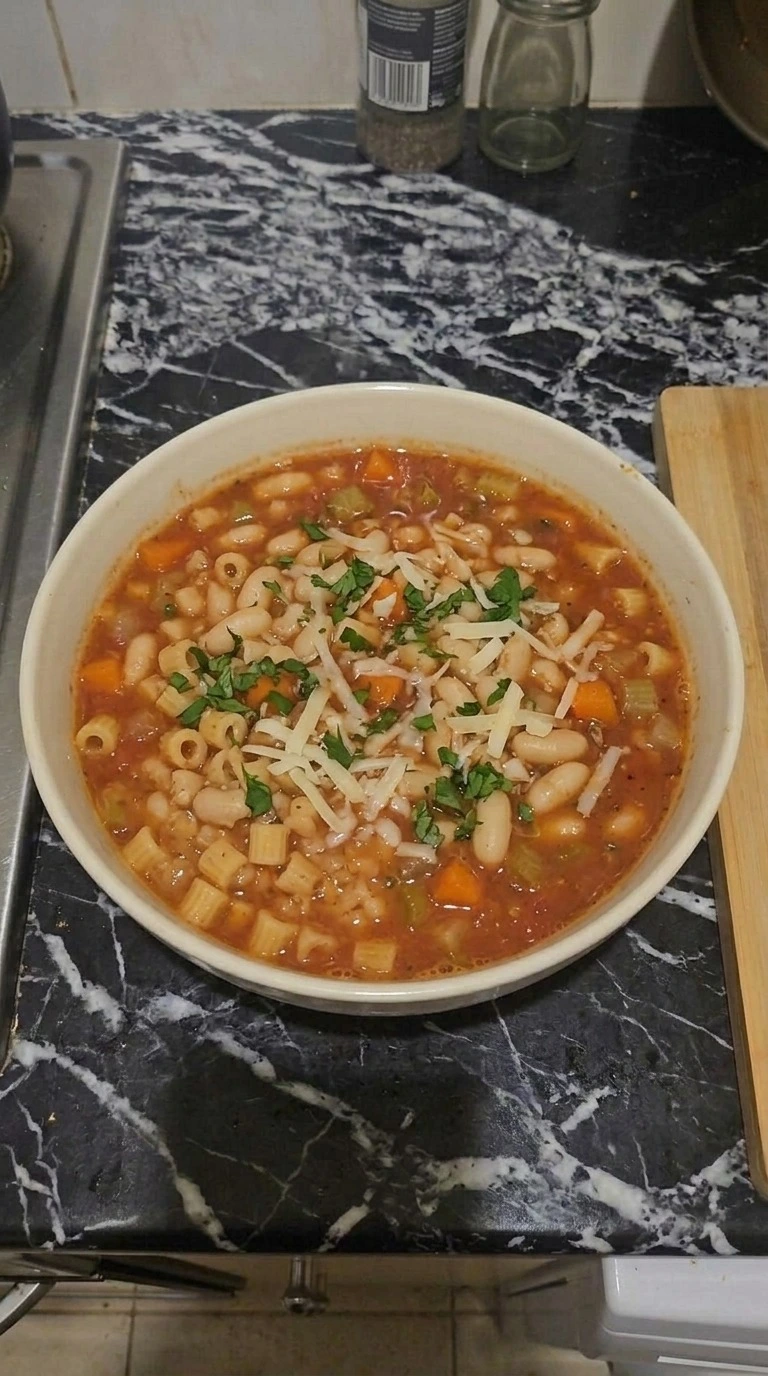
Turn off the heat and leave the pot uncovered for 2 minutes so the bubbling stops and the broth settles. Taste the soup and adjust with a little of the measured fine sea salt or black pepper if needed. Finely chop the fresh flat-leaf parsley and grate the Parmigiano Reggiano while the soup rests. Then ladle one generous portion into a deep serving bowl.
Sprinkle the parsley over the center and add a loose layer of grated cheese. Serve while the soup is still around 175 to 185°F so the Parmesan softens against the hot broth. The finished Pasta e Fagioli should have tender pasta and creamy beans in a broth thick enough to cling to your spoon. The Parmesan will soften into small pale strands while the parsley stays bright green.
Don’t let the finished pasta sit on the heat. Serving promptly stops the noodles from soaking up too much broth.
Tip: Set extra grated Parmigiano Reggiano at the table and offer about 1 tablespoon per bowl so everyone can choose their finish.
Pro Tips
- Cut the carrots and celery into roughly 1/4-inch cubes so they soften within 8 minutes and don’t leave crunchy pieces in the finished soup.
- Choose canned cannellini beans with a short ingredient list. Two 15-ounce cans provide enough beans to thicken the broth while leaving plenty whole.
- Keep the broth near 200 to 205°F when the ditalini goes in. A hard boil can break the beans and make the pasta too soft.
- Use a heavy-bottomed 5-quart pot and stir along the bottom every 2 minutes once the pasta goes in to prevent sticking.
- For firmer pasta when serving later, stop cooking the ditalini about 2 minutes before its package time and let it finish as the soup rests.
- If the tomato broth tastes too sharp, let it simmer for another 3 to 5 minutes before adding the pasta. The extra time softens the tomato flavor.
- Finish each bowl with about 1 tablespoon of freshly grated Parmigiano Reggiano. Grate it just before serving so it softens into the hot broth.
- For a brighter finish, stir 1 teaspoon of fresh lemon juice into each serving just before eating. Taste first because canned tomatoes vary in acidity.
- For a leafy green version, stir 2 cups of roughly chopped baby spinach into the soup during the final 2 minutes so it wilts without turning dull.
- Make a spicy Italian bean soup by adding 1/4 teaspoon of crushed red pepper flakes with the garlic and increasing to 1/2 teaspoon if you prefer more heat.
- For a more filling meat version, brown 8 ounces of mild Italian sausage with the vegetables and cook it fully before adding the broth and beans.
- Give the soup a deeper herbal flavor by adding 1 small fresh rosemary sprig during the 12-minute bean simmer and removing it before the ditalini goes in.
Substitutions & Variations
- dry ridged ditalini pasta: Use 3/4 cup certified gluten-free small rice or corn pasta. Gluten-free pasta can soften faster and release more starch into the broth. Start checking at minute 6 and add 1/4 cup hot water if the soup gets too thick.
- canned cannellini beans: Use 2 cans of great northern beans (15 ounces each). Great northern beans have a slightly firmer texture and hold their shape well. Mash about 1 cup as directed, although the broth may turn out a little less creamy.
- Parmigiano Reggiano: Use 2 tablespoons of nutritional yeast for a dairy-free and vegan option. Nutritional yeast adds a mild nutty flavor but won’t melt into the broth like Parmesan. The soup remains thick because the mashed cannellini beans provide the body.
- low-sodium vegetable broth: Use 4 cups of low-sodium chicken broth. Chicken broth adds a deeper savory flavor but makes the soup unsuitable for vegetarians. Taste before adding more salt because the sodium content varies by brand. For another hearty dinner, try our Stovetop White Chicken Chili.
- dry ridged ditalini pasta: Use 3/4 cup dry egg-free small elbow macaroni. Small elbows have a slightly softer bite and may need 1 to 2 extra minutes. Check the label for eggs because some specialty pasta contains them.
Storage Instructions
Let Pasta e Fagioli cool slightly, then divide it into shallow airtight containers and refrigerate within 2 hours. Keep it at 40°F or below and eat within 3 to 4 days. The ditalini will absorb more broth overnight, so the leftovers will be thicker than the first serving.
For freezing, leave the pasta out if possible and freeze the cooled bean and tomato base in freezer-safe containers for up to 3 months. Leave about 1 inch of room at the top so the liquid can expand. To reheat, warm one portion in a small saucepan over medium-low heat for 5 to 8 minutes until it reaches 165°F.
Add 1/4 cup of vegetable broth or water to loosen the texture and stir gently. If the soup develops an unusual sour smell, visible mold or a slimy texture, discard it. Don’t taste questionable leftovers to check if they’re safe.
Pasta e Fagioli
Ingredients
Method
- Dice the yellow onion into roughly 1/4-inch pieces and cut the carrots and celery into small cubes of a similar size. Mince the garlic cloves and set them aside. Then pour the extra virgin olive oil into a heavy pot and set the burner to medium heat (about 5 on a 10-point dial). Add the onion, carrots and celery and stir with a wooden spoon every minute for 7 to 8 minutes. Keep the vegetables moving across the bottom so they soften without taking on much color. Add the minced garlic and stir for another 60 seconds. The onion should look soft and almost clear while the carrots stay bright orange. You’ll notice a sweet smell as the garlic warms through. But don’t let it turn dark brown or the whole soup can taste bitter. Gentle heat builds the flavor without burning the garlic.
- Pour the crushed San Marzano tomatoes into the pot and stir until the softened vegetables turn red. Drain and rinse both cans of cannellini beans. Add them with the low-sodium vegetable broth, dried oregano, dried thyme, dried bay leaf, fine sea salt and freshly ground black pepper. Bring the pot to a gentle simmer at about 200 to 205°F, then lower the burner to medium-low (about 3 on a 10-point dial). Let it bubble softly for 12 minutes while you stir every 3 minutes. Keep the lid slightly open so the broth can thicken a little. Next, press about 1 cup of beans against the side of the pot with the back of your spoon. They’ll break into the broth and give it a soft creamy look. Don’t boil hard or the beans may fall apart too much. A low simmer thickens the base while keeping most beans intact.
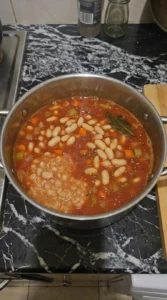
- Turn the heat up until the broth returns to a steady gentle simmer between 200 and 205°F. Remove the bay leaf and stir in the dry ditalini pasta. Make sure every piece sinks below the broth so the small tubes cook at the same pace. Stir along the bottom of the pot every 2 minutes because the pasta can settle and stick as the soup thickens. Let it simmer for 9 to 11 minutes or until the ditalini is tender with a slight bite in the center. If the broth gets too thick, stir in a little hot water from the measured amount. You’ll see the pasta swell and the broth get thicker as starch seeps out. (I once left the noodles simmering for 15 minutes and they turned far too soft.) Check early. Going past 11 minutes can leave the small pasta tubes mushy. Gentle bubbling keeps the pasta tender without breaking it.
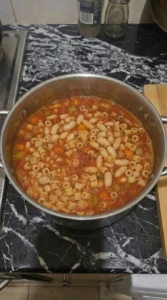
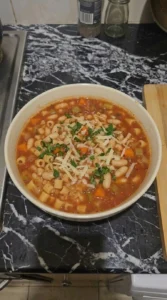
- Turn off the heat and leave the pot uncovered for 2 minutes so the bubbling stops and the broth settles. Taste the soup and adjust with a little of the measured fine sea salt or black pepper if needed. Finely chop the fresh flat-leaf parsley and grate the Parmigiano Reggiano while the soup rests. Then ladle one generous portion into a deep serving bowl. Sprinkle the parsley over the center and add a loose layer of grated cheese. Serve while the soup is still around 175 to 185°F so the Parmesan softens against the hot broth. The finished Pasta e Fagioli should have tender pasta and creamy beans in a broth thick enough to cling to your spoon. The Parmesan will soften into small pale strands while the parsley stays bright green. Don’t let the finished pasta sit on the heat. Serving promptly stops the noodles from soaking up too much broth.
Notes
Frequently Asked Questions
Yes, and the broth tastes even richer after a night in the fridge. Cook the vegetables and beans as directed, then cool the base and refrigerate it within 2 hours for up to 3 days. When you’re ready to eat, bring the broth to a gentle simmer around 200°F and add the dry ditalini for 9 to 11 minutes. This keeps the pasta from soaking up too much liquid overnight.
Store the soup in a sealed container at 40°F or below for up to 3 to 4 days after cooking. The pasta will keep soaking up broth as it sits, so expect a thicker texture by the second day. If you’re keeping several portions, divide them into shallow containers so they cool quickly. Discard anything left at room temperature for more than 2 hours.
Yes. Replace the 3/4 cup of dry ditalini with the same amount of certified gluten-free small pasta and start checking it after 6 minutes. For dairy-free bowls, skip the Parmigiano Reggiano and finish with about 1/2 tablespoon of nutritional yeast per portion. Also check the broth label for allergens. The beans still give the soup a thick texture without adding cream.
The ditalini releases starch as it simmers and keeps soaking up liquid after cooking. If your soup looks more like a stew, stir in 1/4 cup of hot water or low-sodium vegetable broth at a time until it loosens. Warm it over medium-low heat for 2 to 3 minutes while stirring gently. Don’t keep boiling it because the pasta can lose its shape.
Absolutely. Double the ingredients to make approximately 8 servings and use an 8-quart pot so there’s room to stir. The vegetables may need 9 to 11 minutes to soften because the pot is more crowded. Keep the bean simmer at about 12 minutes and check the pasta after 9 minutes. Add the 1 1/2 cups of dry ditalini in one batch and stir well to prevent clumps.
A slice of toasted sourdough bread works well because the thick tomato broth is great for dipping. Toast 1-inch slices at 375°F for about 8 to 10 minutes until the edges turn lightly golden. A green salad with lemon dressing also helps cut through the rich beans and Parmesan. For dinner, plan on about 1 1/2 to 2 cups of soup per person.
Yes, but you’ll get better results if you freeze the soup base before adding the ditalini. Cool the bean and tomato mixture promptly, then freeze it in sealed containers with about 1 inch of space for expansion. Keep it frozen for up to 3 months for the best texture. Thaw overnight in the fridge, bring it back to a gentle simmer and cook fresh ditalini for 9 to 11 minutes.
Final Thoughts
This is one of those dinners I keep making because it never asks for much and still fills everyone up. My favorite thing about Pasta e Fagioli is the old-fashioned way the beans thicken the broth, so there’s no need for cream or a long simmer.
This easy pasta e fagioli has tender ditalini and a rich tomato base, and the whole pot makes four generous bowls. If you’re looking for another filling dinner, try our Creamy White Chicken Chili or Crockpot Cajun Chicken Pasta. Give this pasta e fagioli recipe a try and tell me how yours turns out.
Pasta e fagioli means pasta and beans in Italian. It’s a traditional home dish with many regional versions, and some families make it thick enough to eat with a fork. Others prefer a brothier bowl that feels more like soup.