Ingredients
Method
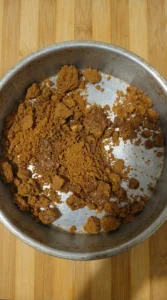
- Crushed Biscoff cookies turn darker and slightly glossy as the butter runs through them and the loose sandy crumbs begin to clump in irregular patches. The mixture looks shaggy rather than smooth and you can see dry bits and richer buttery bits sitting together. This is the first real visual shift and it matters because the crumbs stop looking dusty and start looking like something that will hold its shape. Keep the texture a little uneven so the base feels homemade rather than packed into a perfect uniform paste.
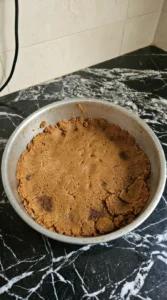
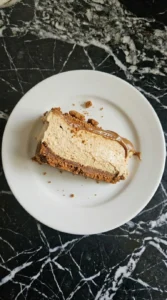
- Once the crumbs are pressed down they change from loose clusters into a compact layer with rough edges and tiny dips across the surface. The colour deepens slightly where the butter settles and the base looks solid enough to support the filling while still keeping a few craggy bits around the sides. That structure change is what you want here. The crumbs are no longer separate pieces and now read as one clear layer with a casual homemade finish rather than a perfectly flat factory base.
- Cream cheese and powdered sugar and vanilla and part of the Biscoff spread come together into a smooth pale tan filling with soft swirls and a noticeably thicker body. The streaks disappear as the ingredients fully mix and the colour shifts from bright white to a warm biscuit shade. This step adds both texture change and colour change. What started as separate soft ingredients becomes one creamy mass with enough body to mound slightly and hold loose ridges instead of sinking flat.
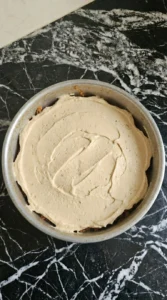
- As the whipped cream is folded through and the filling is spread into the pan the mixture becomes lighter and airier with broad soft ripples across the top. The crust disappears under the filling yet a little crumb still peeks through at the edges and the surface settles into relaxed uneven waves instead of a flat polished top. This is the structure change that turns the recipe into an actual cheesecake. You now have two clear layers and the filling looks soft and pillowy rather than dense which helps the chilled slice feel creamy rather than heavy.
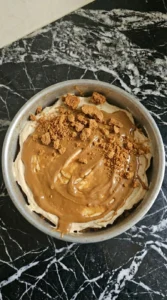
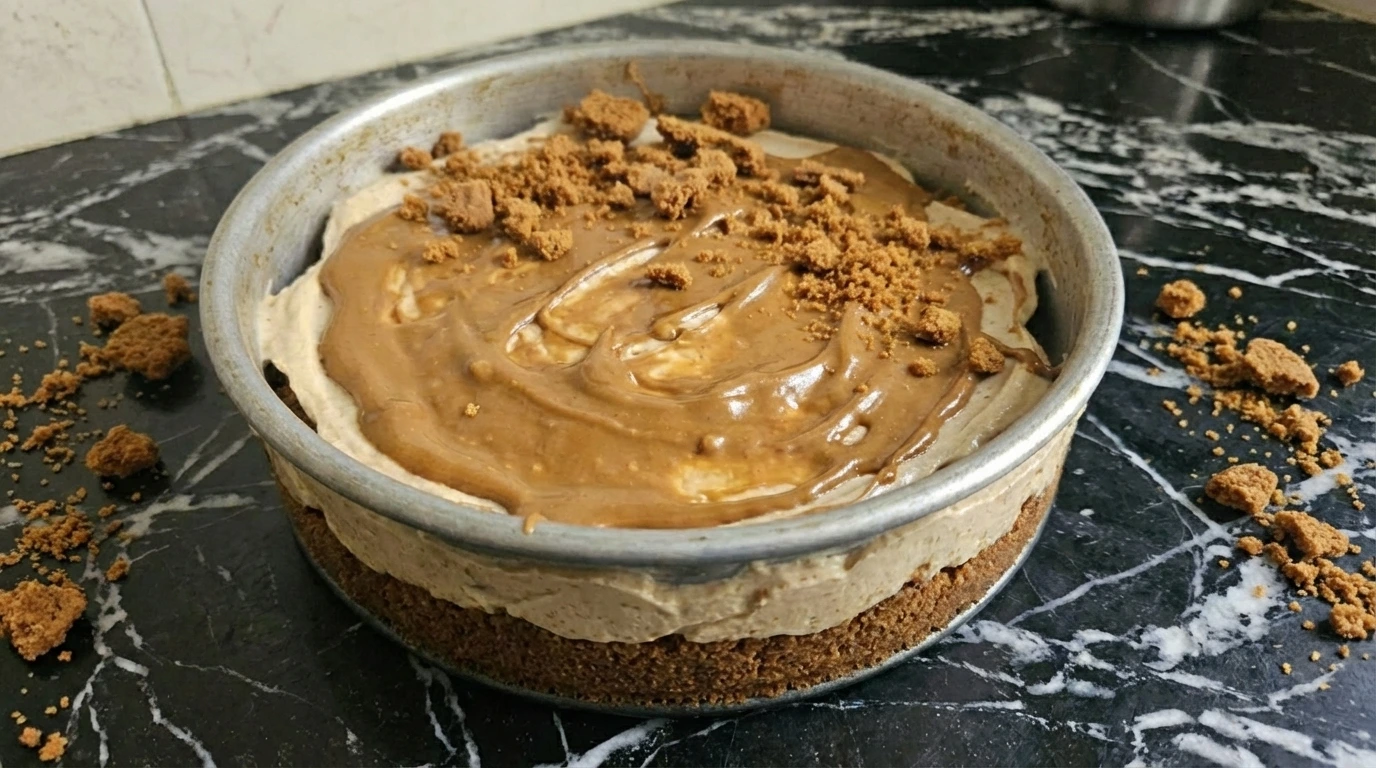
- The chilled cheesecake gets its final visual jump when the remaining Biscoff spread loosens into a glossy darker layer that drapes over the pale filling and settles into natural pools. Crumbled cookies land unevenly over the top and some pieces sink slightly while others stay crisp on the surface. Now the cheesecake looks finished and sliceable with clear contrast between the darker topping and the lighter centre and the crumb base underneath. The top should not look perfect and a few rough patches and thicker drips make it far more inviting.
Notes
This simple No Bake Biscoff Cheesecake is beautiful and delicious! A crisp Biscoff cookie crust with a creamy cheesecake filling and topped with glossy Biscoff spread. So simple and oh-so good!