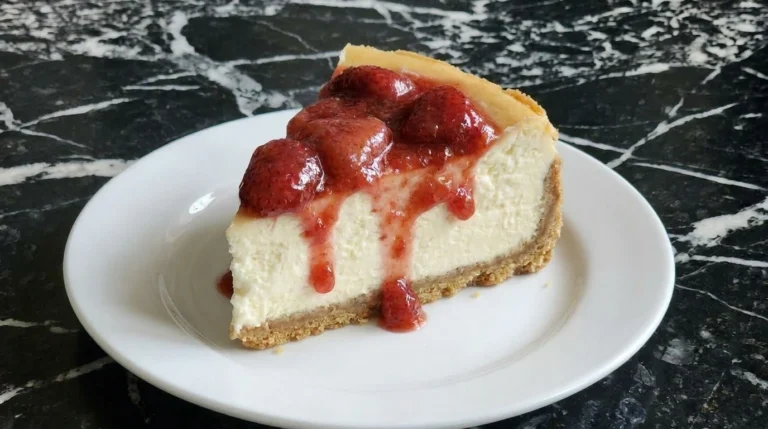
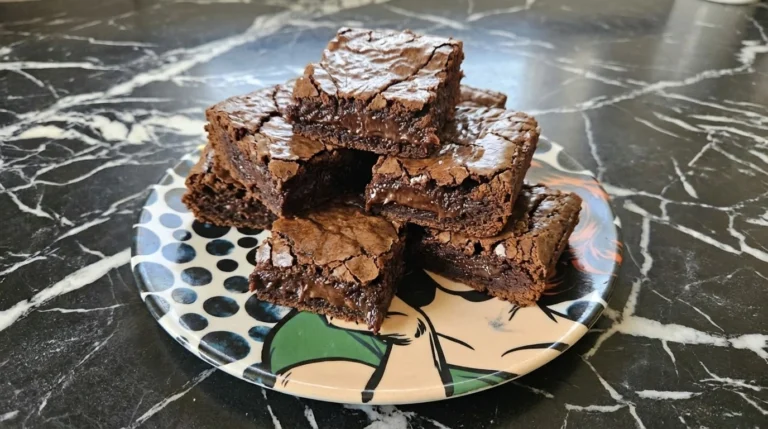
No Bake Biscoff Cheesecake
I wanted a cheesecake that actually tasted like Biscoff, not just a hint you have to hunt for. And that turned out to be trickier than I expected. Too little spread and it felt flat. Too much and the whole thing slumped. Then the topping drove me a bit mad.
Too thin and it disappeared into the filling. Too thick and it just sat there, heavy and dull. I almost gave up and made something else like this Strawberry Cheesecake (https://leagueofcooking. com/? p=3325), which is much more forgiving.
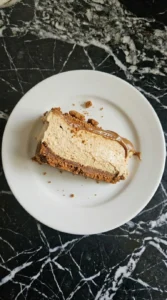
But this version finally hits the balance. You get a crisp base, a creamy center that holds its shape, and real Biscoff flavor all the way through. Every bite actually tastes like what you came for.
Why This Recipe Works
The filling stays stable because the whipped cream is folded in gently at cool room temperature, around 68°F, so it traps air instead of collapsing. Chilling the crust for at least 30 minutes at 40°F firms the butter, which keeps the layers distinct. Warming the Biscoff topping just to about 90°F makes it pourable without thinning, so it sets glossy instead of soaking in.
Ingredient List
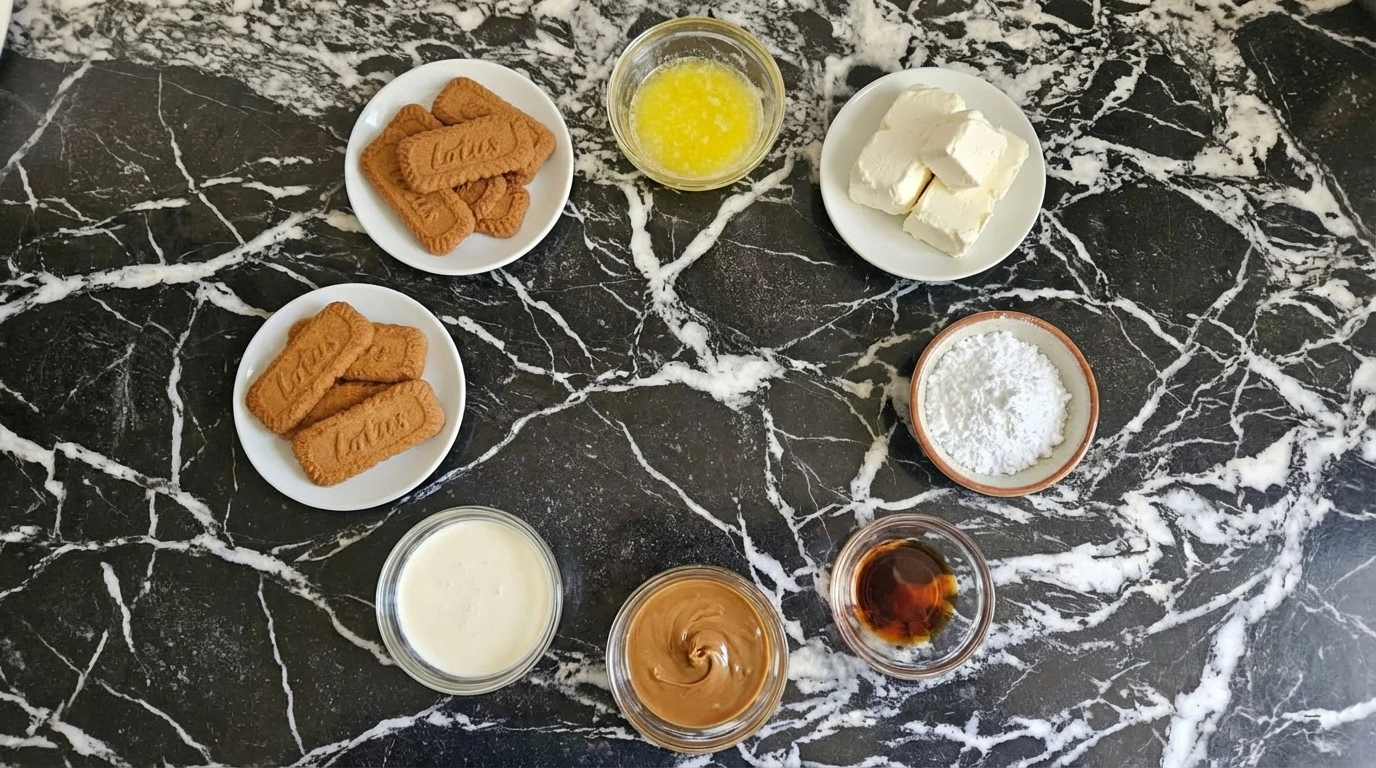
- Biscoff cookies: Finely crushed for the base, with a few slightly larger bits for texture.
- Unsalted butter: Melted and slightly cooled, about 95°F, to bind the crumbs without making them greasy.
- Cream cheese: Full-fat and softened to about 68°F so it blends smooth without lumps.
- Powdered sugar: Sifted to avoid clumps and keep the filling silky.
- Vanilla extract: Adds warmth and balances the tang of the cream cheese.
- Biscoff spread: Used in the filling and gently warmed for the glossy topping.
- Heavy cream: Cold, around 38°F, then whipped to soft peaks for a light texture.
- Extra Biscoff cookies: Roughly crumbled for topping to add crunch and contrast.
Kitchen Equipment
Method
Step 1: Mix the cookie crumbs with melted butter
Stir the crumbs with melted butter at about 95°F for 1 to 2 minutes using a folding motion, almost like scooping from the bottom and turning over. Don’t rush it. You want the butter to coat evenly without turning everything into paste. You’ll see the crumbs turn slightly darker and start clumping in spots. Some dry bits are fine. If you mix past 2 minutes, the crumbs can go greasy and the base loses its crisp bite.
Tip: Use a fork instead of a spoon to break up any butter pockets as you mix.
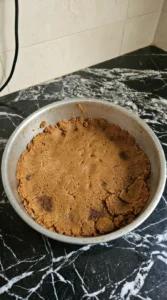
Step 2: Press the crumbs into a firm uneven base

Press the mixture into your pan using the flat bottom of a glass, working for about 2 to 3 minutes. Start in the center, then push outward in small circular motions so the layer stays even without compacting too hard. The surface should look slightly uneven with tiny dips and a deeper golden tone. Chill at 40°F for 30 minutes until firm. Skip the chill and the base can crumble when sliced.
Tip: Line the pan with parchment so you can lift the cheesecake out cleanly later.
Step 3: Blend the filling until thick and pale
Beat the cream cheese, sugar, vanilla, and part of the Biscoff on medium speed, about 4 on a 10-dial, for 2 to 3 minutes. Stop halfway to scrape the bowl down so everything blends evenly. The mix turns pale tan and holds soft ridges when you lift the mixer. You’ll smell a warm biscuit note. Overmix past 3 minutes and it loosens too much, which makes the filling struggle to set. (I used to keep mixing until it looked extra smooth, but it always chilled too soft.)
Tip: If the mixture looks grainy, your cream cheese was too cold. Let it sit 10 more minutes and mix again briefly.
Step 4: Fold in the whipped cream and spread the filling over the crust
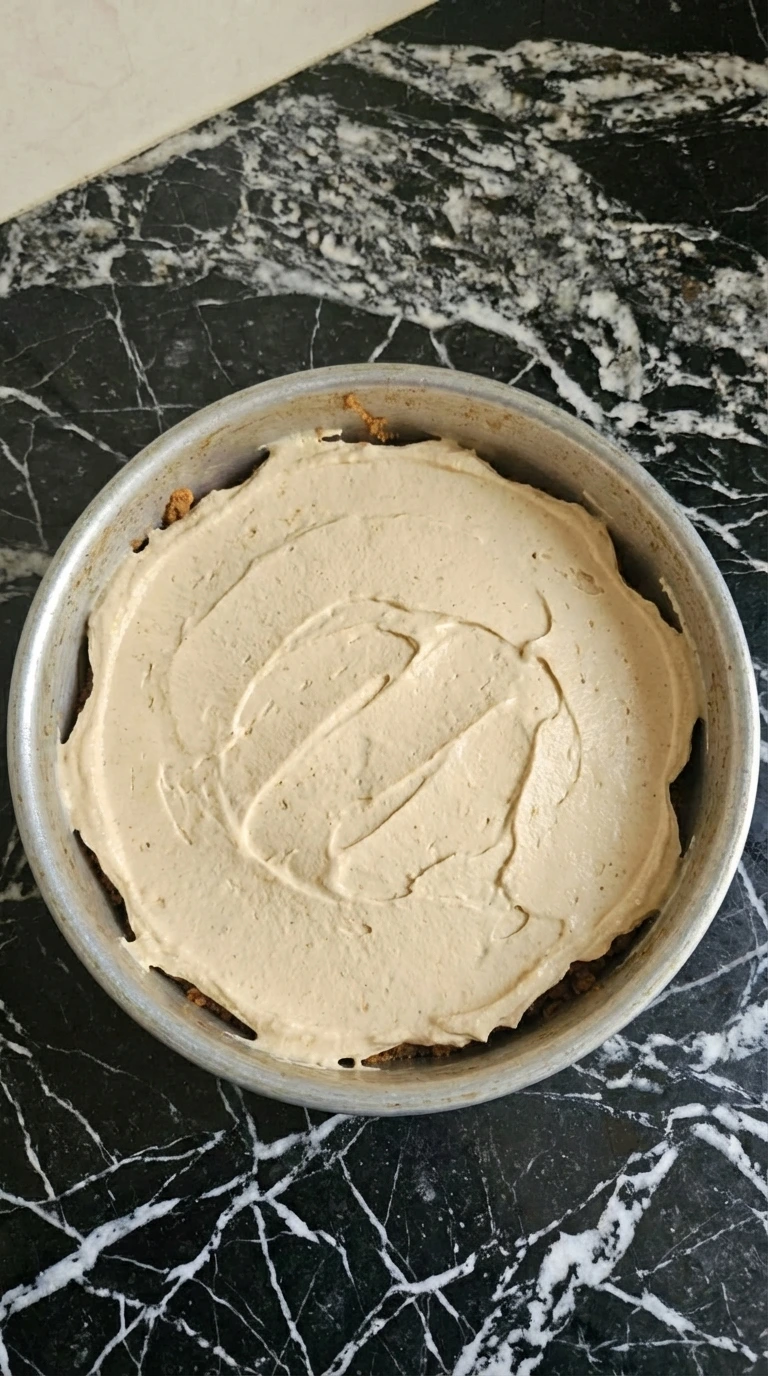
Fold in whipped cream using a slow J-shaped motion for about 1 to 2 minutes. Scoop from the bottom and turn over gently so you don’t knock the air out. Spread the filling over the chilled crust in soft waves using an offset spatula. Chill at 40°F for at least 4 hours, ideally overnight. The surface should look pillowy and hold its shape. Rush the chill and the layers blend instead of staying clean.
Tip: Tap the pan once lightly on the counter to settle large air pockets without flattening the texture.
Step 5: Pour over the melted Biscoff topping and scatter cookie crumble

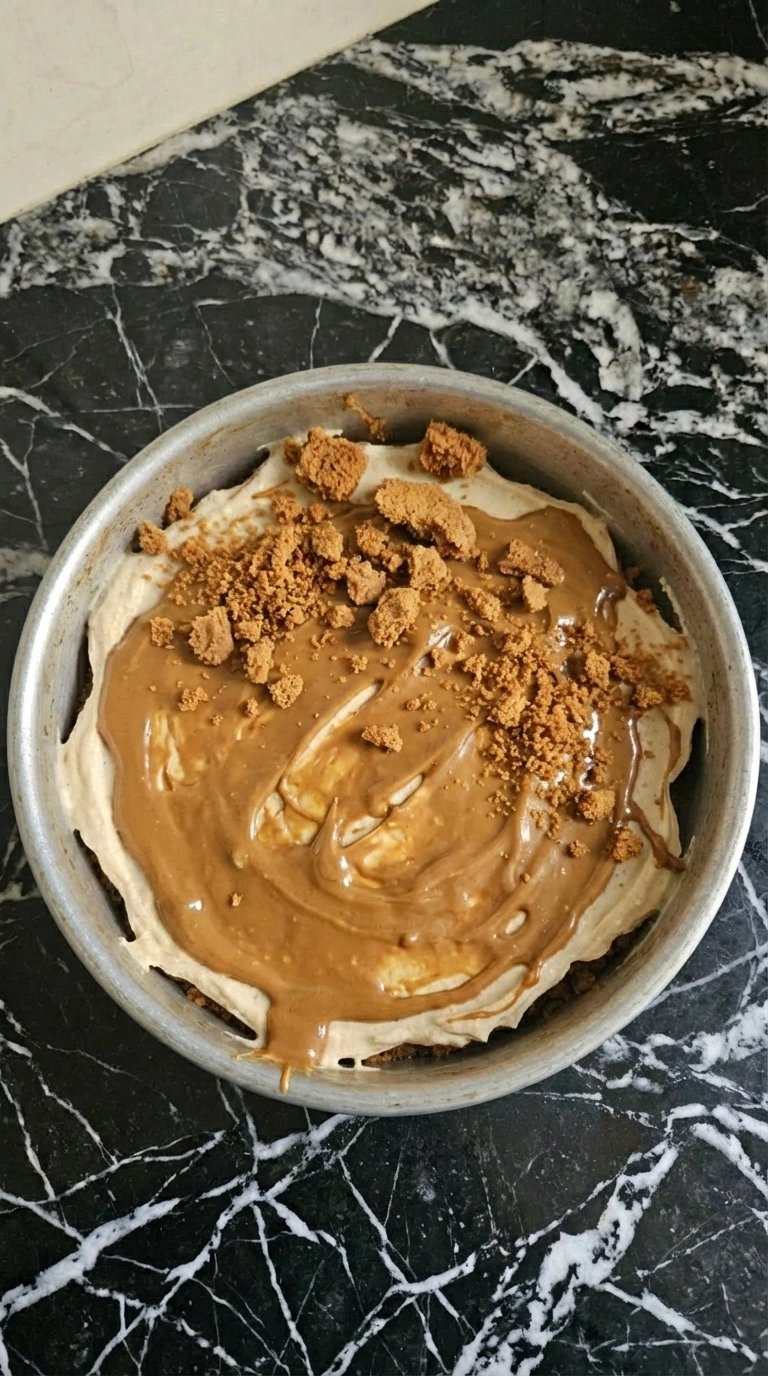
Warm the Biscoff spread gently to about 90°F for 20 to 30 seconds, stirring once halfway. It should pour slowly, not run fast. Pour it over the fully chilled cheesecake and tilt the pan slightly to spread. Scatter cookie crumbs right away so they stick. You’ll see a glossy layer settle into soft pools. Leave it too hot and it sinks into the filling, which dulls the finish.
Tip: Use a spoon to guide the topping to the edges instead of pouring all in one spot.
Pro Tips
- Use full-fat cream cheese so the slices hold cleanly once chilled.
- Always chill the crust first so the filling doesn’t sink into it.
- Warm the Biscoff just enough to loosen it, not to thin it out.
- Give it a full overnight chill for the best texture and flavor.
Swaps and Variations
- Biscoff cookies: Graham crackers — You’ll lose the spiced flavor, so the cheesecake tastes milder.
- Unsalted butter: Coconut oil — Works for dairy-free, but the base softens faster at room temp.
- Cream cheese: Dairy-free cream cheese — Texture is slightly softer and less rich, but still sets if chilled well.
- Heavy cream: Coconut cream — Adds a light coconut taste that changes the overall flavor.
- Biscoff spread: Peanut butter — Completely different flavor direction, but still creamy and works. Try pairing with this Healthy Avocado Toast (https://leagueofcooking.com/healthy-avocado-toast/) for a savory contrast.
How to Store
Keep the cheesecake covered in the fridge at around 40°F for up to 4 days. The texture actually improves by day two, even if the topping loses a bit of shine. For longer storage, freeze slices individually for up to 1 month. Thaw overnight in the fridge and add fresh cookie crumble just before serving so it stays crisp.
No Bake Biscoff Cheesecake
Ingredients
- 250 g Biscoff cookies
- 80 g Unsalted butter
- 500 g Cream cheese
- 100 g Powdered sugar
- 1 tsp Vanilla extract
- 300 g Biscoff spread
- 300 ml Heavy cream
- 4 cookies Extra Biscoff cookies
Instructions
-
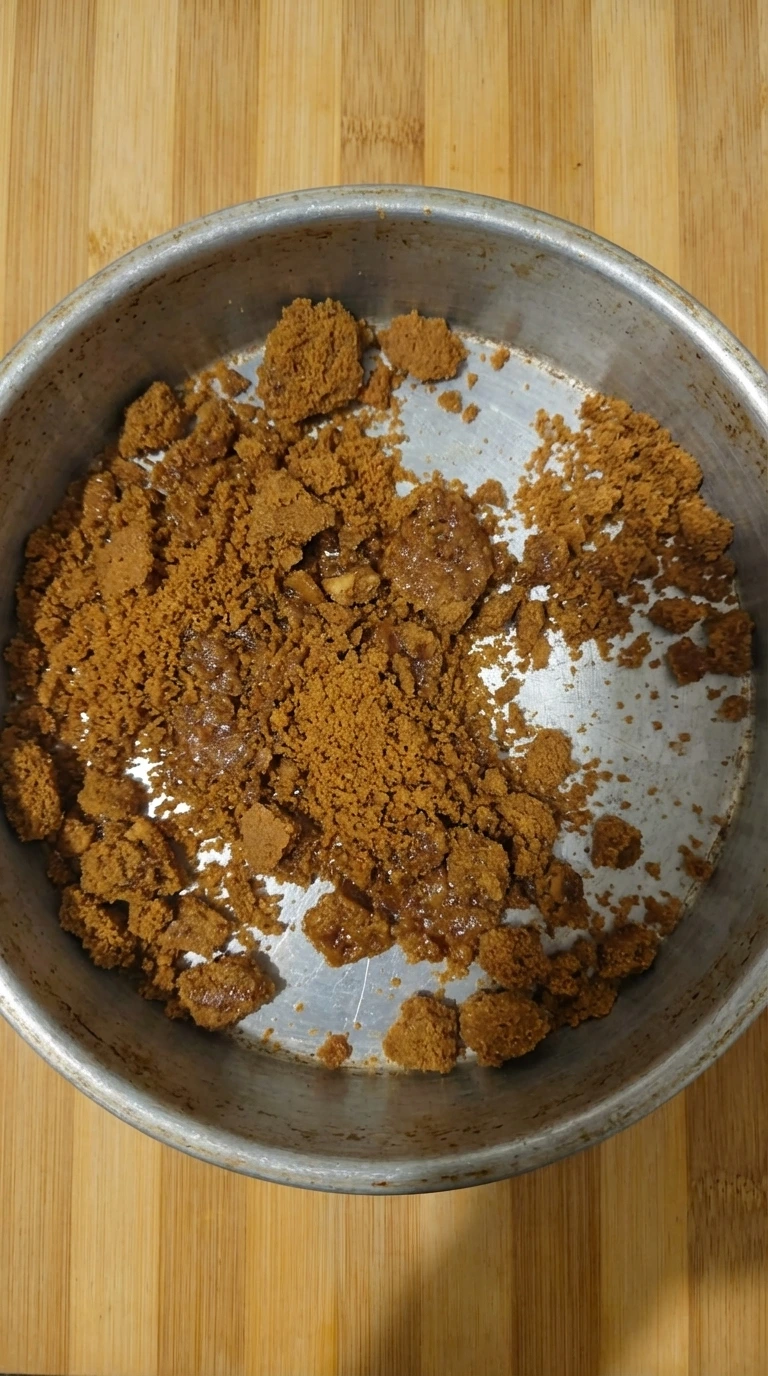
Crushed Biscoff cookies turn darker and slightly glossy as the butter runs through them and the loose sandy crumbs begin to clump in irregular patches. The mixture looks shaggy rather than smooth and you can see dry bits and richer buttery bits sitting together. This is the first real visual shift and it matters because the crumbs stop looking dusty and start looking like something that will hold its shape. Keep the texture a little uneven so the base feels homemade rather than packed into a perfect uniform paste.

-
Once the crumbs are pressed down they change from loose clusters into a compact layer with rough edges and tiny dips across the surface. The colour deepens slightly where the butter settles and the base looks solid enough to support the filling while still keeping a few craggy bits around the sides. That structure change is what you want here. The crumbs are no longer separate pieces and now read as one clear layer with a casual homemade finish rather than a perfectly flat factory base.
-
Cream cheese and powdered sugar and vanilla and part of the Biscoff spread come together into a smooth pale tan filling with soft swirls and a noticeably thicker body. The streaks disappear as the ingredients fully mix and the colour shifts from bright white to a warm biscuit shade. This step adds both texture change and colour change. What started as separate soft ingredients becomes one creamy mass with enough body to mound slightly and hold loose ridges instead of sinking flat.

-
As the whipped cream is folded through and the filling is spread into the pan the mixture becomes lighter and airier with broad soft ripples across the top. The crust disappears under the filling yet a little crumb still peeks through at the edges and the surface settles into relaxed uneven waves instead of a flat polished top. This is the structure change that turns the recipe into an actual cheesecake. You now have two clear layers and the filling looks soft and pillowy rather than dense which helps the chilled slice feel creamy rather than heavy.

-
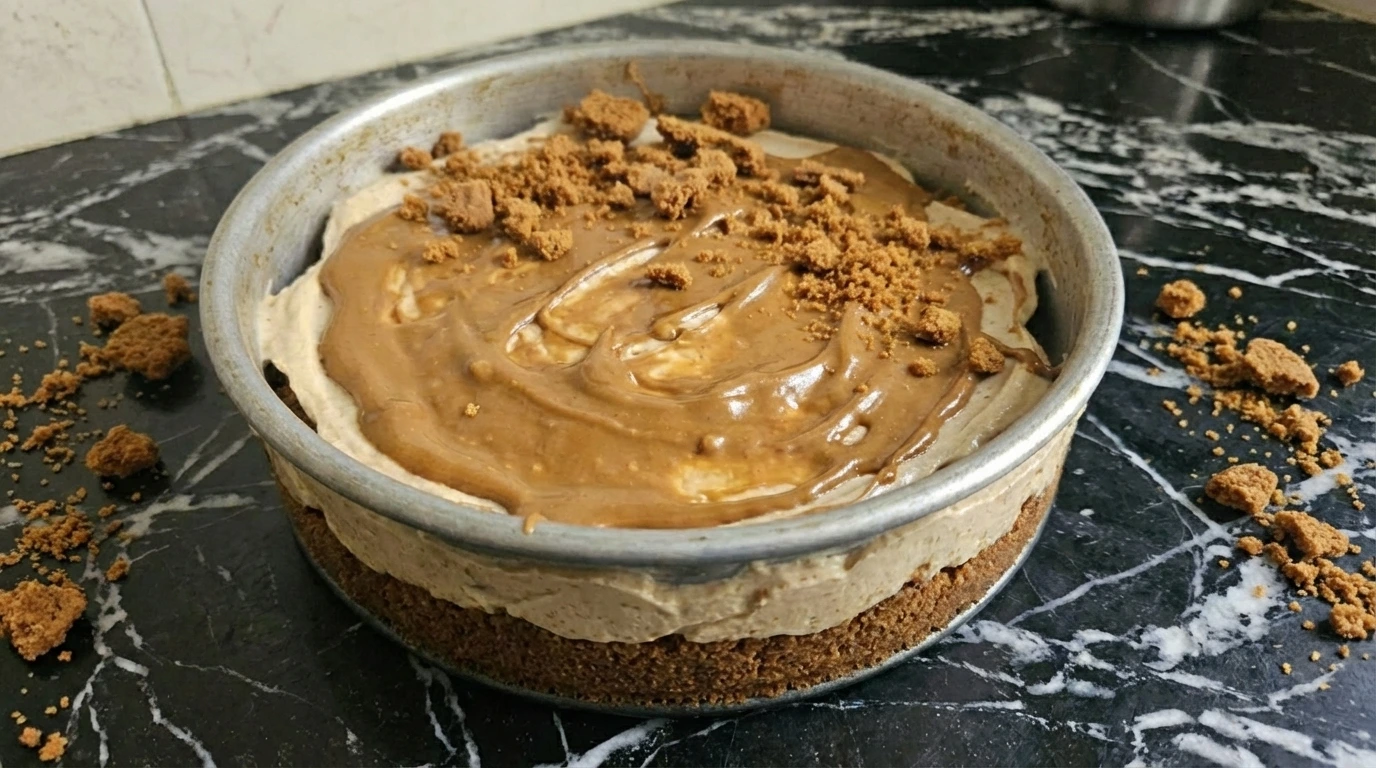
The chilled cheesecake gets its final visual jump when the remaining Biscoff spread loosens into a glossy darker layer that drapes over the pale filling and settles into natural pools. Crumbled cookies land unevenly over the top and some pieces sink slightly while others stay crisp on the surface. Now the cheesecake looks finished and sliceable with clear contrast between the darker topping and the lighter centre and the crumb base underneath. The top should not look perfect and a few rough patches and thicker drips make it far more inviting.
Notes
Common Questions
It usually means it wasn’t chilled long enough or the filling was overmixed. Give it at least 4 hours at 40°F, but overnight is better. Also make sure the whipped cream was folded in gently.
Yes, it’s actually better that way. Make it the day before and chill overnight so the layers firm up. Add the topping just before serving for the best look.
You can, but you’ll miss that extra layer of flavor and texture. The cheesecake will still be creamy, just less rich and a bit simpler.
Final Thoughts
This cheesecake hits that sweet spot of creamy, crisp, and full-on Biscoff flavor. It’s simple but feels a bit special once sliced.
If you like this, you’ll probably enjoy the Strawberry Cheesecake (https://leagueofcooking. com/?
p=3325) too.
Biscoff cookies are baked at high temperatures to caramelize the sugar, which is why their flavor stays strong even in chilled desserts.