High Protein Chicken Bowl
This bowl is what I make when I want something filling but don’t want to think too hard. Everything lands in one place and still feels like a real meal. You’ve got warm, seasoned chicken, a hearty base, and just enough crunch to keep it interesting.
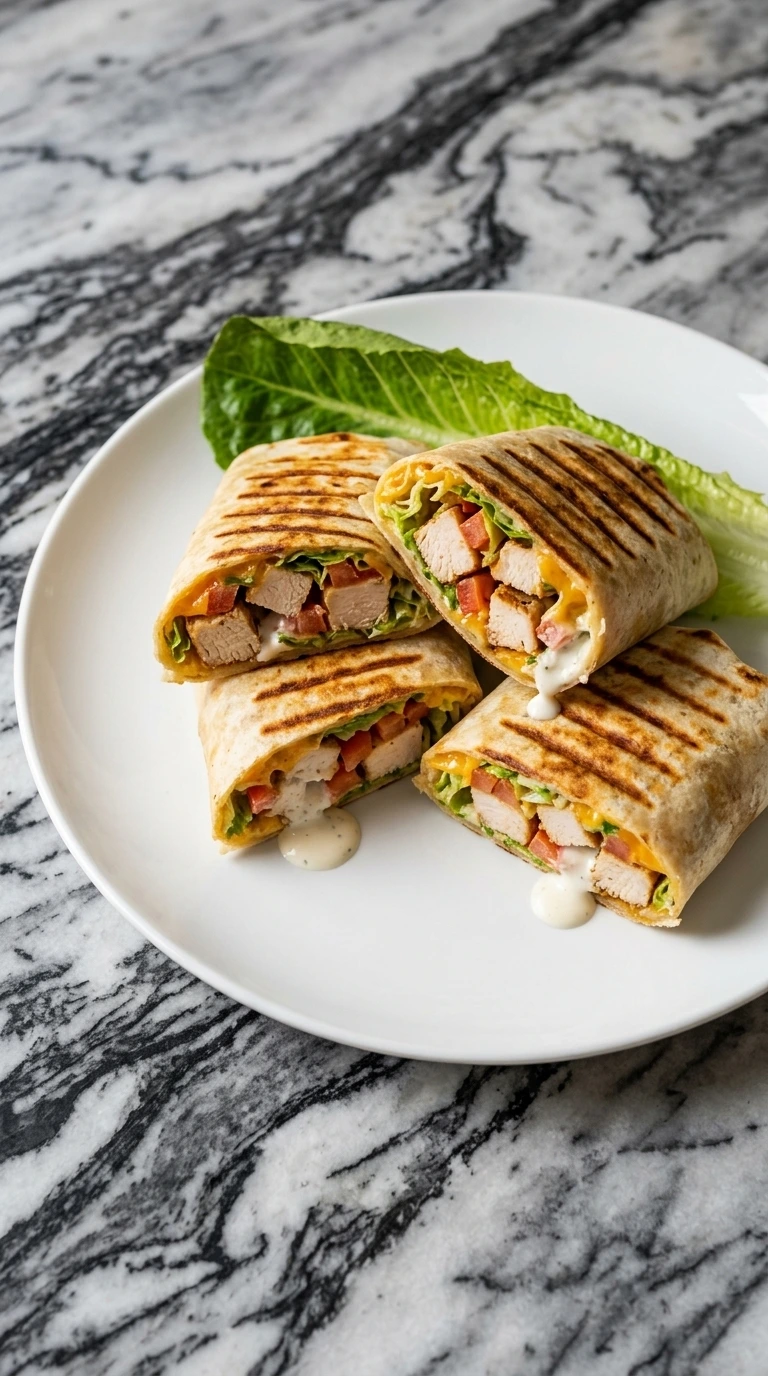
I lean on this the same way I do my Grilled Chicken Salad when I need something reliable. It works for lunch, dinner, or a few days of meal prep. And yes, it gets a little messy.

That’s kind of the point.
What Makes This Recipe Work
Cooking the marinated chicken at a steady 400°F lets the yogurt coating set before it dries out, so it stays juicy instead of chalky. The reserved sauce thickens slightly as it sits, which makes it cling instead of sliding off. And layering warm rice under the chicken helps the cheese soften without needing extra heat.
Ingredients

- boneless skinless chicken breasts: cut into bite-size pieces for quick, even cooking
- Greek yogurt: thick base that tenderizes and lightly coats the chicken
- lime juice: fresh acidity to balance the richness
- olive oil: helps the marinade spread and prevents sticking
- garlic: minced fine so it blends into the marinade
- smoked paprika: adds color and a light smoky depth
- ground cumin: earthy spice that anchors the seasoning
- chili powder: gentle heat and color
- onion powder: boosts savory background flavor
- kosher salt: essential seasoning for all layers
- black pepper: adds mild bite and balance
- cooked brown rice: warm, hearty base that holds everything
- black beans: drained and rinsed for clean flavor
- corn kernels: adds sweetness and texture
- cherry tomatoes: halved for juicy bursts
- cucumber: chopped for crisp contrast
- avocado: sliced just before serving for best texture
- shredded cheddar cheese: melts unevenly for a rich finish
- baby spinach: fresh greens that soften slightly in the bowl
- plain cottage cheese: adds protein and body to the sauce
- hot sauce: adds tangy heat to the sauce
- fresh cilantro: chopped for a bright finish
- green onions: thinly sliced for a sharp topping
Kitchen Equipment
Instructions
Step 1: Cut and gather the chicken and toppings

Set your workspace and aim to prep everything within 10 minutes so nothing dries out. Cut the chicken into uneven 1-inch pieces using a quick rocking motion with your knife. Keep your board steady and scrape pieces into a bowl as you go. You’ll see the chicken stay glossy and pale pink. Lay out all toppings nearby. Keep the rice warm at about 140°F if it’s freshly cooked so it steams lightly. The vegetables should look crisp and bright. If you leave things too long, the chicken edges start to dull and the spinach wilts before you want it to.
Tip: Keep your knife strokes short and controlled so pieces stay close in size without being perfect.
Step 2: Measure and mix the creamy seasoning base
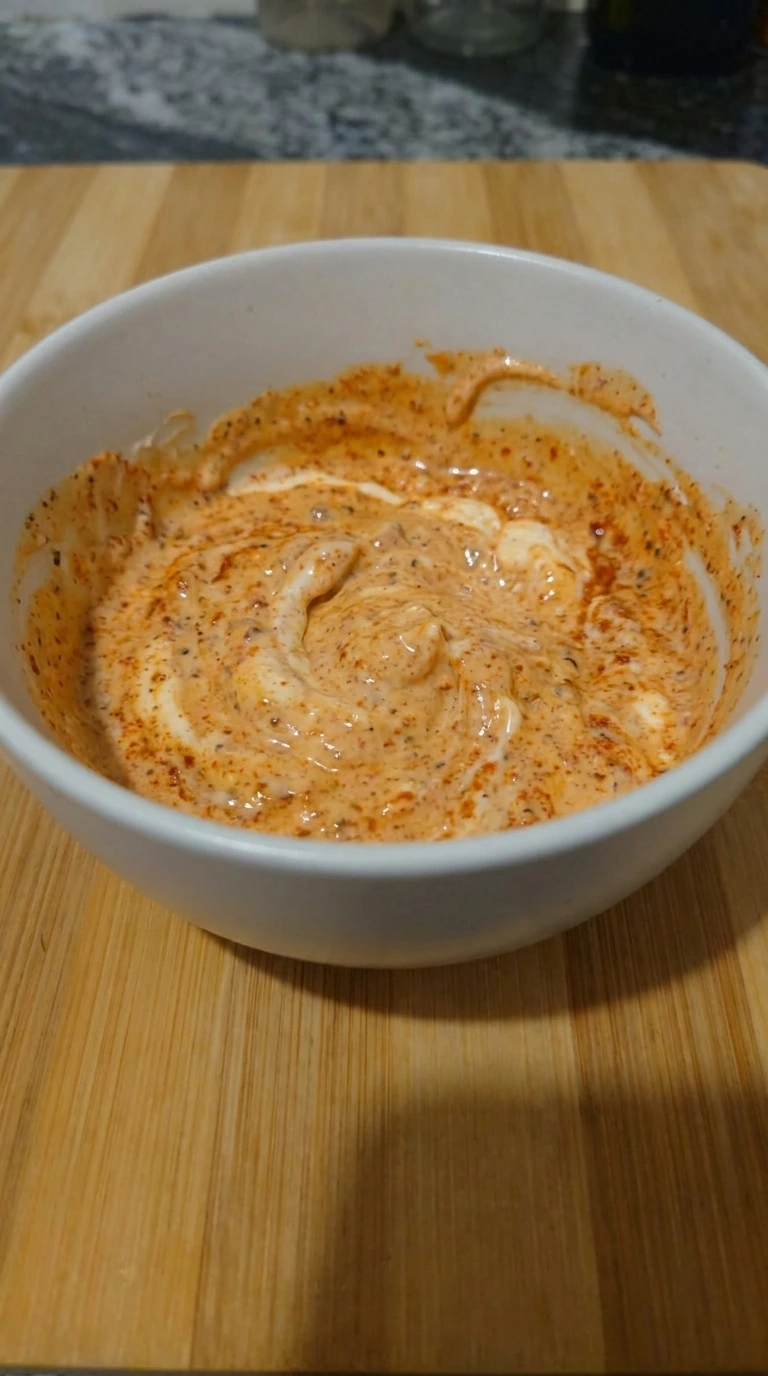
In a bowl, mix everything for about 60 to 90 seconds using a circular stirring motion. Aim for medium speed so the yogurt loosens without getting runny. The mixture should sit thick and creamy with a soft orange tint. Keep it at room temperature around 68 to 72°F so it blends smoothly. You’ll notice little flecks of spice throughout. If you overmix past 2 minutes, it thins out and won’t cling to the chicken later.
Tip: Stop mixing once it looks creamy but still slightly textured for better coating.
Step 3: Coat the chicken and let it marinate
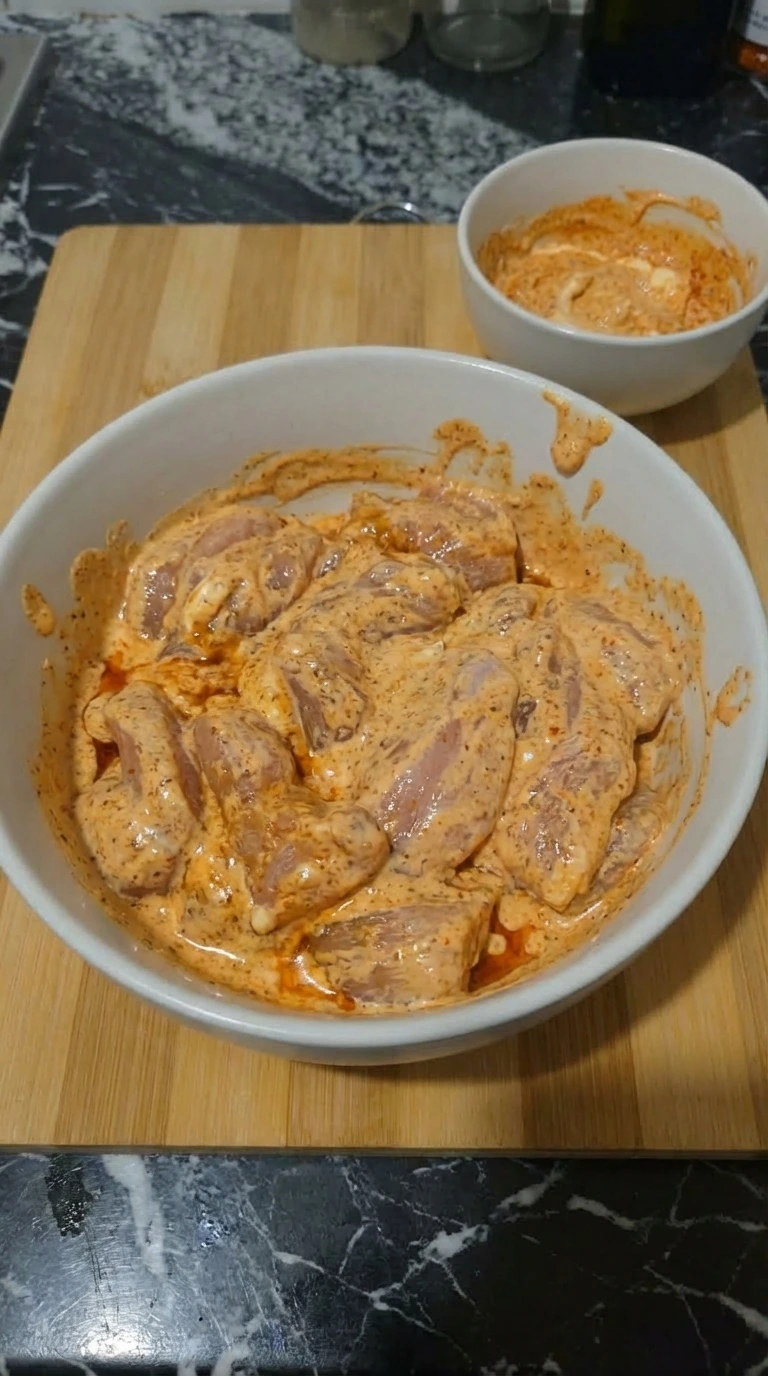
Toss the chicken with the marinade for about 1 to 2 minutes using a folding motion, scooping from the bottom and turning over. Make sure each piece gets coated but don’t force it smooth. The chicken will turn glossy and slightly heavier. Let it sit at room temperature for 10 minutes max. You’ll smell the garlic and spices start to bloom. If you leave it longer than 15 minutes, the coating loosens too much and slides off when cooking. (I used to rush this step, but even a short rest makes the coating stick better.)
Tip: Hold back a spoonful of marinade early so you don’t forget later.
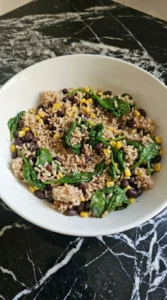
Step 4: Mix the grain and bean base

Combine the rice, beans, corn, and spinach while the rice is still warm around 140°F. Toss gently for about 45 seconds using a lifting motion so you don’t mash the grains. The spinach will just start to soften at the edges. Look for the rice to stay fluffy and separate. You’ll feel light steam as you mix. If you overwork it past 1 minute, the rice compacts and turns heavy instead of loose.
Tip: Fluff the rice with a fork before mixing to keep it from clumping.
Step 5: Blend the high-protein finishing sauce

Stir the sauce ingredients for about 60 seconds using a pressing motion to break down the cottage cheese slightly. Keep it at room temperature so it blends evenly. The texture should be thick but spreadable. You’ll see small curds remain with a glossy finish. It should coat the back of a spoon. If you overmix past 2 minutes, it becomes too loose and won’t hold its shape when drizzled.
Tip: Let the sauce sit 3 to 5 minutes before using so it thickens naturally.
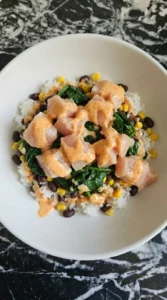
Step 6: Add the chicken to the bowl base

Cook the chicken separately at 400°F for 8 to 10 minutes until fully opaque and lightly golden at the edges, then add it to the bowl. Place it in loose clusters using a spoon so it doesn’t flatten the base. You’ll see slight browning and smell the spices deepen. The coating should look set, not wet. If you add it undercooked or too early, the juices soak into the rice and make everything soggy.
Tip: Let the chicken rest 2 minutes before adding so juices stay inside.
Step 7: Scatter the cheese and let it soften
Sprinkle the cheese while the bowl is still warm around 140°F and let it sit for 2 to 3 minutes. Drop it loosely so some hits the chicken and some falls into the rice. Don’t press it down. You’ll see the edges soften and turn slightly glossy. It should slump naturally. If the bowl cools below 120°F, the cheese won’t melt and stays dry.
Tip: Cover the bowl loosely for 1 minute to trap heat if needed.
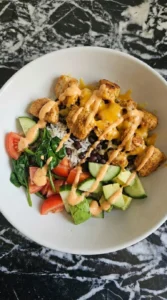
Step 8: Add the fresh toppings and drizzle the sauce
Add the fresh toppings right before serving, within 2 minutes, so they stay crisp. Scatter them with your fingers in a light tossing motion. Keep everything cool around room temp so textures stay sharp. Drizzle the sauce in slow lines over part of the bowl. You’ll see it hold its shape instead of pooling. If you add toppings too early, they soften and lose that fresh crunch.
Tip: Keep avocado last so it doesn’t brown while you assemble.
Step 9: Finish, plate, and garnish
Serve immediately while the bowl is still warm around 135°F. Gently nudge ingredients into place with a spoon, keeping it loose. Sprinkle herbs over the top in a quick pinching motion. You’ll see contrast between warm and fresh layers, with light steam rising. The smell should be savory with a fresh herbal note. If you wait longer than 5 minutes, the textures blend too much and lose that layered feel. (I’ve let it sit before, and it still tastes good, but it’s not the same.)
Tip: Add herbs right before serving so they stay bright and fresh.
Tips and Tricks
- Keep chicken pieces slightly uneven so they cook naturally and stay juicy
- Always reserve a bit of marinade early for a richer final sauce
- Scatter toppings instead of lining them up so the bowl feels relaxed
- Add cheese while the bowl is warm so it softens in patches
Make It Your Own
- Greek yogurt: dairy-free yogurt — works but the sauce will be slightly thinner and less tangy
- brown rice: quinoa — adds more protein but changes the texture to lighter and fluffier
- cheddar cheese: dairy-free cheese — won’t melt the same and stays more firm
- chicken breast: chicken thighs — juicier result but slightly higher fat content
- cottage cheese: Greek yogurt — smoother sauce but slightly less protein, similar to Cottage Cheese Protein Bowl
How to Store
Store each component separately in airtight containers for up to 4 days. Keep the sauce sealed so it stays thick. Slice avocado fresh each time. Assemble just before eating so the vegetables stay crisp and the textures don’t blend together.
High Protein Chicken Bowl
Ingredients
- 1 1/2 pounds boneless skinless chicken breasts
- 1/2 cup Greek yogurt
- 2 tablespoons lime juice
- 2 tablespoons olive oil
- 3 cloves, minced garlic
- 1 teaspoon smoked paprika
- 1 teaspoon ground cumin
- 1 teaspoon chili powder
- 1/2 teaspoon onion powder
- 1 1/4 teaspoons, divided kosher salt
- 3/4 teaspoon, divided black pepper
- 3 cups cooked brown rice
- 1 can (15 ounces), drained and rinsed black beans
- 1 cup corn kernels
- 1 cup, halved cherry tomatoes
- 1 medium, diced cucumber
- 1 large, sliced avocado
- 3/4 cup shredded cheddar cheese
- 2 cups baby spinach
- 1/2 cup plain cottage cheese
- 1 tablespoon hot sauce
- 1/4 cup, roughly chopped fresh cilantro
- 2 , thinly sliced green onions
Instructions
-
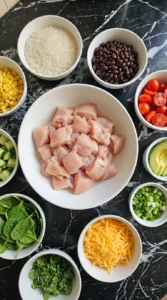
Cut the chicken breasts into small bite-size pieces with slight size variation so the bowl feels homemade and not too tidy. Transfer the chicken to a wide matte white ceramic bowl, then place the rice, beans, corn, tomatoes, cucumber, avocado, spinach, cheese, cilantro, and green onions into their own nearby containers so every ingredient is measured and ready. At this point everything still looks separate and fresh. The chicken is pale pink and raw, the vegetables are crisp and bright, and the cheese is fluffy and loose, with nothing combined yet.
-
In a second matte white ceramic bowl, add the Greek yogurt, olive oil, lime juice, minced garlic, smoked paprika, cumin, chili powder, onion powder, half the salt, and half the pepper. Stir until the mixture turns into a thick creamy coating with a soft orange-red tint and tiny flecks of seasoning throughout. The mixture should not look perfectly smooth. A few streaks of yogurt and spice can still show, giving it a more natural, homemade look before it fully loosens around the chicken.

-
Pour most of the creamy seasoning mixture over the raw chicken and toss until the pieces are coated from edge to edge, leaving some areas thicker than others. The chicken should shift from pale and dry-looking to glossy and fully covered, with uneven clinging sauce in the corners and between the pieces. Let it sit briefly so the coating settles and the surface looks slightly tighter and more absorbed. Reserve a spoonful or two of the sauce in the separate bowl for later so the finished bowl can have a richer final drizzle.

-
Add the cooked brown rice, black beans, corn, and spinach to another wide matte white ceramic bowl. Season with the remaining salt and pepper, then toss gently so the beans and corn thread through the rice and the spinach starts to soften slightly from the moisture already in the bowl. The mixture should look hearty but loose, not packed down. Some spinach leaves will still stand up while others begin to relax into the rice, and the beans should sit irregularly throughout instead of looking evenly distributed.
-
In a small matte white ceramic bowl, stir the cottage cheese, hot sauce, and reserved seasoned yogurt mixture until thick and creamy. The sauce should look more blended than before but still have tiny curds and spice speckles so it feels homemade rather than perfectly whipped. As it sits, it becomes slightly thicker and richer in appearance. The color deepens to a creamy peach-orange tone with a glossy finish that looks ready to drizzle, not pour in a flat sheet.

-
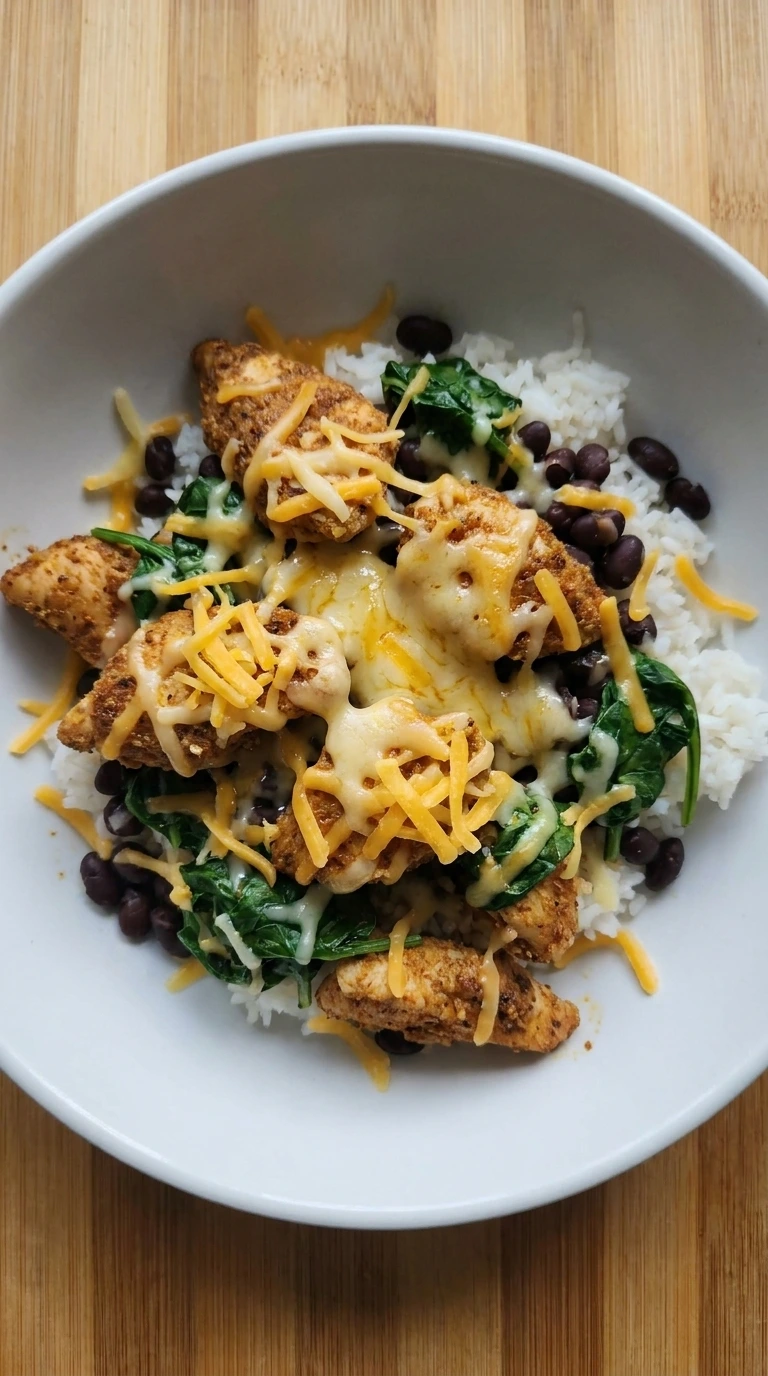
Spoon the marinated chicken over the rice and bean mixture in loose clusters rather than one neat layer. As it rests over the warm base, the coating begins to look more settled and the chicken appears slightly firmer and more opaque, moving visually away from raw and toward a cooked, coated finish. Some of the seasoned coating lightly transfers onto the rice below, creating patches of orange-tinted grains and a thicker look around the edges. The bowl should now look fuller and more integrated, though still clearly mid-assembly.
-
Sprinkle the shredded cheddar over the chicken and base without trying to cover everything. Let some strands catch on the chicken, some fall into the rice, and some stay in little loose mounds so the cheese melts unevenly and softens into irregular glossy patches. The visual shift here is important. The cheese should no longer look dry and fluffy. instead it starts to slump and cling, with a few edges turning slightly deeper in color and the surface looking richer and more finished.

-
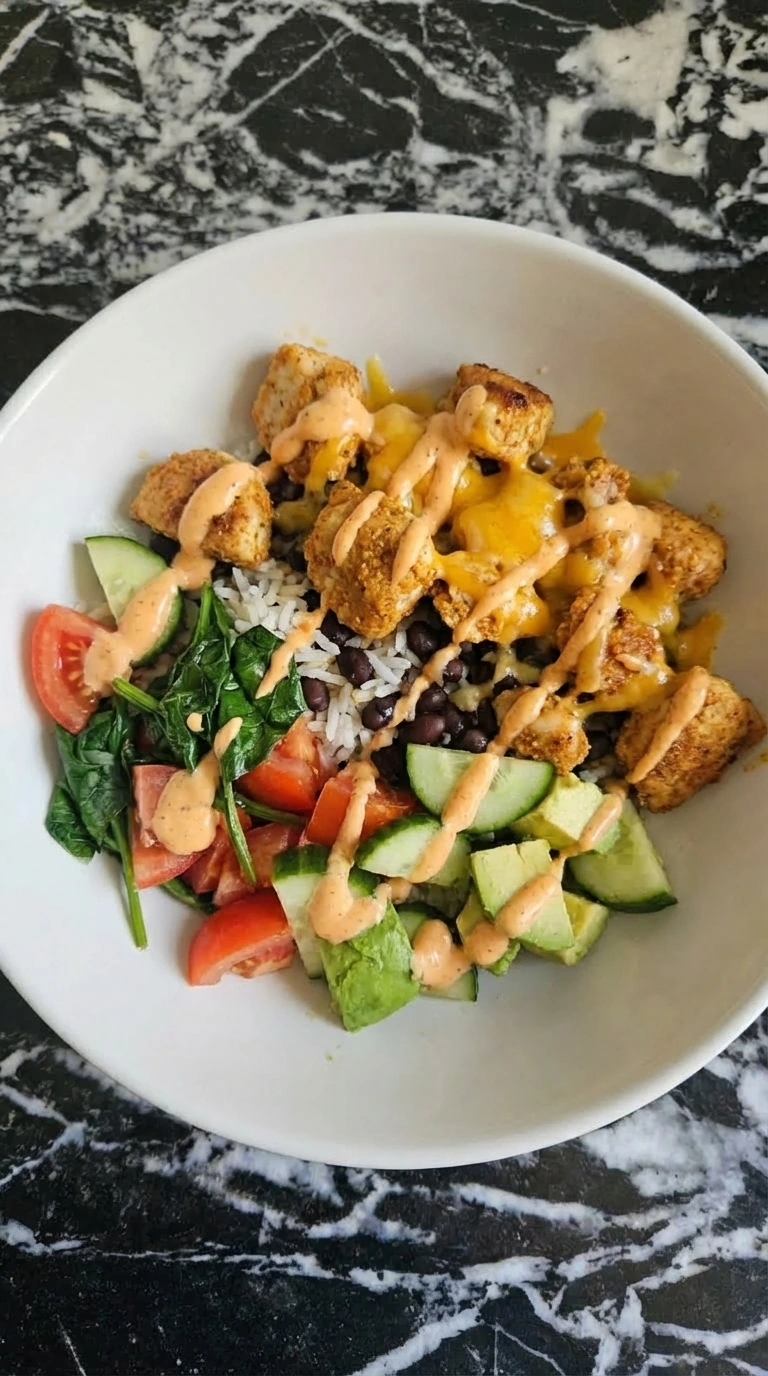
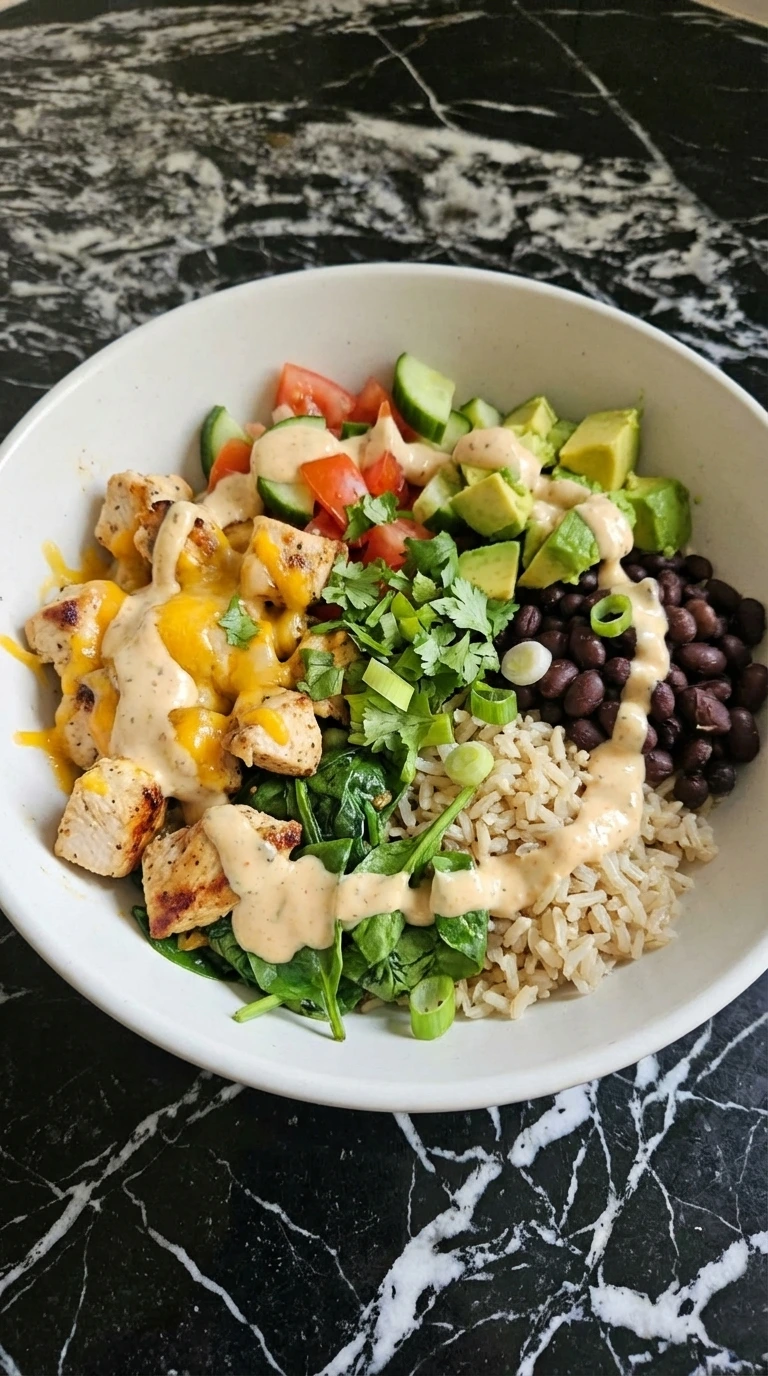
Scatter the tomatoes, cucumber, and avocado over the top with casual spacing and a little overlap so they look tucked naturally into the bowl rather than placed in lines. Drizzle the thick sauce over part of the chicken and some of the rice, leaving other areas uncovered so the colors and textures still show through. Now the bowl starts to look complete. The fresh toppings contrast with the softened base, the sauce sits in uneven ribbons, and the melted cheese peeks out between ingredients instead of being hidden under a perfectly arranged layer.
-
Transfer the finished High Protein Chicken Bowl to a clean matte white ceramic serving bowl and nudge the ingredients just enough to look abundant without becoming neat. The chicken should appear fully cooked with slight golden-brown edges, the sauce should look rich and thick in some spots, and the cheese should be visibly melted in irregular areas across the bowl. Scatter the cilantro and green onions over the top for a fresh final layer. The finished bowl should look hearty, homemade, and ready to serve, with uneven browning, softened textures, and a naturally imperfect arrangement that shows the full journey from raw ingredients to a fully cooked dish.

Notes
Frequently Asked Questions
Yes, just keep everything separate and assemble when ready to eat. This keeps the textures fresh. The chicken reheats well in about 2 minutes in the microwave.
You can, but it’s best slightly warm. The cheese softens and the flavors come through more. Cold works in a pinch but feels less balanced.
Don’t overcook it. Stick to 8 to 10 minutes at 400°F and let it rest briefly. The yogurt coating helps lock in moisture if you don’t push it too far.
Wrap Up
This is the kind of bowl you’ll come back to again and again.
It’s filling, flexible, and easy to tweak.
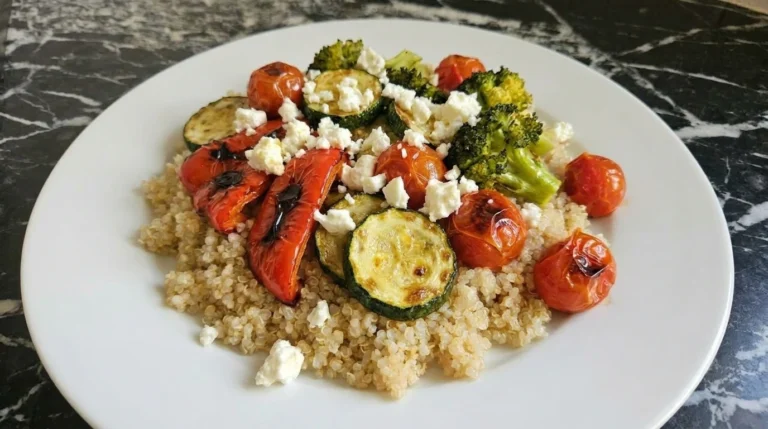
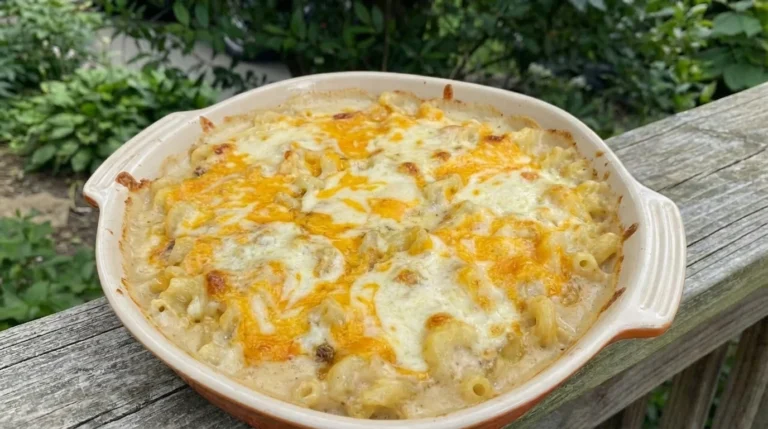
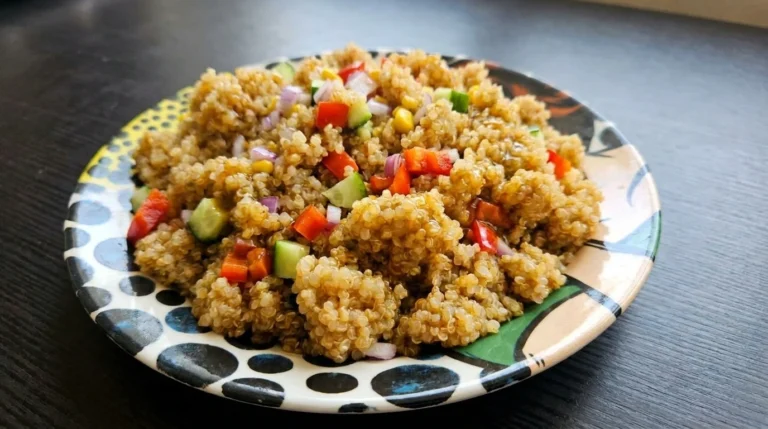
If you liked this, you’ll probably enjoy the Quinoa Veggie Bowl too.
Layered bowls like this gained traction in meal prep culture because they hold texture better than mixed dishes when stored.