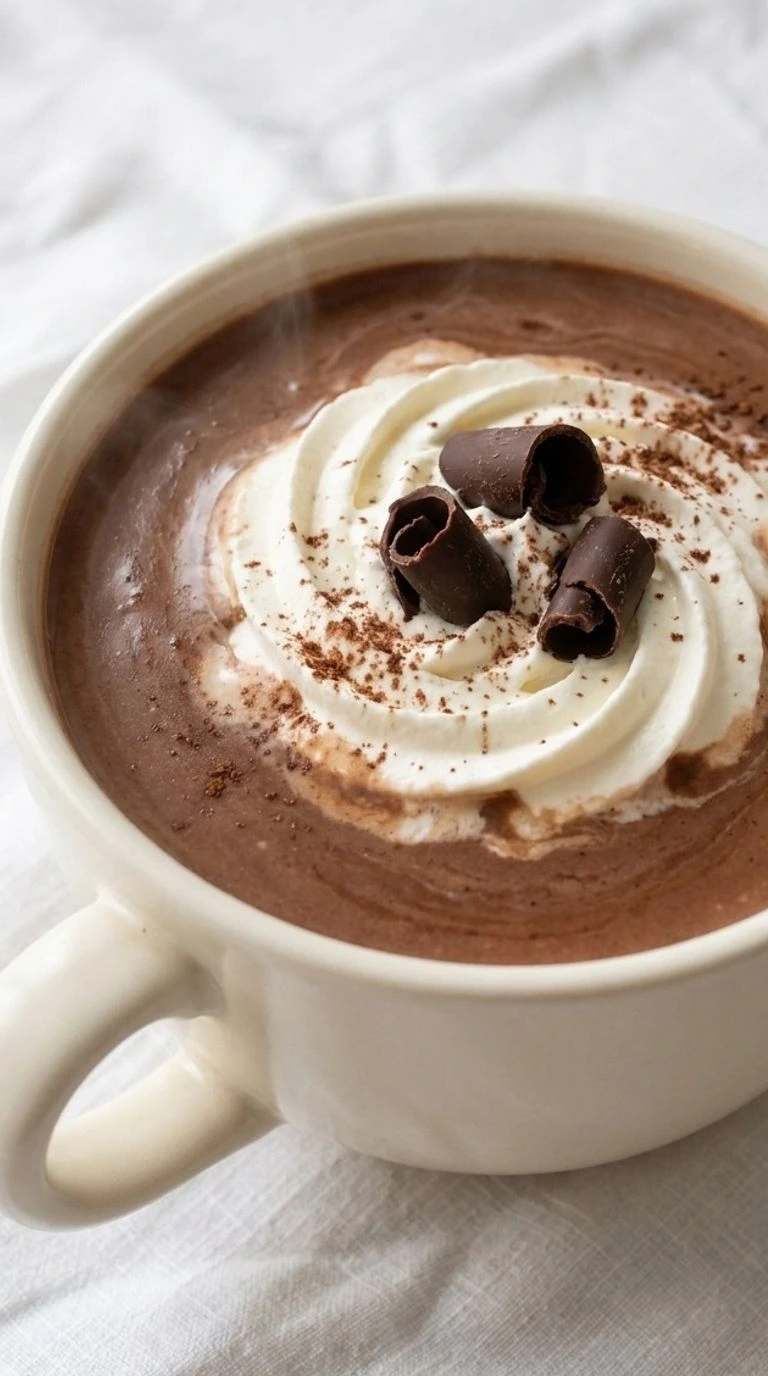
Cranberry Orange Scones
The smell of fresh orange zest and warm butter makes these Cranberry Orange Scones hard to resist. They’re packed with sweet cranberries and have crisp golden edges with soft centers that almost melt in your mouth. Add a little orange glaze on top and breakfast suddenly feels like something worth getting out of bed for. So good. Hi! Meet your new breakfast favorite.
These easy cranberry orange scones are buttery and tender with bright citrus flavor and little bursts of cranberry in every bite. They’re the kind of thing you’ll want to bake on a quiet Sunday morning or bring to a Christmas brunch when everyone wants something sweet with their coffee. And they’re much easier than they look. If you’re planning a full breakfast spread, our Overnight Breakfast Casserole makes a great savory dish alongside them. That’s right. We’re calling upon cold butter and fresh orange zest to turn a few pantry staples into the kind of homemade scones you’d expect from a little bakery.

And those ruby red cranberries? They make each bite sweet and tangy without taking over the orange flavor. The dough needs just a little care and a short chill before baking. That’s all. No fancy skills needed.
Why This Recipe Works
Cold unsalted butter is what gives Cranberry Orange Scones their crumbly edges and tender centers. When the small butter pieces hit a 400°F oven they release steam and leave tiny gaps in the dough. That’s why rubbing the butter into fine paste won’t give you the same result.
Fresh orange zest also adds more flavor than juice alone because its fragrant oils spread through the flour. Then there’s the 15-minute chill before baking. It firms the butter and helps the wedges keep their shape as they rise.
If you’re making a holiday brunch spread, pair these with our Crockpot Breakfast Casserole for a savory option.
Ingredients
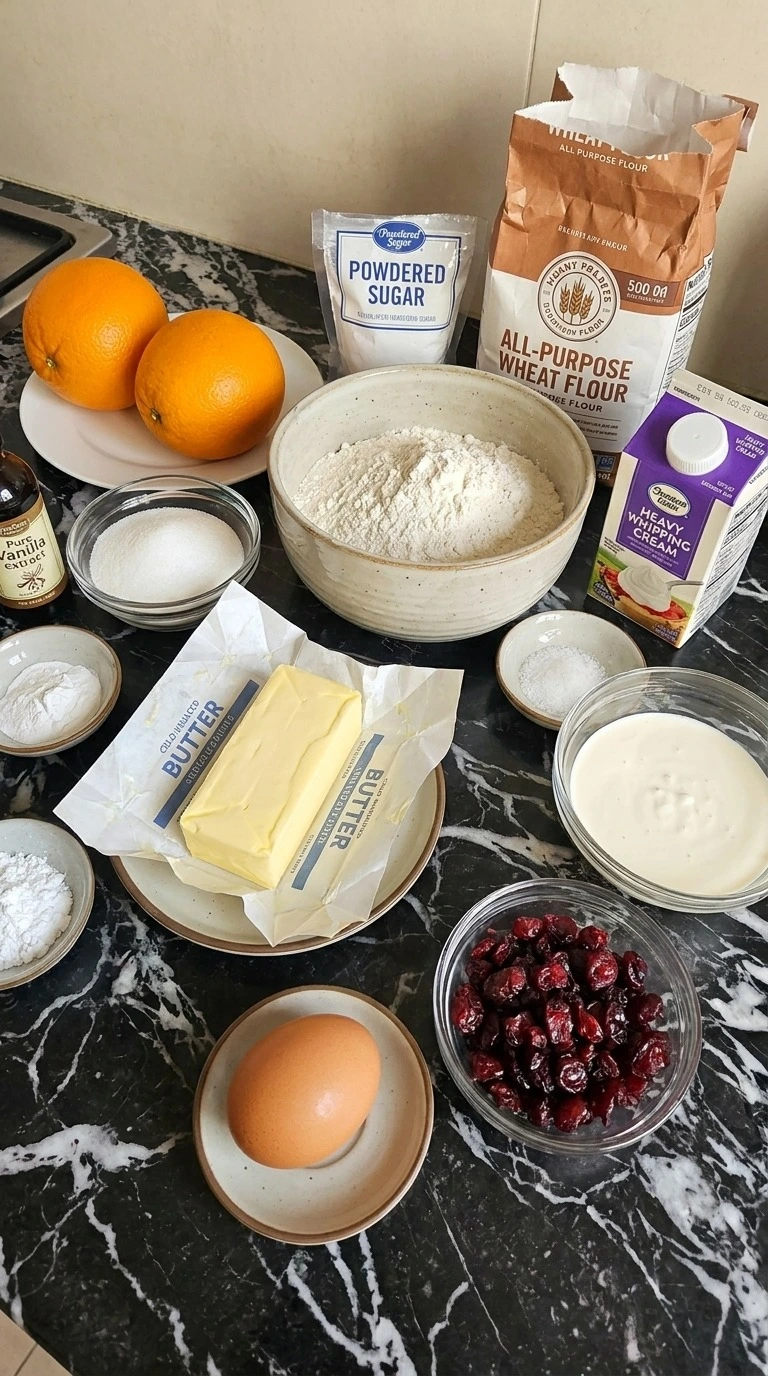
- All-purpose wheat flour: Spoon into the measuring cup and level it off to give the scones a tender but sturdy structure.
- Granulated white sugar: Sweetens the dough without overwhelming the tart cranberry flavor and helps the edges turn golden.
- Baking powder: Use fresh baking powder to help the thick triangular wedges rise in the oven.
- Fine sea salt: Balances the sugar and brings out the butter and orange flavors.
- Navel orange: Wash and dry before zesting the whole orange, then squeeze 2 tablespoons of juice for the glaze.
- Unsalted butter: Keep cold and cut into small cubes so the scones develop flaky layers during baking.
- Sweetened dried cranberries: Use soft and plump dried cranberries for little bursts of sweet-tart flavor throughout the dough.
- Heavy whipping cream: Use 1/2 cup cold in the dough and reserve 1 tablespoon for brushing the unbaked tops.
- Large egg: Whisk with the cold cream to bind the dough and give the crumb a soft texture.
- Pure vanilla extract: Adds a gentle sweet aroma that complements the orange and cranberries.
- Powdered sugar: Sift if lumpy and mix with fresh orange juice to make a smooth citrus glaze.
Kitchen Equipment
- Large mixing bowl: A 3 to 4-quart bowl gives you room to fold the dough gently, while a smaller bowl crowds the mixture and encourages overmixing.
- Medium mixing bowl: A 1-quart bowl holds the egg and cream mixture, and a smaller bowl can work if it has enough room to whisk without splashing.
- Small mixing bowl: A 1-cup bowl works for the orange glaze, while a shallow dish makes it harder to whisk without spilling.
- Pastry cutter: A pastry cutter with sturdy metal blades breaks cold butter into pea-sized crumbs, but clean fingertips work if you move quickly.
- Balloon whisk: An 8 to 10-inch whisk blends the dry ingredients and smooths the glaze, while a small fork works for the liquid mixture.
- Rubber spatula: A flexible medium spatula folds the wet ingredients into the flour without crushing the butter, while a stiff spoon may overwork the dough.
- Citrus zester: A fine Microplane-style zester removes thin orange zest without the bitter white pith, while a coarse grater leaves larger pieces.
- Citrus juicer: A small handheld citrus juicer extracts fresh orange juice for the glaze, but squeezing by hand also works if you remove any seeds.
- Baking sheet: A heavy 13 by 18-inch rimmed baking sheet holds all 8 scones with proper spacing, while a thin tray may brown their bottoms too fast.
- Parchment paper: An oven-safe parchment sheet rated for at least 400°F prevents sticking, while wax paper isn’t safe for this baking temperature.
- Sharp knife or bench scraper: A straight-edged knife or 6-inch bench scraper cuts eight clean wedges without dragging the dough, while a dull blade compresses the edges.
- Cooling rack: A wire cooling rack at least 10 inches wide allows air to move beneath the baked scones, preventing moisture from softening their bottoms.
- Measuring cups and spoons: Standard US measuring cups and spoons keep the flour and liquids in proportion, while an inaccurate oversized scoop can produce dry dough.
- Instant-read thermometer: An instant-read thermometer with a thin probe checks thick scone centers near 200°F, while a bulky probe can break their tender crumb.
How to Make It
Step 1: Rub cold butter into the flour mixture
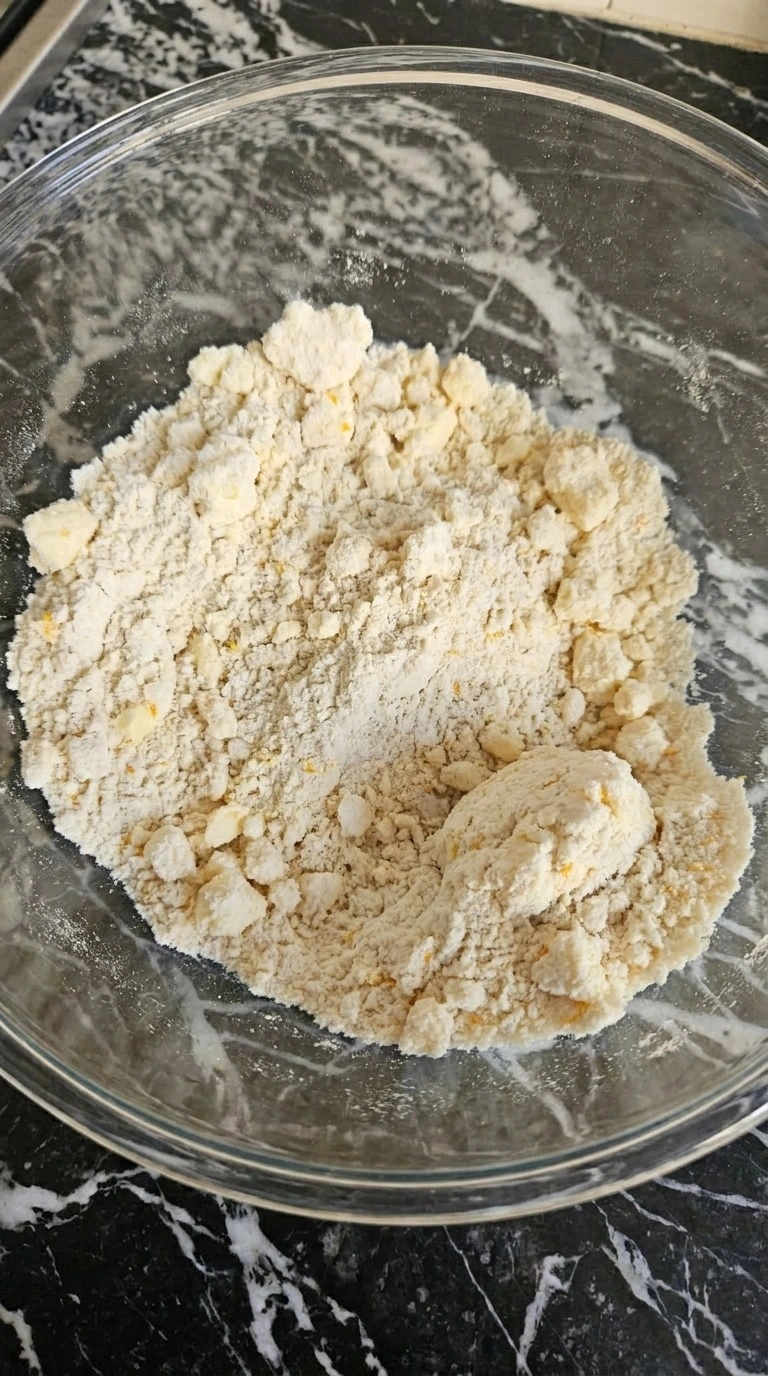
Start by setting your oven to 400°F and lining a large baking sheet with parchment paper. In a large mixing bowl whisk together 2 cups of all-purpose wheat flour, 1/3 cup of granulated white sugar, 1 tablespoon of baking powder and 1/2 teaspoon of fine sea salt. Add the finely grated zest of 1 large navel orange. Next cut 1/2 cup of cold unsalted butter into small cubes and work it through the flour with your fingertips or a pastry cutter for 2 to 3 minutes.
Stop when you see coarse crumbs with some pea-sized butter pieces. Don’t make a smooth paste. The mixture should look rough and a little uneven. That’s good.
You might smell the orange as its zest mixes with the sugar and flour. If you rub the butter too long it softens and the scones lose their flaky texture. Keep the butter cold so small pockets of steam can form during baking.
Tip: For easier handling, freeze the butter for 10 minutes before cutting it into cubes. Keep the unused portion chilled until you’re ready.
Step 2: Fold the cream mixture and cranberries into the dough
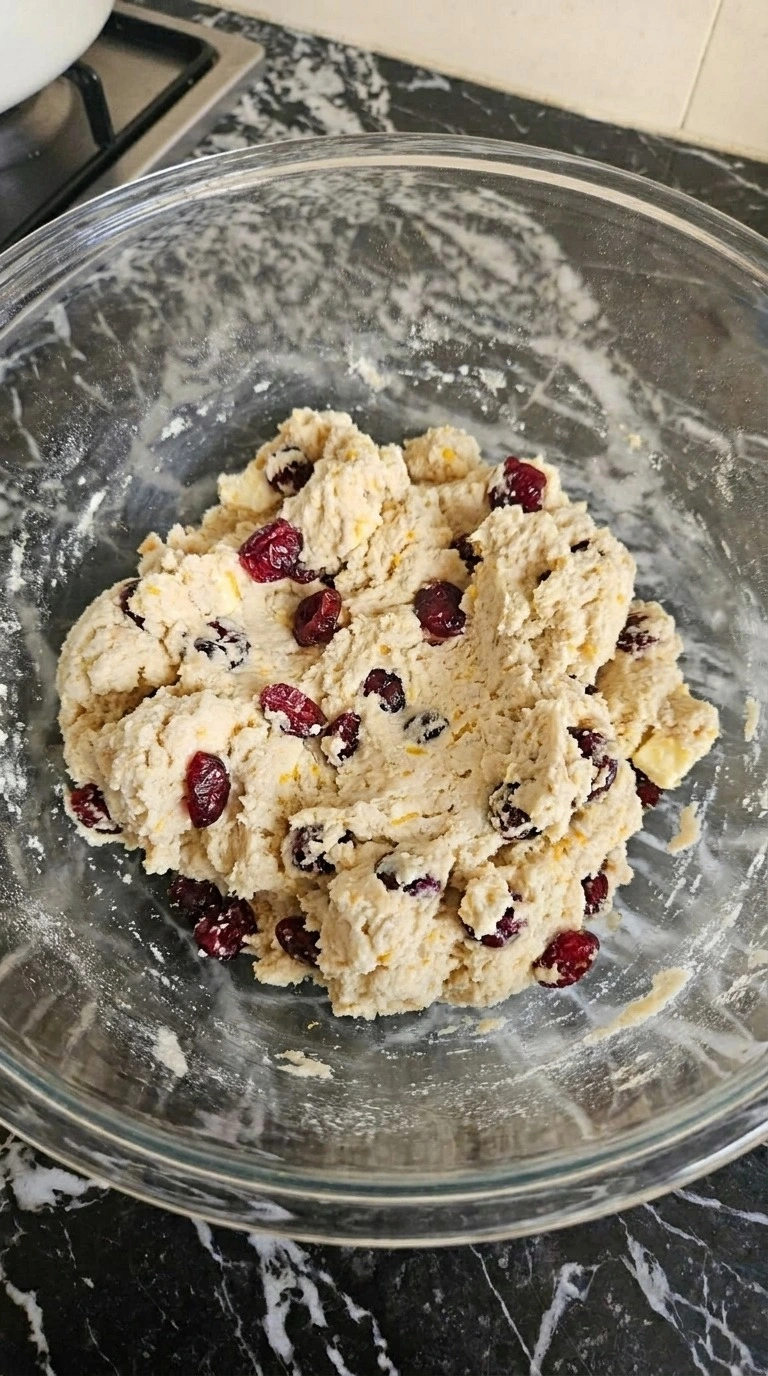
In a separate small bowl whisk 1 large egg with 1/2 cup of cold heavy whipping cream and 1 teaspoon of pure vanilla extract for about 30 seconds. Pour this mixture over the butter crumbs. Then add 3/4 cup of sweetened dried cranberries. Use a rubber spatula to fold everything together with slow strokes for 45 to 60 seconds.
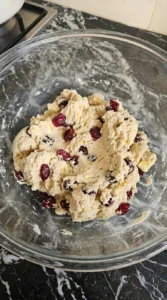
Scrape the bottom as you turn the mixture so the dry flour gets damp without crushing the butter. Stop as soon as the dough forms rough clumps. A few dry-looking patches are fine. You’ll see red cranberry pieces tucked into a pale and slightly sticky dough.
Some crumbs may still sit at the edges. That’s normal. Keep the mixture rough because too much stirring builds gluten and makes the baked wedges firm instead of tender.
Tip: If your dried cranberries feel unusually hard, soak them in warm water for 5 minutes and dry them very well before mixing.
Step 3: Shape the dough and cut eight wedges
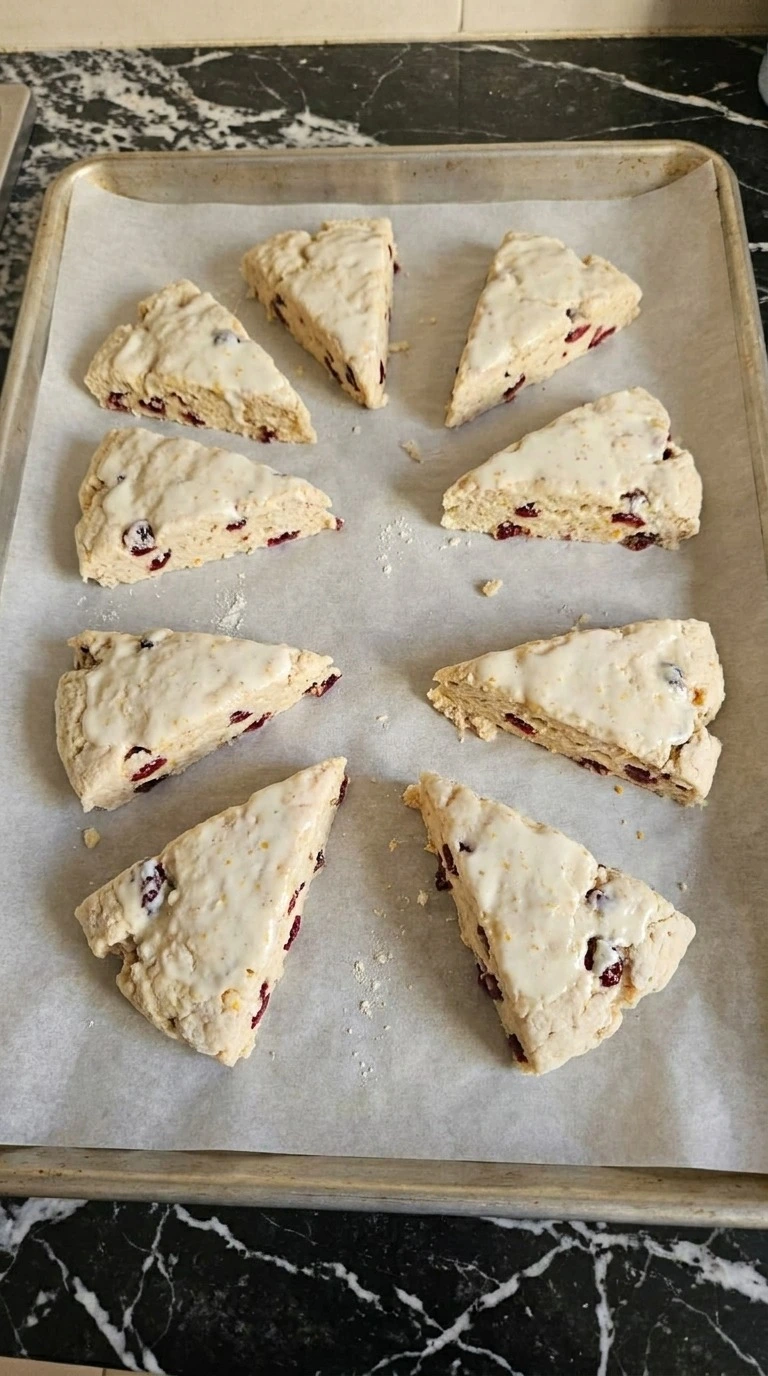
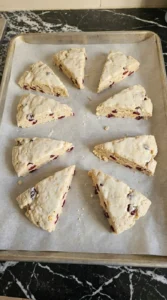
Turn the shaggy dough onto a lightly floured work area and bring it together with 3 or 4 gentle folds. Press it into a round disc about 7 inches wide and 1 inch thick. Don’t knead it like bread. Then cut straight through the disc to make 8 triangular wedges.
Place them on the parchment-lined baking sheet with about 2 inches between each piece. Brush the tops with 1 tablespoon of cold heavy whipping cream. Finally chill the shaped wedges in the refrigerator at about 40°F for 15 minutes while the oven finishes heating. The wedges should hold their shape but still have rough edges and visible cranberry pieces.
If the dough feels greasy or spreads while you cut it, the butter has warmed too much. Chill it before baking. Cold dough helps the scones rise before their edges spread.
Tip: Use a sharp straight-edged cutter and press down once for each cut. Twisting or sawing can pinch the dough’s edges.
Step 4: Bake the wedges until their edges turn golden
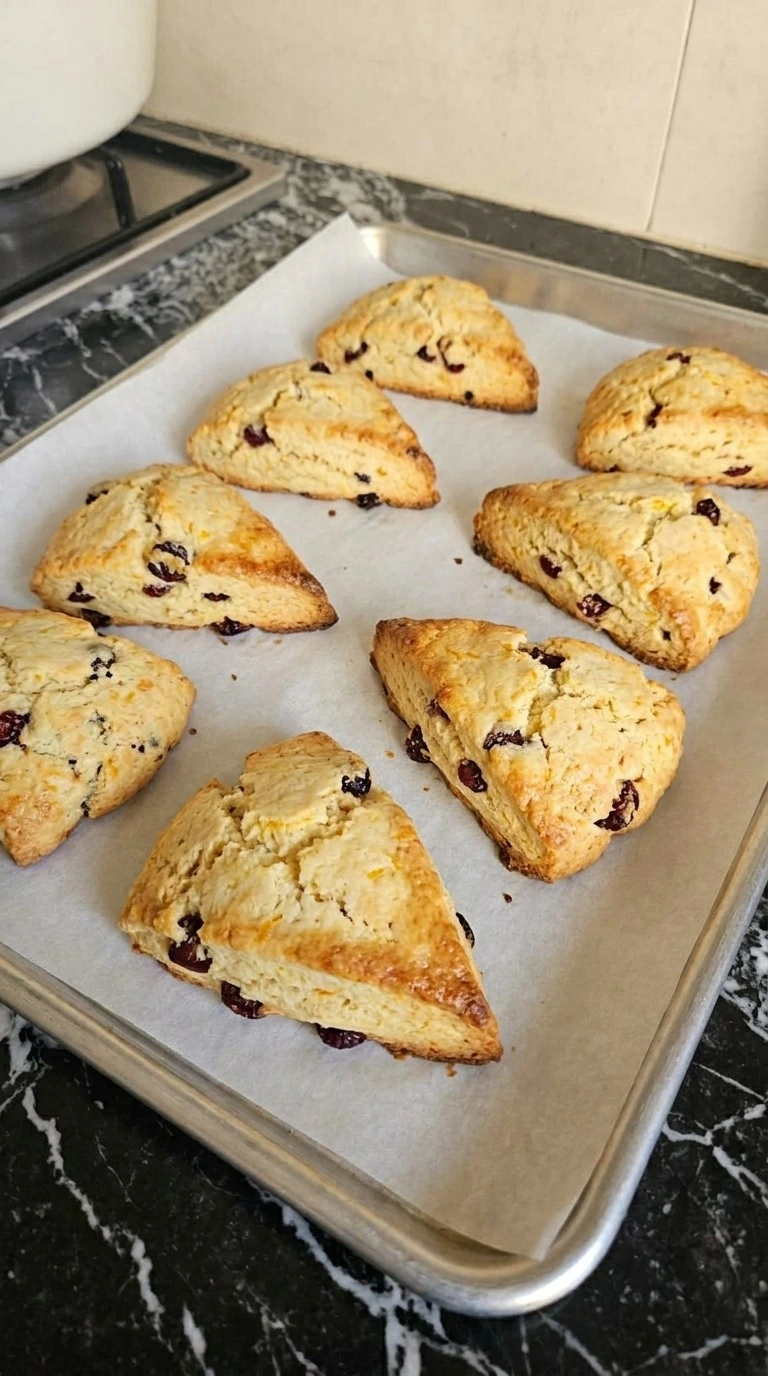
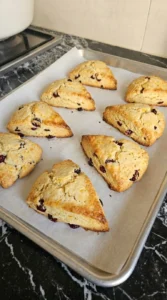
Slide the chilled baking sheet onto the middle rack of the 400°F oven. Bake for 18 to 22 minutes and check the color at minute 18. The wedges should rise and form light golden tops with deeper golden edges. Rotate the baking sheet halfway through if your oven browns more on one side.
Then take the tray out and let the scones rest on it for 5 minutes before moving them to a cooling rack. Give them another 10 to 15 minutes to cool before adding glaze. The tops should feel set and the centers should look pale and crumbly rather than wet. You’ll also smell warm butter and orange zest.
Leave them too long and the edges dry out. Pull them when the centers are set because the hot tray keeps them warm as they rest.
Tip: Check one center with an instant-read thermometer if the wedges are unusually thick. A reading near 200°F confirms the middle has baked through.
Step 5: Whisk the orange glaze and finish the scones
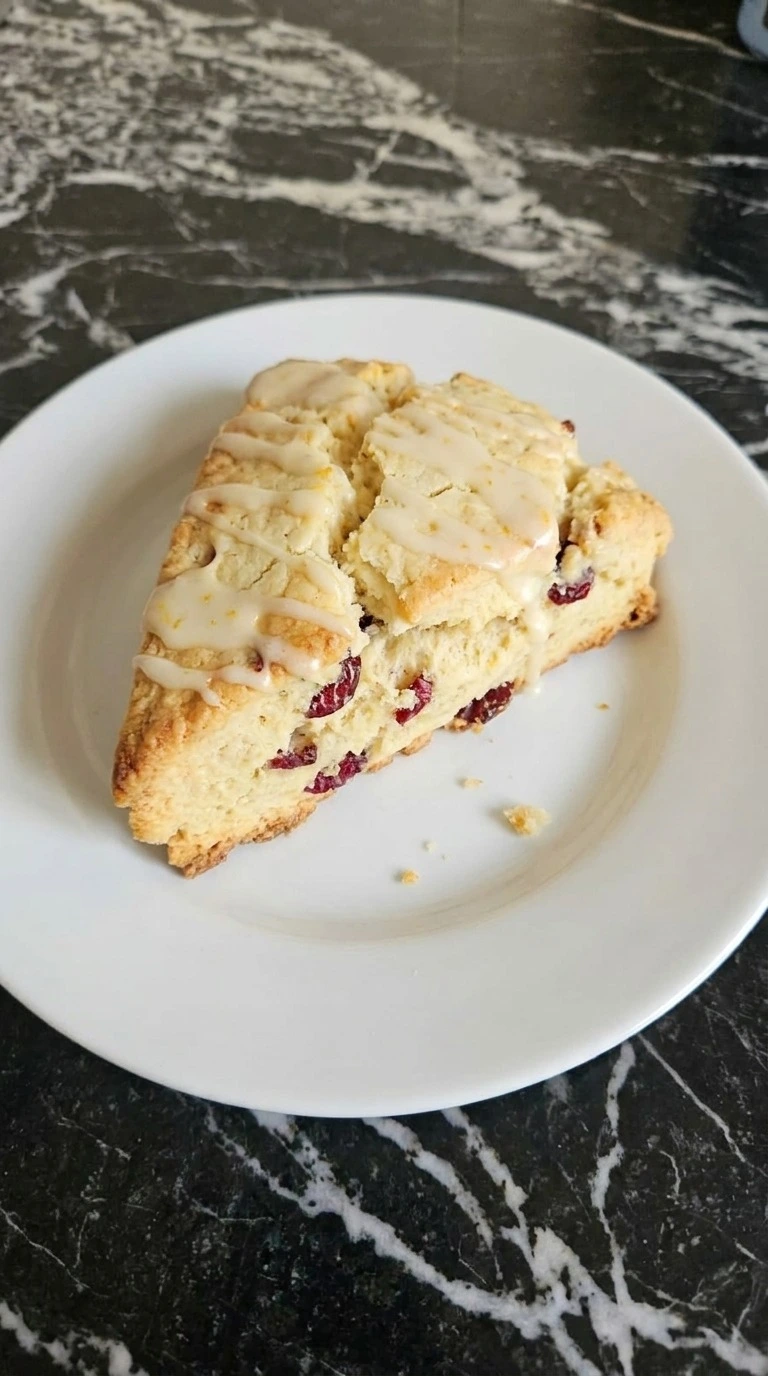
While the baked scones cool, whisk 3/4 cup of powdered sugar with 1 1/2 tablespoons of fresh navel orange juice for 30 to 45 seconds. The glaze should flow slowly from a spoon rather than run like water. Add the remaining 1/2 tablespoon of juice only if it’s too thick to drizzle.
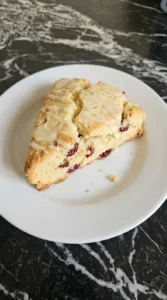
Once the scones have cooled for at least 15 minutes, drizzle the glaze over their tops and let it set for 10 minutes. Then move one wedge to a white serving plate and gently split it to show the soft center. You’ll see thin white ribbons over the golden crust with a few drips along the rough sides.
The glaze should feel lightly set rather than wet. If you add it while the scones are too hot, it’ll soak in and vanish. Cooling protects the crust and helps the glaze hold its shape.
Tip: For a sharper citrus finish, rub 1/4 teaspoon of extra finely grated navel orange zest into the glaze before drizzling.
Pro Tips
- Keep the unsalted butter below 50°F while mixing the dough. If it starts feeling soft or greasy, chill the crumb mixture for 5 minutes before adding the cream.
- Measure 2 cups of all-purpose wheat flour by spooning it into the measuring cup and leveling the top. Packed flour makes the dough dry and harder to shape.
- Choose a large navel orange with firm skin and a strong citrus smell. Grate only the orange outer layer because the white pith tastes bitter.
- Leave about 2 inches between the 8 wedges on the baking sheet. This gives each scone enough room to rise and develop crisp edges.
- Use a heavy 13 by 18-inch baking sheet for more even heat. Thin dark trays can make the bottoms brown too quickly at 400°F.
- Check the scones after 18 minutes of baking instead of relying only on the timer. Look for golden edges and tops that feel set.
- Don’t add extra flour just because the dough looks rough. A few loose crumbs are normal and adding more than 1 tablespoon can make the baked centers dry.
- For a brighter finish, stir 1/4 teaspoon of finely grated navel orange zest into the glaze. The fresh zest adds citrus aroma without making the icing thinner.
- Add 1/3 cup of finely chopped toasted pecans to the dough for a nutty version with extra crunch and a warm holiday flavor.
- Mix 1/2 teaspoon of ground cinnamon into the dry ingredients for gently spiced cranberry orange wedges that smell lovely while baking.
- Replace 1/4 cup of the sweetened dried cranberries with 1/4 cup of dried blueberries for a mixed-berry version with a milder tartness.
- Skip the orange glaze and sprinkle 1 tablespoon of coarse turbinado sugar over the cream-brushed wedges before baking for a crisp sugary crust.
Substitutions & Variations
- Heavy whipping cream: Replace with an equal amount of cold full-fat canned coconut milk. Use 1/2 cup in the dough and 1 tablespoon for brushing. The crumb will taste slightly of coconut and may be less rich. For a fully dairy-free batch, replace the unsalted butter with an equal amount of cold plant-based baking butter.
- All-purpose wheat flour: Replace with 2 cups of a gluten-free 1-to-1 baking flour blend containing xanthan gum. The dough may need 1 to 2 extra tablespoons of heavy whipping cream because gluten-free blends absorb moisture differently. Expect a slightly more delicate crumb. Let the baked wedges cool for 15 minutes before moving them.
- Large egg: Use 3 tablespoons of plain unsweetened dairy yogurt instead of 1 large egg. This egg-free version has a softer and slightly denser texture. Chill the shaped wedges for 20 minutes before baking because the dough may spread more. Choose plain yogurt without added sugar to keep the sweetness balanced.
- Sweetened dried cranberries: Replace with 3/4 cup of chopped dried tart cherries. The flavor becomes sweeter and less sharp while the texture stays pleasantly chewy. If you love cranberry desserts, our Cranberry White Chocolate Cookies are another lovely option for holiday baking.
- Navel orange: Use the finely grated zest of 2 small clementines and 2 tablespoons of fresh clementine juice. Clementines give the scones a softer and sweeter citrus flavor. You’ll still get a fragrant glaze, but it won’t taste quite as sharp. Avoid bottled juice because it lacks the fresh aroma that makes these wedges stand out.
Storage Instructions
Store leftover Cranberry Orange Scones in an airtight container in the refrigerator for up to 5 days. Place a piece of parchment paper between layers so the glaze doesn’t stick. For longer storage, wrap each fully cooled scone in plastic wrap and place it in a freezer-safe bag for up to 2 months.
The glaze can become damp after thawing so unglazed scones freeze best. At room temperature, keep them in a sealed container for up to 2 days. To reheat, place an unglazed scone in a 300°F oven for 6 to 8 minutes or until warm in the center.
Add fresh glaze after reheating if needed. Discard scones that show mold or develop an unusual smell. Don’t reheat spoiled food.
Cranberry Orange Scones
Ingredients
Method
- Start by setting your oven to 400°F and lining a large baking sheet with parchment paper. In a large mixing bowl whisk together 2 cups of all-purpose wheat flour, 1/3 cup of granulated white sugar, 1 tablespoon of baking powder and 1/2 teaspoon of fine sea salt. Add the finely grated zest of 1 large navel orange. Next cut 1/2 cup of cold unsalted butter into small cubes and work it through the flour with your fingertips or a pastry cutter for 2 to 3 minutes. Stop when you see coarse crumbs with some pea-sized butter pieces. Don’t make a smooth paste. The mixture should look rough and a little uneven. That’s good. You might smell the orange as its zest mixes with the sugar and flour. If you rub the butter too long it softens and the scones lose their flaky texture. Keep the butter cold so small pockets of steam can form during baking.
- In a separate small bowl whisk 1 large egg with 1/2 cup of cold heavy whipping cream and 1 teaspoon of pure vanilla extract for about 30 seconds. Pour this mixture over the butter crumbs. Then add 3/4 cup of sweetened dried cranberries. Use a rubber spatula to fold everything together with slow strokes for 45 to 60 seconds. Scrape the bottom as you turn the mixture so the dry flour gets damp without crushing the butter. Stop as soon as the dough forms rough clumps. A few dry-looking patches are fine. You’ll see red cranberry pieces tucked into a pale and slightly sticky dough. Some crumbs may still sit at the edges. That’s normal. Keep the mixture rough because too much stirring builds gluten and makes the baked wedges firm instead of tender.
- Turn the shaggy dough onto a lightly floured work area and bring it together with 3 or 4 gentle folds. Press it into a round disc about 7 inches wide and 1 inch thick. Don’t knead it like bread. Then cut straight through the disc to make 8 triangular wedges. Place them on the parchment-lined baking sheet with about 2 inches between each piece. Brush the tops with 1 tablespoon of cold heavy whipping cream. Finally chill the shaped wedges in the refrigerator at about 40°F for 15 minutes while the oven finishes heating. The wedges should hold their shape but still have rough edges and visible cranberry pieces. If the dough feels greasy or spreads while you cut it, the butter has warmed too much. Chill it before baking. Cold dough helps the scones rise before their edges spread.
- Slide the chilled baking sheet onto the middle rack of the 400°F oven. Bake for 18 to 22 minutes and check the color at minute 18. The wedges should rise and form light golden tops with deeper golden edges. Rotate the baking sheet halfway through if your oven browns more on one side. Then take the tray out and let the scones rest on it for 5 minutes before moving them to a cooling rack. Give them another 10 to 15 minutes to cool before adding glaze. The tops should feel set and the centers should look pale and crumbly rather than wet. You’ll also smell warm butter and orange zest. Leave them too long and the edges dry out. Pull them when the centers are set because the hot tray keeps them warm as they rest.
- While the baked scones cool, whisk 3/4 cup of powdered sugar with 1 1/2 tablespoons of fresh navel orange juice for 30 to 45 seconds. The glaze should flow slowly from a spoon rather than run like water. Add the remaining 1/2 tablespoon of juice only if it’s too thick to drizzle. Once the scones have cooled for at least 15 minutes, drizzle the glaze over their tops and let it set for 10 minutes. Then move one wedge to a white serving plate and gently split it to show the soft center. You’ll see thin white ribbons over the golden crust with a few drips along the rough sides. The glaze should feel lightly set rather than wet. If you add it while the scones are too hot, it’ll soak in and vanish. Cooling protects the crust and helps the glaze hold its shape.
Notes
Frequently Asked Questions
Yes. Shape the dough into 8 wedges and place them on a parchment-lined baking sheet. Cover tightly and refrigerate for up to 12 hours. The next morning you can bake them straight from the refrigerator at 400°F. Start checking after 18 minutes and allow another 2 minutes if the dough is very cold.
Warm butter is often the problem because it melts before the dough has time to set. Keep your butter cold and chill the shaped wedges for 15 minutes before baking. Also check that your baking powder is fresh. A 400°F oven gives the dough a strong initial rise while helping the outside hold its shape.
Yes, but fresh cranberries make the scones noticeably more tart. Chop 3/4 cup of fresh cranberries into halves or quarters and pat them dry before folding them into the dough. Fresh berries release more moisture during baking, so allow another 2 to 3 minutes at 400°F if the centers still look damp.
They’re best on the day you bake them because the edges stay crisp and the centers remain tender. Keep leftovers in an airtight container for up to 2 days at room temperature or 5 days in the refrigerator. For longer storage, freeze individual scones for up to 2 months and thaw them before reheating.
Absolutely. Double every ingredient and divide the dough into 2 separate discs before cutting 16 wedges. Arrange them across 2 large baking sheets with about 2 inches between pieces. Bake at 400°F and rotate the trays halfway through if you’re using two oven racks. Check for golden edges after 18 minutes.
These buttery wedges taste lovely with black tea or hot coffee and a little salted butter. For Christmas breakfast, add scrambled eggs or fresh fruit to make the meal more filling. You can also serve them with our Non Alcoholic Christmas Punch when you’re feeding guests at a holiday gathering.
Yes. Freeze the 8 shaped wedges in a single layer for about 2 hours and then transfer them to a sealed freezer bag. They’ll keep for up to 2 months. Bake straight from frozen at 400°F for 22 to 26 minutes and brush with cream before baking. Add the orange glaze after they’ve cooled.
Final Thoughts
A warm bite of Cranberry Orange Scones with that sweet orange glaze makes me wish I’d found this recipe years ago. It would have saved me so many last-minute Christmas breakfast plans. But now that I’ve got this easy cranberry orange scones recipe, I make it whenever I want something special without spending the whole morning in the kitchen.
The cold butter and fresh orange zest really make this version worth keeping. If you enjoyed these, check out our Cranberry White Chocolate Cookies or Christmas Fruit Salad for more holiday ideas. And leave a comment if you try them.
I read every one and it really makes my day. It works just as well when you are after christmas cranberry orange scones.
Scones have been part of British baking for centuries, though the exact origin of their name is still debated. Traditional versions are often served plain or with dried fruit. Adding cranberries and fresh orange zest gives the old favorite a bright seasonal twist. And those little red cranberry pieces make the wedges look festive without a drop of food coloring.