Halloween Pumpkin Cookies Royal Icing
Once you decide you want real pumpkin shapes with clean orange icing in every bite, Halloween Pumpkin Cookies Royal Icing suddenly gets harder than it sounds. I wanted crisp edges and a soft center, not cookies that puffed into blobs or icing that slid over the sides. That sounds simple. But the dough has to stay firm enough for sharp cutouts while still tasting buttery and tender after baking.
I really thought it would be simple: cut pumpkin shapes, bake them and cover the tops with orange royal icing. But every shortcut had problems. Warm dough spread in the oven, thick icing left ridges and thin icing ran straight off the cookies before I could add faces. Then I found that a short chill after cutting gave the dough enough structure, while a measured icing consistency made decorating far less fussy at home.
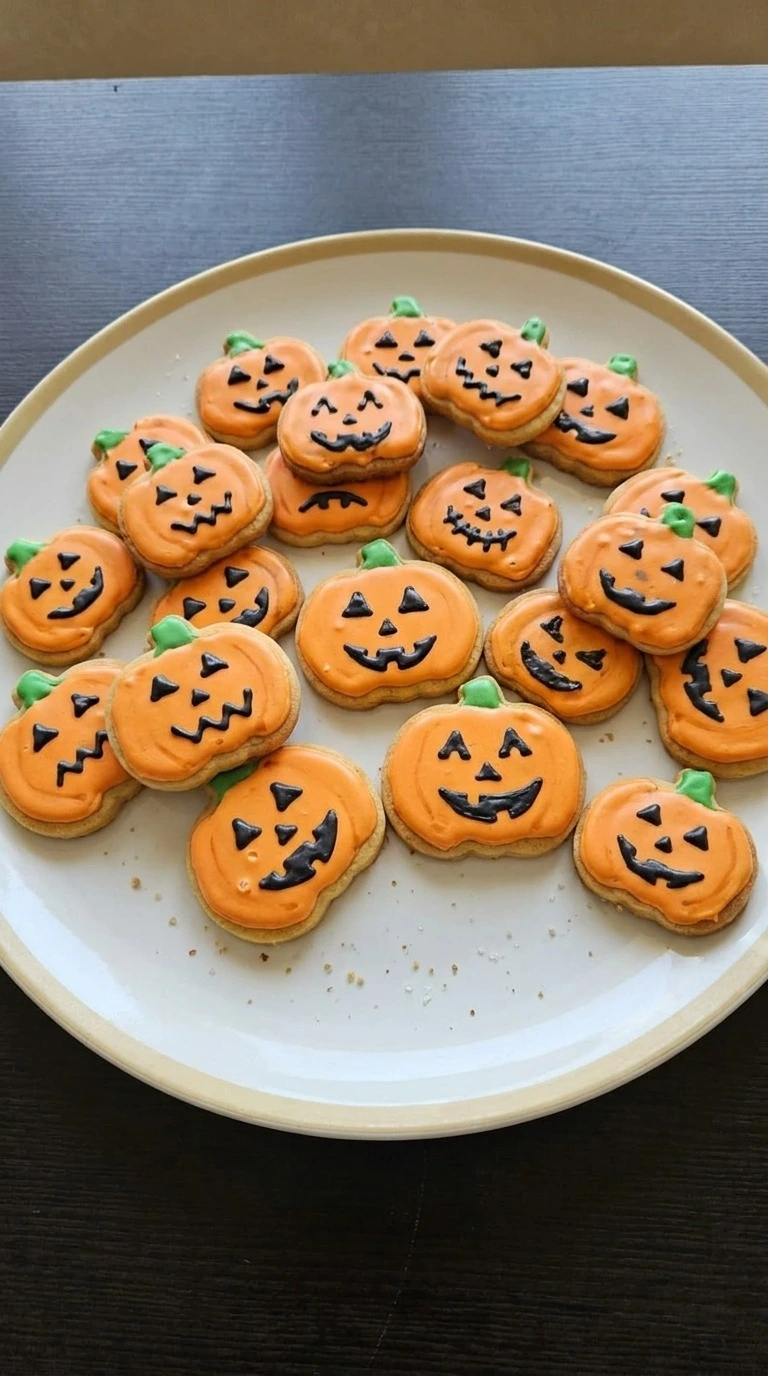
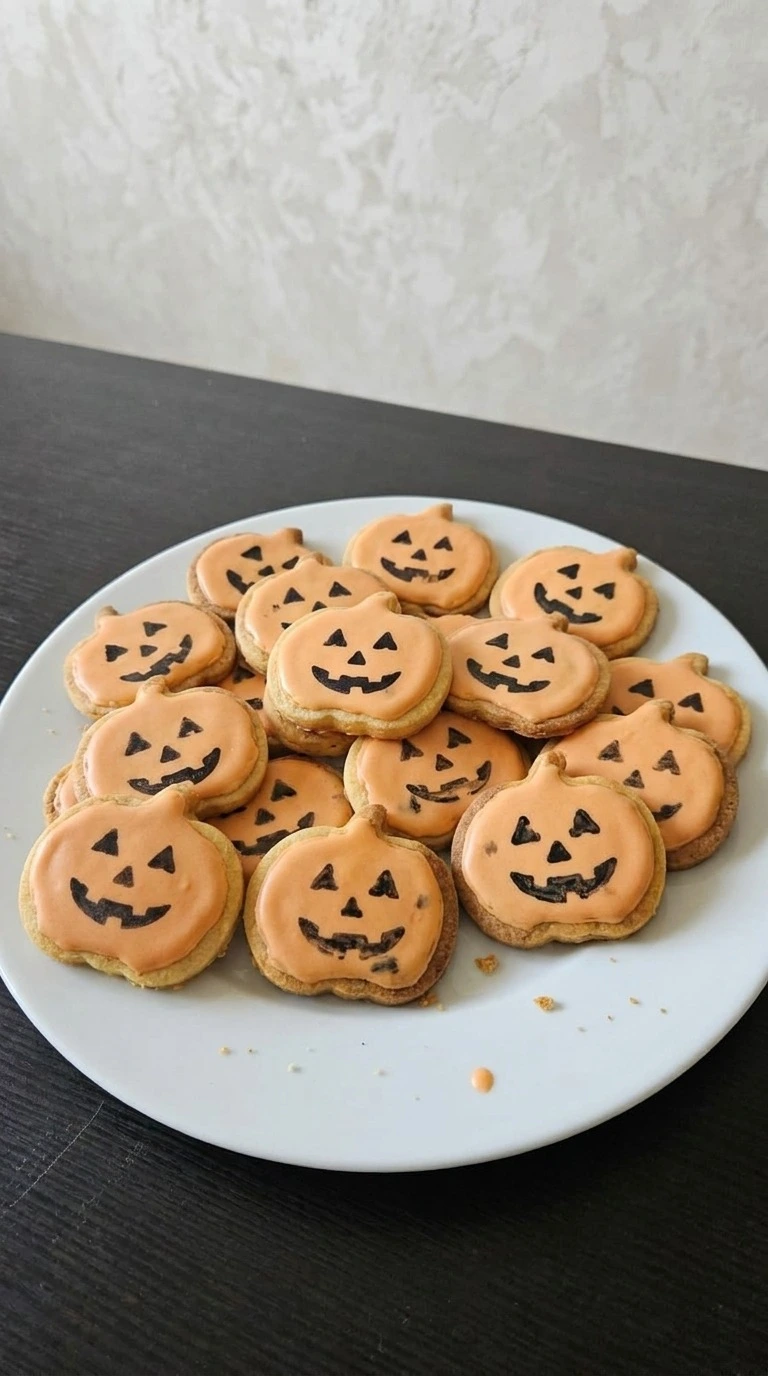
So this version keeps the cookie dough lightly spiced and the royal icing smooth enough to flood without turning watery. The pumpkin cookie shapes stay easy to recognize, and the black and green details still look homemade rather than factory neat. A little unevenness helps. You’ll get cookies that feel playful enough for Halloween but sturdy enough to stack on a party tray once the icing dries.
Why This Recipe Works
Halloween Pumpkin Cookies Royal Icing works best when the butter stays cool and the cut dough chills for 20 minutes before baking at 350°F. That pause firms the fat, so the pumpkin edges set before the butter can melt outward and blur the shape.
Small timing change, big payoff. For the icing, 10-second flood consistency gives enough flow to level itself without spilling over the baked edge, while thicker 20-second icing holds stems and faces cleanly.
Ingredients

- unsalted butter: Softened to about 68°F so it creams smoothly without becoming greasy.
- granulated cane sugar: Adds sweetness and helps the cookie edges bake with a light crispness.
- large egg: Use one whole egg to bind the dough without making the cutouts too soft.
- pure vanilla extract: Divide between the cookie dough and royal icing for a clean vanilla flavor.
- unbleached all-purpose flour: Spoon and level it so the dough stays firm enough to roll without turning dry.
- baking powder: Provides a small lift while keeping the pumpkin ridges recognizable.
- fine sea salt: Balances the sweetness and sharpens the butter and vanilla flavors.
- ground cinnamon: Adds a warm spice note without darkening the dough too much.
- confectioners’ sugar: Sift before mixing so the royal icing dries smooth with fewer lumps.
- meringue powder: Stabilizes the royal icing so it dries firm enough for stacking.
- water: Use 6 tablespoons to start the icing and add the extra amount by teaspoons only if needed.
- orange gel food coloring: Tint the largest icing portion to a clear pumpkin orange without thinning it like liquid dye.
- green gel food coloring: Color a small thick icing portion for pumpkin stems.
- black gel food coloring: Color a small thick icing portion for simple Halloween faces.
Kitchen Equipment
- Stand mixer or electric hand mixer: A mixer with medium and low speeds creams the butter and whips the icing evenly, while a weak single-speed mixer can overwork the dough or leave lumpy icing.
- 3-inch pumpkin cookie cutter: A rigid 3-inch cutter gives 24 clear pumpkin shapes, while a soft or bent cutter can leave warped ridges that spread unevenly.
- Rolling pin: A 12-inch rolling pin keeps the dough near 1/4 inch thick, while a very short pin makes even thickness harder across a full batch.
- Two half-sheet baking pans: Heavy 13 by 18-inch pans bake the cookies evenly with room between shapes, while thin dark pans can brown the bottoms before the centers set.
- Parchment paper or silicone baking mats: A flat liner prevents sticking and protects the pumpkin edges, while wrinkled paper can distort the base of soft cutouts.
- Wire cooling rack: A rack at least 12 inches wide lets air reach the cookies during the 30-minute cooling stage, while crowding them on a plate traps warmth underneath.
- Disposable piping bags: Small piping bags give close control for flooding and face details, while very large bags are harder to squeeze gently around 3-inch cookies.
How to Make It
Step 1: Cream the butter and build the cookie dough

Keep the unsalted butter near 68°F, then beat it with granulated cane sugar for 3 to 4 minutes until the mix looks pale and slightly fluffy. Add the large egg and pure vanilla extract, then beat for 30 seconds and scrape the bowl once. Next, whisk unbleached all-purpose flour with baking powder, fine sea salt and ground cinnamon, then mix it into the butter mixture on low just until no dry streaks remain.
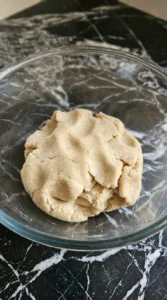
Stop there. Overmix for another minute and the cookies turn tougher because extra gluten develops. The dough should look smooth and soft but not shiny or greasy, and it should pull into one mass when pressed.
If it smears like frosting, it’s too warm. Cool mixing protects the tender crumb and sharp pumpkin shape.
Tip: If your kitchen is above 75°F, chill the mixed dough for 10 minutes before rolling so the butter doesn’t soften too fast.
Step 2: Roll cut and chill the pumpkin shapes
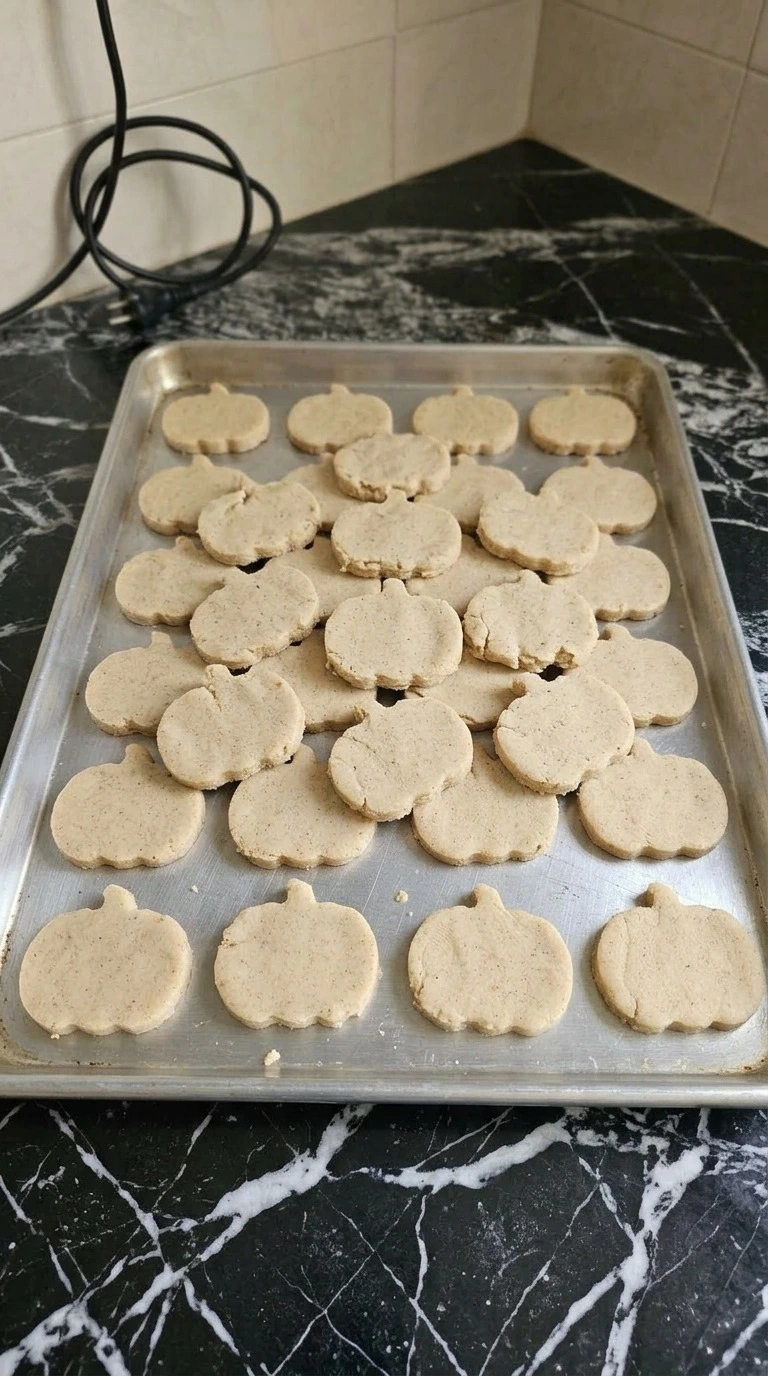
Roll the dough to 1/4 inch thick while it stays close to 68°F, then cut 24 pumpkin shapes and place them with about 1 inch of space between pieces. Press straight down instead of twisting so the edges stay clean, then reroll scraps only once and cut the remaining shapes. Chill the full tray at 38°F for 20 minutes.
(I used to skip this chill, and the pumpkins came out wider with soft ridges. Twenty minutes fixed it. ) Rush this stage and the warm butter spreads before the dough can set, which blurs Halloween Pumpkin Cookies Royal Icing before they reach the oven.
After chilling, each pumpkin should feel firm when lightly touched and the ridges should still look crisp. The shapes won’t bend when lifted. This rest firms the fat so the silhouette survives the oven.
Tip: Dip the cutter edge in flour after every 4 or 5 cookies, then tap off excess so flour doesn’t dry the surface.
Step 3: Bake the pumpkin cookies until the edges set

Bake the chilled shapes in a 350°F oven for 10 to 12 minutes, rotating the tray once at minute 6 so the front and back color evenly. Watch the bottom edge rather than the top. Remove the cookies when the centers look matte and the outer rims turn pale golden, then leave them on the tray for 5 minutes before moving them to cool for 30 minutes.
Go past 12 minutes and the thin edges dry out before the centers settle. For Halloween Pumpkin Cookies Royal Icing, full cooling matters before any icing touches the surface. You’ll smell warm butter and cinnamon right as the edges take on a light toast color.
The centers should feel set, not squishy. Cooling fully keeps the royal icing from melting or turning patchy.
Tip: Bake one test cookie first for 11 minutes if your oven runs hot, then adjust the full tray by 1 minute if needed.
Step 4: Whip and tint the royal icing

Keep the icing ingredients between 68°F and 72°F, then beat confectioners’ sugar with meringue powder and water for 5 to 6 minutes until the mixture forms soft glossy peaks. Mix in pure vanilla extract for 15 seconds. Next, divide the icing and tint the largest portion with orange gel food coloring, a small portion with green gel food coloring and another with black gel food coloring.
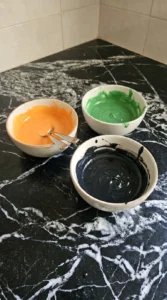
Thin the orange portion with 1 teaspoon water at a time until a ribbon disappears in 10 seconds. For Halloween Pumpkin Cookies Royal Icing, add too much water and the flood icing runs past the cookie edge. The orange icing should settle smooth after a counted 10 seconds, while the green and black portions should hold a line for about 20 seconds.
Gloss without bubbles is the cue. Measured water controls flow so the design sets cleanly.
Tip: Cover each icing portion whenever it sits longer than 2 minutes because exposed royal icing skins over fast and creates hard flecks.
Step 5: Outline flood and dry the decorated pumpkins
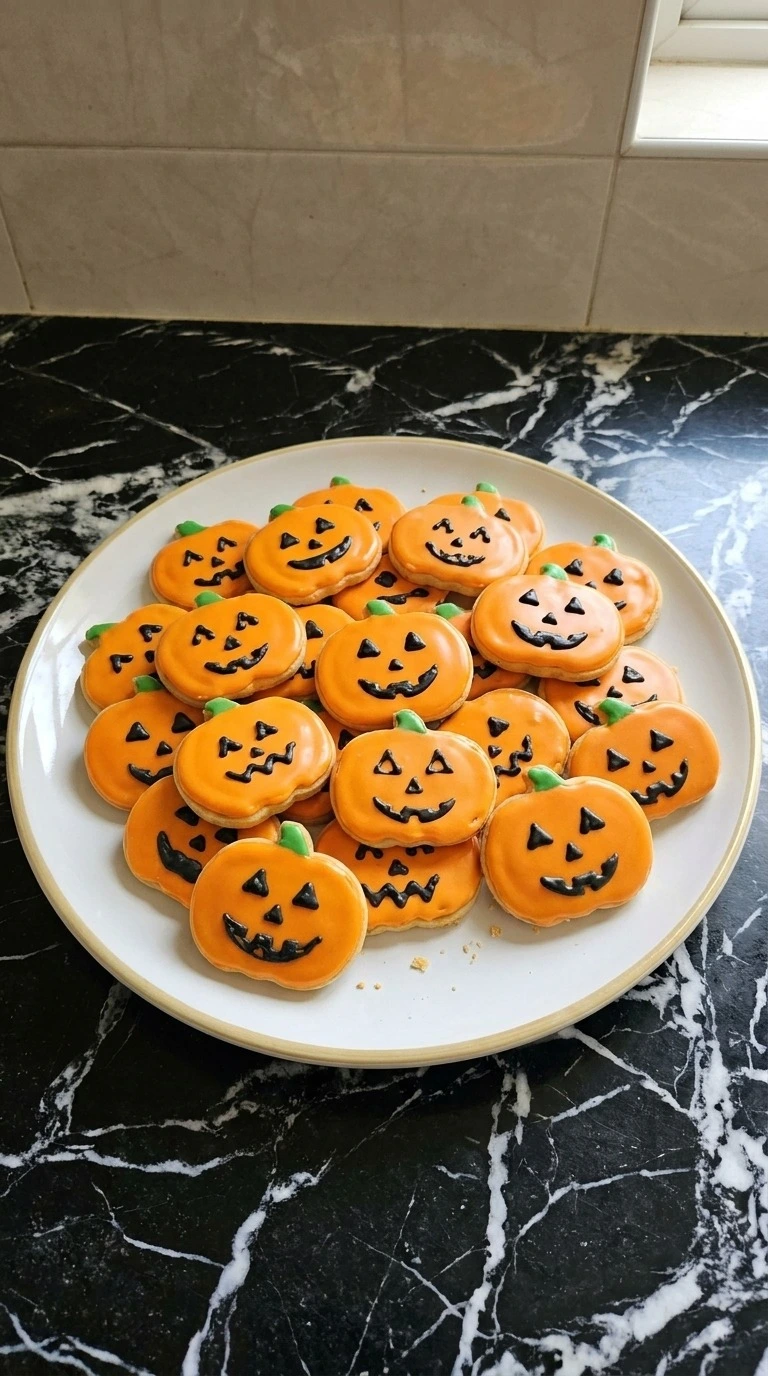
Work with the 24 cookies fully cool at 68°F to 72°F, then pipe an orange outline and flood each center with the 10-second icing. Use a small circular motion to guide icing into the ridges without pushing it over the edge, then let the orange layer sit for 20 minutes. Add green stems and black faces with the thicker 20-second icing.
Finally, leave the decorated cookies uncovered for 90 minutes before stacking or serving. Smudge them earlier and the surface dents because the sugar shell hasn’t formed. Halloween Pumpkin Cookies Royal Icing should look smooth but slightly uneven, not factory perfect.
The finished pumpkins should have firm orange tops, pale golden cookie edges and tiny natural differences from one face to the next. The icing shouldn’t stick to a fingertip. Drying builds a hard sugar shell that protects the design.
Tip: If you need to bag the cookies, give the icing 6 hours before packaging so trapped moisture doesn’t mark the orange surface.
Pro Tips
- Keep the butter near 68°F before mixing. If it looks glossy or starts pooling around the bowl, chill it for 10 minutes before continuing.
- Roll the dough to a true 1/4 inch thickness so all 24 cookies bake at the same rate. Thin edges can darken before minute 10.
- Chill the cut pumpkins for 20 minutes at about 38°F. This short rest keeps the ridges sharper when the butter begins melting in the oven.
- Rotate the baking tray once at minute 6 and watch for pale golden rims by minutes 10 to 12. Dark brown edges mean they’ve gone too far.
- Count to 10 after lifting a ribbon of orange icing. If the line disappears sooner, mix in 1 tablespoon confectioners’ sugar before flooding the cookies.
- Use gel food coloring instead of liquid dye and start with 1/8 teaspoon. Liquid color can loosen royal icing enough to make the edges overflow.
- Let the orange base dry for 20 minutes before adding black faces. You’ll get cleaner features because the dark icing won’t sink into the flood layer.
- Wait at least 6 hours before sealing decorated cookies in bags. The icing should feel hard when tapped lightly and shouldn’t leave a fingerprint.
- Add 1/2 teaspoon ground ginger and 1/4 teaspoon ground nutmeg to the dough for a deeper pumpkin spice flavor without changing the bake time.
- Tint part of the orange icing deep red and part yellow, then flood several cookies in different autumn shades for a mixed pumpkin patch tray.
- Replace the black jack-o’-lantern faces with white royal icing ghosts and spiderweb lines while keeping the same 20-second detail consistency.
- Add 1 teaspoon finely grated orange zest to the dough for a brighter citrus note that pairs well with the cinnamon and vanilla.
Substitutions & Variations
- unsalted butter: Use an equal amount of firm plant-based baking butter. — Use 1 cup plant butter for a dairy-free batch. Choose a stick-style product with about 80% fat because soft tub spreads can make the pumpkin edges spread more.
- unbleached all-purpose flour: Use a 1-to-1 gluten-free baking flour that contains xanthan gum. — Replace the flour cup for cup and chill the cut cookies for 30 minutes instead of 20. The texture will be slightly more fragile and less chewy.
- large egg and meringue powder: Use aquafaba for an egg-free version. — Replace the dough egg with 3 tablespoons aquafaba. For the icing use 6 tablespoons aquafaba instead of meringue powder and water, then beat with the confectioners’ sugar until thick.
- ground cinnamon: Use pumpkin pie spice in the same amount. — Use 1 teaspoon pumpkin pie spice for a warmer clove and nutmeg note. The cookies will taste more strongly spiced but the bake time stays the same.
- pure vanilla extract: Use 1/2 teaspoon almond extract for each teaspoon of vanilla replaced. — Almond extract tastes much stronger than vanilla, so use only half as much. It gives the cookies a sharper bakery flavor that can overpower the cinnamon if you add more.
Storage Instructions
Store fully dried Halloween Pumpkin Cookies Royal Icing in an airtight container at room temperature for up to 5 days, or refrigerate them for up to 7 days if your room is very warm. Layer parchment between cookies so the faces don’t rub.
For longer storage, freeze them in a sealed container for up to 2 months after the icing has dried for at least 8 hours. Don’t reheat decorated cookies because the royal icing can soften and spot.
If you freeze them, thaw the closed container for 2 to 3 hours before opening it. Discard cookies if they smell stale or rancid, show moisture beads that don’t dry or develop any visible mold.
Halloween Pumpkin Cookies Royal Icing
Ingredients
- 1 cup unsalted butter Softened to about 68°F so it creams smoothly without becoming greasy.
- 3/4 cup granulated cane sugar Adds sweetness and helps the cookie edges bake with a light crispness.
- 1 large large egg Use one whole egg to bind the dough without making the cutouts too soft.
- 1 tablespoon pure vanilla extract Divide between the cookie dough and royal icing for a clean vanilla flavor.
- 3 cups unbleached all-purpose flour Spoon and level it so the dough stays firm enough to roll without turning dry.
- 1/2 teaspoon baking powder Provides a small lift while keeping the pumpkin ridges recognizable.
- 1/2 teaspoon fine sea salt Balances the sweetness and sharpens the butter and vanilla flavors.
- 1 teaspoon ground cinnamon Adds a warm spice note without darkening the dough too much.
- 4 cups confectioners’ sugar Sift before mixing so the royal icing dries smooth with fewer lumps.
- 3 tablespoons meringue powder Stabilizes the royal icing so it dries firm enough for stacking.
- 6 tablespoons plus up to 2 teaspoons water Use 6 tablespoons to start the icing and add the extra amount by teaspoons only if needed.
- 1/2 teaspoon orange gel food coloring Tint the largest icing portion to a clear pumpkin orange without thinning it like liquid dye.
- 1/8 teaspoon green gel food coloring Color a small thick icing portion for pumpkin stems.
- 1/8 teaspoon black gel food coloring Color a small thick icing portion for simple Halloween faces.
Instructions
- Keep the unsalted butter near 68°F, then beat it with granulated cane sugar for 3 to 4 minutes until the mix looks pale and slightly fluffy. Add the large egg and pure vanilla extract, then beat for 30 seconds and scrape the bowl once. Next, whisk unbleached all-purpose flour with baking powder, fine sea salt and ground cinnamon, then mix it into the butter mixture on low just until no dry streaks remain. Stop there. Overmix for another minute and the cookies turn tougher because extra gluten develops. The dough should look smooth and soft but not shiny or greasy, and it should pull into one mass when pressed. If it smears like frosting, it’s too warm. Cool mixing protects the tender crumb and sharp pumpkin shape.
- Roll the dough to 1/4 inch thick while it stays close to 68°F, then cut 24 pumpkin shapes and place them with about 1 inch of space between pieces. Press straight down instead of twisting so the edges stay clean, then reroll scraps only once and cut the remaining shapes. Chill the full tray at 38°F for 20 minutes. (I used to skip this chill, and the pumpkins came out wider with soft ridges. Twenty minutes fixed it.) Rush this stage and the warm butter spreads before the dough can set, which blurs Halloween Pumpkin Cookies Royal Icing before they reach the oven. After chilling, each pumpkin should feel firm when lightly touched and the ridges should still look crisp. The shapes won’t bend when lifted. This rest firms the fat so the silhouette survives the oven.

- Bake the chilled shapes in a 350°F oven for 10 to 12 minutes, rotating the tray once at minute 6 so the front and back color evenly. Watch the bottom edge rather than the top. Remove the cookies when the centers look matte and the outer rims turn pale golden, then leave them on the tray for 5 minutes before moving them to cool for 30 minutes. Go past 12 minutes and the thin edges dry out before the centers settle. For Halloween Pumpkin Cookies Royal Icing, full cooling matters before any icing touches the surface. You’ll smell warm butter and cinnamon right as the edges take on a light toast color. The centers should feel set, not squishy. Cooling fully keeps the royal icing from melting or turning patchy.

- Keep the icing ingredients between 68°F and 72°F, then beat confectioners’ sugar with meringue powder and water for 5 to 6 minutes until the mixture forms soft glossy peaks. Mix in pure vanilla extract for 15 seconds. Next, divide the icing and tint the largest portion with orange gel food coloring, a small portion with green gel food coloring and another with black gel food coloring. Thin the orange portion with 1 teaspoon water at a time until a ribbon disappears in 10 seconds. For Halloween Pumpkin Cookies Royal Icing, add too much water and the flood icing runs past the cookie edge. The orange icing should settle smooth after a counted 10 seconds, while the green and black portions should hold a line for about 20 seconds. Gloss without bubbles is the cue. Measured water controls flow so the design sets cleanly.
- Work with the 24 cookies fully cool at 68°F to 72°F, then pipe an orange outline and flood each center with the 10-second icing. Use a small circular motion to guide icing into the ridges without pushing it over the edge, then let the orange layer sit for 20 minutes. Add green stems and black faces with the thicker 20-second icing. Finally, leave the decorated cookies uncovered for 90 minutes before stacking or serving. Smudge them earlier and the surface dents because the sugar shell hasn’t formed. Halloween Pumpkin Cookies Royal Icing should look smooth but slightly uneven, not factory perfect. The finished pumpkins should have firm orange tops, pale golden cookie edges and tiny natural differences from one face to the next. The icing shouldn’t stick to a fingertip. Drying builds a hard sugar shell that protects the design.

Notes
Frequently Asked Questions
Yes. Make the dough up to 2 days ahead and keep it tightly wrapped in the refrigerator at 38°F or colder. You can also bake the cookies 2 days before decorating, then cool them for at least 30 minutes and store them airtight until you’re ready to mix the icing.
The dough was probably too warm or rolled too thin. Chill the cut shapes for a full 20 minutes before baking at 350°F and keep them about 1/4 inch thick. If your kitchen is above 75°F, give the tray another 10 minutes in the refrigerator before it goes into the oven.
Your flood icing is too thin if a ribbon disappears in less than about 10 seconds. Beat in confectioners’ sugar 1 tablespoon at a time until the line settles slowly. If you add too much sugar, correct it with only 1/2 teaspoon water at a time because a tiny amount changes the texture quickly.
Yes, but mix two separate dough batches if your mixer is smaller than 5 quarts because an overloaded bowl won’t cream the butter evenly. Bake one tray at a time at 350°F for 10 to 12 minutes, or rotate two trays between racks halfway through if your oven heats evenly.
You can freeze them after the royal icing has dried for at least 8 hours. Layer the cookies between parchment in an airtight container and freeze for up to 2 months. Thaw the closed container at room temperature for 2 to 3 hours before opening it so condensation forms outside instead of spotting the icing.
Serve them with warm apple cider, hot chocolate or plain milk for a Halloween dessert table. For a party tray, plan on 2 cookies per person and add fresh apple slices or salted popcorn nearby. The crisp edges and sweet icing work especially well with drinks that aren’t heavily sweetened.
Don’t heat decorated cookies because royal icing can soften and lose its smooth finish above room temperature. If you’re serving undecorated cookies, warm them at 275°F for 3 to 4 minutes and cool them completely before icing. The cookies should feel barely warm, not hot, when they leave the oven.
Final Thoughts
The batch I remember most is the first one where I was sure every pumpkin would spread and every face would run. Instead, Halloween Pumpkin Cookies Royal Icing taught me that cold dough and patient drying cover a lot of beginner mistakes, even when your piping isn’t neat.
What makes this version special is that the cookies stay buttery while the shapes remain clear and every little face comes out different. If you try them, leave a comment or share your pumpkin designs because I read every one and I’d love to see your batch.
Royal icing gets its firm shell from sugar and egg proteins drying together. That’s why decorated cookies can stack without smearing once fully set.