Peppermint Brownies
The smell of chocolate and mint coming from the oven always makes my kitchen feel like Christmas! When I first thought about making Peppermint Brownies for the holidays, I knew I wanted something rich and fudgy rather than a dry chocolate cake. And that first bite? So good. The soft center and cool peppermint finish make these little squares hard to leave alone.
They’re the kind of dessert that disappears before anyone asks for seconds. I’ve always loved a good chocolate dessert, so these easy peppermint brownies were right up my alley. The brownie base uses melted dark chocolate and cocoa powder for a deep flavor while a thin layer of ganache adds that smooth chocolate finish. If you’re a chocolate lover too, you should also try our Fudgy Chocolate Zucchini Brownies (no One Will Guess! ). I like making these mint chocolate squares in an 8-inch pan because the batch gives you 16 small pieces.
But you can easily make more for a crowd. These brownies are lovely after Christmas dinner, but they’re just as welcome at a cookie swap or a family movie night. You can even make them a day ahead and keep them chilled until everyone arrives. I love how the crushed peppermint candies add a little crunch against the soft chocolate. And if you’re putting together a holiday dessert tray, these squares look festive without much extra work.
Why This Recipe Works
Peppermint Brownies stay dense and fudgy because melted bittersweet chocolate adds cocoa butter while a small amount of flour keeps the crumb from turning cakey. Baking at 350°F for 25 to 30 minutes helps the edges set while the middle stays soft.
If you like rich brownies with a different twist, our Sweet Potato Brownies are another fun version to try. The ganache uses 2 parts chocolate chips to 1 part cream by volume, so it sets into a soft layer once chilled.
And adding crushed candy after spreading the ganache keeps the peppermint pieces visible instead of letting them sink into the brownie batter.
Ingredients
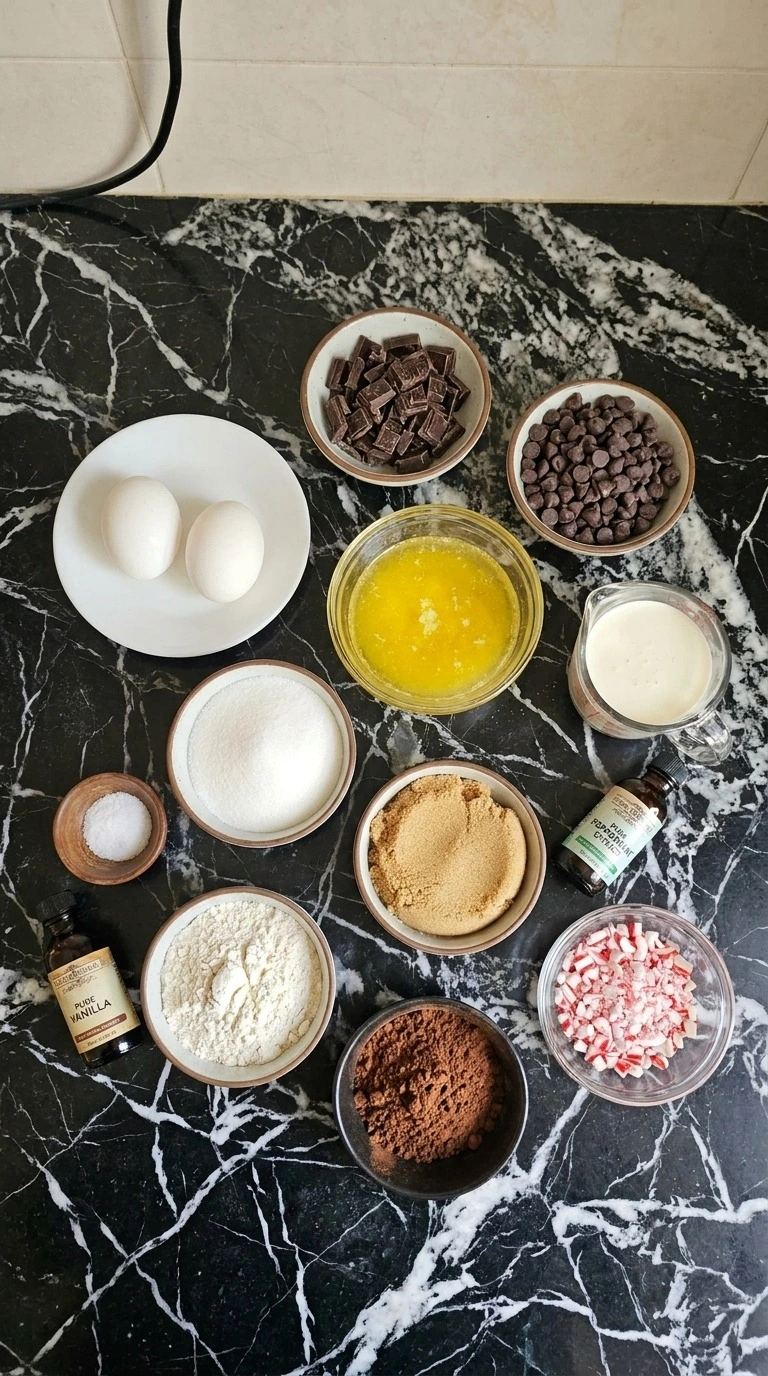
- unsalted butter: Cut into small pieces and melted with the bittersweet chocolate to give the brownies a tender and rich center.
- bittersweet chocolate: Chopped into small pieces. Choose chocolate with about 60% to 70% cocoa for a strong chocolate flavor and fudgy texture.
- large eggs: Bring close to room temperature before whisking. They help the batter set while keeping the center moist.
- granulated white sugar: Whisked with the eggs to provide sweetness and help create a delicate crackled crust.
- light brown sugar: Lightly packed. Adds moisture and a mild caramel note that rounds out the dark chocolate.
- pure vanilla extract: Mixed into the eggs and sugar to soften the sharper notes of dark chocolate.
- pure peppermint extract: Adds a cool mint flavor throughout the brownie base. Measure carefully because too much can taste medicinal.
- all-purpose wheat flour: Spoon into the measuring cup and level the top. Sift before folding to avoid flour lumps and keep the crumb tender.
- Dutch-process cocoa powder: Sift with the flour for deeper chocolate flavor and a rich dark brown color.
- fine kosher salt: Mixed into the dry ingredients to sharpen the chocolate flavor and keep the sweetness from tasting flat.
- heavy whipping cream: Heated until steaming with tiny bubbles at the edges. Melts the chocolate chips into a smooth ganache.
- semisweet chocolate chips: Combined with the hot cream to form a smooth chocolate topping that sets softly when chilled.
- red-and-white peppermint candies: Crushed into uneven small pieces with a few larger fragments. Scattered over the ganache for festive color and crunchy mint flavor.
Kitchen Equipment
- 8-inch square baking pan: A metal 8-inch square pan gives the brownies their thick shape and helps the edges set evenly. A 9-inch pan makes thinner brownies that may need less baking time.
- Parchment paper: Use a sheet wide enough to cover the base and two sides of the pan with about 2 inches of overhang. Thin paper that tears easily makes lifting the brownies harder.
- Large mixing bowl: A 3-quart mixing bowl leaves room to whisk the eggs and fold in the chocolate without spilling. A bowl that’s too small makes gentle mixing difficult.
- Medium microwave-safe bowl: A heatproof bowl holding at least 1 quart provides space for melting the butter and chocolate together. Avoid bowls with metallic decoration in the microwave.
- Small saucepan: A heavy-bottomed 1-quart saucepan warms the cream evenly for the ganache. A very thin saucepan can create hot spots that scorch the cream.
- Whisk: A medium balloon whisk blends the eggs and sugars and adds a little air. A small whisk takes more effort to mix a thick brownie base.
- Rubber spatula: A flexible silicone spatula folds the flour gently and spreads the ganache without scraping the pan. Choose a heat-safe model rated to at least 400°F.
- Fine-mesh sieve: A sieve about 4 to 6 inches wide breaks up cocoa powder lumps before they enter the batter. Without one, whisk the dry ingredients thoroughly to remove clumps.
- Measuring cups and spoons: Use standard measuring tools with clear 1/4-cup and 1/2-teaspoon markings. Oversized or poorly marked spoons can make the peppermint flavor too strong.
- Sharp chef’s knife: An 8-inch sharp knife cuts the chilled brownies into squares with less pressure on the ganache. A dull blade tends to drag candy pieces through the topping.
- Cutting board: A flat cutting board at least 12 inches wide supports the whole brownie slab while slicing. A board that rocks can make the cuts uneven.
How to Make It
Step 1: Melt the Butter and Dark Chocolate
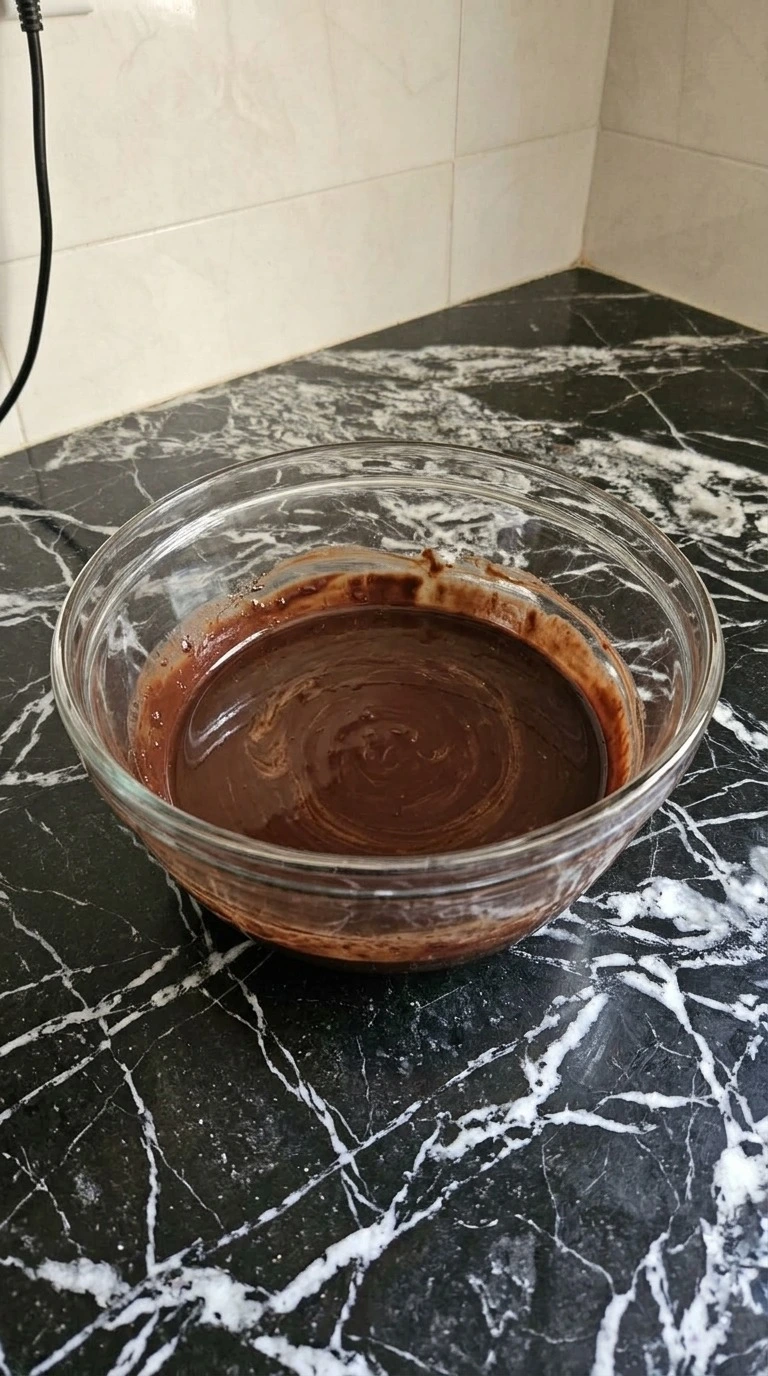
Cut 1/2 cup unsalted butter into small pieces and add it to a heatproof bowl with 4 ounces of chopped bittersweet chocolate. Microwave at 50% power in 30-second bursts for about 90 seconds to 2 minutes total. Stir well after each burst with a rubber spatula and scrape the sides as you go. If you have a thermometer, keep the chocolate mixture below 120°F.
Stop heating when a few small bits remain because the warmth in the bowl will melt them as you stir. Let the mixture cool for 5 minutes before adding it to the batter. Next, check the texture. It should look smooth and dark with no hard chocolate pieces left.
You’ll notice a rich cocoa smell as the butter blends with the chocolate. Don’t keep heating after it’s smooth or the mixture may scorch and turn grainy. Gentle heat keeps the cocoa butter smooth.
Tip: Use chocolate containing about 60% to 70% cocoa for a deeper flavor. Very sweet chocolate can make the ganache topping feel too sugary.
Step 2: Whisk the Eggs and Mix the Brownie Batter
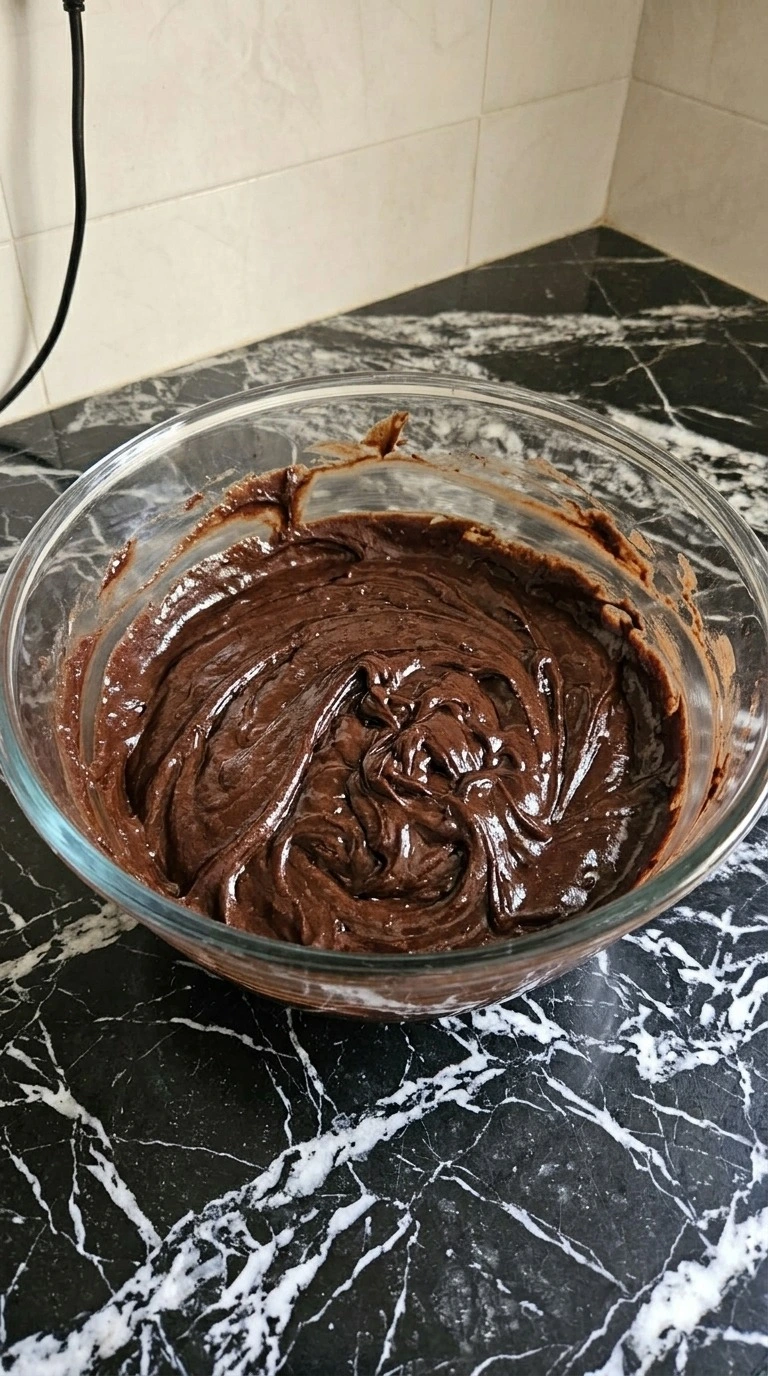
In a large mixing bowl, whisk 2 large eggs with 3/4 cup granulated white sugar and 1/4 cup packed light brown sugar for 2 minutes. Use firm circular strokes until the mix looks thicker and slightly pale. Then whisk in 1 teaspoon pure vanilla extract and 1/2 teaspoon pure peppermint extract. Pour in the warm melted chocolate mixture and stir until the color turns even.
Next, sift in 3/4 cup all-purpose wheat flour with 1/4 cup Dutch-process cocoa powder and 1/4 teaspoon fine kosher salt. Fold with a spatula for about 45 to 60 seconds until no dry flour remains. The batter should be thick and dark. When you lift the spatula, it should fall back in slow ribbons rather than splash like cake batter.
Don’t keep stirring once the flour blends in or the brownies may turn tough. A short fold limits gluten growth.
Tip: Measure flour by spooning it into the cup and leveling it. Packing flour into the cup can add enough extra to make brownies dry.
Step 3: Spread the Batter into the Baking Pan
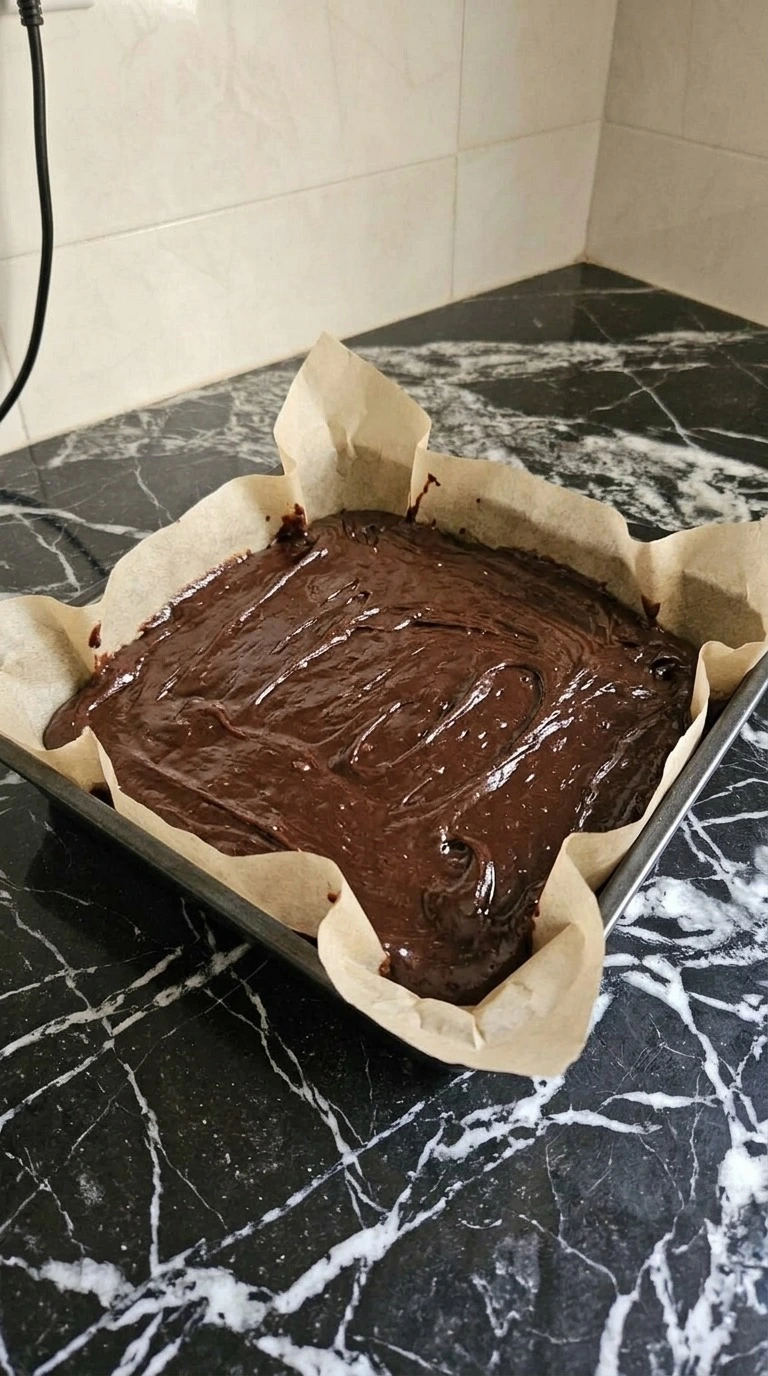
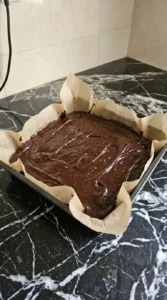
Line an 8-inch square baking pan with parchment paper and leave enough overhang to lift the brownies out later. Heat the oven to 350°F and set a rack near the center. Next, pour all the chocolate batter into the lined pan. Use a spatula to push it toward the corners and spread it into a layer about 1 inch thick.
Scrape the mixing bowl well so the full batch ends up in the pan. Give the pan two gentle taps to settle large air pockets. This takes about 2 to 3 minutes. Now look across the surface.
The batter should reach all four corners with a few natural swirls still visible on top. Don’t leave a thick mound in the middle or the edges may bake before the center sets. Even depth helps the brownie bake at one rate.
Tip: Leave about 2 inches of parchment hanging over two opposite sides. Those handles help you lift the slab without cracking the edges.
Step 4: Bake Until the Brownie Center Is Fudgy
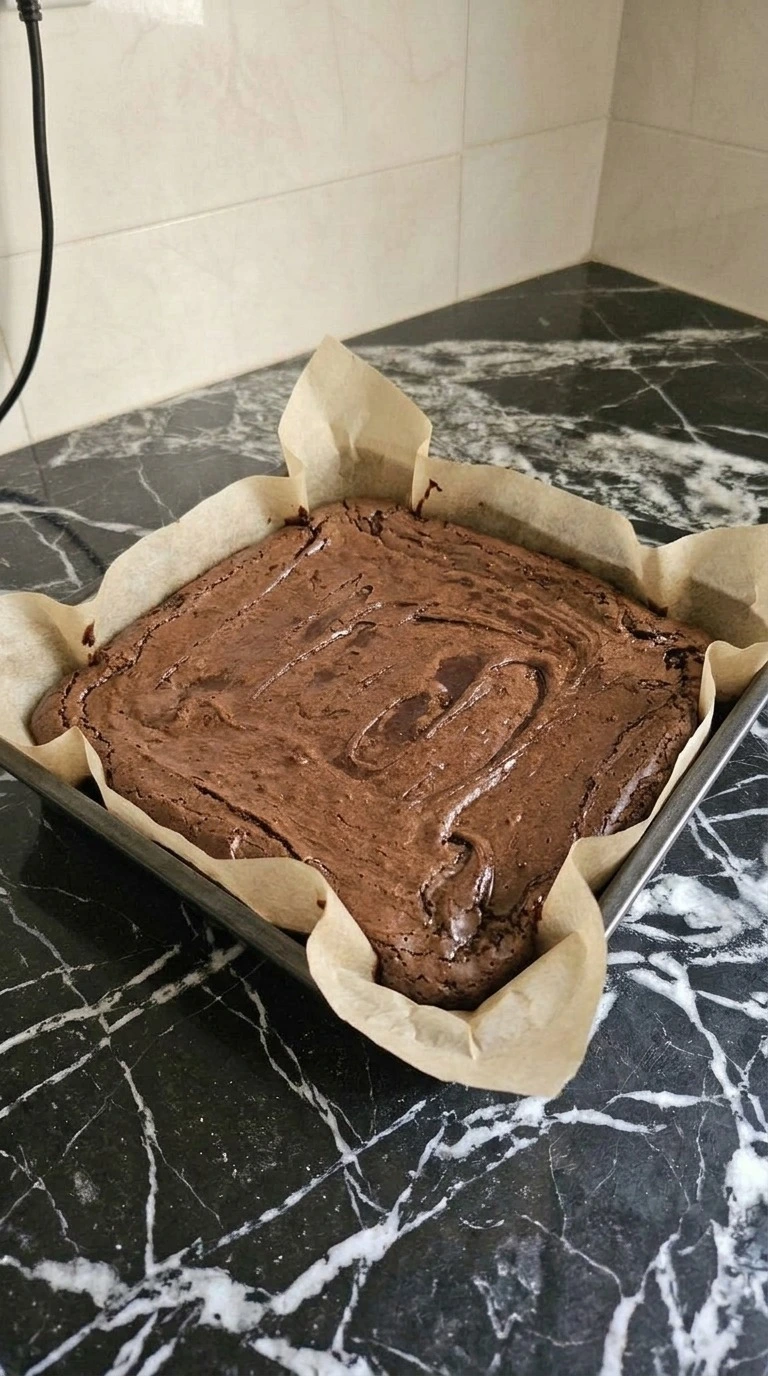
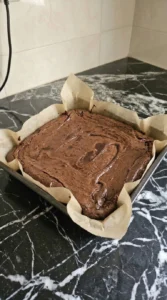
Place the pan on the middle rack of the 350°F oven and bake for 25 to 30 minutes. Start checking at minute 25 because ovens can run hot. Look for set edges and a thin crackled crust on top. Insert a toothpick about 1 inch from the center.
You want moist chocolate crumbs clinging to it but no runny batter. If the center still looks wet, bake for another 2 minutes and check again. Set the pan aside and let the brownies cool for at least 45 minutes before adding the topping. The top should look matte in some spots with a few shiny cracks.
And the kitchen will smell like dark chocolate with a hint of mint. Don’t wait for a completely dry toothpick or you’ll lose that fudgy center. The resting time lets the crumb set without drying out.
Tip: Use an oven thermometer to check for 350°F. A dial that’s off by 25°F can change the crust before the middle catches up.
Step 5: Spread the Chocolate Ganache and Add Crushed Peppermint
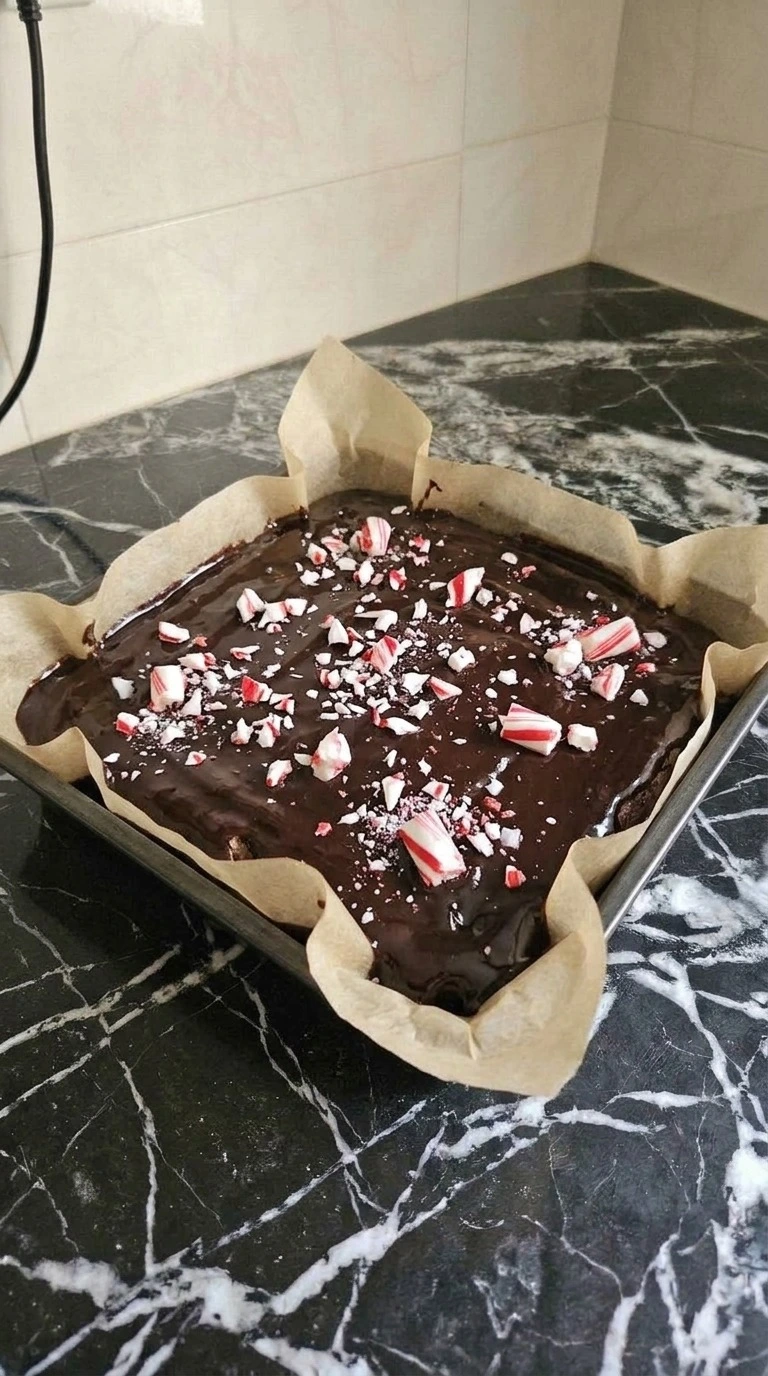
Heat 1/2 cup heavy whipping cream in a small saucepan over medium-low heat for 3 to 4 minutes until tiny bubbles form around the edge. Remove it from the heat before it boils. Pour the hot cream over 1 cup semisweet chocolate chips in a heatproof bowl and leave it untouched for 2 minutes. Then stir slowly from the center outward until you have a smooth dark ganache.
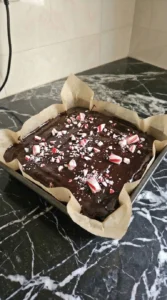
Let it stand for 5 minutes so it thickens slightly. Spread it over the fully cooled brownie slab and scatter 1/3 cup crushed red-and-white peppermint candies across the surface. You’ll see the candy pieces settle into the soft chocolate while some stay raised on top. Refrigerate the pan for 20 to 30 minutes until the ganache feels firm but still yields lightly to a touch.
Don’t pour hot ganache onto warm brownies or the layers may blur together. Cooling gives the topping a clean separate layer.
Tip: For brighter red-and-white candy pieces, save 1 tablespoon from the measured topping and scatter it on just before serving.
Step 6: Slice the Brownies and Serve
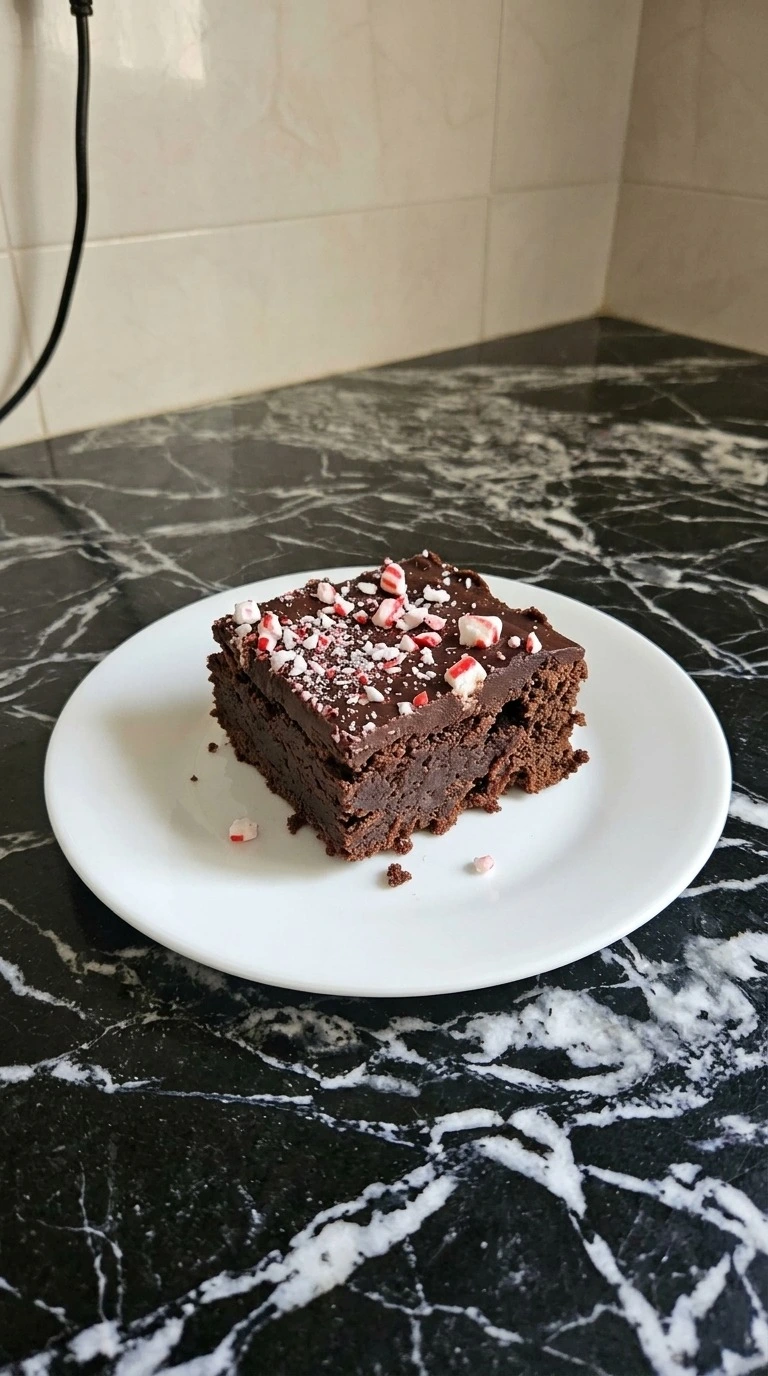
Lift the chilled brownie slab from the pan using the parchment handles. Place it on a cutting board and use a long sharp knife to cut four rows in each direction for 16 square brownies. For cleaner edges, dip the knife in hot water around 120°F and wipe it dry between cuts. Allow about 5 minutes for slicing and another 5 to 10 minutes for the squares to lose their fridge chill.
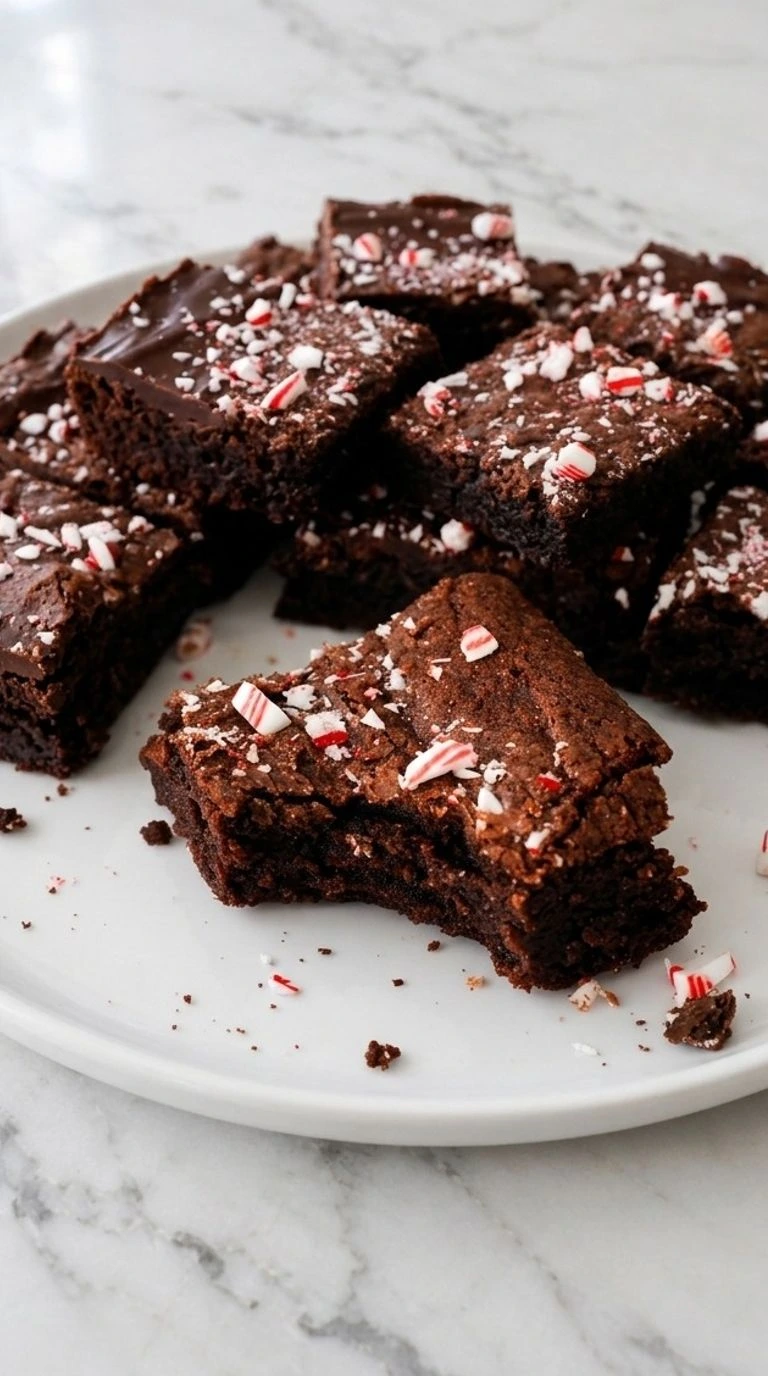
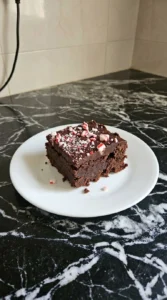
Then place one brownie on a small white dessert plate with its cut side showing the thick chocolate center. Don’t press hard through the candy topping or it may crack. You should see a dark dense brownie base beneath a smooth ganache layer and uneven peppermint pieces. The center feels soft when you bite into it while the candy adds a crisp snap.
Serve slightly cool rather than ice cold. A short rest softens the chocolate without melting the topping.
Tip: Cut the brownies into 25 smaller pieces instead of 16 for a holiday dessert tray. Small servings work well beside other sweets.
Pro Tips
- Choose bittersweet chocolate with 60% to 70% cocoa for the brownie base. It gives the center a deeper flavor without making the ganache topping overly sweet.
- Beat the 2 eggs and both sugars for a full 2 minutes before adding chocolate. The mixture should look slightly pale and thicker, which helps form a thin crust.
- Line your 8-inch pan with parchment that extends 2 inches beyond two opposite sides. You’ll lift the chilled slab more easily without damaging its edges.
- Start checking the brownies at 25 minutes rather than relying on the timer alone. A toothpick near the center should carry moist crumbs instead of liquid batter.
- Use a scale when possible and aim for about 90 grams of all-purpose wheat flour. Too much flour can turn the soft chocolate center into a dry cake-like crumb.
- Crush the peppermint candies into pieces ranging from fine crumbs to roughly 1/4 inch. This gives you color and crunch without large chunks that make slicing difficult.
- Make the brownie base the evening before your party and refrigerate it after cooling. Add the ganache and candy topping the following day for a neater finish.
- Save 1 tablespoon of the measured crushed candies for the final garnish. Add them just before serving if you want brighter color and a sharper peppermint crunch.
- For white chocolate peppermint brownies, replace the semisweet chocolate chips in the ganache with 1 1/4 cups white chocolate chips and reduce the heavy cream to 1/3 cup. The topping will be sweeter and softer.
- For extra dark chocolate brownies, use bittersweet chocolate containing 70% cocoa in the batter and replace the semisweet ganache chips with 1 cup dark chocolate chips. The result tastes less sweet and more intense.
- For a chocolate chip peppermint version, fold 1/2 cup mini semisweet chocolate chips into the finished batter before baking. The extra chocolate creates little pockets of soft melted chocolate throughout each square.
- For a festive chocolate-orange twist, replace the 1/2 teaspoon peppermint extract in the brownie batter with 1 teaspoon finely grated orange zest. Keep the crushed peppermint topping for a bright citrus and mint finish.
Substitutions & Variations
- unsalted butter: Use 1/2 cup plant-based baking butter instead. Choose a dairy-free baking stick with at least 75% fat rather than a soft spread. The brownies may taste slightly less buttery, but they’ll still have a rich texture. Use dairy-free chocolate and cream alternatives for a fully dairy-free batch.
- all-purpose wheat flour: Replace with 3/4 cup gluten-free all-purpose baking flour containing xanthan gum. Use a 1:1 baking blend rather than almond flour or coconut flour. The brownies may have a slightly more delicate crumb, so chill them for 30 minutes before slicing. For another chocolate dessert with a different base, try our Sweet Potato Brownies.
- large eggs: Use 2 commercial liquid egg replacer portions formulated for baking, following the package directions for 2 large eggs. Egg-free brownies tend to have a softer center and less of the classic crackled crust. Start checking at 25 minutes and allow an extra 10 minutes of cooling before handling. This swap hasn’t been tested in this specific recipe, so the texture may vary.
- heavy whipping cream: Replace with 1/2 cup full-fat canned coconut cream. Use the thick cream from a chilled can rather than a thin coconut beverage. The ganache may taste faintly of coconut and can set slightly firmer. Keep the same 1 cup of chocolate chips and chill for 30 minutes. Choose dairy-free chocolate chips if needed.
- pure peppermint extract: Replace with 1/4 teaspoon food-grade peppermint oil flavoring formulated for baking, adjusting according to the. Peppermint oil flavorings vary greatly in concentration, so begin with less than the label’s suggested equivalent and taste carefully. Some need only a few drops. Don’t replace peppermint extract with an equal amount of concentrated essential oil, as it may be unsuitable for food.
Storage Instructions
Store Peppermint Brownies in an airtight container in the refrigerator for up to 5 days. Place parchment paper between layers so the chocolate ganache won’t stick to the brownies above it. For longer storage, wrap individual squares tightly in plastic wrap and place them inside a sealed freezer container for up to 2 months.
If you’re making them for a holiday party, the best texture comes from storing the brownies whole and slicing them shortly before serving. The peppermint candies may soften during storage, but the chocolate layers will stay rich and dense. For a softer center, let a chilled brownie stand at room temperature for 15 to 20 minutes before serving.
You can also warm an individual square in the microwave at 50% power for 5 to 8 seconds, though the ganache may soften and the candy may become sticky. Thaw frozen pieces overnight in the refrigerator. Discard any brownies that develop mold, an unusual sour smell or a slimy surface.
Peppermint Brownies
Ingredients
Method
- Cut 1/2 cup unsalted butter into small pieces and add it to a heatproof bowl with 4 ounces of chopped bittersweet chocolate. Microwave at 50% power in 30-second bursts for about 90 seconds to 2 minutes total. Stir well after each burst with a rubber spatula and scrape the sides as you go. If you have a thermometer, keep the chocolate mixture below 120°F. Stop heating when a few small bits remain because the warmth in the bowl will melt them as you stir. Let the mixture cool for 5 minutes before adding it to the batter. Next, check the texture. It should look smooth and dark with no hard chocolate pieces left. You’ll notice a rich cocoa smell as the butter blends with the chocolate. Don’t keep heating after it’s smooth or the mixture may scorch and turn grainy. Gentle heat keeps the cocoa butter smooth.
- In a large mixing bowl, whisk 2 large eggs with 3/4 cup granulated white sugar and 1/4 cup packed light brown sugar for 2 minutes. Use firm circular strokes until the mix looks thicker and slightly pale. Then whisk in 1 teaspoon pure vanilla extract and 1/2 teaspoon pure peppermint extract. Pour in the warm melted chocolate mixture and stir until the color turns even. Next, sift in 3/4 cup all-purpose wheat flour with 1/4 cup Dutch-process cocoa powder and 1/4 teaspoon fine kosher salt. Fold with a spatula for about 45 to 60 seconds until no dry flour remains. The batter should be thick and dark. When you lift the spatula, it should fall back in slow ribbons rather than splash like cake batter. Don’t keep stirring once the flour blends in or the brownies may turn tough. A short fold limits gluten growth.
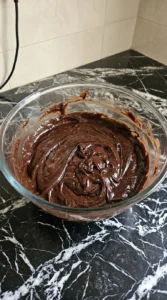
- Line an 8-inch square baking pan with parchment paper and leave enough overhang to lift the brownies out later. Heat the oven to 350°F and set a rack near the center. Next, pour all the chocolate batter into the lined pan. Use a spatula to push it toward the corners and spread it into a layer about 1 inch thick. Scrape the mixing bowl well so the full batch ends up in the pan. Give the pan two gentle taps to settle large air pockets. This takes about 2 to 3 minutes. Now look across the surface. The batter should reach all four corners with a few natural swirls still visible on top. Don’t leave a thick mound in the middle or the edges may bake before the center sets. Even depth helps the brownie bake at one rate.
- Place the pan on the middle rack of the 350°F oven and bake for 25 to 30 minutes. Start checking at minute 25 because ovens can run hot. Look for set edges and a thin crackled crust on top. Insert a toothpick about 1 inch from the center. You want moist chocolate crumbs clinging to it but no runny batter. If the center still looks wet, bake for another 2 minutes and check again. Set the pan aside and let the brownies cool for at least 45 minutes before adding the topping. The top should look matte in some spots with a few shiny cracks. And the kitchen will smell like dark chocolate with a hint of mint. Don’t wait for a completely dry toothpick or you’ll lose that fudgy center. The resting time lets the crumb set without drying out.
- Heat 1/2 cup heavy whipping cream in a small saucepan over medium-low heat for 3 to 4 minutes until tiny bubbles form around the edge. Remove it from the heat before it boils. Pour the hot cream over 1 cup semisweet chocolate chips in a heatproof bowl and leave it untouched for 2 minutes. Then stir slowly from the center outward until you have a smooth dark ganache. Let it stand for 5 minutes so it thickens slightly. Spread it over the fully cooled brownie slab and scatter 1/3 cup crushed red-and-white peppermint candies across the surface. You’ll see the candy pieces settle into the soft chocolate while some stay raised on top. Refrigerate the pan for 20 to 30 minutes until the ganache feels firm but still yields lightly to a touch. Don’t pour hot ganache onto warm brownies or the layers may blur together. Cooling gives the topping a clean separate layer.
- Lift the chilled brownie slab from the pan using the parchment handles. Place it on a cutting board and use a long sharp knife to cut four rows in each direction for 16 square brownies. For cleaner edges, dip the knife in hot water around 120°F and wipe it dry between cuts. Allow about 5 minutes for slicing and another 5 to 10 minutes for the squares to lose their fridge chill. Then place one brownie on a small white dessert plate with its cut side showing the thick chocolate center. Don’t press hard through the candy topping or it may crack. You should see a dark dense brownie base beneath a smooth ganache layer and uneven peppermint pieces. The center feels soft when you bite into it while the candy adds a crisp snap. Serve slightly cool rather than ice cold. A short rest softens the chocolate without melting the topping.
Notes
Frequently Asked Questions
Yes, you can bake the brownie base up to 2 days before serving and keep it in an airtight container in the refrigerator. Add the chocolate ganache and crushed peppermint candies the day you plan to serve them for the freshest crunch. Allow 20 to 30 minutes for the topping to set before slicing.
The most common causes are too much flour, overmixing or leaving the brownies in the oven too long. For an 8-inch square pan, start checking after 25 minutes at 350°F and look for moist crumbs on a toothpick inserted near the center. If the toothpick comes out completely clean, the brownies may have baked past their fudgiest stage.
Yes, leave out the 1/2 teaspoon peppermint extract and keep the crushed peppermint candy topping for a lighter mint flavor. You can also replace the extract with another 1/2 teaspoon of pure vanilla extract if you want the chocolate flavor to stand out more. The brownie base will taste less minty, but the candy topping will still add a cool finish.
Yes, double every ingredient and bake the batter in a 9-by-13-inch pan at 350°F. The batter will be somewhat thicker, so begin checking at 30 minutes and expect roughly 30 to 38 minutes depending on your oven. Use moist crumbs on a toothpick rather than the clock to judge when the center has set.
Peppermint candy absorbs moisture from the ganache and refrigerator air, so its color may begin to bleed after several hours. For the brightest topping, reserve some of the measured 1/3 cup of crushed candy and add it within 30 minutes of serving. Keep the rest of the brownie slab covered and chilled until you’re ready to cut it.
Yes, chill the brownies until the ganache firms up and then wrap individual pieces tightly in plastic wrap. Place them inside a freezer-safe airtight container and freeze for up to 2 months. Thaw the wrapped squares in the refrigerator overnight, then let them stand for 15 minutes before serving. The candy topping may become slightly sticky after thawing.
Try serving one small brownie square with fresh raspberries or a spoonful of lightly whipped cream. The tart fruit cuts through the rich chocolate while the cream softens the mint flavor. For a festive dessert table, arrange the brownies beside our Chewy Chocolate Gingerbread Cookies and Gluten Free Gingerbread Cookies.
Final Thoughts
These little chocolate squares have earned a spot on my Christmas baking list! Peppermint Brownies have that rich fudgy center I love, with a smooth ganache topping and crunchy candy pieces that make each bite a little different. The first time I sliced a chilled batch, I loved seeing those thick chocolate layers underneath the red-and-white peppermint topping.
This peppermint brownies recipe makes 16 small servings, but you can cut 25 bite-sized pieces for a bigger holiday dessert tray. If you’re filling a Christmas cookie box, try our Chewy Chocolate Gingerbread Cookies too. Give these christmas peppermint brownies a try and share how your batch turns out!
Come back to it whenever you need easy peppermint brownies.
Peppermint candy canes have become a familiar part of Christmas baking because their red-and-white stripes add color without food coloring in the brownie batter. When crushed and scattered over chocolate ganache, the candy creates a crisp topping that slowly softens as it absorbs moisture. That’s why adding a few fresh pieces just before serving makes such a noticeable difference.