Red White Blue Cupcakes
I made this for the first time the week we moved into our house in 2019, boxes everywhere, no proper kitchen setup, and somehow it turned out better than expected. What saved me that night was keeping the heat lower than I thought I should so the delicate vanilla tops didn’t over-brown. Since then it’s become my go-to when I’m exhausted but still want something that tastes real. My husband always says it’s better than bakery treats, and the kids ask for seconds.
If you want more holiday inspiration, you can also look at my Halloween Cookies for another fun baking project. But these patriotic treats are even simpler. They are ready fast, and you don’t need any fancy decorating tools to make a big impact. We’re just using a basic star tip to recreate the classic piping styles from my favorite reference photos.

They’re perfect for any summer backyard gathering because the frosting holds up nicely. Just don’t leave them out in the direct afternoon sun. The bright colors look beautiful on a serving platter, and the crumb stays incredibly moist for days.
Why You’ll Love It
Creaming the butter and sugar on medium speed for five minutes builds a stable matrix of tiny air pockets. This mechanical leavening is what creates the light crumb because the baking powder expands these existing pockets rather than forcing new ones.
Baking at 350°F ensures the outer edges of the sponge don’t set before the center finishes rising. If you want a richer chocolate option for your dessert table, you can also check out our Chocolate Cupcakes which use a similar temperature trick.
Shopping List

- unsalted butter: Softened to room temperature for proper creaming with the sugars.
- Domino granulated sugar: Fine sugar crystals that dissolve easily into the fat matrix.
- soft swann down cake flour: Low-protein flour sifted carefully to ensure an incredibly soft crumb structure.
- baking powder: Provides the consistent chemical leavening needed for uniform domes.
- fine sea salt: Balances the sweetness of the vanilla batter.
- whole milk: Brought to room temperature to prevent the creamed butter from seizing.
- pure vanilla extract: High-quality extract added to give the sponge a deep aroma.
- Domino powdered sugar: Sifted fine for a silky smooth buttercream frosting base.
- deep red gel food coloring paste: Concentrated gel paste to achieve a vivid patriotic red tone without thinning the icing.
- deep blue gel food coloring paste: Concentrated blue gel paste to create the navy contrast drops.
- white sugar stars: Tiny edible sprinkles scattered over the blue icing for detail.
Tools You’ll Need
- 12-cup metal muffin tin: A heavy-gauge aluminum 12-cup muffin tin distributes heat evenly so the bottoms don’t scorch — thin dark tins will hot-spot and burn the wrappers.
- electric mixer: A stand mixer or powerful hand mixer is required to properly aerate the butter and sugar — trying to do this by hand won’t incorporate enough air.
- piping bags and star tips: Using standard disposable bags with a closed star tip gives you the sharp definition needed for the rose textures shown in the reference photos.
Directions
Step 1: Cream the butter and sugar

Place the softened unsalted butter and Domino granulated sugar into a large clear glass mixing bowl. Fit your electric mixer with the paddle attachment and turn it to medium speed (about 4 on a 10-dial). Beat the mixture for exactly 4 to 5 minutes without stopping.
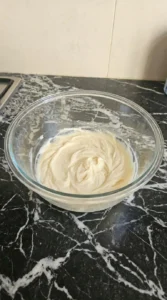
Scrape the bowl down with a rubber spatula halfway through to catch any loose sugar granules. You’ll see the mixture transform from a dense yellow paste into a light, pale-ivory cream that holds soft peaks. The grainy texture should disappear entirely as the sugar dissolves into the fat.
(I tried using cold butter the first time, it flew out of the bowl and never aerated properly, so stick to soft room-temp blocks). Miss this window and your cupcakes will turn out dense and flat instead of fluffy. Beat on medium speed, the friction builds the necessary air pockets for a perfect rise.
Tip: Make sure your butter is soft enough that your finger leaves a deep indent when pressed but not warm enough to look greasy.
Step 2: Whisk the dry ingredients and alternate mixing

Sift the soft swann down cake flour, baking powder, and fine sea salt together into a separate bowl. Turn your mixer down to low speed (about 2 on a 10-dial) to prevent a flour cloud. Add the dry ingredients alternately with the whole milk and pure vanilla extract in three small batches, starting and ending with the flour.
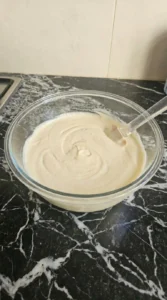
The batter will gradually smooth out and thicken into a glossy, velvety ribbon that falls slowly from the spatula. You shouldn’t see any visible flour streaks or pockets of dry powder left in the bowl. Stop mixing the second the last white streak vanishes.
Over-mixing at this stage activates the gluten and makes the cakes tough. Fold gently on low speed, this short mixing time keeps the delicate crumb structure soft.
Tip: Sifting the cake flour is non-negotiable because it breaks up the tiny clumps that cause dry pockets in your final baked sponge.
Step 3: Bake the cake bases
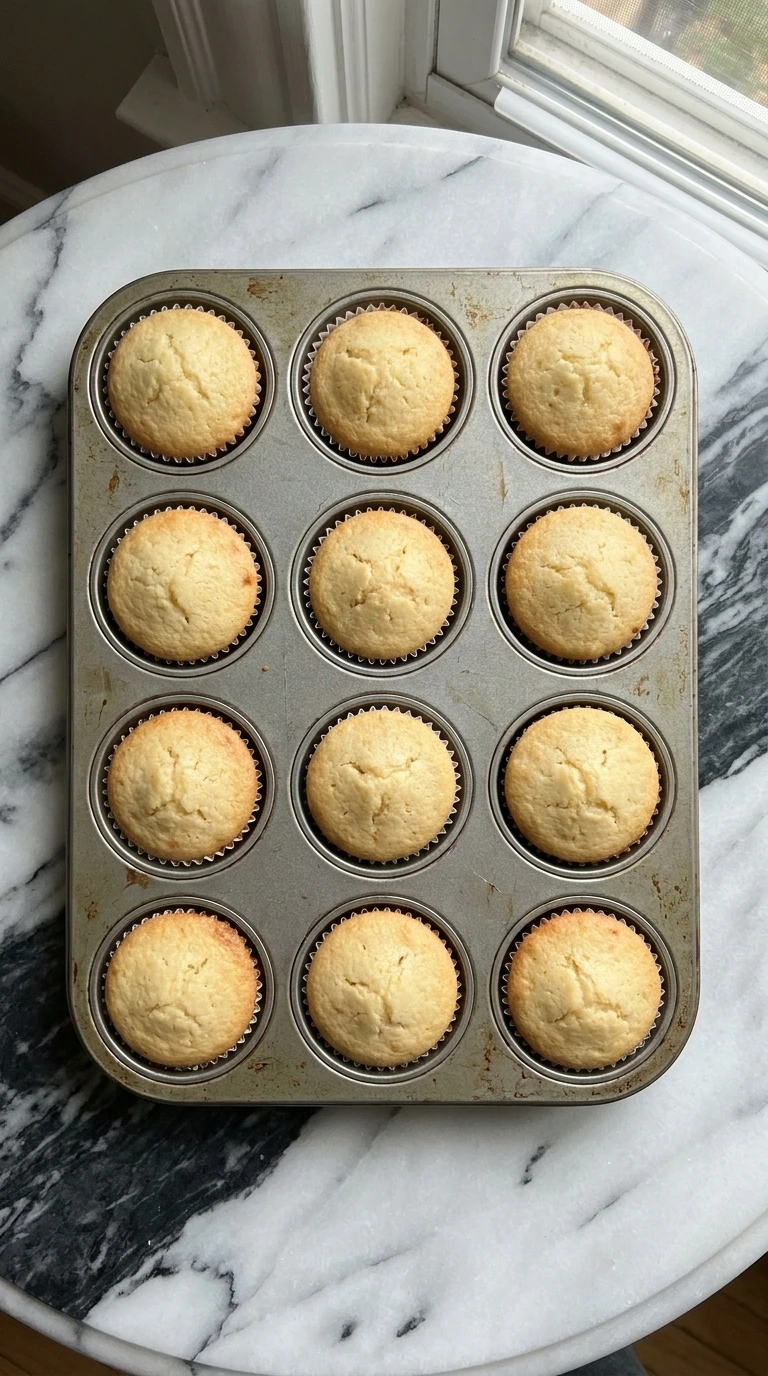
Line a 12-cup metal muffin tin with white paper liners. Use a standard ice cream scoop to divide the thick batter evenly among the cups, filling each exactly three-quarters full. Slide the tin onto the middle rack of your 350°F preheated oven and bake for 18 to 20 minutes without opening the door.
The tops will puff up into gentle domes and turn a light golden color around the edges while a toothpick inserted comes out clean. You’ll smell a rich vanilla aroma right when the centers set. (My first batch went into a 400°F oven and the tops cracked open before the inside cooked through).
Leave them past 20 minutes and the edges will scorch and dry out. Bake at 350°F, steady heat allows the center to rise fully before the crust sets.
Tip: Let the cupcakes rest in the hot metal tin for exactly 5 minutes before moving them to a wire rack to finish cooling.
Step 4: Pipe the patriotic buttercream designs

Divide your whipped buttercream frosting into three separate bowls. Leave one white, tint one with deep red gel food coloring paste, and tint the last with deep blue gel food coloring paste. Fit three piping bags with star tips and create custom rosettes and star drops across the cooled bases to match our reference images.
The frosting should form crisp, glossy ridges that hold their shape sharply without melting or slumping down. You’ll see beautiful deep red roses accented by rich blue star drops and tiny white sugar stars scattered unevenly on top. Work quickly so the warmth of your hands doesn’t soften the fat.
If the frosting gets too warm the details blend together into a blurry mess. Pipe with a firm, steady motion, the cold fat preserves the sharp definitions of the piped roses.
Tip: If your hands run hot, wrap a cold damp towel around the piping bag every few minutes to keep the buttercream firm.
Chef’s Notes
- Bring your milk and eggs to room temperature before mixing because cold liquids will curdle the creamed butter instantly.
- Fill your muffin liners using an ice cream scoop to guarantee each cupcake gets the exact same amount of batter for even baking.
- Stop your mixer immediately once the flour disappears to prevent overworking the gluten and making your cakes dense.
- Let the baked bases cool completely on a wire rack for at least one hour before piping or the frosting will melt off.
- Use gel paste color instead of liquid coloring to get those deep tones without making your buttercream watery.
- Sift your powdered sugar through a fine-mesh strainer to ensure your decorating tips never get clogged by tiny sugar lumps.
- Fold one cup of fresh blueberries and diced strawberries directly into the dry batter for a juicy fruit burst inside.
- Core the center of each baked cupcake and fill it with bright red strawberry jam before adding the buttercream swirl.
- Add a teaspoon of fresh lemon zest to the vanilla batter for a bright citrus twist that pairs perfectly with sweet frosting.
Substitutions
- soft swann down cake flour: all-purpose flour plus cornstarch — Remove two tablespoons of all-purpose flour from each cup and replace it with cornstarch then sift three times. This lowers the protein content but the result will still be slightly denser than using pure cake flour.
- whole milk: unsweetened almond milk — Use an equal amount of room temperature almond milk. The cupcakes will bake up with a slightly thinner crumb texture because it lacks dairy fat.
- deep red gel food coloring paste: liquid food dye — Avoid liquid dyes because you need a massive amount to get a deep red and that extra moisture will break your buttercream frosting.
Keeping Leftovers
Store the decorated cupcakes inside a tall airtight plastic container at cool room temperature for up to three days. Make sure the lid is high enough so it does not crush your beautiful piped roses and star shapes.
If your kitchen gets warm you can keep them in the fridge instead but let them sit out for twenty minutes before serving so the butter softens. You can freeze the unfrosted cupcake bases by wrapping each one tightly in plastic wrap and placing them in a freezer bag for up to two months.
Thaw them on the counter at room temperature for one hour before piping fresh frosting. Watch out for dry crumb surfaces or a sour aroma which are clear signs that the cakes have spoiled.
Red White Blue Cupcakes
Ingredients
- 1 cup unsalted butter Softened to room temperature for proper creaming with the sugars.
- 1 cup Domino granulated sugar Fine sugar crystals that dissolve easily into the fat matrix.
- 1.5 cups soft swann down cake flour Low-protein flour sifted carefully to ensure an incredibly soft crumb structure.
- 1.5 teaspoons baking powder Provides the consistent chemical leavening needed for uniform domes.
- 0.25 teaspoon fine sea salt Balances the sweetness of the vanilla batter.
- 0.5 cup whole milk Brought to room temperature to prevent the creamed butter from seizing.
- 2 teaspoons pure vanilla extract High-quality extract added to give the sponge a deep aroma.
- 4 cups Domino powdered sugar Sifted fine for a silky smooth buttercream frosting base.
- 1 teaspoon deep red gel food coloring paste Concentrated gel paste to achieve a vivid patriotic red tone without thinning the icing.
- 1 teaspoon deep blue gel food coloring paste Concentrated blue gel paste to create the navy contrast drops.
- 2 tablespoons white sugar stars Tiny edible sprinkles scattered over the blue icing for detail.
Instructions
- Place the softened unsalted butter and Domino granulated sugar into a large clear glass mixing bowl. Fit your electric mixer with the paddle attachment and turn it to medium speed (about 4 on a 10-dial). Beat the mixture for exactly 4 to 5 minutes without stopping. Scrape the bowl down with a rubber spatula halfway through to catch any loose sugar granules. You’ll see the mixture transform from a dense yellow paste into a light, pale-ivory cream that holds soft peaks. The grainy texture should disappear entirely as the sugar dissolves into the fat. (I tried using cold butter the first time, it flew out of the bowl and never aerated properly, so stick to soft room-temp blocks). Miss this window and your cupcakes will turn out dense and flat instead of fluffy. Beat on medium speed, the friction builds the necessary air pockets for a perfect rise.
- Sift the soft swann down cake flour, baking powder, and fine sea salt together into a separate bowl. Turn your mixer down to low speed (about 2 on a 10-dial) to prevent a flour cloud. Add the dry ingredients alternately with the whole milk and pure vanilla extract in three small batches, starting and ending with the flour. The batter will gradually smooth out and thicken into a glossy, velvety ribbon that falls slowly from the spatula. You shouldn’t see any visible flour streaks or pockets of dry powder left in the bowl. Stop mixing the second the last white streak vanishes. Over-mixing at this stage activates the gluten and makes the cakes tough. Fold gently on low speed, this short mixing time keeps the delicate crumb structure soft.
- Line a 12-cup metal muffin tin with white paper liners. Use a standard ice cream scoop to divide the thick batter evenly among the cups, filling each exactly three-quarters full. Slide the tin onto the middle rack of your 350°F preheated oven and bake for 18 to 20 minutes without opening the door. The tops will puff up into gentle domes and turn a light golden color around the edges while a toothpick inserted comes out clean. You’ll smell a rich vanilla aroma right when the centers set. (My first batch went into a 400°F oven and the tops cracked open before the inside cooked through). Leave them past 20 minutes and the edges will scorch and dry out. Bake at 350°F, steady heat allows the center to rise fully before the crust sets.

- Divide your whipped buttercream frosting into three separate bowls. Leave one white, tint one with deep red gel food coloring paste, and tint the last with deep blue gel food coloring paste. Fit three piping bags with star tips and create custom rosettes and star drops across the cooled bases to match our reference images. The frosting should form crisp, glossy ridges that hold their shape sharply without melting or slumping down. You’ll see beautiful deep red roses accented by rich blue star drops and tiny white sugar stars scattered unevenly on top. Work quickly so the warmth of your hands doesn’t soften the fat. If the frosting gets too warm the details blend together into a blurry mess. Pipe with a firm, steady motion, the cold fat preserves the sharp definitions of the piped roses.

Notes
Nutrition
Frequently Asked Questions
Yes you can bake the bases a day ahead and store them in an airtight container at room temperature. Keep the frosting in separate bowls in the fridge then bring it to room temp and give it a quick whip before piping.
This usually happens if your baking powder is expired or if you opened the oven door too early in the baking cycle. The sudden draft causes the fragile air pockets to collapse before the surrounding crumb structure sets completely.
Keep the decorated treats in a cool dry place out of humid air. If you need to store them in the fridge make sure they are in an airtight container and let them come to room temperature before opening the lid.
I do not recommend liquid dye for this recipe because it introduces too much water to the buttercream. You will end up with a sloppy frosting that cannot hold the sharp rose petals and star shapes shown in the photos.
They will stay moist and delicious for up to three days when stored inside an airtight container at cool room temperature. The high sugar content in the homemade buttercream acts as a natural barrier that keeps the sponge from drying out.
Let Me Know
If you make this on a weekend afternoon with music playing, the way I do, you’ll understand why it’s been in our family rotation for years now. The little trick I mentioned about not rushing the creamed butter stage is honestly the difference between okay and really good.
Tag me on Instagram if you make it, I love seeing what you cook. And our friends always say these are the highlight of the summer party.
The multi-colored piping trend totally blew up on Pinterest for a simple reason. Bakers realized they didn’t need multiple bags. Instead, they just line the different colors side-by-side on a sheet of plastic wrap. Then, you roll it up and slide the whole thing right into one single piping bag. It’s an easy trick that completely changed the game.