Chocolate Cake
Last winter we were visiting my in-laws and my mother-in-law made this dessert three nights in a row because the kids kept asking for it. I must have watched her make it four times before I figured out her little secret, she whisks hot coffee into the cocoa batter right at the end instead of mixing it with the dry ingredients. Now it’s on heavy rotation in our house too.
Honestly it took me three tries to get the balance right because the first time I used too much flour and it dried everything else out. If you want something a bit different for your holiday spread, you can also check out our Red White Blue Cupcakes for another crowd-pleasing dessert option. But for pure chocolate comfort, nothing beats this simple cake.
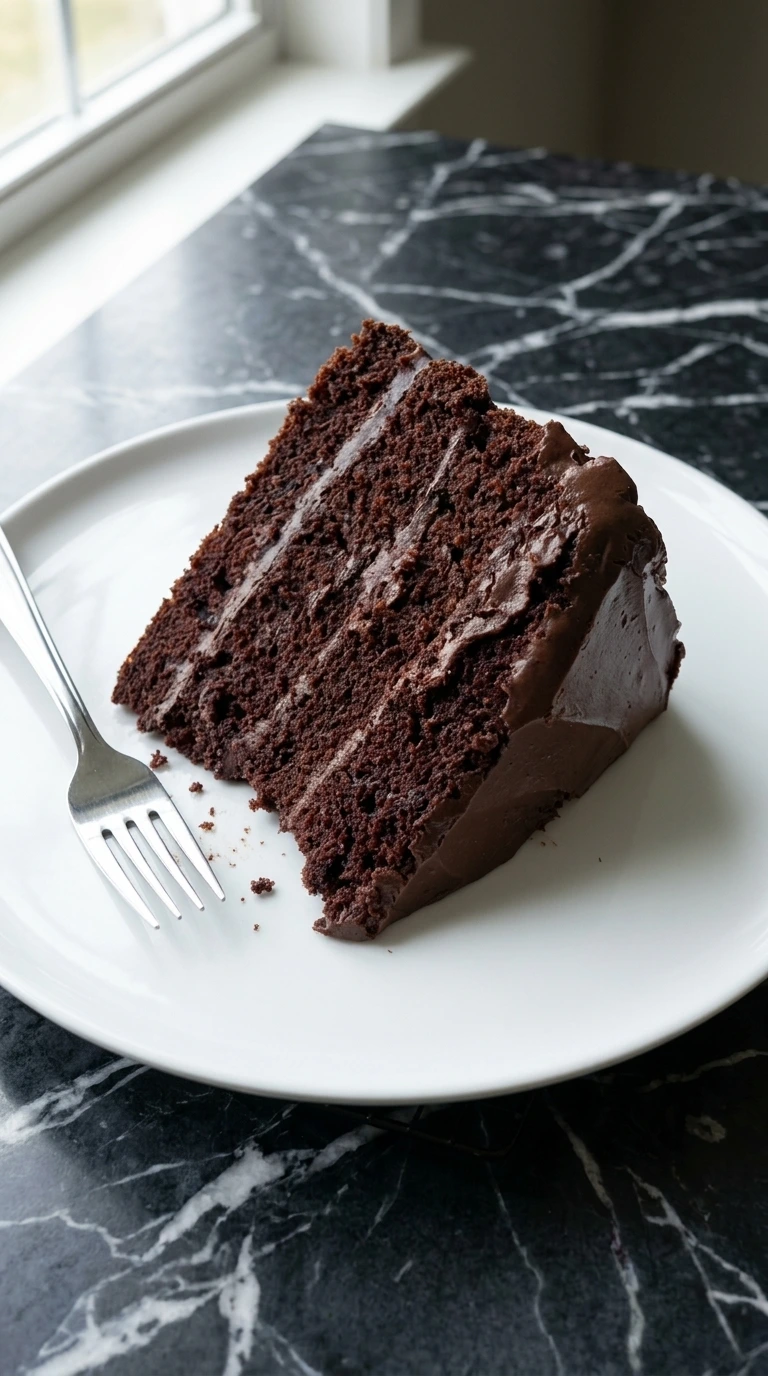
We love serving this after a big family dinner because it feels special without requiring hours of work. It has a deeply rich crumb that stays moist for days under a glossy fudge glaze. You won’t need any fancy equipment or advanced pastry skills to pull this off.
The Secret to This Recipe
Mixing hot coffee directly into the batter dissolves the starch granules in the cocoa powder instantly. This blooming technique releases trapped flavor compounds that standard room-temperature mixing leaves behind. The high liquid content relative to the flour ensures a remarkably tender crumb structure.
Baking at 350°F allows the heat to penetrate the deep layers steadily without burning the outer edges. This moderate temperature gives the baking soda enough time to generate carbon dioxide bubbles before the proteins set. The result is a cake that rises evenly with a uniform sponge texture.
If you want a fun baking project that uses a similar slow-bake method, our Halloween Cookies are another great kitchen experiment.
What You’ll Need

- Gold Medal all-purpose flour: Spoon and level carefully to provide the structural foundation of the cake crumb.
- Domino granulated sugar: Sweetens the batter and tenderizes the gluten matrix for a soft bite.
- Hershey’s unsweetened cocoa powder: Natural cocoa powder provides intense chocolate flavor and essential acidity for leavening.
- Arm & Hammer baking soda: Reacts with the acidic buttermilk to lift the heavy batter during baking.
- Morton sea salt: Fine grains sharpen the contrast and enhance the deep cocoa notes.
- large eggs: Bring to room temperature to emulsify properly and bind the batter structure.
- McArthur buttermilk: Full-fat variety provides moisture and the necessary acid activation for the rising agent.
- Crisco vegetable oil: Keeps the cake exceptionally moist and tender even when stored in the fridge.
- McCormick pure vanilla extract: Deepens the complexity of the chocolate flavor profile significantly.
- hot brewed coffee: Freshly boiled coffee dissolves and blooms the cocoa powder for maximum flavor depth.
Equipment
- 9-inch round cake pans: Three matching aluminum pans distribute heat evenly across the batter so the cakes rise flat without steep domed centers.
- Balloon whisk: A sturdy wire whisk incorporates air into the dry ingredients and breaks up small cocoa clumps without compacting the flour.
- Offset spatula: An angled metal blade allows you to glide smoothly across the cake surface to spread frosting without dragging your knuckles through the cake.
How to
Step 1: Whisk the dry ingredients
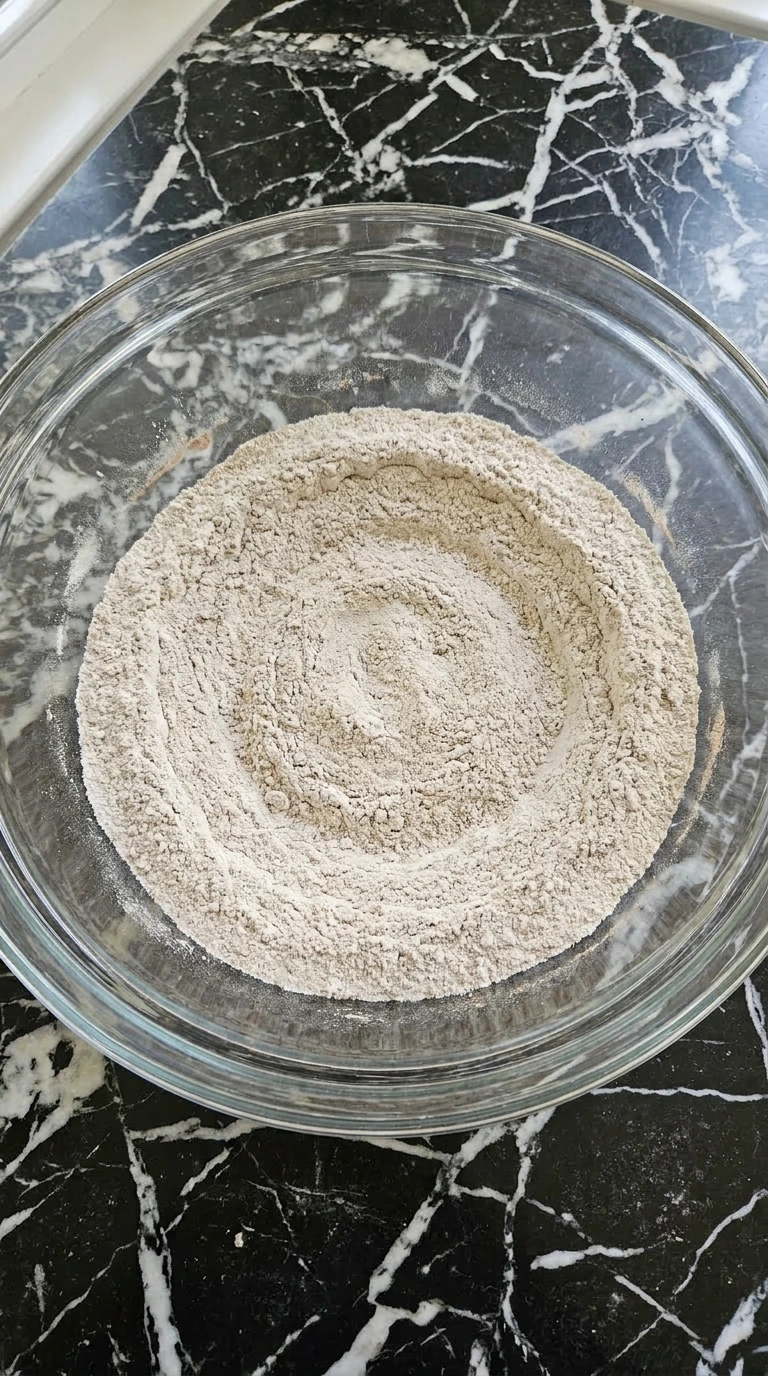
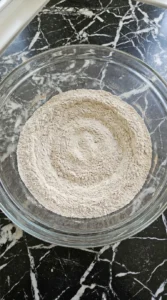
Measure your dry components carefully before starting the mixing process. Combine the all-purpose flour, granulated sugar, unsweetened cocoa powder, baking soda, and fine sea salt in your mixing vessel. (I tried using Dutch-process cocoa the first time, the cake didn’t rise properly because it lacks the acid needed to react with the baking soda.
Stick to standard natural cocoa powder here. ) Whisk the mixture continuously with a balloon whisk using a circular motion for exactly 45 seconds at room temperature. You’ll see the pale white flour and dark brown cocoa blend into a uniform, light tan powder with no visible streaks.
This thorough blending ensures the leavening agent distributes evenly so your cake rises uniformly without large holes.
Tip: Sift the cocoa powder through a fine-mesh strainer if it looks clumpy to prevent dry pockets in your finished batter.
Step 2: Incorporate the wet ingredients
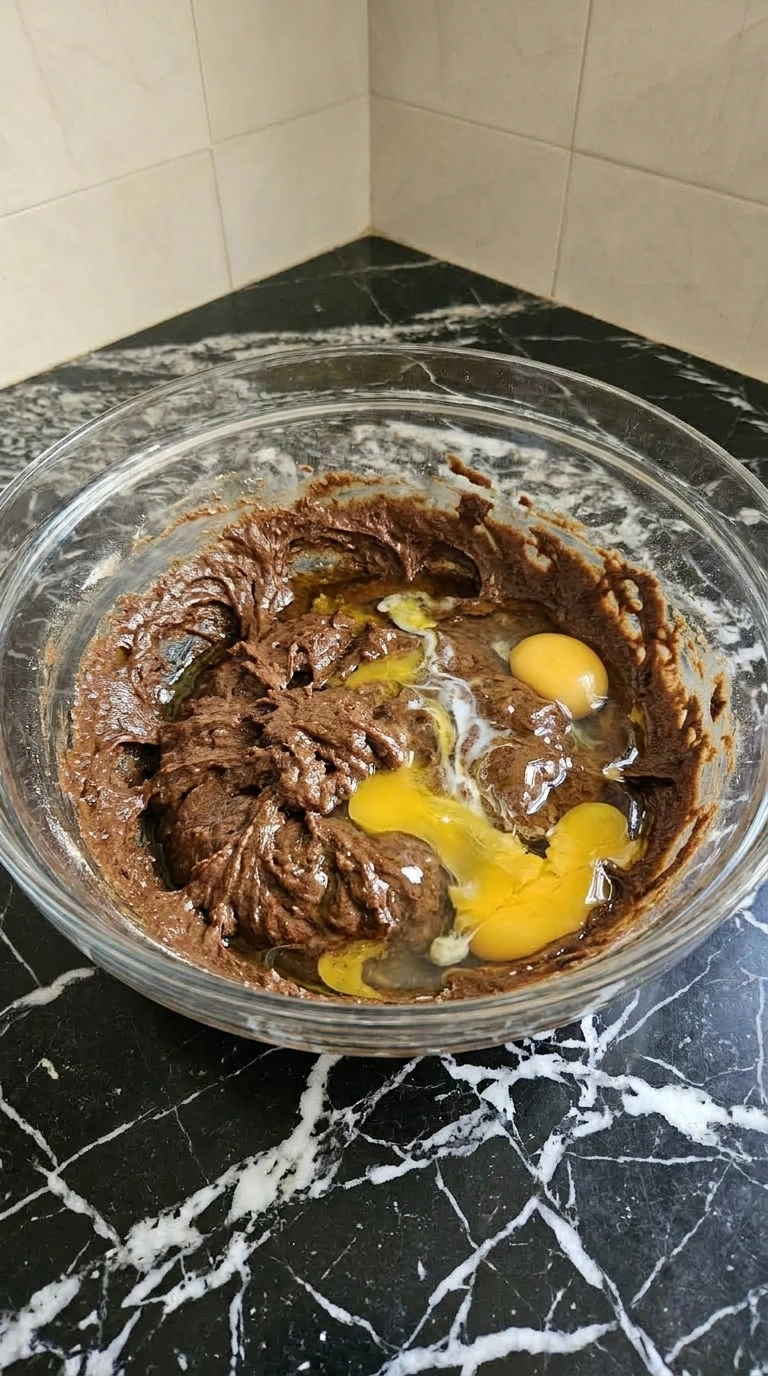
Crack the large eggs directly into the center of the dry mixture, then pour in the buttermilk, vegetable oil, and pure vanilla extract. Use a heavy wooden spoon to stir the liquid into the powder using a wide, sweeping motion from the edges inward.
Work the ingredients together at room temperature for about 1 to 2 minutes until the flour disappears completely. The mixture will transform into a very thick, matte, dark brown paste that resists your spoon slightly.
Do not worry about a few small lumps at this stage because the hot liquid in the next step will smooth them out nicely. Miss this window of full incorporation and you’ll end up with pockets of dry flour baking into the core of your cake crumb.
Tip: Make sure your eggs and buttermilk are at room temperature so the fats blend smoothly without seizing up the batter.
Step 3: Pour the hot coffee and bloom the cocoa
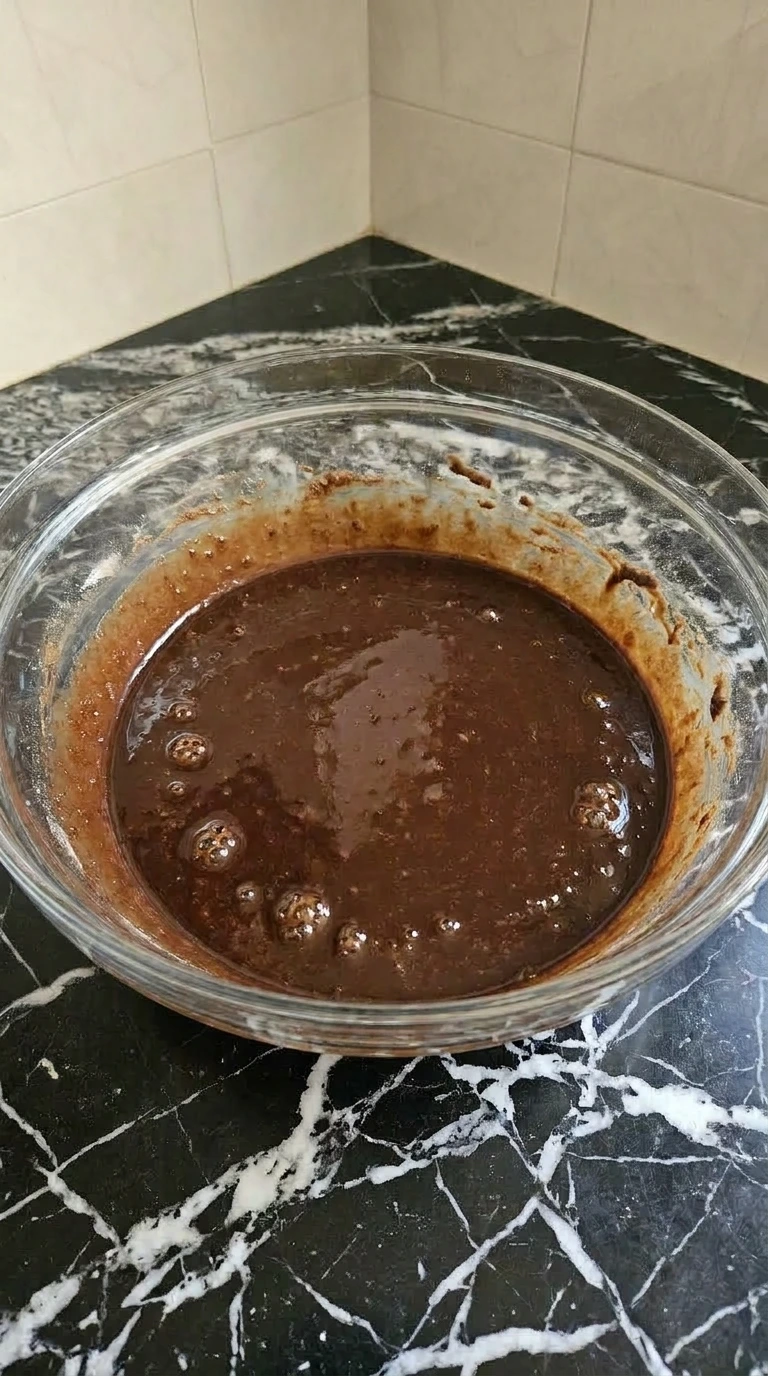
Pour the hot brewed coffee slowly into the thick batter paste while whisking gently with your free hand. Use a steady, J-shaped folding motion with a flexible rubber spatula to draw the liquid from the bottom up to the top.
Continue this gentle agitation for 60 seconds until the liquid incorporates fully into a sleek, pourable consistency. You’ll smell a sudden burst of roasted chocolate aroma as the heat blooms the cocoa solids, and the batter will turn into a thin, glossy, dark mahogany liquid with tiny bubbles popping on the surface.
If you skimp on the hot liquid, the cocoa crystals won’t dissolve properly. Whisk gently so you don’t overwork the gluten inside the flour.
Tip: The batter will look surprisingly thin and watery, but don’t add extra flour because this high moisture level creates the signature tender crumb.
Step 4: Bake the cake layers

Divide the liquid batter evenly into three greased 9-inch round cake pans, filling each pan about halfway up the sides. Place the pans carefully onto the middle rack of your 350°F preheated oven.
Bake steadily for 28 to 32 minutes without opening the oven door during the first 20 minutes to prevent a temperature drop. The liquid batter will set into a firm, dull, deep espresso-colored sponge that springs back lightly when touched in the center.
You’ll see the edges pull away slightly from the pan walls, and a wooden toothpick inserted into the middle will come out clean. Pull the cakes out too early and the centers will collapse into dense, gummy puddles as they cool down.
Tip: Rotate the pans halfway through the baking time if your oven has hot spots to ensure all three layers bake at an identical rate.
Step 5: Assemble and frost the layers
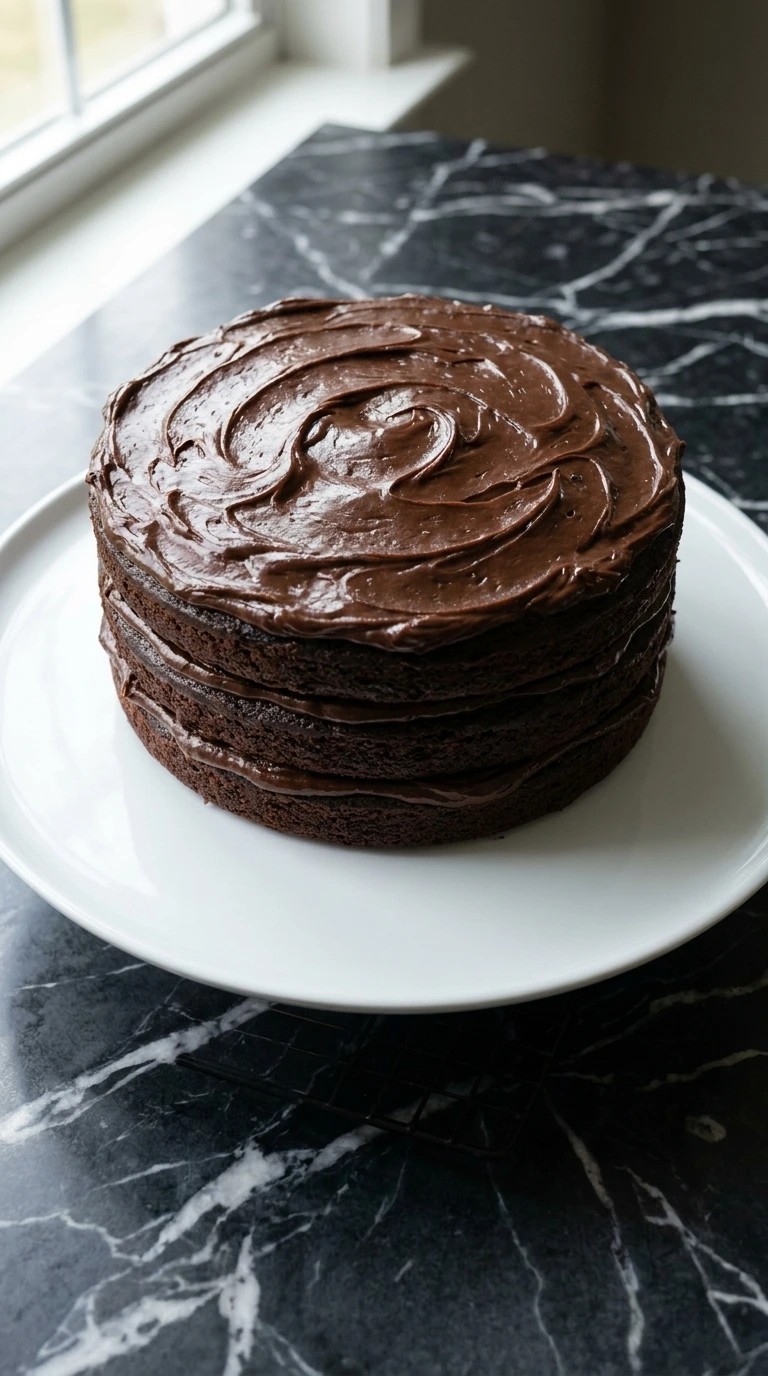
Place the first cooled cake layer onto your serving plate, then scoop a generous cup of chocolate fudge frosting onto the center. Spread the frosting unevenly to the edges using an offset spatula, then stack the second layer on top and repeat. Finish by coating the third layer and the outer sides with the remaining frosting.
The assembled cake will present a rustic, multi-tiered silhouette with dark brown frosting sealing the horizontal seams. You’ll see a thick, rich, spreadable texture that catches the light with a slight sheen across its non-uniform surfaces. (My first batch slid apart because I tried frosting the layers while they were still slightly warm.
Wait until they are completely cool to the touch.
Tip: If you need a break between baking and assembling, check out our How to Store section for tips on keeping the layers fresh.
Recipe Notes
- Grease your baking pans with vegetable shortening and dust them with cocoa powder instead of flour to avoid white streaks on your finished cake edges.
- Cool the cake layers inside their pans for exactly 10 minutes on a wire rack before flipping them out to prevent the hot sponge from tearing.
- Wrap the cooled cake layers tightly in plastic wrap and chill them for 1 hour before frosting to minimize crumb shedding as you spread the fudge.
- Measure your flour by weight using a digital kitchen scale at 240 grams to guarantee the cake crumb never turns out dense or dry.
- Tap the filled cake pans sharply against your counter twice right before baking to force trapped large air bubbles to the surface.
- Use a hot knife dipped in boiling water and wiped dry to slice the finished cake cleanly through the sticky fudge layers.
- Store your frosting at a room temperature of 72°F while the cakes bake so it remains completely pliable for easy assembly later.
- Add 1 teaspoon of ground cinnamon and a pinch of cayenne pepper to the dry blend for a Mexican chocolate twist that pairs well with coffee.
- Fold 1 cup of mini semi-sweet chocolate chips into the batter right before pouring into pans to create pockets of molten chocolate throughout the cake.
- Swap the fudge frosting for a light espresso buttercream to create an elegant mocha perfect for adult birthday parties.
Substitutions & Variations
- McArthur buttermilk: Whole milk and white vinegar — Mix 1 cup of whole milk with 1 tablespoon of vinegar and let it sit for 5 minutes until curdled. It provides the same acidity but makes the cake texture a tiny bit lighter.
- Crisco vegetable oil: Melted unsalted butter — Use an equal amount of melted butter to boost the dairy flavor, but note that the cake will firm up significantly more when refrigerated.
- hot brewed coffee: Boiling water — Swap with boiling water if you want to avoid caffeine entirely. The cocoa will still bloom from the heat, though the flavor profile will lose a bit of its earthy complexity.
How to Store
Store any leftovers in an airtight cake keeper at room temperature for up to three days to maintain the softest crumb texture. If your kitchen is warm, you can keep it in the refrigerator for up to six days instead.
Wrap the cake securely to shield it from drying out because cold fridge air pulls moisture from baked goods quickly. Serve your refrigerated slices by letting them sit on the counter for 30 minutes to warm up to room temperature.
This waiting step allows the fats in the fudge frosting to soften into a creamy consistency. Watch out for a dry surface or a dull, faded color as clear visual signs that the cake has spoiled.
Chocolate Cake
Ingredients
- 2 cups Gold Medal all-purpose flour Spoon and level carefully to provide the structural foundation of the cake crumb.
- 2 cups Domino granulated sugar Sweetens the batter and tenderizes the gluten matrix for a soft bite.
- 0.75 cup Hershey’s unsweetened cocoa powder Natural cocoa powder provides intense chocolate flavor and essential acidity for leavening.
- 2 teaspoons Arm & Hammer baking soda Reacts with the acidic buttermilk to lift the heavy batter during baking.
- 1 teaspoon Morton sea salt Fine grains sharpen the contrast and enhance the deep cocoa notes.
- 2 large eggs Bring to room temperature to emulsify properly and bind the batter structure.
- 1 cup McArthur buttermilk Full-fat variety provides moisture and the necessary acid activation for the rising agent.
- 0.5 cup Crisco vegetable oil Keeps the cake exceptionally moist and tender even when stored in the fridge.
- 1 tablespoon McCormick pure vanilla extract Deepens the complexity of the chocolate flavor profile significantly.
- 1 cup hot brewed coffee Freshly boiled coffee dissolves and blooms the cocoa powder for maximum flavor depth.
Instructions
- Measure your dry components carefully before starting the mixing process. Combine the all-purpose flour, granulated sugar, unsweetened cocoa powder, baking soda, and fine sea salt in your mixing vessel. (I tried using Dutch-process cocoa the first time, the cake didn’t rise properly because it lacks the acid needed to react with the baking soda. Stick to standard natural cocoa powder here.) Whisk the mixture continuously with a balloon whisk using a circular motion for exactly 45 seconds at room temperature. You’ll see the pale white flour and dark brown cocoa blend into a uniform, light tan powder with no visible streaks. This thorough blending ensures the leavening agent distributes evenly so your cake rises uniformly without large holes.
- Crack the large eggs directly into the center of the dry mixture, then pour in the buttermilk, vegetable oil, and pure vanilla extract. Use a heavy wooden spoon to stir the liquid into the powder using a wide, sweeping motion from the edges inward. Work the ingredients together at room temperature for about 1 to 2 minutes until the flour disappears completely. The mixture will transform into a very thick, matte, dark brown paste that resists your spoon slightly. Do not worry about a few small lumps at this stage because the hot liquid in the next step will smooth them out nicely. Miss this window of full incorporation and you’ll end up with pockets of dry flour baking into the core of your cake crumb.

- Pour the hot brewed coffee slowly into the thick batter paste while whisking gently with your free hand. Use a steady, J-shaped folding motion with a flexible rubber spatula to draw the liquid from the bottom up to the top. Continue this gentle agitation for 60 seconds until the liquid incorporates fully into a sleek, pourable consistency. You’ll smell a sudden burst of roasted chocolate aroma as the heat blooms the cocoa solids, and the batter will turn into a thin, glossy, dark mahogany liquid with tiny bubbles popping on the surface. If you skimp on the hot liquid, the cocoa crystals won’t dissolve properly. Whisk gently so you don’t overwork the gluten inside the flour.

- Divide the liquid batter evenly into three greased 9-inch round cake pans, filling each pan about halfway up the sides. Place the pans carefully onto the middle rack of your 350°F preheated oven. Bake steadily for 28 to 32 minutes without opening the oven door during the first 20 minutes to prevent a temperature drop. The liquid batter will set into a firm, dull, deep espresso-colored sponge that springs back lightly when touched in the center. You’ll see the edges pull away slightly from the pan walls, and a wooden toothpick inserted into the middle will come out clean. Pull the cakes out too early and the centers will collapse into dense, gummy puddles as they cool down.

- Place the first cooled cake layer onto your serving plate, then scoop a generous cup of chocolate fudge frosting onto the center. Spread the frosting unevenly to the edges using an offset spatula, then stack the second layer on top and repeat. Finish by coating the third layer and the outer sides with the remaining frosting. The assembled cake will present a rustic, multi-tiered silhouette with dark brown frosting sealing the horizontal seams. You’ll see a thick, rich, spreadable texture that catches the light with a slight sheen across its non-uniform surfaces. (My first batch slid apart because I tried frosting the layers while they were still slightly warm. Wait until they are completely cool to the touch.)

Notes
Nutrition
Questions I Get Asked
Yes, you can easily bake the layers up to two days in advance. Wrap the completely cooled sponges tightly in a double layer of plastic wrap and keep them at room temperature. This prep-ahead step actually makes the cake easier to frost because the crumb settles and firms up slightly.
This common troubleshooting issue happens if you open the oven door too early, causing a sudden drop in baking temperature. It can also occur if your baking soda is old and expired, which leaves the batter without enough lifting power to support the heavy cocoa structure as it bakes.
You can easily swap the buttermilk for 1 cup of almond milk mixed with 1 tablespoon of fresh lemon juice. Let it stand for 5 minutes until it curdles slightly before adding it to your batter. Ensure your chocolate frosting uses dairy-free stick butter to keep the entire dessert safe.
You can freeze the fully frosted cake successfully for up to three months. Place the uncovered cake in the freezer for 1 hour until the fudge frosting solidifies completely, then wrap it securely in plastic wrap and heavy aluminum foil. Thaw it overnight inside the refrigerator before serving.
This liquid batter works beautifully for cupcakes, but you must adjust your baking time down to 18 to 22 minutes at 350°F. Line a standard muffin tin with paper liners and fill each cup exactly two-thirds full so the thin batter has room to rise without spilling over the edges.
A Final Note
Every time I make this cake I think about the first time I tried it, nervous about screwing it up, convinced I’d need more pastry experience. Turns out it’s one of those desserts that forgives you for being a beginner in the kitchen.
You can mess up the timing like I did those first three attempts and the sponge still turns out remarkably good. If you try it, leave me a comment below because I read every single one.
And if you enjoyed this baking project, check out our other sweets like the Pumpkin Pie to keep your oven busy.
You might think pouring coffee into chocolate cake batter makes it taste like a latte, but it actually won’t. The hot liquid and the natural acids just wake up the cocoa beans and bring out their deep, fruity flavors instead.