Milkshake
Nothing hits the spot quite like a classic milkshake on a warm afternoon. It is the ultimate nostalgic treat and it takes me right back to the old-school diner counters of my childhood. But a lot of people struggle to get that perfect texture at home. It either turns out too thick to drink or it melts into a watery mess before you can even find a straw. I used to think you needed a fancy commercial machine to get it right.
Then last summer we were visiting family and my sister-in-law whipped up a batch using a simple trick. If you love frosty drinks, you should also check out our Strawberry Smoothie for a fruitier spin on breakfast. The secret to the perfect shake is actually just the temperature of your ingredients.
Today we are making a baseline vanilla bean version because it is the foundation for everything. Once you master this simple ratio, you can start adding all kinds of mix-ins. Grab your favorite tall glasses and let us get blending because this takes less than five minutes.
Why This Recipe Works
Blending at a specific low speed for exactly forty-five seconds prevents the friction of the blades from warming up the dairy.
Using premium vanilla ice cream with at least fourteen percent butterfat creates a stable emulsion that does not separate.
The small splash of whole milk must be ice-cold to keep the ice crystals from melting into water during the process.
Shopping List

- premium vanilla bean ice cream: Provides the dense fat base and the primary sweet flavor structure.
- whole milk: Thins the ice cream just enough to make it fluid while retaining creaminess.
- heavy whipping cream: Adds extra fat to stabilize the foam and create a velvety mouthfeel.
The Gear
- high-speed electric blender: Blends the dense ingredients into a smooth emulsion quickly.
- metal ice cream scoop: Portions out hard ice cream easily.
- tall glass milkshake parlor cup: Holds the finished beverage and keeps it cold.
How to
Step 1: Temper the ice cream

Take your premium vanilla bean ice cream out of the freezer and let it sit on the counter at a room temperature of 70°F. Leave it out for exactly 5 minutes before you plan to scoop it. You want the outer edges to soften slightly while the core stays solid. (I tried scooping right from the deep freeze the first time, the blades just spun and heated up the motor.
) Watch for the surface to lose its hard matte look and take on a faint glossy sheen. If you skip this quick resting window, the ice cream will be too stubborn to blend smoothly. Then you will be forced to add extra milk to get things moving. That mistake ruins the thick diner texture because the excess liquid dilutes the rich fat structure.
Letting it temper makes scooping effortless. It ensures the dairy incorporates evenly without turning into soup. Slow warming at room temperature keeps the ice crystals small.
Tip: Dip your metal scoop in warm water for ten seconds to make carving the frozen scoops effortless.
Step 2: Layer the ingredients

Place 3 large scoops of the tempered ice cream directly into the bottom of the transparent blender jar. Pour 0. 5 cup of ice-cold whole milk and 2 tablespoons of heavy whipping cream right over the top. Make sure your dairy comes straight from a 38°F refrigerator so it stays as cold as possible.
You will see the liquid pool around the base of the scoops while the vanilla bean specks settle in the cream. Do not stir the mixture yet because the blender needs the liquid at the bottom to create a vortex. If you put the liquid in last, the blades will jam on the solid mass. Layering correctly protects the motor and ensures a fast breakdown.
Keeping everything chilled prevents early melting. This specific sequence builds the ideal emulsion later.
Tip: Measure your milk in a chilled liquid measuring cup to prevent any temperature rise before blending.
Step 3: Blend on low speed

Secure the lid and turn your machine to a medium-low heat equivalent speed (about level 3 on a 10-dial scale). Run the blades for exactly 45 seconds without stopping. Use a rubber spatula to scrape the sides down halfway through if any large chunks get stuck on the walls. You will hear the heavy thudding sound quiet down into a smooth rhythmic hum as the mixture unifies.
Look for a deep vortex to form in the center of the jar. The liquid should completely swallow the solid chunks until you see a thick frothy cream with tiny black vanilla specks swirling around. Go past 60 seconds and the friction from the spinning blades will melt the shake completely. Stop blending the moment the last visible lump disappears.
Keeping the speed low keeps the air bubbles small and dense. This short timing window preserves the frozen microcrystalline structure.
Tip: Do not use the high pulse button or you will whip too much air into the dairy and create a thin foam.
Step 4: Pour and finish

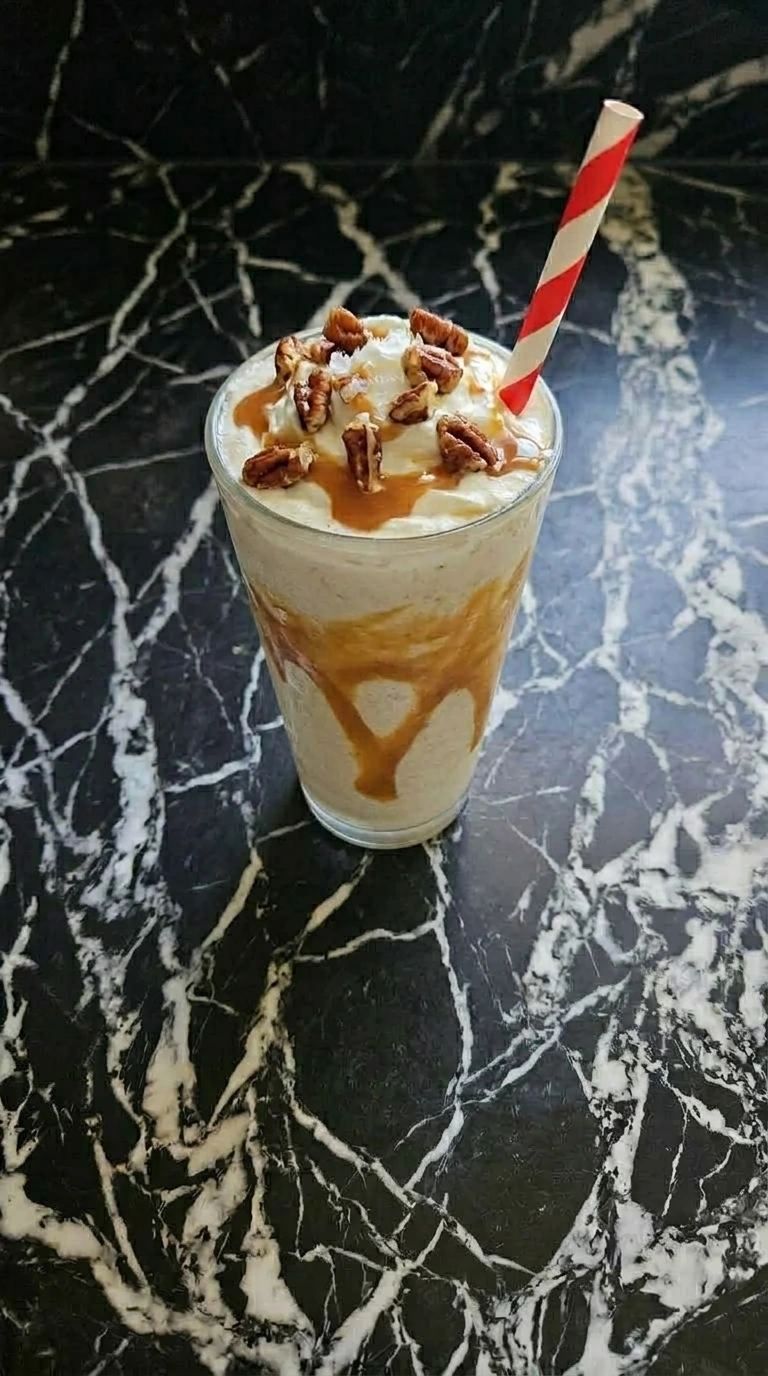
Tilt the blender jar and pour the thick mixture directly into a chilled tall glass parlor cup from a height of about 3 inches. The stream should look dense and ribbon slightly as it hits the bottom of the glass. It forms a gentle mound in the center that slowly settles into an uneven surface with natural air pockets. You will smell the sweet vanilla bean aroma rising up as the glass fills to the brim.
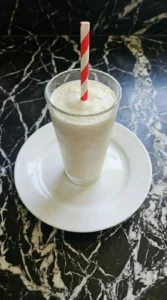
If your shake is perfect, a red paper straw inserted into the center will stand perfectly straight without tilting to the side. (I used to use warm glasses from the dishwasher. The shake melts instantly on contact so always freeze your glass for 10 minutes. ) Serve it immediately while the frost is still clinging to the outside of the glass.
The non-uniform top edge shows it is thick and homemade. Pouring from a slight height helps the shake settle without trapping huge air pockets.
Tip: Put your serving glasses in the freezer for ten minutes before pouring to keep the shake frosty until the last sip.
Chef’s Notes
- Use premium ice cream brands with low overrun because cheaper brands pump too much air into the container.
- Chill your blender jar in the refrigerator for twenty minutes before adding ingredients to prevent the glass from melting the dairy.
- Always use whole milk because lower fat options like skim milk make the drink taste icy instead of creamy.
- Measure your ingredients exactly instead of eyeballing because a single extra ounce of milk ruins the thickness instantly.
- Scrape the blender walls down with a rubber spatula at the twenty-second mark to catch stray solid pieces.
- Serve with a wide-diameter straw because classic thin straws will collapse under the pressure of a dense diner shake.
Variations to Try
- premium vanilla bean ice cream: premium chocolate fudge ice cream — Changes the flavor profile entirely but keeps the same thick texture. Excellent if you want a deeper cocoa taste.
- whole milk: unsweetened almond milk — Works to thin the shake but makes the final texture much thinner and less velvety because it lacks the natural milk fats.
- heavy whipping cream: whole milk — You can just use extra milk but the shake will lose that luxurious diner richness and melt slightly faster in the glass.
- premium vanilla bean ice cream: dairy-free oat milk vanilla frozen dessert — If you want a lighter version try our [Mango Smoothie](https://leagueofcooking.com/?p=4930) or use this swap. It creates a decent texture but melts much faster than dairy.
How to Store
Milkshakes do not store well once they are blended. You should always enjoy this dessert fresh from the blender jar.
If you have leftovers, you can pour them into a covered jar and keep them in the freezer for up to 2 days. The texture will freeze solid so you must let it thaw on the counter for 15 minutes and stir it vigorously before drinking.
It will lose some of its original fluffiness but the flavor stays great.
Milkshake
Ingredients
- 3 scoops (approx. 1.5 cups) premium vanilla bean ice cream Provides the dense fat base and the primary sweet flavor structure.
- 0.5 cup whole milk Thins the ice cream just enough to make it fluid while retaining creaminess.
- 2 tablespoons heavy whipping cream Adds extra fat to stabilize the foam and create a velvety mouthfeel.
Instructions
- Take your premium vanilla bean ice cream out of the freezer and let it sit on the counter at a room temperature of 70°F. Leave it out for exactly 5 minutes before you plan to scoop it. You want the outer edges to soften slightly while the core stays solid. (I tried scooping right from the deep freeze the first time — the blades just spun and heated up the motor.) Watch for the surface to lose its hard matte look and take on a faint glossy sheen. If you skip this quick resting window, the ice cream will be too stubborn to blend smoothly. Then you will be forced to add extra milk to get things moving. That mistake ruins the thick diner texture because the excess liquid dilutes the rich fat structure. Letting it temper makes scooping effortless. It ensures the dairy incorporates evenly without turning into soup. Slow warming at room temperature keeps the ice crystals small.

- Place 3 large scoops of the tempered ice cream directly into the bottom of the transparent blender jar. Pour 0.5 cup of ice-cold whole milk and 2 tablespoons of heavy whipping cream right over the top. Make sure your dairy comes straight from a 38°F refrigerator so it stays as cold as possible. You will see the liquid pool around the base of the scoops while the vanilla bean specks settle in the cream. Do not stir the mixture yet because the blender needs the liquid at the bottom to create a vortex. If you put the liquid in last, the blades will jam on the solid mass. Layering correctly protects the motor and ensures a fast breakdown. Keeping everything chilled prevents early melting. This specific sequence builds the ideal emulsion later.

- Secure the lid and turn your machine to a medium-low heat equivalent speed (about level 3 on a 10-dial scale). Run the blades for exactly 45 seconds without stopping. Use a rubber spatula to scrape the sides down halfway through if any large chunks get stuck on the walls. You will hear the heavy thudding sound quiet down into a smooth rhythmic hum as the mixture unifies. Look for a deep vortex to form in the center of the jar. The liquid should completely swallow the solid chunks until you see a thick frothy cream with tiny black vanilla specks swirling around. Go past 60 seconds and the friction from the spinning blades will melt the shake completely. Stop blending the moment the last visible lump disappears. Keeping the speed low keeps the air bubbles small and dense. This short timing window preserves the frozen microcrystalline structure.

- Tilt the blender jar and pour the thick mixture directly into a chilled tall glass parlor cup from a height of about 3 inches. The stream should look dense and ribbon slightly as it hits the bottom of the glass. It forms a gentle mound in the center that slowly settles into an uneven surface with natural air pockets. You will smell the sweet vanilla bean aroma rising up as the glass fills to the brim. If your shake is perfect, a red paper straw inserted into the center will stand perfectly straight without tilting to the side. (I used to use warm glasses from the dishwasher. The shake melts instantly on contact so always freeze your glass for 10 minutes.) Serve it immediately while the frost is still clinging to the outside of the glass. The non-uniform top edge shows it is thick and homemade. Pouring from a slight height helps the shake settle without trapping huge air pockets.
Notes
Nutrition
Common Questions
This usually happens because you added too much milk or blended for too long. The friction from the blender blades generates heat and melts the ice cream crystals. Keep your blending time strictly under forty-five seconds on low speed.
You cannot blend this ahead of time because the emulsion breaks as it sits. However, you can scoop your ice cream onto a baking sheet and freeze the balls overnight. This trick makes the actual assembly take under sixty seconds when guests arrive.
The golden ratio is three large scoops of premium dense ice cream to half a cup of liquid. If you change this balance, the drink either will not blend or it becomes too thin to hold a straw.
Add two tablespoons of original malted milk powder into the blender jar during the layering step. Do not use chocolate malt powder unless you want to change the vanilla . This adds a classic roasty sweetness.
Never add ice cubes to a traditional dairy shake because they crush into water and ruin the creamy texture. If you want a cold fruity option without dairy, our [Iced Coffee](https://leagueofcooking.com/?p=4944) or a cold smoothie is a better choice.
In Conclusion
This classic vanilla treat is proof that simple ingredients make the absolute best desserts. It is rich and thick and takes almost no effort to clean up afterwards.
I love serving these on warm weekend evenings when everyone wants something sweet but nobody wants to turn on the oven. Give this diner ratio a try next time you have a craving and let me know how your straw stands up.