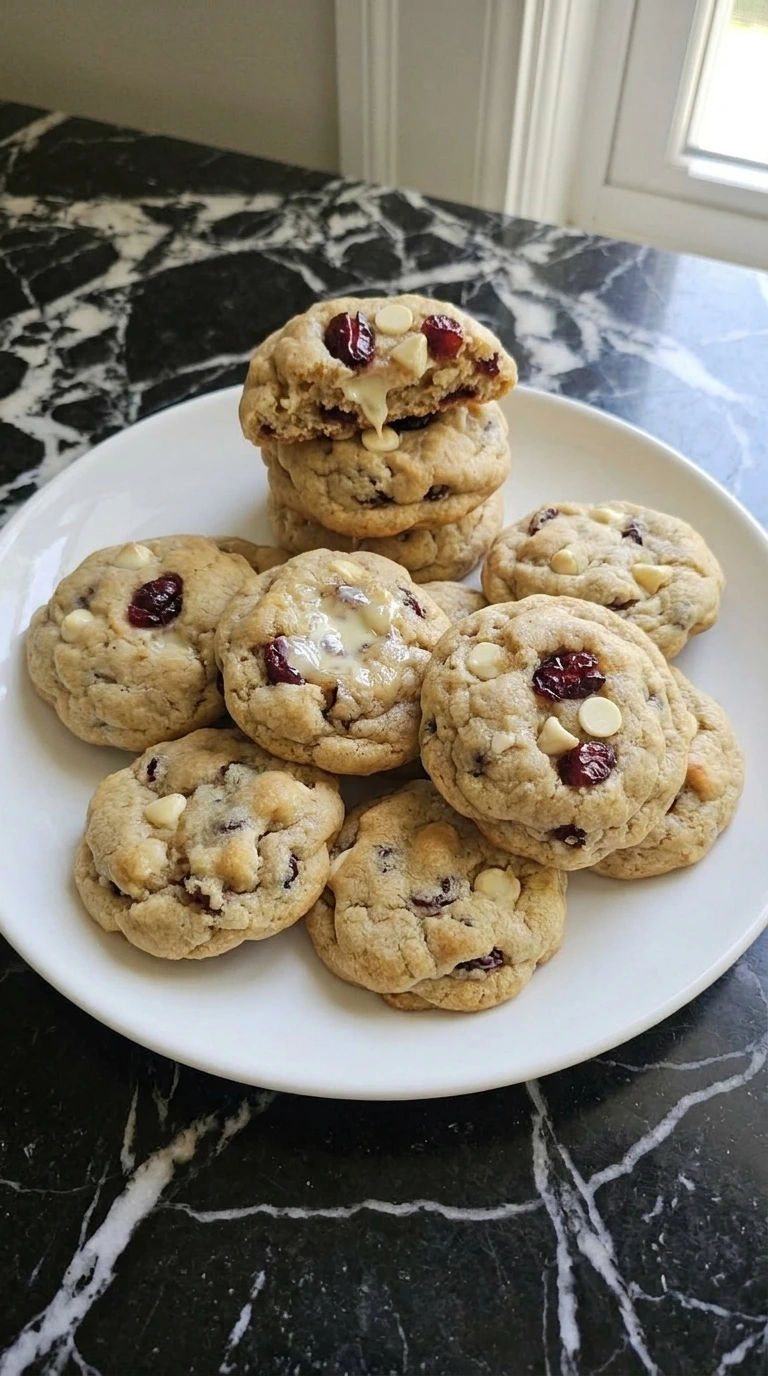
Chocolate Cupcakes
This is the kind of thing I wish I’d learned sooner. The first time I made it was for Thanksgiving 2020, when we couldn’t travel, and I overcooked it by almost 10 minutes. It was still the best part of the meal somehow. That’s when I realized this recipe is way more forgiving than most people admit. Since then I’ve made it for holiday dinners, random Tuesday nights when friends dropped by, and once for a potluck where three people asked for the recipe.
It’s juicy, packed with flavor, and genuinely simple even if the ingredient list looks long. I used to be intimidated by getting that perfect bakery-style dome on top. My old batches always sank in the middle or turned out dense like hockey pucks. But after tweaking the leavening agents and switching to standard Dutch-process cocoa, everything changed. If you love deep chocolate flavors, you will also want to check out my classic Carrot Cake for another crowd-pleasing dessert option.
You do not need any fancy equipment for this recipe either. A couple of bowls and a sturdy whisk will get the job done beautifully. The batter will look thin when you pour it, but do not panic because that high moisture content is exactly what keeps them incredibly soft for days.
Why You’ll Love It
The science behind this recipe relies on blooming the cocoa powder with hot brewed coffee before baking. The high temperature of the liquid dissolves the cocoa solids quickly, which releases trapped volatile flavor compounds and deepens the overall chocolate intensity.
Using canola oil instead of traditional creamed butter keeps the crumb exceptionally soft. Liquid fats remain fluid at room temperature, so the cupcakes stay moist for days without turning dense or drying out.
If you prefer a lighter velvet style, you can see how a similar acid-base reaction works in our popular Green Velvet Cupcakes post.
The Ingredients

- Gold Medal All-Purpose Flour: Sifted cleanly to provide the foundational gluten structure for a soft crumb.
- granulated white sugar: Adds essential sweetness and locks in moisture during the baking process.
- Hershey’s Cocoa Powder: Unsweetened Dutch-process variety for an intensely rich and dark chocolate base.
- baking powder: Acts as the primary leavening agent to help the domes rise beautifully.
- baking soda: Reacts with the acidic cocoa elements to create an airy interior texture.
- fine sea salt: Enhances the deep cocoa notes and balances the heavy sweetness.
- large brown eggs: Bring to room temperature before mixing to ensure seamless emulsification.
- whole milk: Provides the fat content necessary for a tender and velvety mouthfeel.
- canola oil: Keeps the cake crumb incredibly moist for days after baking.
- McCormick Vanilla Extract: Adds a warm background aroma that deepens the chocolate profile.
- dark brewed coffee: Must be hot to bloom the cocoa solids and intensify the natural flavors.
- Land O’Lakes unsalted butter: Softened completely to create a smooth, pipeable frosting base.
- powdered sugar: Sifted fine to thicken and sweeten the chocolate buttercream smoothly.
- heavy whipping cream: Thins the frosting slightly to achieve a velvety, spreadable consistency.
- rainbow nonpareil sprinkles: Used as an asymmetric, festive garnish across the frosted tops.
What You’ll Use
- 12-cup aluminum muffin tin: A heavy-gauge aluminum muffin tin distributes heat evenly across all cups so the individual batters rise at the same rate — thin steel pans can create hot spots that scorch the outer edges.
- Wire whisk: A sturdy stainless steel wire whisk is essential for breaking up tiny cocoa lumps and blending the liquid ingredients efficiently without overworking the delicate gluten structure.
- Pastry bag with open-star tip: A durable canvas or disposable plastic pastry bag allows you to control the pressure needed for clean bakery-style frosting swirls — using a basic knife will flatten the airy texture.
How to
Step 1: Whisk the dry ingredients
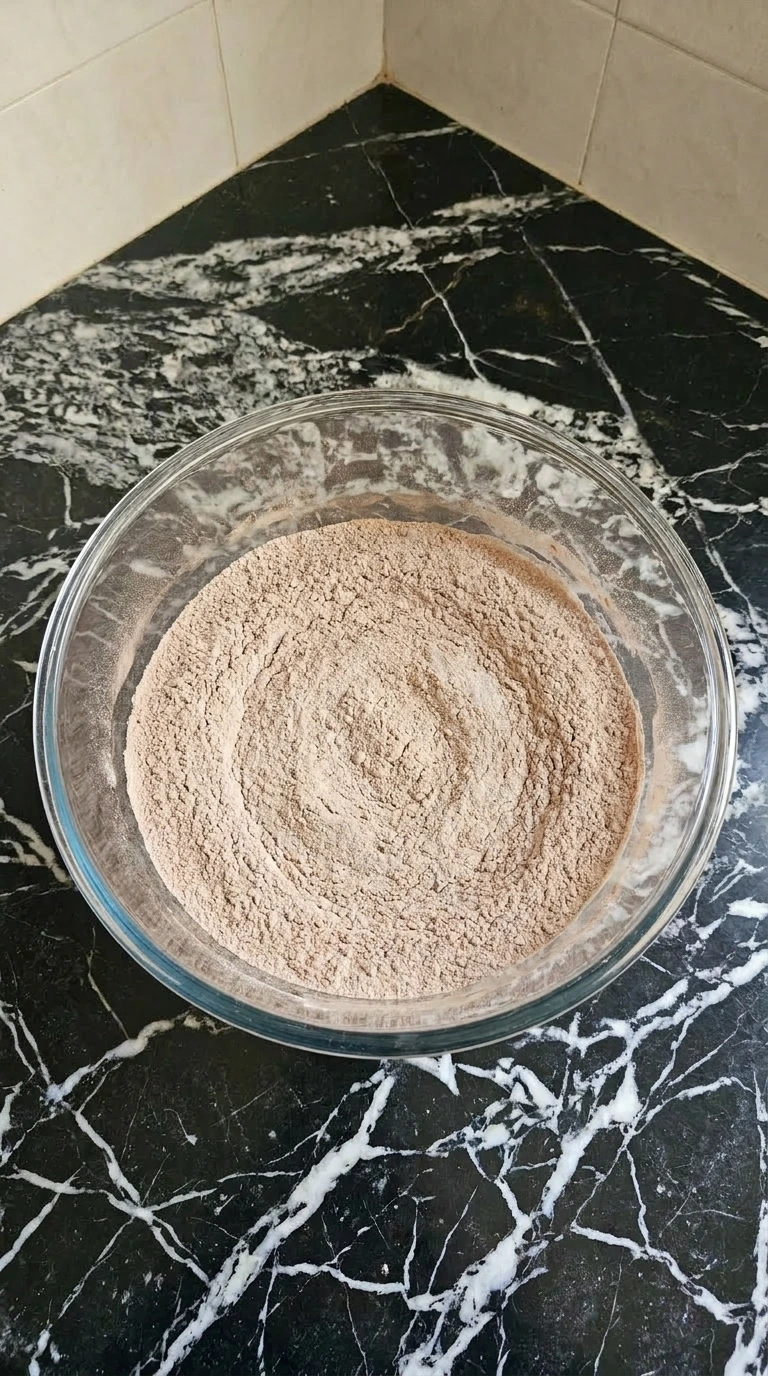
Sift the all-purpose flour, granulated sugar, cocoa powder, baking powder, baking soda, and fine sea salt into a large clear glass mixing bowl. Use a wire whisk to combine them thoroughly using an easy circular motion for about 30 seconds. (I tried skipping the sifting step during my first test run, the cocoa clumped up and left bitter pockets of powder in the final baked cakes.
) You want to see a completely uniform, pale brown powdery mixture without any distinct streaks of white flour or dark cocoa. The whisking introduces air into the heavy components and breaks up stubborn lumps. This ensures the leavening agents distribute evenly through the flour.
Combine the dry ingredients thoroughly, even distribution prevents the batter from rising unevenly in the oven.
Tip: Sift the cocoa powder specifically because it tends to absorb moisture and form hard lumps that regular whisking cannot break.
Step 2: Mix the wet ingredients
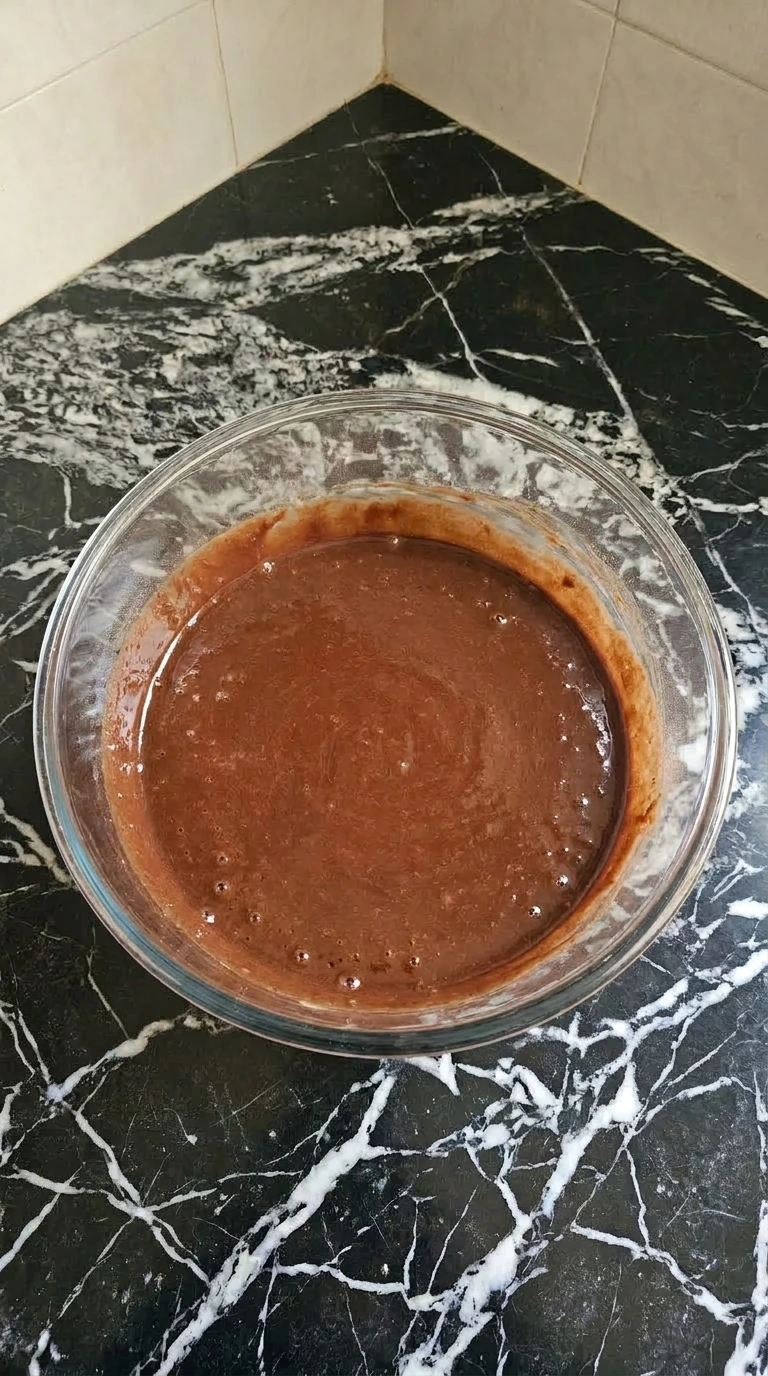
Crack the two large eggs directly into the dry mixture, then add the whole milk, canola oil, and vanilla extract. Pour the hot brewed coffee slowly into the bowl while whisking continuously in a steady J-shaped motion from the bottom up. Work the liquids into the powder for about 1 to 2 minutes until a smooth, thin batter forms.
You will notice the dark liquid instantly transforming the pale powder into a glossy, liquid chocolate mahogany mixture. The batter will appear quite thin and watery compared to traditional cake mixes, and you will smell a sudden burst of rich chocolate aromatic notes. The hot coffee blooms the cocoa particles instantly.
Whisk the liquids in quickly, the heat activates the cocoa flavors without cooking the eggs.
Tip: Make sure your coffee is hot but not boiling because excessively hot liquid can accidentally scramble the raw eggs in the mix.
Step 3: Divide into the tin
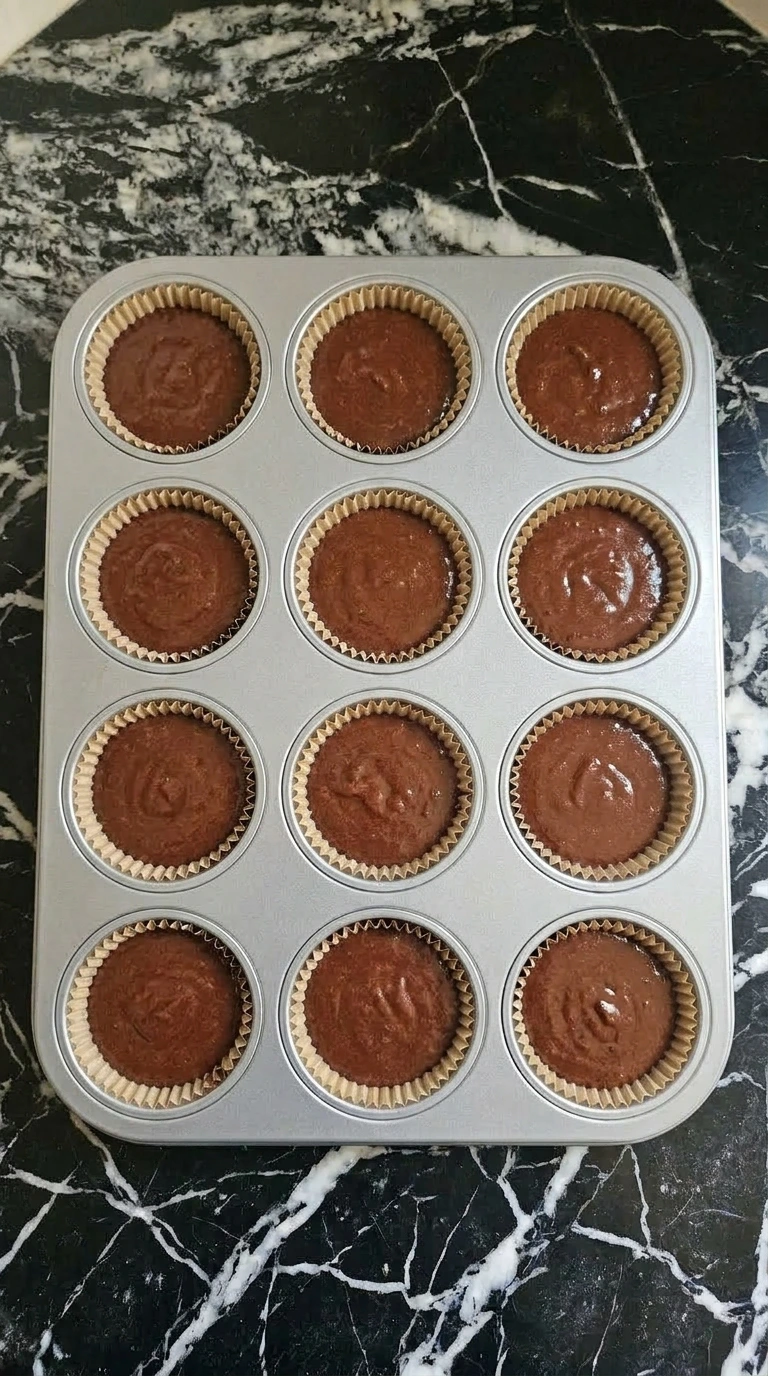
Place 12 paper liners into a standard 12-cup aluminum muffin tin, choosing a neutral tone to match the rustic feel. Use a stainless steel batter scoop to transfer the thin fluid mix, filling each lined cup exactly three-quarters full. Work carefully to avoid dripping batter onto the metal edges of the pan.
The dark brown fluid pool will sit cleanly inside the pleated paper cups, leaving about a quarter-inch of space below the rim. The surface of each filled cup should look glossy and smooth with a few tiny surface bubbles. The arrangement is slightly asymmetrical across the tin.
Fill each cup three-quarters full, leaving space allows the cakes to expand without overflowing.
Tip: Use a spring-loaded ice cream scoop for this step because it measures the thin batter precisely and keeps your kitchen counters clean.
Step 4: Bake until set
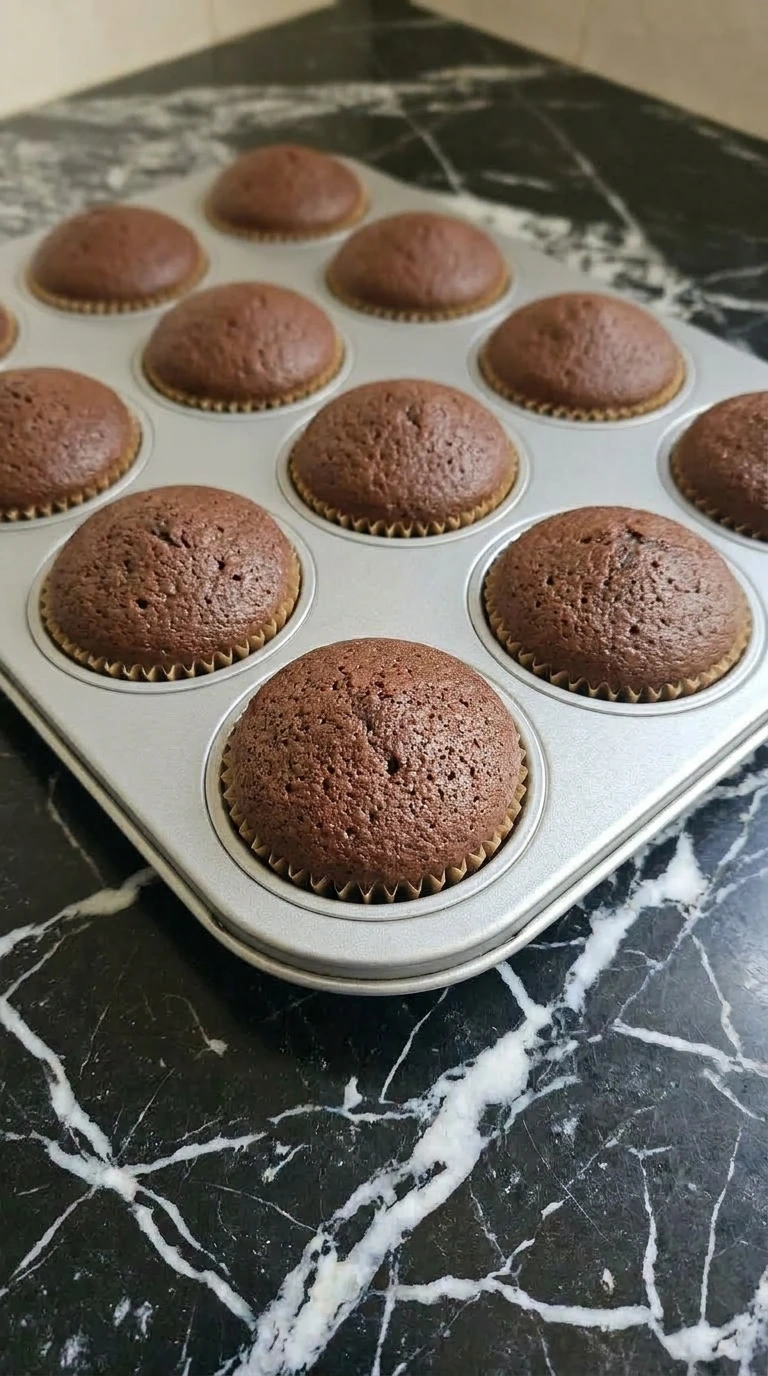
Slide the filled tin onto the center rack of a 350°F preheated oven and bake for exactly 18 to 20 minutes. Do not open the oven door during the first 15 minutes because the sudden draft can cause the rising centers to collapse. (My first batch went into a 400°F oven and the tops set before the centers cooked through, 350°F is the permanent fix.
) You will watch the fluid pools puff up into a soft, rounded dome shape with a matte, dark brown appearance. A wooden toothpick inserted into the center of a middle cupcake should come out clean or with a few moist crumbs attached. The kitchen will fill with an intense chocolate aroma.
Bake at 350°F until set, stable heat sets the crumb structure perfectly without drying the edges.
Tip: Rotate the muffin tin 180 degrees halfway through the baking time if your oven has known hot spots for an even rise.
Step 5: Frost and garnish

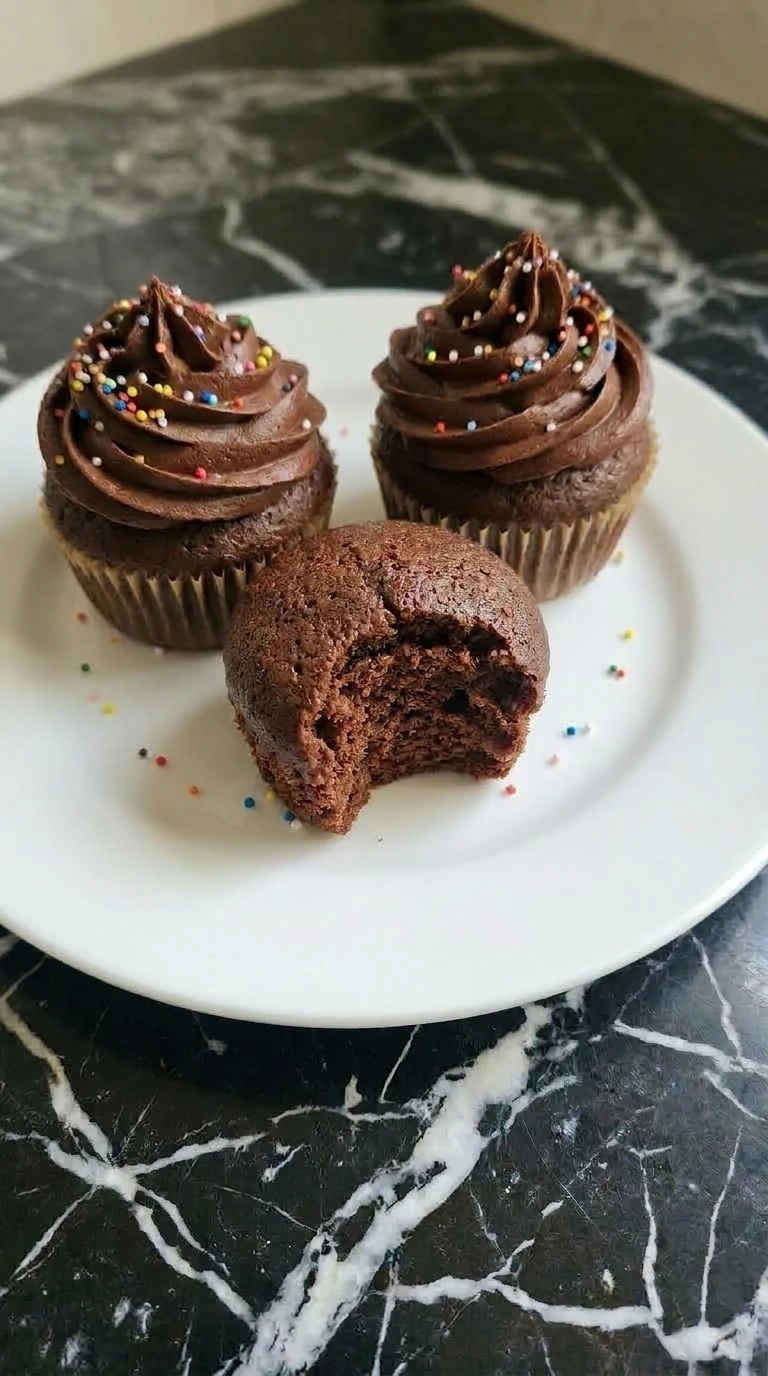
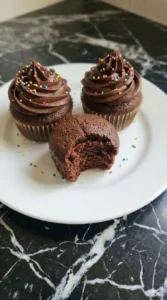
Transfer the cooled cakes onto a flat white ceramic serving plate, arranging them with natural spacing and a slight overlap. Load a pastry bag fitted with an open-star tip with rich chocolate buttercream frosting. Pipe a high, tight spiral mound onto each cake, then scatter bright rainbow nonpareils unevenly over the swirls.
The glossy, deep chocolate frosting creates a dramatic contrast against the matte cupcake surface. The nonpareils add dots of color that catch the light, while a few stray crumbs sit naturally on the white plate. Take a clean bite out of one cupcake to showcase the aerated crumb.
Frost only when completely cool, warm cakes melt the butter base and ruin the piped definition.
Tip: Let the cupcakes rest on a wire rack for at least 45 minutes before frosting because any trapped heat will liquefy the buttercream.
My Favorite Tips
- Bring your eggs and milk to room temperature before mixing because cold liquids can seize the fats and cause uneven baking.
- Sift your powdered sugar twice before building the buttercream frosting to eliminate stubborn micro-lumps that block pastry tips.
- Measure your flour using the spoon-and-level method because scooping directly with a cup packs the flour and makes cakes dense.
- Keep the oven door completely closed until minute 15 because early drafts drop the internal temperature and sink the centers.
- Use premium Dutch-process cocoa powder rather than natural cocoa because it has lower acidity and creates a darker color.
- Apply the frosting only when the cupcake bases feel completely cold to the touch or the buttercream will melt completely.
- Tap the filled muffin tin firmly against the kitchen counter twice before baking to release large trapped air pockets.
- Fold 1/2 cup of mini semi-sweet chocolate chips into the finished batter right before portioning for an intense double-chocolate texture.
- Swirl a teaspoon of creamy peanut butter into the center of each filled liner before baking for a rich salty-sweet surprise.
- Add 1 teaspoon of ground cinnamon and a tiny pinch of cayenne pepper to the dry ingredients for a Mexican hot chocolate twist.
Substitutions & Variations
- canola oil: melted coconut oil — Use the exact same ratio but expect a subtle tropical flavor undertone and a slightly firmer crumb when the cupcakes cool completely.
- whole milk: plain oat milk — Works as a fantastic dairy-free alternative at a one-to-one ratio without altering the final baking time or the moisture balance.
- dark brewed coffee: boiling water — Use a one-to-one replacement if you want to avoid caffeine entirely, though the chocolate flavor will taste slightly less intense.
- Gold Medal All-Purpose Flour: Bob’s Red Mill 1-to-1 Gluten-Free Baking Flour — Swap evenly but add an extra tablespoon of milk because alternative grains tend to absorb slightly more moisture during baking. For a different gluten-free option on our site, see the Detox Green Smoothie for a fresh morning change.
How to Store
You can keep your decorated cupcakes in a single layer inside a tall, airtight container right on the counter for up to three days. If your kitchen gets too warm, just slip the container into the fridge for up to five days instead. Just make sure to let them sit out for twenty minutes before you serve them.
If you haven’t frosted them yet, the plain bases can be wrapped tightly in plastic wrap and tossed into a heavy-duty freezer bag for up to three months. When you’re ready to thaw them, leave them wrapped on the counter for about two hours. Keeping the wrap on stops condensation from making the tops sticky.
Whatever you do, don’t use a microwave to warm up frosted cupcakes because the butter in the frosting will liquefy instantly. To tell if they’ve gone bad, look out for a dry crumb or any weird, off-flavors in the dairy.
Chocolate Cupcakes
Ingredients
- 1.75 cups Gold Medal All-Purpose Flour Sifted cleanly to provide the foundational gluten structure for a soft crumb.
- 2 cups granulated white sugar Adds essential sweetness and locks in moisture during the baking process.
- 0.75 cup Hershey’s Cocoa Powder Unsweetened Dutch-process variety for an intensely rich and dark chocolate base.
- 1.5 teaspoons baking powder Acts as the primary leavening agent to help the domes rise beautifully.
- 1.5 teaspoons baking soda Reacts with the acidic cocoa elements to create an airy interior texture.
- 1 teaspoon fine sea salt Enhances the deep cocoa notes and balances the heavy sweetness.
- 2 large brown eggs Bring to room temperature before mixing to ensure seamless emulsification.
- 1 cup whole milk Provides the fat content necessary for a tender and velvety mouthfeel.
- 0.5 cup canola oil Keeps the cake crumb incredibly moist for days after baking.
- 2 teaspoons McCormick Vanilla Extract Adds a warm background aroma that deepens the chocolate profile.
- 1 cup dark brewed coffee Must be hot to bloom the cocoa solids and intensify the natural flavors.
- 1 cup Land O’Lakes unsalted butter Softened completely to create a smooth, pipeable frosting base.
- 3.5 cups powdered sugar Sifted fine to thicken and sweeten the chocolate buttercream smoothly.
- 3 tablespoons heavy whipping cream Thins the frosting slightly to achieve a velvety, spreadable consistency.
- 2 tablespoons rainbow nonpareil sprinkles Used as an asymmetric, festive garnish across the frosted tops.
Instructions
- Sift the all-purpose flour, granulated sugar, cocoa powder, baking powder, baking soda, and fine sea salt into a large clear glass mixing bowl. Use a wire whisk to combine them thoroughly using an easy circular motion for about 30 seconds. (I tried skipping the sifting step during my first test run, the cocoa clumped up and left bitter pockets of powder in the final baked cakes.) You want to see a completely uniform, pale brown powdery mixture without any distinct streaks of white flour or dark cocoa. The whisking introduces air into the heavy components and breaks up stubborn lumps. This ensures the leavening agents distribute evenly through the flour. Combine the dry ingredients thoroughly, even distribution prevents the batter from rising unevenly in the oven.

- Crack the two large eggs directly into the dry mixture, then add the whole milk, canola oil, and vanilla extract. Pour the hot brewed coffee slowly into the bowl while whisking continuously in a steady J-shaped motion from the bottom up. Work the liquids into the powder for about 1 to 2 minutes until a smooth, thin batter forms. You will notice the dark liquid instantly transforming the pale powder into a glossy, liquid chocolate mahogany mixture. The batter will appear quite thin and watery compared to traditional cake mixes, and you will smell a sudden burst of rich chocolate aromatic notes. The hot coffee blooms the cocoa particles instantly. Whisk the liquids in quickly, the heat activates the cocoa flavors without cooking the eggs.

- Place 12 paper liners into a standard 12-cup aluminum muffin tin, choosing a neutral tone to match the rustic feel. Use a stainless steel batter scoop to transfer the thin fluid mix, filling each lined cup exactly three-quarters full. Work carefully to avoid dripping batter onto the metal edges of the pan. The dark brown fluid pool will sit cleanly inside the pleated paper cups, leaving about a quarter-inch of space below the rim. The surface of each filled cup should look glossy and smooth with a few tiny surface bubbles. The arrangement is slightly asymmetrical across the tin. Fill each cup three-quarters full, leaving space allows the cakes to expand without overflowing.

- Slide the filled tin onto the center rack of a 350°F preheated oven and bake for exactly 18 to 20 minutes. Do not open the oven door during the first 15 minutes because the sudden draft can cause the rising centers to collapse. (My first batch went into a 400°F oven and the tops set before the centers cooked through, 350°F is the permanent fix.) You will watch the fluid pools puff up into a soft, rounded dome shape with a matte, dark brown appearance. A wooden toothpick inserted into the center of a middle cupcake should come out clean or with a few moist crumbs attached. The kitchen will fill with an intense chocolate aroma. Bake at 350°F until set, stable heat sets the crumb structure perfectly without drying the edges.
- Transfer the cooled cakes onto a flat white ceramic serving plate, arranging them with natural spacing and a slight overlap. Load a pastry bag fitted with an open-star tip with rich chocolate buttercream frosting. Pipe a high, tight spiral mound onto each cake, then scatter bright rainbow nonpareils unevenly over the swirls. The glossy, deep chocolate frosting creates a dramatic contrast against the matte cupcake surface. The nonpareils add dots of color that catch the light, while a few stray crumbs sit naturally on the white plate. Take a clean bite out of one cupcake to showcase the aerated crumb. Frost only when completely cool, warm cakes melt the butter base and ruin the piped definition.
Notes
Reader Questions
Yes, you can easily bake the cupcake bases up to two days in advance. Store them unfrosted in an airtight container at room temperature to keep the crumb soft, then pipe the fresh buttercream right before your guests arrive.
The centers usually collapse if your baking powder or baking soda is expired and lost its strength. It can also happen if you open the oven door too early during baking, which causes a sudden temperature drop before the structure sets.
If your chocolate buttercream feels too dense to pipe cleanly, beat in heavy whipping cream one teaspoon at a time. The extra liquid thins the sugar matrix quickly and restores a velvety, smooth consistency that flows through pastry tips easily.
Baked unfrosted cupcakes freeze beautifully for up to three months when wrapped tightly in plastic wrap and stored in a freezer bag. Thaw them completely on the kitchen counter for two hours before adding fresh frosting.
You can use a heavy-duty gallon Ziploc bag by snipping off one bottom corner to create a makeshift pastry pouch. Alternatively, use a small offset spatula or a butter knife to spread thick, rustic swirls of buttercream over the tops.
In Conclusion
This is the kind of recipe I wish I had found years ago. It would have saved me so many stressful dinner nights.
But now that I have it, I make it all the time and I think you will too. If you enjoyed this, check out some of my other popular recipes on the blog, like our classic holiday favorite Strawberry Cheesecake.
And leave a comment, I read every single one and it really makes my day.
Don’t worry, adding hot coffee won’t turn your cupcakes into an espresso bomb. It’s actually a neat little trick because the hot liquid simply wakes up the cocoa beans. It brings out all those hidden, rich, fruity, and earthy notes that make dark chocolate taste so amazing.