Green Velvet Cupcakes
I wanted a green velvet cupcake that actually tastes like velvet, not just vanilla dyed green. It took a few tries. Too much color looked fake, too much cocoa felt heavy, and the frosting kept sliding off. So I pulled it back.
Less cocoa, more buttermilk, and a frosting that holds its shape without turning stiff. If you like the classic version, you’ll probably enjoy these just as much as my Red Velvet Cupcakes

The result is soft, lightly tangy, and just festive enough. The green looks natural, not neon. And the swirl on top stays put, even when you go a little messy with it.
The Secret to This Recipe
The balance comes from keeping cocoa low while letting buttermilk and vinegar react with baking soda at 350°F. That quick lift in the first 12 minutes sets a tender crumb before the structure firms up. Overmixing after flour goes in ruins that texture, so the fold step matters more than people think.
What You Will Need

- whole cultured buttermilk: Or mix 1/2 cup whole milk with 1 1/2 teaspoons distilled white vinegar and let it sit 5 minutes. It works, just slightly less tangy.
- all-purpose wheat flour: Or use a 1:1 gluten-free blend with xanthan gum. The crumb stays soft but can crack on top and feel a bit sandy once chilled.
- large eggs: Or use 1/2 cup unsweetened applesauce. Expect a softer, slightly denser center. Bake 1 to 2 minutes longer if needed.
- full-fat block cream cheese: Or use dairy-free cream cheese style spread. It works, but softens faster so chill before using. For another creamy dessert, try Strawberry Cheesecake
- green gel food coloring: Liquid coloring works too, but start with 2 teaspoons. It lightens the shade and thins the batter slightly.
Kitchen Equipment
Step by Step
Step 1: Cream the butter and sugar

Start with butter at about 68°F. Press it and it should dent, not smear. Beat with sugar on medium speed for 2 to 3 minutes, scraping the bowl at minute 2 so nothing sticks low. Keep your motion steady and circular. You’re looking for a pale, fluffy mix with fine sugar trails. It should look lighter and almost whipped. Go past 4 minutes and the structure gets too airy, which makes the cupcakes rise fast then collapse.
Tip: If your kitchen runs warm, chill the butter for 5 minutes before starting so it doesn’t go greasy mid-mix.
Step 2: Mix the green velvet batter
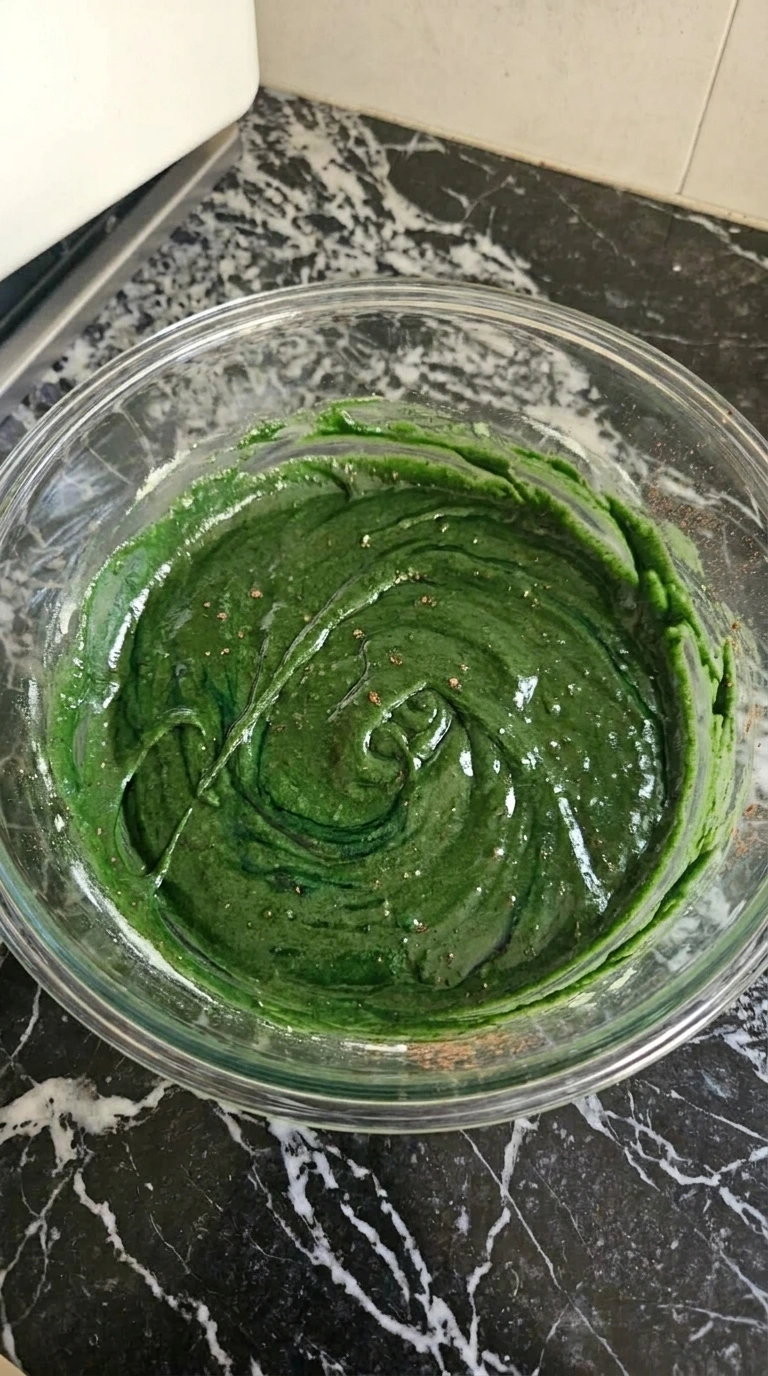
Keep the bowl near 68°F so the batter stays stable. Add eggs one at a time, mixing about 20 seconds each. Then pour in buttermilk, vanilla, food coloring, and vinegar and mix for 60 to 75 seconds until fully combined. Switch to a spatula and fold in flour, cocoa, salt, and baking soda using a J-shaped motion. Scrape down halfway. The batter should look thick, smooth, and deep green with tiny cocoa specks. Stop as soon as the flour disappears or the crumb turns chewy. (I used to keep mixing for a smoother look, but the cupcakes came out tight every time.)
Tip: Fold gently from the bottom up so you don’t knock out the air you just built.
Step 3: Fill the cupcake liners

Keep the batter at room temperature, around 68°F, so it flows evenly. Divide into 12 liners, filling each about two-thirds full. Use a scoop-and-drag motion so the tops stay slightly uneven. Look for soft peaks and dips on the surface. That uneven top helps them dome in the oven. Fill past three-quarters and they’ll spill over instead of rising cleanly. (I tried overfilling once and ended up with one big sheet instead of cupcakes.)
Tip: Use an ice cream scoop for even portions so they bake at the same rate.
Step 4: Bake until softly domed

Bake in a fully preheated 350°F oven for 17 to 19 minutes. Rotate the pan at minute 12 so the back row doesn’t brown faster than the front. The tops should spring back when pressed lightly and show a faint darker ring at the edges. You’ll smell a light cocoa note right at minute 17. Leave them longer and the edges dry out near the liner, which makes them crumbly.
Tip: Check one cupcake early at minute 16 if your oven runs hot.
Step 5: Whip the cream cheese frosting
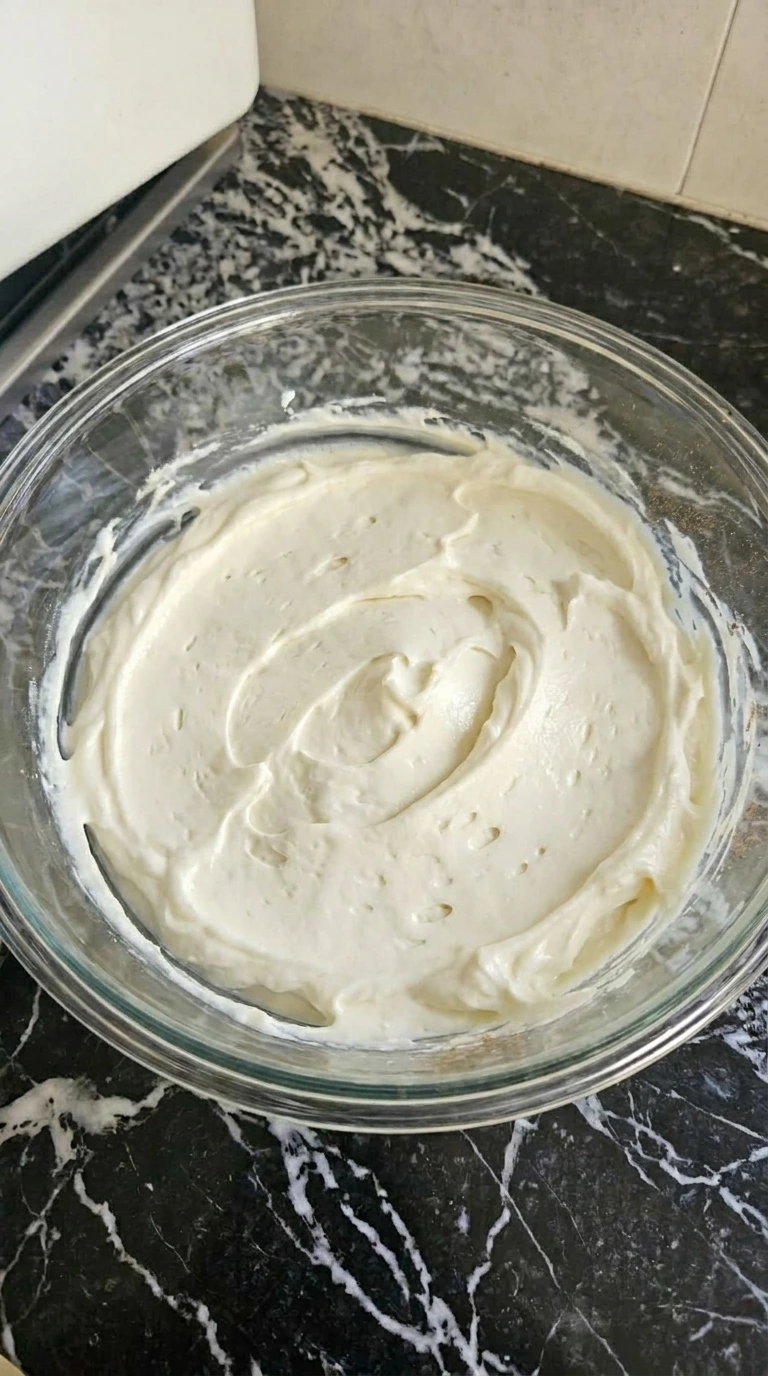
Use cream cheese and butter at about 65°F so they blend smoothly. Beat for 90 seconds until creamy, then add powdered sugar in two parts and mix for another 2 minutes. Press the frosting against the bowl side between mixes to crush any lumps. You want thick, smooth frosting with soft ridges that hold shape. If it looks glossy and loose, it’s too warm and will slump before you can swirl it.
Tip: If the frosting loosens, chill it for 10 minutes instead of adding extra sugar.
Step 6: Frost and finish one cupcake

Let the cupcakes cool to about 72°F or lower for at least 25 minutes. Then spread frosting using a loose swirl motion, working about 8 to 10 seconds per cupcake. The swirl should sit tall but relaxed, with a few crumbs catching on the surface. You’ll see a soft green edge under the frosting. Frost too early and the heat melts the cream cheese into a slick layer that slides off.
Tip: Use an offset spatula for a more natural swirl without overworking the frosting.
Tips and Tricks
- Spoon flour into the cup and level it. Packed flour makes the crumb dry.
- Stick with gel coloring for a stronger green without thinning the batter.
- Wait until cupcakes are fully cool before frosting or it will slide.
- Bake on the center rack for even doming and color.
Swaps and Variations
- buttermilk: milk + vinegar — Works fine but the tang is lighter and the flavor feels less classic.
- flour: gluten-free 1:1 blend — Texture is slightly sandy once chilled and the tops may crack.
- eggs: unsweetened applesauce — Makes them denser and softer. Bake a bit longer to set the center.
- cream cheese: dairy-free cream cheese — Frosting softens quickly so chill before using. Flavor is a bit less rich.
- green gel coloring: liquid food coloring — Color turns lighter and batter thins slightly. Don’t overpour.
- cocoa powder: natural cocoa — Flavor shifts slightly sharper. For a classic version, see Red Velvet Cupcakes.
Storing Leftovers
Store frosted cupcakes in an airtight container in the fridge for up to 4 days. Let them sit out for 20 minutes before eating so the frosting softens and the crumb relaxes. Unfrosted cupcakes freeze well for up to 2 months. Wrap tightly, thaw overnight in the fridge, then frost once they’re fully dry on top.
Green Velvet Cupcakes
Ingredients
- 1 1/4 cups all-purpose wheat flour
- 1 tablespoon Dutch-process cocoa powder
- 1/2 teaspoon fine sea salt
- 1/2 teaspoon baking soda
- 1/2 cup softened unsalted butter
- 3/4 cup granulated white sugar
- 2 large eggs
- 1/2 cup whole cultured buttermilk
- 2 teaspoons pure vanilla extract
- 1 teaspoon green gel food coloring
- 1 teaspoon distilled white vinegar
- 8 ounces softened full-fat block cream cheese
- 1/4 cup softened unsalted butter for frosting
- 2 cups powdered cane sugar
Instructions
- Set softened unsalted butter and granulated white sugar in a bowl at 68°F room temperature. Beat for 2 to 3 minutes with firm circular strokes and scrape the sides once at minute 2. The mixture should turn pale and fluffy with tiny sugar trails through it. Stop there because go past 4 minutes and the cupcakes can rise too fast then sink in the middle.

- Add the large eggs one at a time while the bowl stays near 68°F, then mix in whole cultured buttermilk, pure vanilla extract, green gel food coloring and distilled white vinegar for 60 to 75 seconds. Fold in all-purpose wheat flour, Dutch-process cocoa powder, fine sea salt and baking soda with a rubber spatula in a J-shaped motion. The batter should look thick and satin-smooth with a deep green color and a few tiny cocoa specks. Don’t beat once the flour disappears because extra mixing makes the crumb chewy.

- Keep the batter at room temperature and divide it into 12 cupcake liners, filling each about two-thirds full. Use a scoop-and-drag motion so the batter lands in uneven mounds rather than flat puddles. The liners should look full but not crowded, with little peaks and dips on top. Fill higher than three-quarters and the batter spills over the edges instead of doming. (I tried filling them almost to the top once, cute idea until the tray looked like one giant green sheet cake.)

- Bake the filled muffin tin in a 350°F preheated oven for 17 to 19 minutes. Rotate the tin once at minute 12 so the back cupcakes don’t brown faster than the front. The tops should spring back lightly and the edges should look set with a faint darker green ring. Pull them late and the crumb dries out around the liner.

- Beat full-fat block cream cheese and unsalted butter for frosting at 65°F for 90 seconds, then add powdered cane sugar in two additions and mix for 2 more minutes. Press the frosting against the bowl side between turns so no cream cheese lumps hide inside. The frosting should look thick and smooth with soft ridges that hold their shape. Use cream cheese that’s too warm and the frosting slumps before it ever reaches the cupcakes.

- Cool the cupcakes to 72°F or lower for at least 25 minutes, then spread frosting over the tops with a loose swirl motion. Work for 8 to 10 seconds per cupcake so the frosting sits high but still looks relaxed. The finished cupcake should show a soft green edge beneath the white frosting and a few crumbs clinging to the swirl. Frost too soon and the cream cheese melts into a shiny slide.

Notes
Nutrition
Common Questions
Yes. Bake them a day ahead and keep them unfrosted in an airtight container. Frost the day you serve so the texture stays fresh and soft.
Too much cocoa or baking past 19 minutes dulls the color. Pull them when the tops spring back and edges just set.
Yes. Bake at 350°F for 9 to 11 minutes. Start checking at minute 8 because they dry out faster.
Very close. You still get cocoa, buttermilk, and vinegar. The main difference is the green color and slightly lighter cocoa feel.
It’s usually too warm. Chill it for 10 minutes and beat briefly again to bring back structure.
A Final Note
These are the kind of cupcakes you make when you want something fun but still balanced. Soft, a little tangy, and easy to get right.
If you’re in a baking mood, you might also like this Strawberry Cheesecake
Green velvet gets its color entirely from dye, since the cocoa amount is too low to create the natural reddish tone found in classic velvet cakes.