Iced Coffee
I made this for the first time the week we moved into our house in 2019, boxes everywhere, no proper kitchen setup, and somehow it turned out better than expected. What saved me that afternoon was keeping the coffee brew stronger than I thought I should. Since then it’s become my go-to when I’m exhausted but still want something that tastes real. Mark always says it’s better than the local cafe and Emma asks for seconds of the sweet creamy foam.
We started experimenting with different milk bases and syrups during that chaotic week. I found that letting the hot coffee cool completely before hitting the ice prevents that sad watery flavor everyone hates. If you are looking for a fruity pairing for your morning routine, our Fruit Smoothies make an amazing companion. This drink takes about five minutes with zero fancy equipment needed.

You do not need a commercial espresso machine to get this right. Regular brewed coffee or a simple French press works beautifully as long as you double the grounds. It is all about creating a concentrated base that can handle the ice melting without losing its punch.
The Secret to This Recipe
Brewing the coffee at double strength ensures the flavor stays bold even when the ice melts completely. Cooling the hot liquid slowly to room temperature prevents the chlorogenic acid from turning bitter and metallic.
Using whole milk instead of skim milk adds fat molecules that coat the tongue and soften the sharp tannins of the dark roast. For a sweet chocolate pairing with your afternoon drink, check out our rich Chocolate Cake for a perfect dessert combo.
Ingredient List

- coffee grounds: Dark roast coarse grounds for a rich non-bitter flavor base.
- water: Filtered water heated to 200°F for optimal extraction.
- whole milk: Full cream milk to provide a smooth velvety mouthfeel.
- vanilla syrup: Sweet vanilla flavoring to balance the strong coffee roast.
- ice cubes: Large solid cubes to chill the drink without melting too fast.
- whipped cream: Sweetened heavy whipped cream for a luxurious topping.
- chocolate syrup: Rich dark chocolate sauce for garnishing the top.
- Oreo cookie: One chocolate sandwich cookie tucked into the cream for decoration.
Kitchen Equipment
- French press: A glass 8-cup French press allows you to control the steep time perfectly for a bold coffee concentrate — thin paper filters can strip away the rich flavorful oils.
- Tall glass pitcher: A heavy glass pitcher holds the heat safely during the initial cooling phase — plastic containers can warp or absorb old coffee odors over time.
Let’s Make It
Step 1: Brew a concentrated coffee base
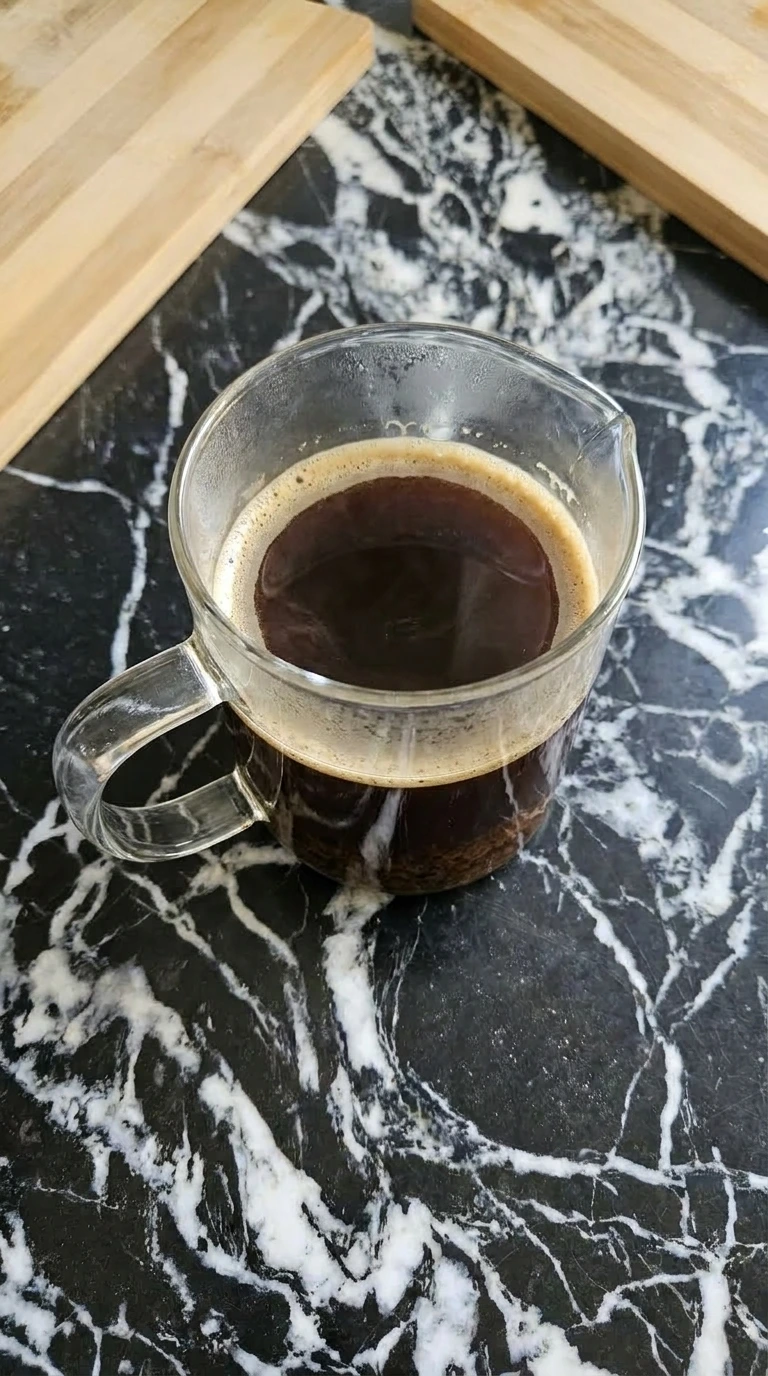
Start by brewing your coffee extra strong because the ice will dilute it later. Measure your coffee grounds and water carefully to ensure a deep extraction. Use hot water at exactly 200°F in your French press or drip machine to pull the best oils without scorching the beans.
You will smell a deep toasted cacao aroma as the water hits the coffee grounds. Watch for a thick dark tan foam called the crema to form right on the surface. (I tried using regular strength coffee the first time and the melting ice turned it into colored water so definitely use a double dose of grounds).
Let the mixture steep for exactly 4 minutes before straining. Press the filter down slowly with steady hand pressure so you do not force bitter sediment into your clean liquid base. Brew it hot and dark, the high concentration prevents a watery drink later.
Tip: If you do not have a thermometer just bring your water to a boil and let it sit off the heat for 30 seconds to hit 200°F.
Step 2: Chill the liquid completely

Pour the hot concentrated coffee into a clear glass pitcher and let it sit on your counter. Do not rush this step by throwing ice in immediately because sudden temperature drops make the liquid cloudy and bitter. Cool it to room temperature for about 20 minutes then slide it into the fridge.
The deep brown color will clarify slightly and turn glossy as the heat dissipates. You will know it is ready when the container feels completely cool to the touch and no steam rises. Miss this window and the hot liquid melts your ice instantly which ruins the texture.
Keep the pitcher covered while it chills in the refrigerator at 37°F. Chill for at least 1 hour, cooling slowly preserves the delicate aromatics.
Tip: Make this base the night before and keep it in the fridge so you have instant cold coffee ready for busy mornings.
Step 3: Assemble the ice and sweeteners

Grab a tall glass and fill it with large solid ice cubes right to the brim. Avoid crushed ice because it melts too fast and dilutes the flavor. Drizzle the vanilla syrup directly over the ice cubes so it coats them nicely.
You will hear a sharp cracking sound as the room-temperature syrup hits the frozen ice. The clear syrup will pool slightly at the bottom of the glass while creating a glossy sheen on the cubes. (My first batch used small ice chips and they vanished within two minutes which left me with a lukewarm mess so stick to big cubes).
Pour the vanilla syrup over the ice cubes, the thick sugar layers coat the cubes to sweeten every sip evenly.
Step 4: Pour the coffee and milk

Slowly pour your chilled coffee concentrate over the sweet ice until the glass is three-quarters full. Next pour the whole milk gently into the center of the glass to create a beautiful swirling effect. Do not stir it yet because the visual separation is part of the fun.
Watch the pale white milk bloom through the dark brown coffee like clouds in a storm. A light tan layer will form where the liquids meet and the dark coffee color softens into a rich milk chocolate hue. If you over-mix right now you lose that gorgeous contrast that makes homemade drinks look professional.
Pour the liquids slowly over the ice, steady pouring maintains the layered separation before the final stir.
Tip: Use a spoon turned upside down over the glass and pour the milk over it to get a perfect layered look.
Step 5: Garnish and serve

Top the glass with a generous swirl of whipped cream right before serving. Drizzle dark chocolate syrup across the top in a zig-zag pattern and drop a whole chocolate sandwich cookie into the cream at a slight angle. Add a clean metal straw to finish the presentation.
The dark chocolate syrup sinks slowly into the white whipped cream to create deep rich lines. The cookie sits firmly in the fluffy topping without deflating it. Serve this immediately because the whipped cream will start to soften and dissolve into the cold milk within five minutes.
Add the toppings right at the end, instant serving keeps the textures completely separate.
Tip: Dust a tiny pinch of cocoa powder or cinnamon over the whipped cream for an extra pop of aroma.
Recipe Notes
- Always use a coarse grind for your coffee beans to prevent fine dust from slipping through the mesh filter and making your drink muddy.
- Chill your glass in the freezer for 10 minutes before assembling the drink to keep the ice from melting the second it hits the cup.
- Measure your syrup exactly with a spoon because pouring directly from the bottle usually leads to an overly sweet drink.
- Shake the chilled coffee and milk together in a mason jar before pouring over ice to create an ultra-frothy texture.
- Avoid using boiling water directly on the grounds because it burns the coffee and leaves a harsh ash-like aftertaste.
- Use filtered water instead of tap water to ensure no chlorine flavors interfere with the natural taste of the coffee beans.
- Add a tiny pinch of sea salt to the hot coffee grounds before brewing to neutralize any natural bitterness in the roast.
- Add 1 tablespoon of coconut cream and a sprinkle of toasted coconut flakes for a tropical iced coffee twist.
- Blend the entire mixture with a scoop of vanilla bean ice cream to turn this recipe into a thick dessert frappe.
- Stir in 1/2 teaspoon of ground cinnamon and a dash of cayenne pepper into the hot grounds for a spicy Mexican mocha style.
Make It Your Own
- whole milk: oat milk — Provides an equally creamy texture and a slight nutty flavor that pairs brilliantly with dark roasts.
- vanilla syrup: maple syrup — Gives a deeper caramel sweetness but changes the classic vanilla profile to a more autumnal flavor.
- coffee grounds: instant coffee powder — Use 2 tablespoons dissolved in hot water for a faster prep time though the body will be lighter than brewed grounds.
- Oreo cookie: no garnish — If you want a healthier morning option you can skip the cookie and whipped cream entirely. For another clean breakfast drink try our delicious Strawberry Smoothie instead.
How to Store
Store any leftover black coffee concentrate in an airtight glass pitcher in the refrigerator for up to 5 days. Do not store the fully assembled drink with milk and ice because the ice will melt and ruin the flavor balance.
Freezing the black coffee concentrate in silicone ice trays is an excellent option and these cubes will stay fresh for up to 3 months. When you are ready to use the frozen coffee cubes just drop them straight into a glass and pour warm milk over them.
Look out for any sour odors or a strange oily film on top of the refrigerated liquid. Discard the batch immediately if you notice these signs of age.
Iced Coffee
Ingredients
- 0.5 cup coffee grounds Dark roast coarse grounds for a rich non-bitter flavor base.
- 2 cups water Filtered water heated to 200°F for optimal extraction.
- 0.5 cup whole milk Full cream milk to provide a smooth velvety mouthfeel.
- 2 tablespoons vanilla syrup Sweet vanilla flavoring to balance the strong coffee roast.
- 2 cups ice cubes Large solid cubes to chill the drink without melting too fast.
- 0.25 cup whipped cream Sweetened heavy whipped cream for a luxurious topping.
- 1 tablespoon chocolate syrup Rich dark chocolate sauce for garnishing the top.
- 1 Oreo cookie One chocolate sandwich cookie tucked into the cream for decoration.
Instructions
- Start by brewing your coffee extra strong because the ice will dilute it later. Measure your coffee grounds and water carefully to ensure a deep extraction. Use hot water at exactly 200°F in your French press or drip machine to pull the best oils without scorching the beans. You will smell a deep toasted cacao aroma as the water hits the coffee grounds. Watch for a thick dark tan foam called the crema to form right on the surface. (I tried using regular strength coffee the first time and the melting ice turned it into colored water so definitely use a double dose of grounds). Let the mixture steep for exactly 4 minutes before straining. Press the filter down slowly with steady hand pressure so you do not force bitter sediment into your clean liquid base. Brew it hot and dark, the high concentration prevents a watery drink later.

- Pour the hot concentrated coffee into a clear glass pitcher and let it sit on your counter. Do not rush this step by throwing ice in immediately because sudden temperature drops make the liquid cloudy and bitter. Cool it to room temperature for about 20 minutes then slide it into the fridge. The deep brown color will clarify slightly and turn glossy as the heat dissipates. You will know it is ready when the container feels completely cool to the touch and no steam rises. Miss this window and the hot liquid melts your ice instantly which ruins the texture. Keep the pitcher covered while it chills in the refrigerator at 37°F. Chill for at least 1 hour, cooling slowly preserves the delicate aromatics.

- Grab a tall glass and fill it with large solid ice cubes right to the brim. Avoid crushed ice because it melts too fast and dilutes the flavor. Drizzle the vanilla syrup directly over the ice cubes so it coats them nicely. You will hear a sharp cracking sound as the room-temperature syrup hits the frozen ice. The clear syrup will pool slightly at the bottom of the glass while creating a glossy sheen on the cubes. (My first batch used small ice chips and they vanished within two minutes which left me with a lukewarm mess so stick to big cubes). Pour the vanilla syrup over the ice cubes, the thick sugar layers coat the cubes to sweeten every sip evenly.

- Slowly pour your chilled coffee concentrate over the sweet ice until the glass is three-quarters full. Next pour the whole milk gently into the center of the glass to create a beautiful swirling effect. Do not stir it yet because the visual separation is part of the fun. Watch the pale white milk bloom through the dark brown coffee like clouds in a storm. A light tan layer will form where the liquids meet and the dark coffee color softens into a rich milk chocolate hue. If you over-mix right now you lose that gorgeous contrast that makes homemade drinks look professional. Pour the liquids slowly over the ice, steady pouring maintains the layered separation before the final stir.

- Top the glass with a generous swirl of whipped cream right before serving. Drizzle dark chocolate syrup across the top in a zig-zag pattern and drop a whole chocolate sandwich cookie into the cream at a slight angle. Add a clean metal straw to finish the presentation. The dark chocolate syrup sinks slowly into the white whipped cream to create deep rich lines. The cookie sits firmly in the fluffy topping without deflating it. Serve this immediately because the whipped cream will start to soften and dissolve into the cold milk within five minutes. Add the toppings right at the end, instant serving keeps the textures completely separate.

Notes
Nutrition
Frequently Asked Questions
This happens because regular strength hot coffee melts the ice cubes instantly. You must brew your base at double strength using twice the grounds and let it cool completely before pouring it over ice.
You can store the black coffee concentrate in a sealed glass jar for up to 5 days. Keep the milk and sweeteners separate until you are ready to assemble your glass to maintain the freshest flavor.
Yes you can use 2 shots of fresh espresso as your base. Just let the espresso shots cool down for a few minutes so they do not melt your ice structure immediately upon contact.
You can easily swap the whole milk for almond or oat milk. Be sure to use a coconut-cream-based whipped topping instead of traditional dairy cream to keep the full presentation intact.
If you must use hot coffee you need to flash-chill it by shaking the hot liquid vigorously in a cocktail shaker filled with sacrificial ice cubes then strain the cold liquid over fresh ice.
A Final Note
If you make this on a weekend afternoon with music playing, the way I do, you’ll understand why it’s been in our family rotation for years now. The little trick I mentioned about not rushing the cooling step is honestly the difference between okay and really good.
Tag me on Instagram if you make it, I love seeing what you cook. And Liam says hi, he stole the cookie right off the top when I tested it which is the highest endorsement you’ll get from a 5-year-old.
Most people don’t know that iced coffee actually started in Algeria during the 1840 battle of Mazagran. It turns out soldiers began drinking their coffee cold with water because they ran out of milk.