Banana Bread
You guys! When my mom tasted this recipe, she said…” I think that’s one of the best things you’ve ever done”! I have to say, it’s one of my top five favorites! A Saturday morning experiment turned into the best healthy Banana Bread ever!
It has the same moist texture as a bakery-style loaf, but it’s made with whole ingredients, and it’s dairy, refined sugar, and nut-free. This bread is sweetened with coconut sugar and maple syrup, and the base uses gluten-free all-purpose flour. I think you all know I’m a chocolate lover, I already tasted our [Chocolate Chip Cookies](https://leagueofcooking. com/?
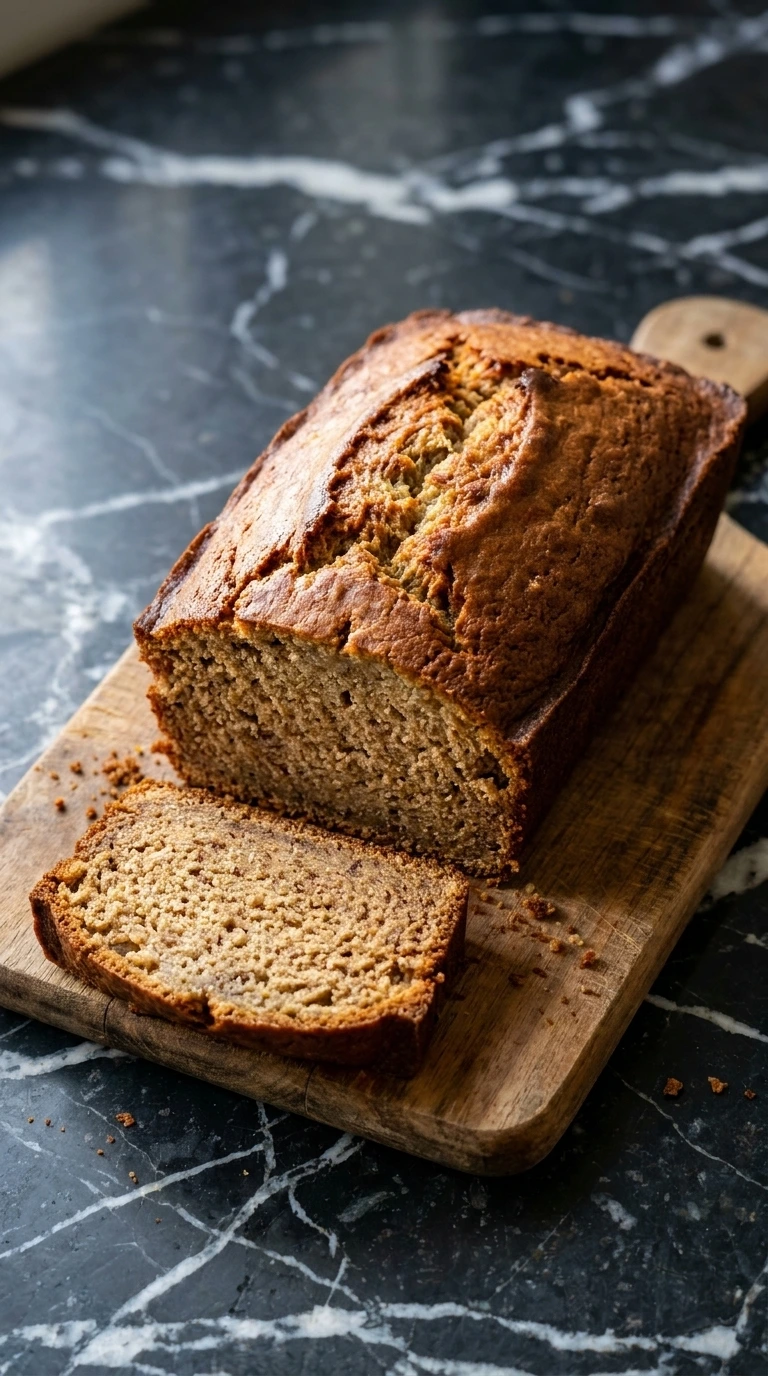
p=4990) and so many chocolate muffins before, I rarely love a recipe that doesn’t have chocolate in the name, but this loaf is just to die for! The recipe makes 1 loaf, I typically like to make things in smaller batches since I do so much baking, but if you have a bigger group or want to make more, you can double the batch and make 2 loaves! This banana bread can be a dessert, or you can pair it with some fresh fruit and hot coffee for a tasty breakfast. It’s also great for meal prep, if you want to make a large batch, store slices in the freezer, and take them out for breakfasts during the week!
What Makes It Work
Using three large overripe bananas provides the ultimate base moisture and natural sugar concentration for this loaf. Baking at 350°F instead of a higher heat allows the dense fruit-forward batter to cook thoroughly to the center without burning the exterior crust.
Folding the dry ingredients gently with a spatula prevents the starch structure from getting tough and dense. If you enjoy this warm spiced treat, you should try our comforting [Garlic Bread](https://leagueofcooking.
com/? p=4891) for another cozy baking project later.
Ingredient List

- banana: Overripe with heavy brown spotting on the skin for maximum natural sweetness.
- pure maple syrup: Dark amber variety provides a rich caramel undertone to the wet batter base.
- coconut oil: Melted and cooled slightly to keep the interior crumb exceptionally moist.
- egg: Bring to room temperature before cracking to prevent the oil from solidifying.
- gluten-free all-purpose flour: A high-quality blend containing xanthan gum to mimic traditional structure.
- baking soda: Acts as the leavening agent that reacts with the acidic bananas for a proper rise.
- ground cinnamon: Adds a warm spiced aroma and a subtle speckled color throughout the loaf crumb.
- sea salt: Fine grain crystals to balance the intense sweetness of the ripe fruit.
Kitchen Equipment
- Metal Loaf Pan: An 8.5×4.5 inch medium-gauge metal loaf pan distributes heat efficiently to form a crisp golden crust — glass or ceramic dishes retain heat differently and often leave the bottom soggy.
- Large Glass Mixing Bowl: A clear 4-quart glass mixing bowl gives you plenty of space to mash and fold without spilling ingredients over the sides.
- Rubber Spatula: A flexible silicone rubber spatula allows you to scrape the bowl sides clean and fold the batter gently without overmixing.
Directions
Step 1: Mash the overripe bananas

Peel 3 large overripe spotty bananas and place them into a large clear glass mixing bowl. Use the tines of a sturdy metal dinner fork to press down firmly with a rocking wrist motion. Smash them thoroughly for about 2 minutes until they turn into a thick, chunky puree.
You should see a wet, glossy mixture with plenty of small banana bits remaining rather than a completely smooth liquid. The sweet aroma of ripe fruit will fill the air immediately. Avoid blending them completely because leaving small chunks ensures pockets of moisture throughout the finished loaf.
Baking at 350°F requires these moisture pockets so the interior stays soft without turning gummy.
Tip: Always choose bananas with lots of dark brown spots because they contain more natural sugar and mash much easier.
Step 2: Whisk the wet ingredients
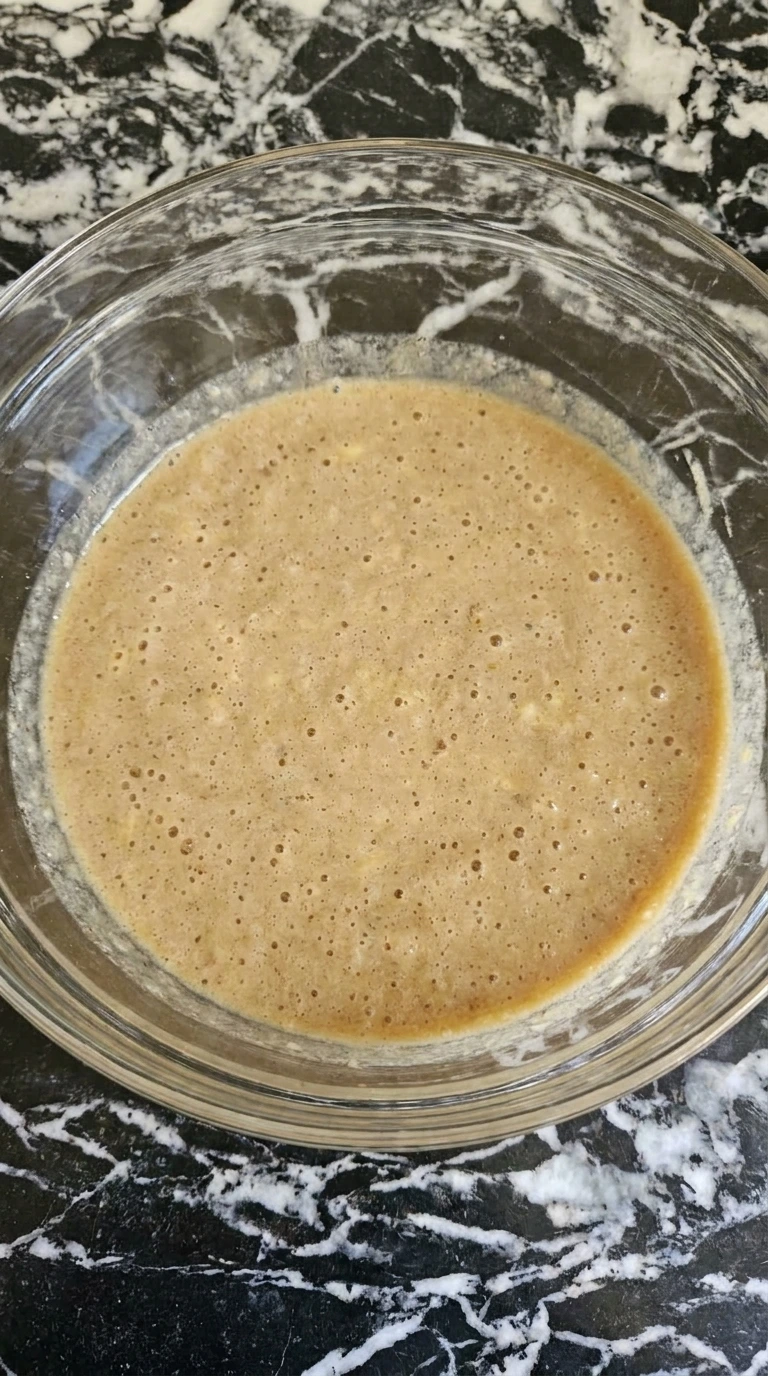
Pour 0. 33 cup of melted coconut oil, 0. 5 cup of pure maple syrup, and 2 large eggs directly into the mashed bananas at room temperature.
Whisk the mixture vigorously with a large balloon whisk using a circular whipping motion for exactly 60 seconds. (I tried using cold eggs once and they immediately solidified the melted coconut oil into tiny hard clumps, so stick to room temperature ingredients. ) The mixture will lighten slightly in color and turn into a uniform, smooth, bubbly liquid emulsion.
You will hear a soft splashing sound as air incorporates into the base. Miss this thorough whisking window and the fat will separate from the fruit liquid during baking. Vigorous whisking binds the fats and liquids tightly together so the bread rises evenly.
Tip: If your eggs are cold from the fridge, submerge them in a bowl of warm water for 5 minutes before cracking.
Step 3: Fold in the dry ingredients

Add 1. 75 cups of gluten-free all-purpose flour, 1 teaspoon of baking soda, 1 teaspoon of ground cinnamon, and 0. 5 teaspoon of fine sea salt into the bowl.
Switch to a flexible rubber spatula and fold the mixture gently using a J-shaped motion from the bottom of the bowl upward. Mix for about 90 seconds just until the white flour pockets disappear into the brown base. The wet liquid transforms into a thick, tacky, scoopable batter with visible specks of ground cinnamon distributed unevenly throughout.
You will notice the sweet cinnamon aroma mixing with the banana scent. Overworking the batter at this stage will deflate the trapped air bubbles and cause a dense loaf. Fold just until combined because a light hand preserves the delicate rise.
Tip: Sift the baking soda and cinnamon together before adding them to ensure they distribute perfectly without any bitter clumps.
Step 4: Bake the loaf until golden brown

Line an 8. 5×4. 5 inch metal loaf pan with parchment paper and scrape the thick batter into it using your spatula. Smooth the top into an uneven rustic layer, then place it on the center rack of a 350°F preheated oven.
Bake for exactly 55 to 60 minutes until an inserted toothpick comes out clean. (My first test batch went into a 375°F oven and the top scorched before the center set, so 350°F is absolutely the sweet spot. ) The pale wet batter rises significantly and develops a deep golden-brown crusted top with a dramatic jagged crack down the center. The aroma of caramelized sugar and warm cinnamon will fill your entire kitchen.
Pull the loaf out too early and the center will collapse into a wet gummy layer as it cools. Bake until a toothpick emerges clean, slow heat cooks the center fully without burning the exterior sugars.
Tip: Leave an inch of parchment paper overhanging the sides of the pan so you can easily lift the baked bread out.
Tips for Success
- Bake the loaf on the center oven rack at 350°F because this position ensures even heat circulation around the entire pan metal.
- Measure your flour using the spoon-and-level method rather than scooping directly from the bag because scooping packs too much flour and dries out the bread.
- Mash your bananas until they resemble a chunky puree with small pieces left because those small bits create pockets of moisture.
- Cool the baked bread in the pan for exactly 10 minutes before moving it to a wire rack so it stabilizes without tearing.
- Wrap the cooled loaf tightly in plastic wrap and let it sit overnight because the banana flavor intensifies and the crust softens beautifully.
- Check the center internal temperature with a digital meat thermometer. it should read between 200°F and 205°F when fully baked through.
- Fold in 0.5 cup of dark chocolate chips during the final mixing step for a rich sweet twist.
- Stir 0.5 cup of chopped raw walnuts into the thick batter to add a crunchy textured element.
- Swirl 2 tablespoons of creamy sunflower seed butter through the top of the batter before baking for a beautiful marble look.
Substitutions
- gluten-free all-purpose flour: regular whole wheat flour — Swap in an equal 1:1 ratio if you do not need the recipe to be gluten-free. The texture becomes slightly nuttier and contains more fiber.
- coconut oil: unsalted melted butter — Use the exact same measurement. It adds a traditional rich dairy flavor but the loaf will no longer be dairy-free.
- pure maple syrup: honey — Use a 1:1 replacement. Honey makes the batter slightly heavier and browns much faster in the oven so check the loaf at minute 50.
Storage Instructions
Store any leftover banana bread in an airtight glass container on your kitchen counter for up to 4 days. Keep the container out of direct sunlight so condensation does not build up inside the lid. If you want to keep it longer, slice the loaf completely and wrap each piece in plastic wrap.
Place the wrapped slices into a heavy-duty freezer bag and freeze them for up to 3 months. Reheat individual slices in a toaster oven at 325°F for about 5 minutes until warmed through. You can also microwave a slice for 20 seconds if you are in a rush.
Watch out for a sour smell or visible fuzzy spots as these are clear signs of spoilage.
Banana Bread
Ingredients
- 3 large banana Overripe with heavy brown spotting on the skin for maximum natural sweetness.
- 0.5 cup pure maple syrup Dark amber variety provides a rich caramel undertone to the wet batter base.
- 0.33 cup coconut oil Melted and cooled slightly to keep the interior crumb exceptionally moist.
- 2 large egg Bring to room temperature before cracking to prevent the oil from solidifying.
- 1.75 cups gluten-free all-purpose flour A high-quality blend containing xanthan gum to mimic traditional structure.
- 1 teaspoon baking soda Acts as the leavening agent that reacts with the acidic bananas for a proper rise.
- 1 teaspoon ground cinnamon Adds a warm spiced aroma and a subtle speckled color throughout the loaf crumb.
- 0.5 teaspoon sea salt Fine grain crystals to balance the intense sweetness of the ripe fruit.
Instructions
- Peel 3 large overripe spotty bananas and place them into a large clear glass mixing bowl. Use the tines of a sturdy metal dinner fork to press down firmly with a rocking wrist motion. Smash them thoroughly for about 2 minutes until they turn into a thick, chunky puree. You should see a wet, glossy mixture with plenty of small banana bits remaining rather than a completely smooth liquid. The sweet aroma of ripe fruit will fill the air immediately. Avoid blending them completely because leaving small chunks ensures pockets of moisture throughout the finished loaf. Baking at 350°F requires these moisture pockets so the interior stays soft without turning gummy.

- Pour 0.33 cup of melted coconut oil, 0.5 cup of pure maple syrup, and 2 large eggs directly into the mashed bananas at room temperature. Whisk the mixture vigorously with a large balloon whisk using a circular whipping motion for exactly 60 seconds. (I tried using cold eggs once and they immediately solidified the melted coconut oil into tiny hard clumps, so stick to room temperature ingredients.) The mixture will lighten slightly in color and turn into a uniform, smooth, bubbly liquid emulsion. You will hear a soft splashing sound as air incorporates into the base. Miss this thorough whisking window and the fat will separate from the fruit liquid during baking. Vigorous whisking binds the fats and liquids tightly together so the bread rises evenly.
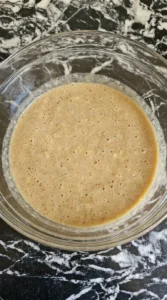
- Add 1.75 cups of gluten-free all-purpose flour, 1 teaspoon of baking soda, 1 teaspoon of ground cinnamon, and 0.5 teaspoon of fine sea salt into the bowl. Switch to a flexible rubber spatula and fold the mixture gently using a J-shaped motion from the bottom of the bowl upward. Mix for about 90 seconds just until the white flour pockets disappear into the brown base. The wet liquid transforms into a thick, tacky, scoopable batter with visible specks of ground cinnamon distributed unevenly throughout. You will notice the sweet cinnamon aroma mixing with the banana scent. Overworking the batter at this stage will deflate the trapped air bubbles and cause a dense loaf. Fold just until combined because a light hand preserves the delicate rise.

- Line an 8.5×4.5 inch metal loaf pan with parchment paper and scrape the thick batter into it using your spatula. Smooth the top into an uneven rustic layer, then place it on the center rack of a 350°F preheated oven. Bake for exactly 55 to 60 minutes until an inserted toothpick comes out clean. (My first test batch went into a 375°F oven and the top scorched before the center set, so 350°F is absolutely the sweet spot.) The pale wet batter rises significantly and develops a deep golden-brown crusted top with a dramatic jagged crack down the center. The aroma of caramelized sugar and warm cinnamon will fill your entire kitchen. Pull the loaf out too early and the center will collapse into a wet gummy layer as it cools. Bake until a toothpick emerges clean, slow heat cooks the center fully without burning the exterior sugars.

Notes
Nutrition
Questions I Get Asked
This common mistake happens when the bread is pulled out of the oven too early. The center requires a full 55 minutes at 350°F to cook completely. If the interior starches do not set, the trapped steam condenses and causes the middle to collapse down as it cools.
Yes, you can freeze this bread easily. Wrap the completely cooled loaf or individual slices tightly in two layers of plastic wrap and store them in a freezer bag for up to 3 months. Thaw individual slices at room temperature for 20 minutes before enjoying.
Place the cooled banana bread in an airtight container or wrap it tightly with plastic wrap. Store it on the kitchen counter at room temperature for up to 4 days. Avoid refrigeration because the cold air dries out the crumb texture quickly.
Yellow bananas lack the high sugar content and intense aroma needed for this recipe. They are also difficult to mash into a smooth liquid base. If you must use them, roast the unpeeled yellow produce at 300°F for 15 minutes until the skins turn completely black.
Warm a single sliced piece in the oven at 350°F for about 5 to 8 minutes until the center feels hot. You can also toast it in a toaster oven on medium low heat. Add a tiny smear of coconut oil immediately after warming for a fresh baked finish.
A Final Note
If you make this on a weekend afternoon with music playing, the way I do, you’ll understand why it’s been in our family rotation for years now. The little trick I mentioned about not rushing the final step is honestly the difference between okay and really good.
Tag me on Instagram if you make it, I love seeing what you cook. And Liam says hi (he ate almost half of this when I tested it, which is the highest endorsement you’ll get from a 5-year-old).
Did you know banana bread actually became a huge deal in America during the Great Depression? It’s all because resourceful home cooks flat-out refused to throw away overripe fruit when times were incredibly tough.