Creamy Hatch Green Chile Chicken Enchiladas
I haven’t shared many enchilada recipes on this blog, but these Creamy Hatch Green Chile Chicken Enchiladas were one I had to post. The first tray disappeared before it had fully cooled, which told me the balance was right. You get tender shredded chicken, soft tortillas and a pale green sauce that stays rich without feeling heavy. The golden cheese on top gives every serving a little stretch and a lightly toasted edge. This recipe is inspired by New Mexican flavors and it’s simple enough for a busy dinner. Roasted Hatch chiles bring a gentle smokiness while sour cream softens their heat.
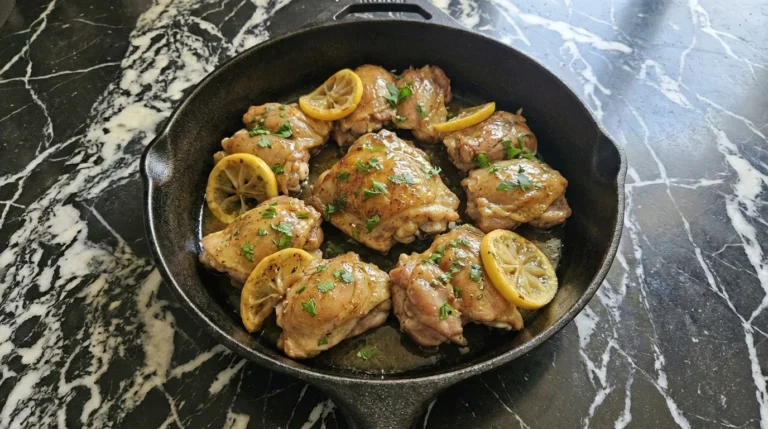
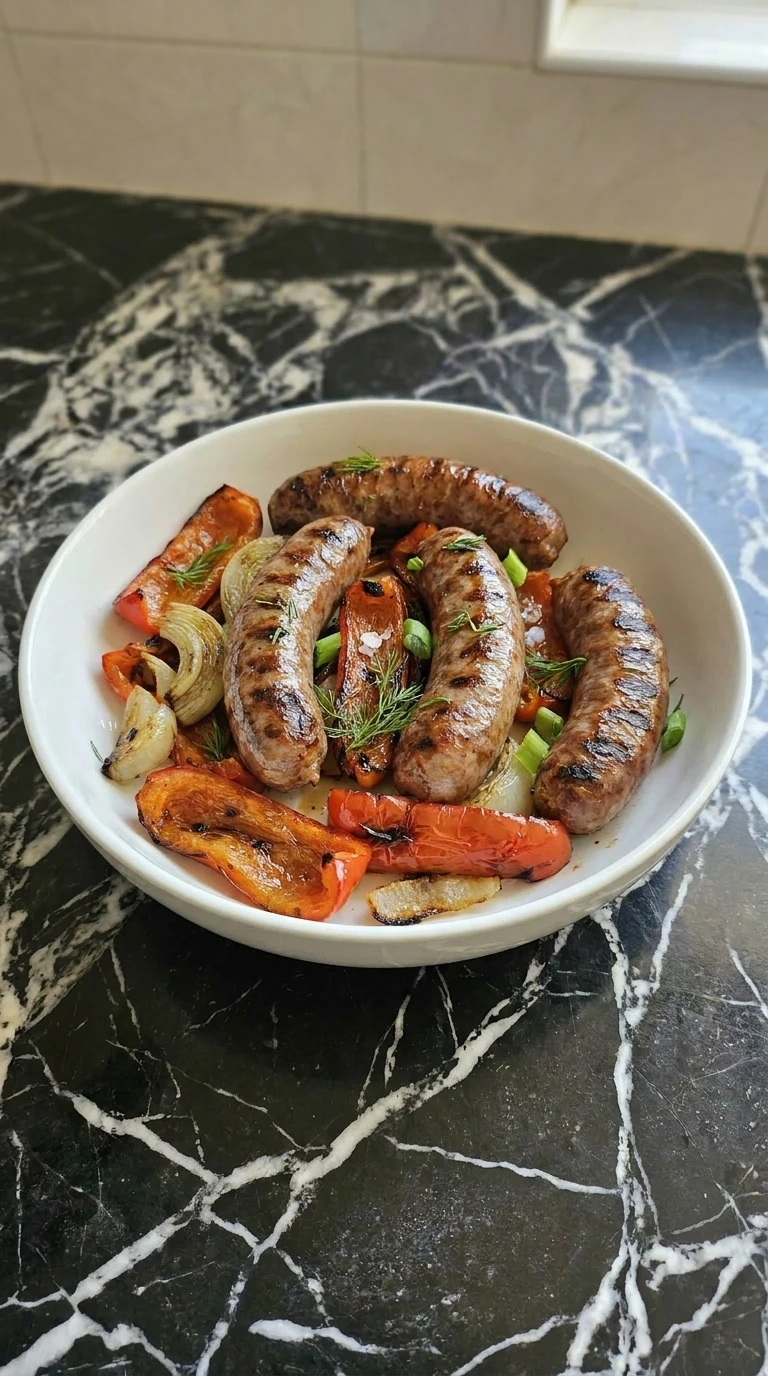
I like serving the enchiladas with Cinnamon Maple Roasted Carrots when I want something sweet beside the savory sauce. The contrast works well and the whole meal still feels relaxed too. Some people avoid green chile enchiladas because they expect a sharp burn or a watery sauce. But when the roux cooks properly and the sour cream goes in off the strongest heat, the sauce turns smooth and balanced. The chiles taste earthy rather than harsh. And the filling stays distinct instead of dissolving into the sauce, which gives each cut roll a clear chicken center.

This version is quick enough for a weeknight and filling enough for company. I recommend it when you want a warm casserole that feels familiar but still has real chile character. The steps aren’t fussy, yet each one matters. Give the sauce a few quiet minutes to thicken, roll the tortillas snugly and let the baked dish rest before serving.
The Secret to Perfect Creamy Hatch Green Chile Chicken Enchiladas
The roux cooks for a full minute before broth enters, so the flour loses its raw taste and can thicken evenly during the short simmer. Cooling the sauce for 60 seconds before adding sour cream keeps Creamy Hatch Green Chile Chicken Enchiladas silky because strong boiling can split the dairy emulsion into grainy curds.
Warming the tortillas for 3 minutes makes them flexible, while baking at 375°F melts the cheese without toughening the exposed edges or drying the chicken. The same controlled filling approach also keeps Fig and Goat Cheese Stuffed Chicken moist, since the creamy component stays inside instead of leaking into the pan.
Ingredient List
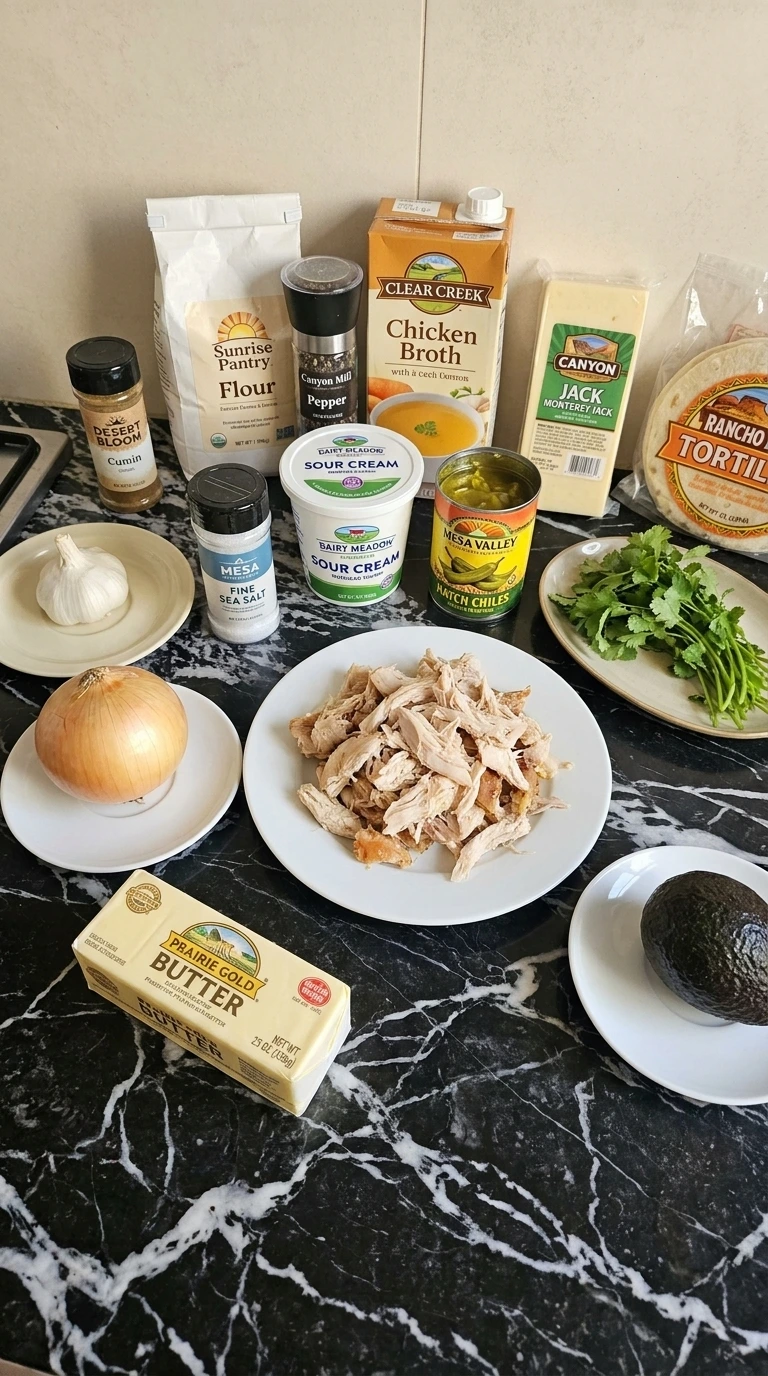
- Unsalted butter: Used to soften the onion and build the roux without adding extra salt.
- Yellow onion: Finely diced so it softens fully and disappears into the sauce.
- Garlic cloves: Minced to release their aroma quickly without leaving large pieces.
- Ground cumin: Adds warm earthy depth that supports the roasted chile flavor.
- Fine sea salt: Seasons the sauce while leaving room for the salty broth and chicken.
- Freshly ground black pepper: Adds mild heat and a clean savory finish.
- All-purpose flour: Whisked into butter to thicken the sauce into a spoon-coating consistency.
- Low-sodium chicken broth: Added slowly so the roux loosens smoothly without becoming lumpy.
- Full-fat sour cream: Brought close to room temperature so it blends into the sauce without splitting.
- Roasted Hatch green chiles: Drained for 5 minutes and diced to bring smoky green chile flavor without excess liquid.
- Rotisserie chicken breast: Skin removed and meat shredded into visible strands for a tender filling.
- Monterey Jack cheese: Freshly grated and divided between the filling and the unevenly melted topping.
- Fresh cilantro: Chopped and divided between the filling and the final garnish.
- Seven-inch flour tortillas: Warmed until flexible so they roll tightly without cracking.
- Hass avocado: Thinly sliced just before serving for a cool creamy finish.
Equipment
- 9×13-inch ceramic baking dish: A 2-inch-deep ceramic dish holds 8 rolled enchiladas and distributes oven heat gently, while a shallow pan can let the sauce bubble over.
- 2-quart heavy-bottomed saucepan: A heavy 2-quart saucepan cooks the roux evenly so the dairy sauce doesn’t scorch, while thin metal creates hot spots.
- Large clear glass mixing bowl: A 4-quart bowl gives the chicken room to fold without crushing, while a smaller bowl pushes filling over the rim.
- Balloon whisk: A sturdy 10-inch whisk smooths flour into broth before lumps form, while a tiny whisk can’t reach the saucepan corners.
- Box grater: A coarse stainless-steel grater creates loose Monterey Jack shreds that melt evenly, while fine holes make the cheese clump.
- Instant-read thermometer: A fast thermometer confirms the center reaches 165°F, while judging only by melted cheese can leave a chilled casserole underheated.
How to Make Creamy Hatch Green Chile Chicken Enchiladas Step by Step
Step 1: Cook the Hatch chile cream sauce

Set a saucepan over medium-low heat at about 4 on a 10-dial. Melt the butter, then stir in the diced yellow onion for 4 minutes. Add minced garlic, ground cumin, fine sea salt and black pepper for 30 seconds. Sprinkle in all-purpose flour and whisk for 1 minute.
Slowly stream in low-sodium chicken broth while whisking, then simmer for 4 to 5 minutes. The sauce should thicken enough to coat a spoon and smell lightly toasted. Remove it from heat for 60 seconds, then whisk in sour cream and roasted Hatch green chiles. Stop when the color turns pale green and no white streaks remain.
Boiling after the sour cream goes in can split the sauce. Gentle heat keeps the dairy emulsion smooth.
Tip: Use a room-temperature sour cream tub around 68°F, because very cold dairy can tighten the sauce before it blends.
Step 2: Fold the chicken filling
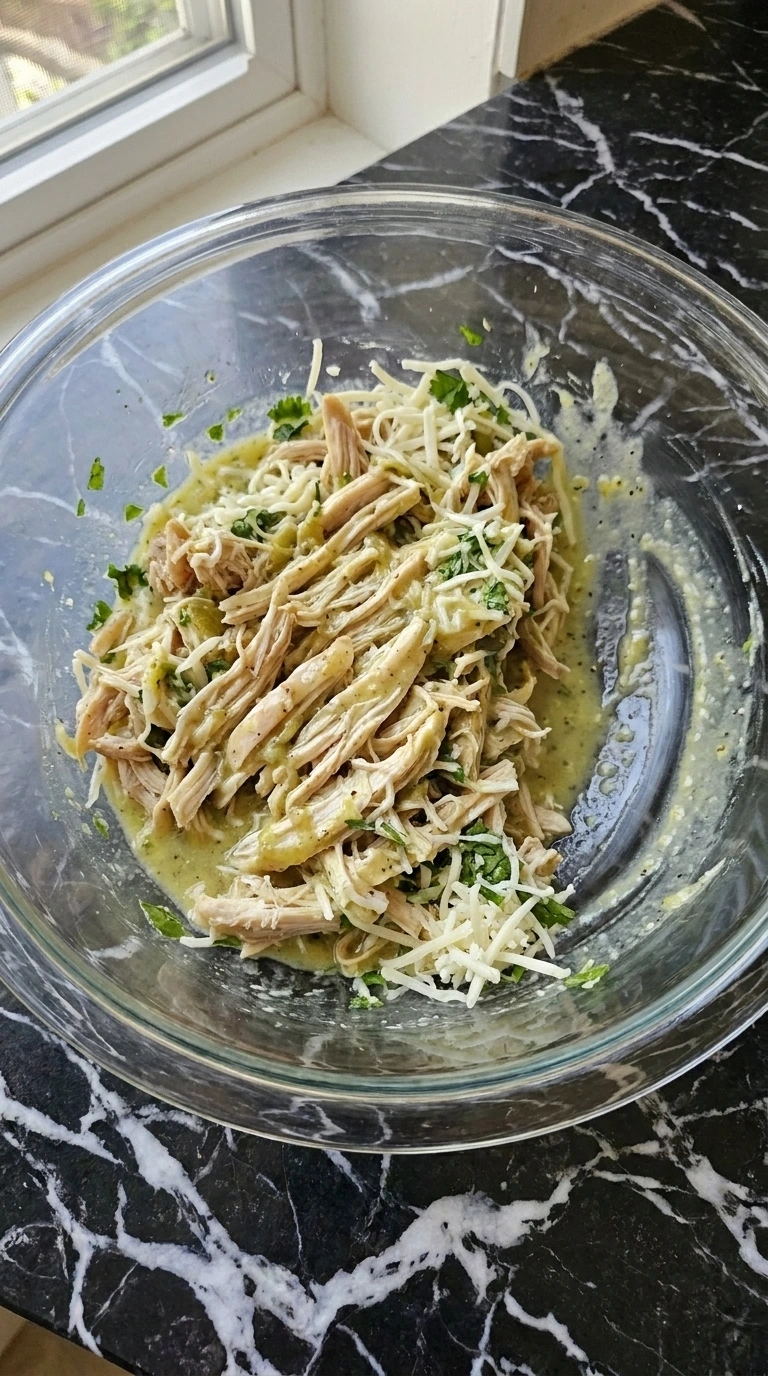
Place the shredded rotisserie chicken breast in a large bowl at 65°F to 70°F. Add 1 cup Monterey Jack, 1/2 cup chile sauce and 2 tablespoons chopped cilantro. Fold with a rubber spatula in broad scooping motions for 60 to 90 seconds.
Turn the bowl every three folds so the sauce coats the chicken without crushing its strands. The filling should look moist but not wet, with separate chicken shreds still visible. Press a spoonful against the bowl and check that it still holds together.
If it slumps into a puddle, the sauce was overmeasured and the tortillas may tear during rolling. Brief folding preserves the filling’s structure. Preheat the oven to 375°F now so it’s fully hot by the time the pan goes in.
Tip: Reserve 2 tablespoons of sauce before mixing if your chicken seems dry, then add only what the strands absorb.
Step 3: Warm and roll the tortillas

Heat the oven to 375°F. Wrap 8 seven-inch flour tortillas together and warm them for 3 minutes, then uncover them immediately. Spread 1/2 cup sauce across the bottom of a 9×13-inch baking dish.
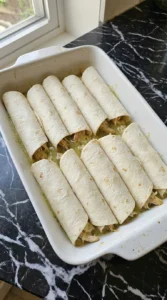
Place about 1/2 cup filling down each tortilla’s center, then roll firmly once and set each seam-side down. Work for 6 to 8 minutes while the tortillas stay flexible. Each roll should feel plump and hold its cylinder without cracking.
Arrange the 8 rolls in two slightly uneven rows with small gaps between them. Wait too long and dry tortillas split at the fold. Warm tortillas bend before their starch stiffens.
Tip: Choose soft flour tortillas without dark toasted spots. Stiff patches split when the 1/2-cup filling tightens the roll.
Step 4: Cover the enchiladas with sauce and cheese

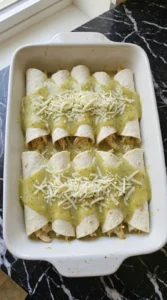
Keep the remaining sauce near 130°F so it pours easily. Spoon it lengthwise over the 8 rolled enchiladas in 2 to 3 minutes, leaving a few tortilla edges exposed. Scatter the remaining 1 cup Monterey Jack unevenly across the center and sides. I tried adding all the sauce inside once.
The rolls slid apart, so this split keeps them tidy. The sauce should settle between the rolls while the cheese remains in loose mounds. Let the dish stand for 5 minutes near 70°F before baking. This is where Creamy Hatch Green Chile Chicken Enchiladas keep their distinct rolled shape.
If you flood every edge, the tortillas soften into one flat layer. Partial coverage keeps the rolled shape visible.
Tip: Keep the cheese in loose 1-inch clumps rather than a solid blanket. The gaps let pale green sauce stay visible after baking.
Step 5: Bake until bubbling and golden
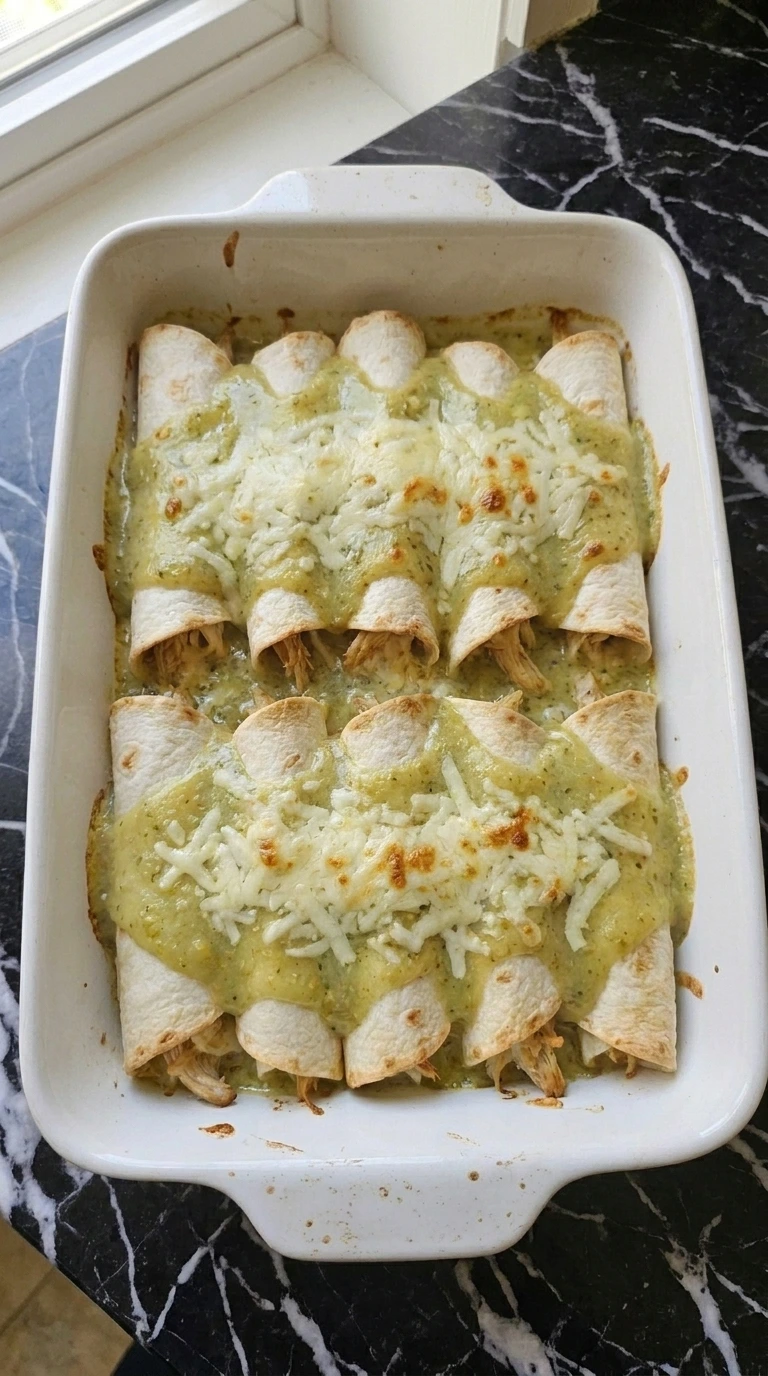
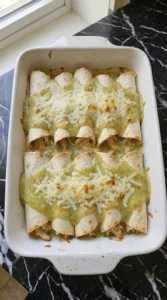
Bake the dish at 375°F for 18 to 20 minutes. Rotate it 180 degrees at minute 10 so the sauce bubbles evenly. Then switch to a 500°F broil for 1 to 2 minutes.
Watch continuously and stop when the Monterey Jack shows scattered golden patches. The center must reach 165°F. You’ll hear steady bubbling at the edges and smell toasted cheese near the final minute.
The exposed tortilla tips should turn light tan while the sauce stays creamy. Broil past 2 minutes and the cheese can scorch before the center settles. High finishing heat browns the cheese without drying the filling.
Tip: Set the dish on the middle rack, then move it 6 inches below the broiler only for the final 1 to 2 minutes.
Step 6: Rest and plate one enchilada
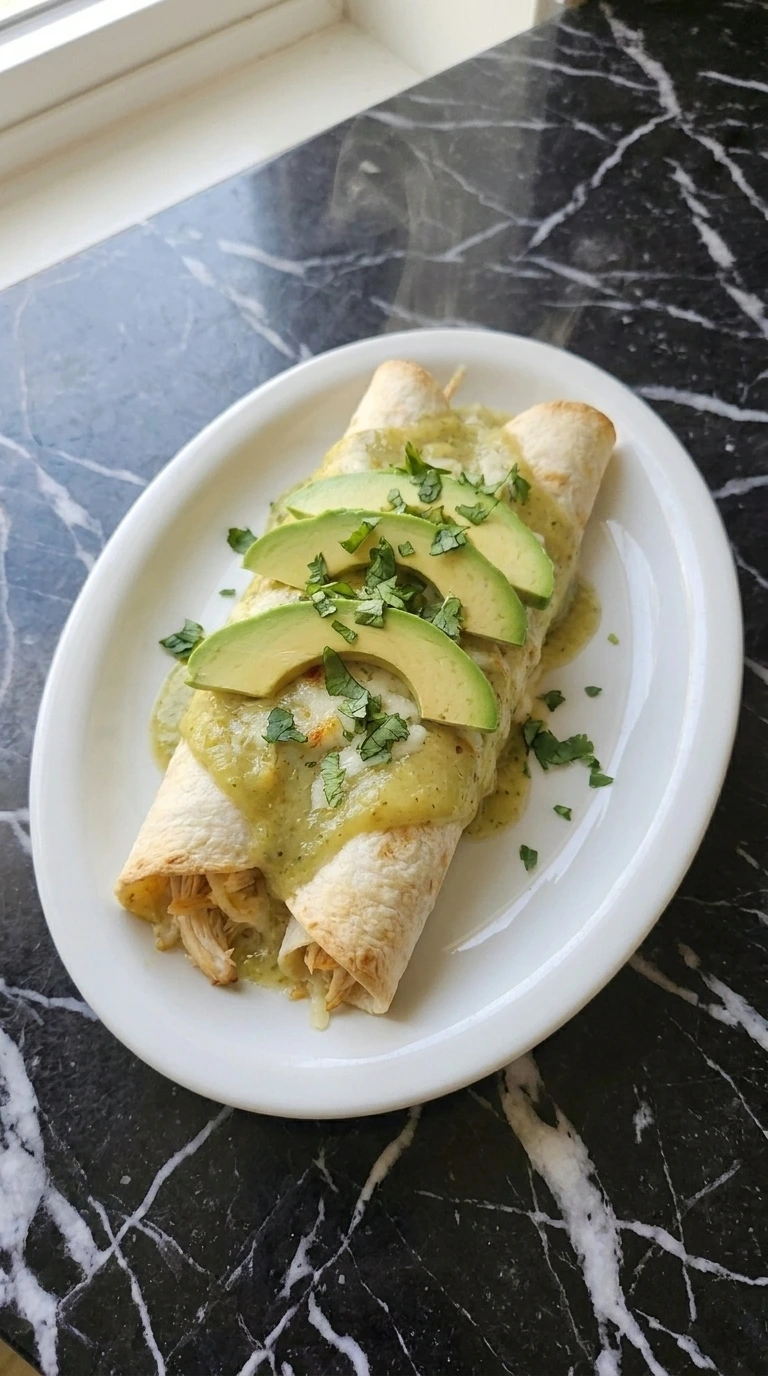
Rest the baking dish at room temperature near 70°F for exactly 8 minutes. Cut between the rolls, then lift one enchilada onto a white oval plate with a broad motion. Spoon 2 tablespoons of sauce from the dish over the center.
Add 4 avocado slices and 1 tablespoon chopped cilantro, keeping the ends visible. The plated roll should hold its shape while tender chicken shows at one open end. The sauce will look glossy rather than runny and the cheese will stretch in short strands.
Serve too early and the sauce floods the plate after it leaves the oven. Resting lets starch and melted cheese regain body.
Tip: Warm the serving plate at 170°F for 5 minutes so the cheese stays soft while you add avocado.
Chef’s Notes
- Drain the roasted Hatch chiles in a fine strainer for 5 minutes, because extra liquid can thin the sauce after baking.
- Grate 8 ounces of Monterey Jack from a block. Pre-shredded cheese contains starch and won’t melt into the same smooth patches.
- Use a true 9×13-inch dish with 2-inch sides. A smaller pan crowds the rolls and traps too much steam.
- Warm all 8 tortillas together for exactly 3 minutes at 375°F, then roll them before they cool and stiffen.
- Let Creamy Hatch Green Chile Chicken Enchiladas rest 8 minutes before serving, so the sauce clings instead of flooding the plate.
- Taste the sauce after adding 1/2 teaspoon sea salt. Rotisserie chicken and broth vary, so add only 1/8 teaspoon more if needed.
- Slice the avocado within 5 minutes of serving and keep the pieces overlapped, which slows browning without adding another garnish.
- Replace 1 cup of chicken with 1 cup rinsed black beans and 1/2 cup roasted corn for a hearty Southwestern filling.
- Add 1 finely diced jalapeño and swap 1 cup Monterey Jack for pepper Jack when you want a sharper chile heat.
- Fold 2 cups wilted baby spinach into the filling and reduce the chicken to 2 cups for a greener version.
- Use 3 cups shredded turkey breast after a holiday meal and add 1/2 teaspoon smoked paprika to deepen the flavor.
Ingredient Swaps
- Full-fat sour cream and Monterey Jack cheese: Unsweetened cashew sour cream and dairy-free Monterey-style shreds — Use both at a 1:1 ratio. The sauce becomes slightly nuttier and the topping browns less, so broil only 30 to 60 seconds.
- All-purpose flour: Gluten-free 1:1 baking flour — Use the same 3 tablespoons. The sauce may feel a little softer, so simmer it 1 minute longer before adding the sour cream.
- Seven-inch flour tortillas: Six-inch certified gluten-free corn tortillas — Use 12 tortillas because they’re smaller. Warm them for 45 seconds under a damp towel or they’ll crack and give a firmer corn flavor.
- Seven-inch flour tortillas: Certified egg-free flour tortillas — Use 8 at the same size. Most flour tortillas are already egg-free, but check the label because some refrigerated brands add egg for tenderness.
- Roasted Hatch green chiles: Roasted Anaheim green chiles — Use 1 cup at a 1:1 ratio. Anaheim chiles taste milder and less earthy, so add 1/4 teaspoon extra cumin for more depth.
- Rotisserie chicken breast: Poached boneless chicken breast or shredded turkey breast — Use 3 cups and keep the meat slightly moist. For a lighter chicken meal, try Chicken Caesar Salad instead.
How to Store Creamy Hatch Green Chile Chicken Enchiladas
Cool Creamy Hatch Green Chile Chicken Enchiladas within 2 hours, then refrigerate them in a shallow airtight container for 3 to 4 days. For freezing, separate portions with parchment and wrap each one tightly in foil before placing them in a freezer bag. Freeze for up to 2 months.
The tortillas soften slightly after thawing, but the filling and sauce keep their flavor. Reheat a covered portion at 350°F for 15 to 18 minutes and add 1 tablespoon chicken broth before sealing the foil. For a full dish, bake covered for 25 minutes, then uncover for 5 minutes.
Discard leftovers if the sauce smells sour, develops gray patches or feels unusually sticky. Don’t keep reheated portions at room temperature beyond 2 hours total.
Creamy Hatch Green Chile Chicken Enchiladas
Ingredients
- 3 tablespoons Unsalted butter Used to soften the onion and build the roux without adding extra salt.
- 1 small Yellow onion Finely diced so it softens fully and disappears into the sauce.
- 2 large Garlic cloves Minced to release their aroma quickly without leaving large pieces.
- 1 teaspoon Ground cumin Adds warm earthy depth that supports the roasted chile flavor.
- 1/2 teaspoon Fine sea salt Seasons the sauce while leaving room for the salty broth and chicken.
- 1/4 teaspoon Freshly ground black pepper Adds mild heat and a clean savory finish.
- 3 tablespoons All-purpose flour Whisked into butter to thicken the sauce into a spoon-coating consistency.
- 1 1/2 cups Low-sodium chicken broth Added slowly so the roux loosens smoothly without becoming lumpy.
- 1 cup Full-fat sour cream Brought close to room temperature so it blends into the sauce without splitting.
- 1 cup Roasted Hatch green chiles Drained for 5 minutes and diced to bring smoky green chile flavor without excess liquid.
- 3 cups Rotisserie chicken breast Skin removed and meat shredded into visible strands for a tender filling.
- 2 cups Monterey Jack cheese Freshly grated and divided between the filling and the unevenly melted topping.
- 3 tablespoons Fresh cilantro Chopped and divided between the filling and the final garnish.
- 8 Seven-inch flour tortillas Warmed until flexible so they roll tightly without cracking.
- 1 medium Hass avocado Thinly sliced just before serving for a cool creamy finish.
Instructions
- Set a saucepan over medium-low heat at about 4 on a 10-dial. Melt the butter, then stir in the diced yellow onion for 4 minutes. Add minced garlic, ground cumin, fine sea salt and black pepper for 30 seconds. Sprinkle in all-purpose flour and whisk for 1 minute. Slowly stream in low-sodium chicken broth while whisking, then simmer for 4 to 5 minutes. The sauce should thicken enough to coat a spoon and smell lightly toasted. Remove it from heat for 60 seconds, then whisk in sour cream and roasted Hatch green chiles. Stop when the color turns pale green and no white streaks remain. Boiling after the sour cream goes in can split the sauce. Gentle heat keeps the dairy emulsion smooth.
- Place the shredded rotisserie chicken breast in a large bowl at 65°F to 70°F. Add 1 cup Monterey Jack, 1/2 cup chile sauce and 2 tablespoons chopped cilantro. Fold with a rubber spatula in broad scooping motions for 60 to 90 seconds. Turn the bowl every three folds so the sauce coats the chicken without crushing its strands. The filling should look moist but not wet, with separate chicken shreds still visible. Press a spoonful against the bowl and check that it still holds together. If it slumps into a puddle, the sauce was overmeasured and the tortillas may tear during rolling. Brief folding preserves the filling’s structure. Preheat the oven to 375°F now so it’s fully hot by the time the pan goes in.

- Heat the oven to 375°F. Wrap 8 seven-inch flour tortillas together and warm them for 3 minutes, then uncover them immediately. Spread 1/2 cup sauce across the bottom of a 9×13-inch baking dish. Place about 1/2 cup filling down each tortilla’s center, then roll firmly once and set each seam-side down. Work for 6 to 8 minutes while the tortillas stay flexible. Each roll should feel plump and hold its cylinder without cracking. Arrange the 8 rolls in two slightly uneven rows with small gaps between them. Wait too long and dry tortillas split at the fold. Warm tortillas bend before their starch stiffens.
- Keep the remaining sauce near 130°F so it pours easily. Spoon it lengthwise over the 8 rolled enchiladas in 2 to 3 minutes, leaving a few tortilla edges exposed. Scatter the remaining 1 cup Monterey Jack unevenly across the center and sides. I tried adding all the sauce inside once. The rolls slid apart, so this split keeps them tidy. The sauce should settle between the rolls while the cheese remains in loose mounds. Let the dish stand for 5 minutes near 70°F before baking. This is where Creamy Hatch Green Chile Chicken Enchiladas keep their distinct rolled shape. If you flood every edge, the tortillas soften into one flat layer. Partial coverage keeps the rolled shape visible.
- Bake the dish at 375°F for 18 to 20 minutes. Rotate it 180 degrees at minute 10 so the sauce bubbles evenly. Then switch to a 500°F broil for 1 to 2 minutes. Watch continuously and stop when the Monterey Jack shows scattered golden patches. The center must reach 165°F. You’ll hear steady bubbling at the edges and smell toasted cheese near the final minute. The exposed tortilla tips should turn light tan while the sauce stays creamy. Broil past 2 minutes and the cheese can scorch before the center settles. High finishing heat browns the cheese without drying the filling.
- Rest the baking dish at room temperature near 70°F for exactly 8 minutes. Cut between the rolls, then lift one enchilada onto a white oval plate with a broad motion. Spoon 2 tablespoons of sauce from the dish over the center. Add 4 avocado slices and 1 tablespoon chopped cilantro, keeping the ends visible. The plated roll should hold its shape while tender chicken shows at one open end. The sauce will look glossy rather than runny and the cheese will stretch in short strands. Serve too early and the sauce floods the plate after it leaves the oven. Resting lets starch and melted cheese regain body.

Notes
Nutrition
Common Questions About Creamy Hatch Green Chile Chicken Enchiladas
Yes. Assemble the rolls and cover the dish for up to 12 hours, but keep the final cheese layer in a separate container. Add the cheese before baking, then cook at 375°F for 23 to 28 minutes because the chilled center needs extra time to reach 165°F.
The usual causes are undrained chiles or a roux that never simmered long enough. Drain the roasted chiles for 5 minutes and simmer the broth mixture for 4 to 5 minutes, until it coats a spoon. Then rest the baked dish for 8 minutes so the starch can tighten the sauce.
Use 1 cup unsweetened cashew sour cream and 2 cups dairy-free Monterey-style shreds. Add the sour cream after the saucepan sits off heat for 90 seconds because plant-based products can separate faster. The sauce will taste slightly nuttier and the topping may melt with fewer golden spots.
Prepare two separate 9×13-inch dishes instead of packing 16 rolls into one pan. Bake both at 375°F for 24 to 30 minutes and switch their rack positions at minute 14. Check each center for 165°F because one dish may finish several minutes before the other.
Yes. Assemble them without avocado or cilantro, wrap the entire dish in plastic and foil and freeze for up to 2 months. Thaw in the refrigerator for 24 hours, then bake covered at 375°F for 25 minutes and uncovered for another 10 minutes.
Pair them with a crisp salad or roasted vegetables so the plate doesn’t feel too heavy. For a warm side, bake Cinnamon Maple Roasted Carrots at the same time. Start the carrots 10 minutes earlier because they need a longer roasting window.
Let Me Know
One of my signature recipes! These Creamy Hatch Green Chile Chicken Enchiladas are made with roasted chiles, tender chicken and a silky sour cream sauce.
The first tray vanished before it cooled, and the homemade sauce is what makes this version special. It makes 4 generous servings, so try it and share your photo, then save Banana Cake for dessert.
Hatch green chile comes from New Mexican chile varieties grown near the Hatch Valley. People love its earthy flavor, but the heat isn’t always the same, it can range from mild to seriously spicy.