Friendsgiving Pie Party
This is the kind of thing I wish I’d discovered sooner. The first time I hosted a Friendsgiving Pie Party was during Thanksgiving 2020, when travel wasn’t really an option, and I accidentally overbaked one pie by nearly 10 minutes. Somehow, it still ended up being one of the highlights of the meal. That’s when I realized a pie table is much more forgiving than people think.
Since then, I’ve created this dessert spread for holiday dinners, spontaneous Tuesday nights when friends stopped by, and even a potluck where three people asked me for the recipes. The best part of this pie-filled gathering is that everyone finds a slice they love. Some guests go straight for pumpkin, while others can’t resist apple or pecan. If you enjoy seasonal baking, try our Pumpkin Cream Cheese Danish for another cozy fall treat that brings the same warm gathering vibe.
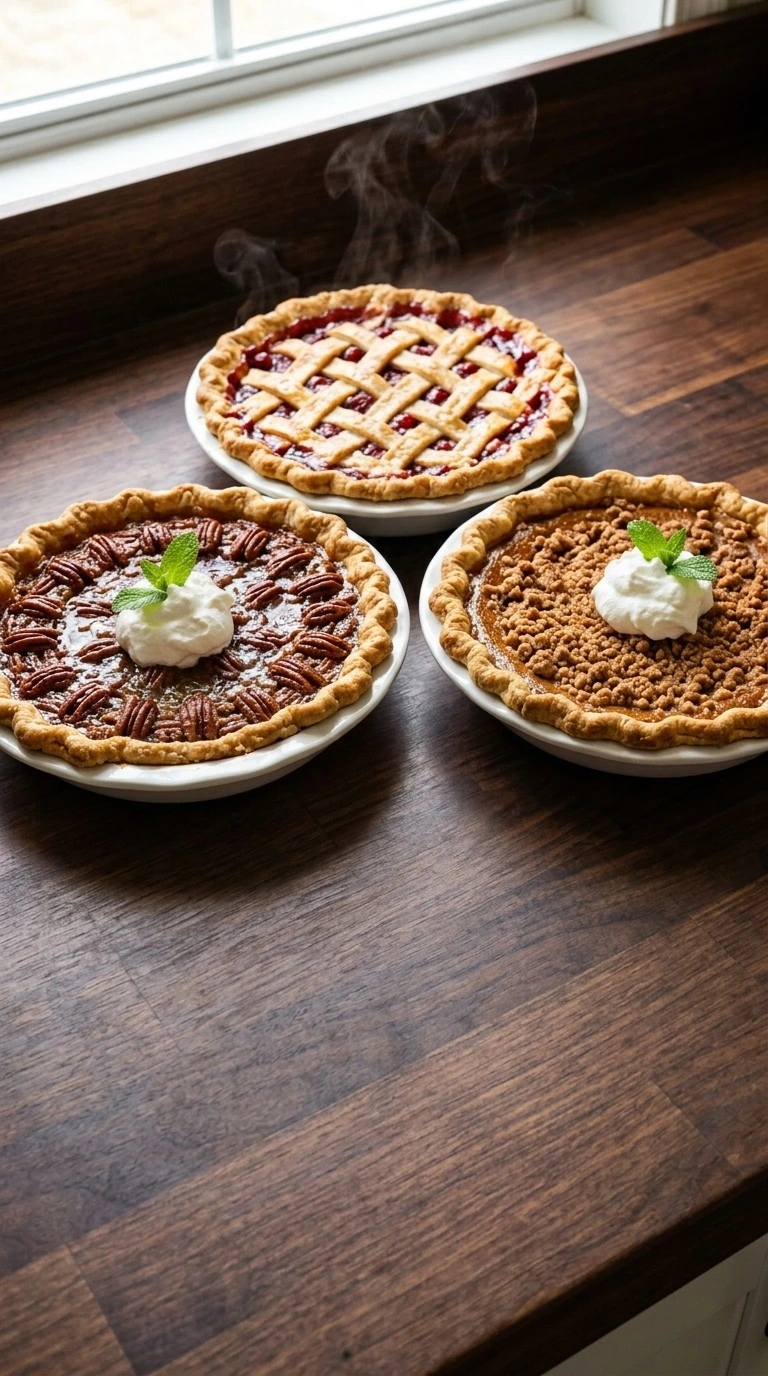
This homemade Friendsgiving dessert spread is full of classic flavors and feels special without needing professional bakery skills. The crusts can be a little rustic, the toppings don’t have to be perfectly even, and the whole table still feels inviting. That’s exactly why I keep making this whenever friends come together during the fall season.
What Makes This Friendsgiving Pie Party Work
The Friendsgiving Pie Party works because each filling uses balanced moisture and structure. Baking at 350°F lets custard fillings set slowly without cracking the surface.
Resting the pies for 2 hours also helps the slices hold their shape. The combination of warm spices and creamy fillings creates contrast with crisp crusts.
For another seasonal idea, try our Crockpot Thanksgiving Ham when planning a full holiday menu.
Ingredients for Friendsgiving Pie Party
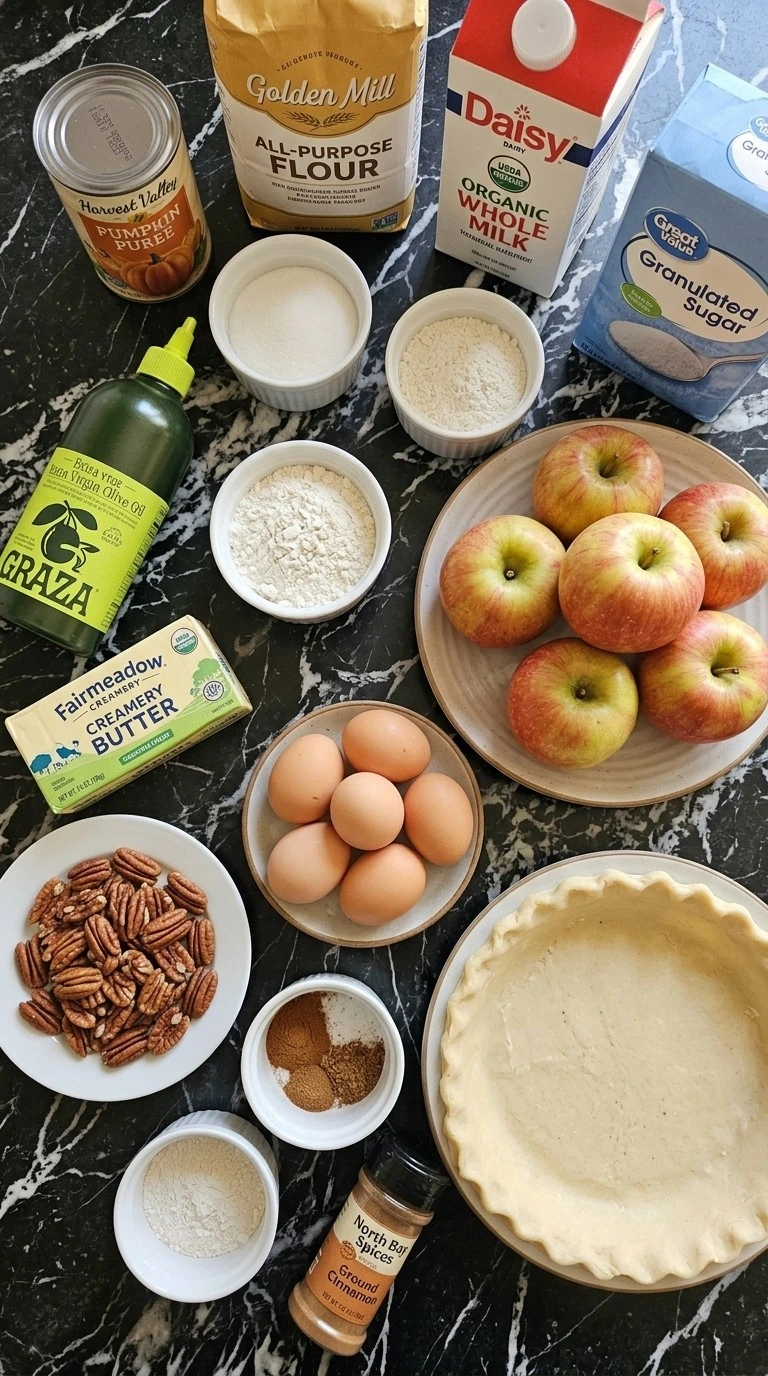
- pumpkin puree: Used as the creamy seasonal base for the pumpkin filling.
- large eggs: Added for structure and a rich custard texture.
- evaporated milk: Creates a smooth and creamy filling consistency.
- granulated sugar: Sweetens the fillings while helping the texture set.
- ground cinnamon: Adds warm autumn spice flavor.
- ground ginger: Adds gentle spice depth to the filling.
- pie crust: Provides the golden flaky base for each pie.
What You’ll Use
- 9-inch pie plates: Use sturdy 9-inch pie plates that distribute heat evenly so crusts bake properly and thin fragile dishes don’t crack.
- large mixing bowl: Choose a large bowl with enough room for smooth filling mixtures so ingredients combine without spilling over the sides.
How to Make Friendsgiving Pie Party Step by Step
Step 1: Mix the pie fillings
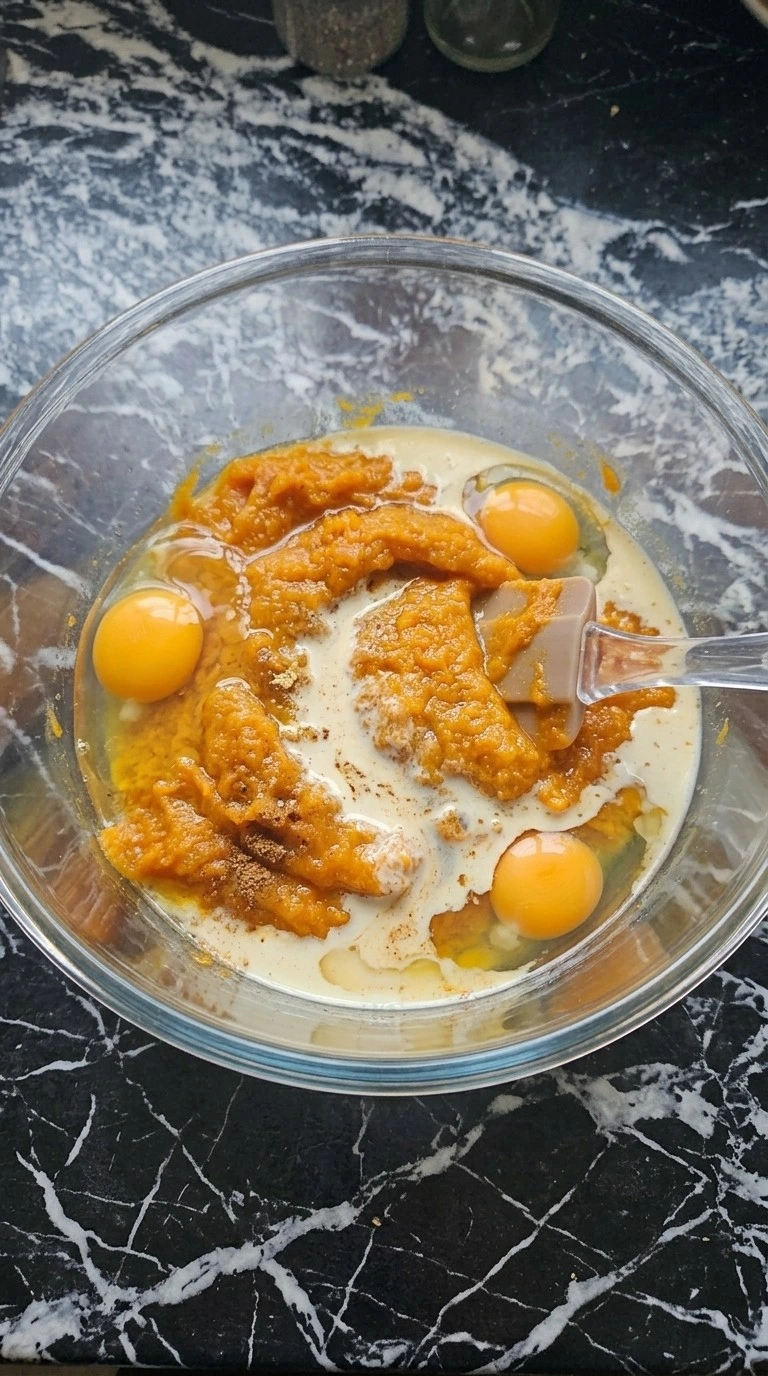
Preheat the oven to 350°F. Combine pumpkin puree, eggs, evaporated milk, sugar and spices at 350°F preparation conditions before baking. Whisk slowly for 3 to 5 minutes using a circular hand motion until the mixture becomes smooth and evenly colored.
(I tried rushing this step once and the filling had spice pockets. Slow mixing fixed the texture. ) You’ll see a glossy orange pumpkin mixture with tiny spice flecks evenly distributed.
The aroma becomes warm and sweet from the cinnamon and ginger. Miss this mixing window and the filling can separate during baking. Blend the ingredients evenly, this keeps the custard structure stable while baking.
Tip: Measure spices before mixing because small changes can overpower delicate pumpkin and custard flavors.
Step 2: Fill the pie crusts
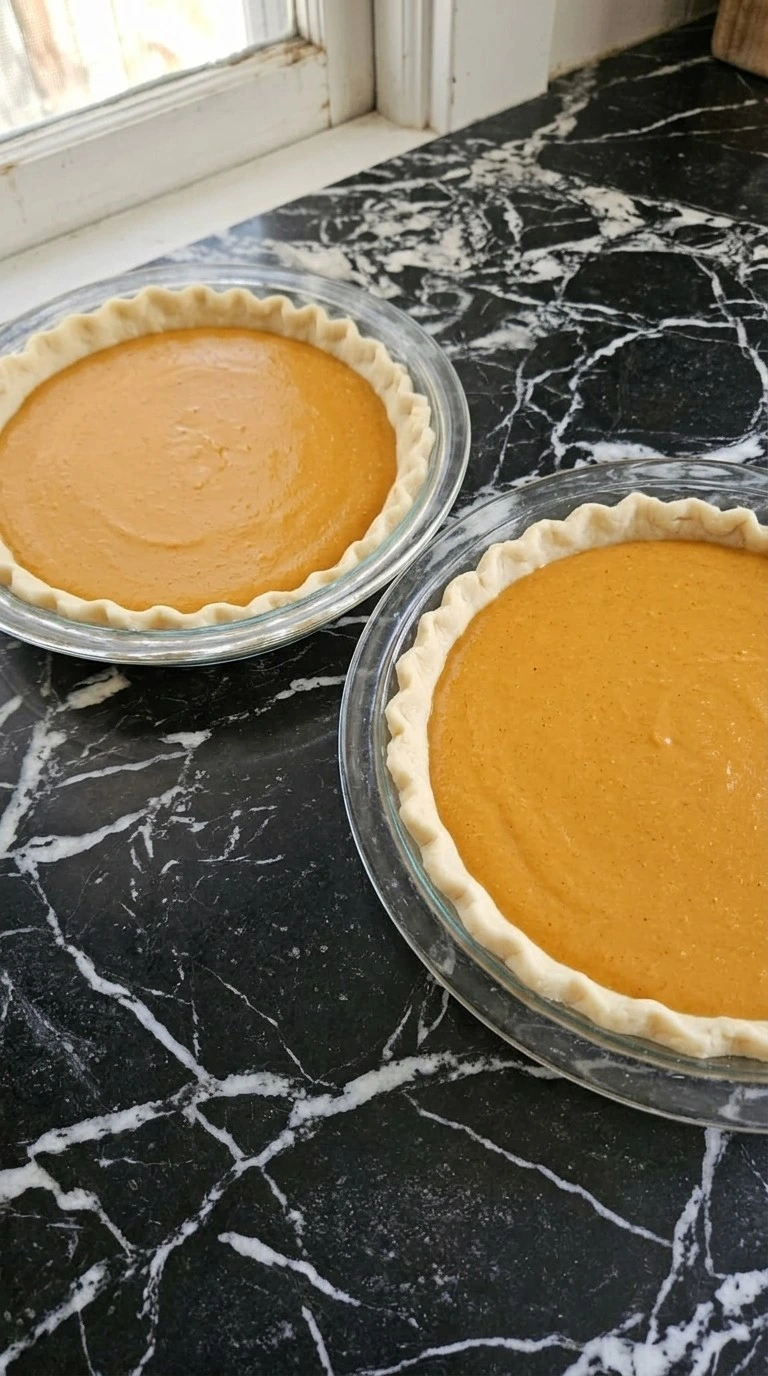
Pour the prepared fillings into 9-inch pie crusts and arrange them evenly before baking at 350°F for 10 minutes of preparation. Use a slow pouring motion and gently tap the crust edges to remove air pockets. The filling should sit below the rim.
The surface will look smooth and slightly shiny before entering the oven. You’ll notice a thick custard texture instead of a watery mixture. Skip removing air pockets and the baked pies may develop uneven cracks.
Careful filling protects the crust shape and creates a cleaner slice later.
Tip: Leave about 1/4 inch space below the crust edge so bubbling filling does not overflow.
Step 3: Bake the pies until set
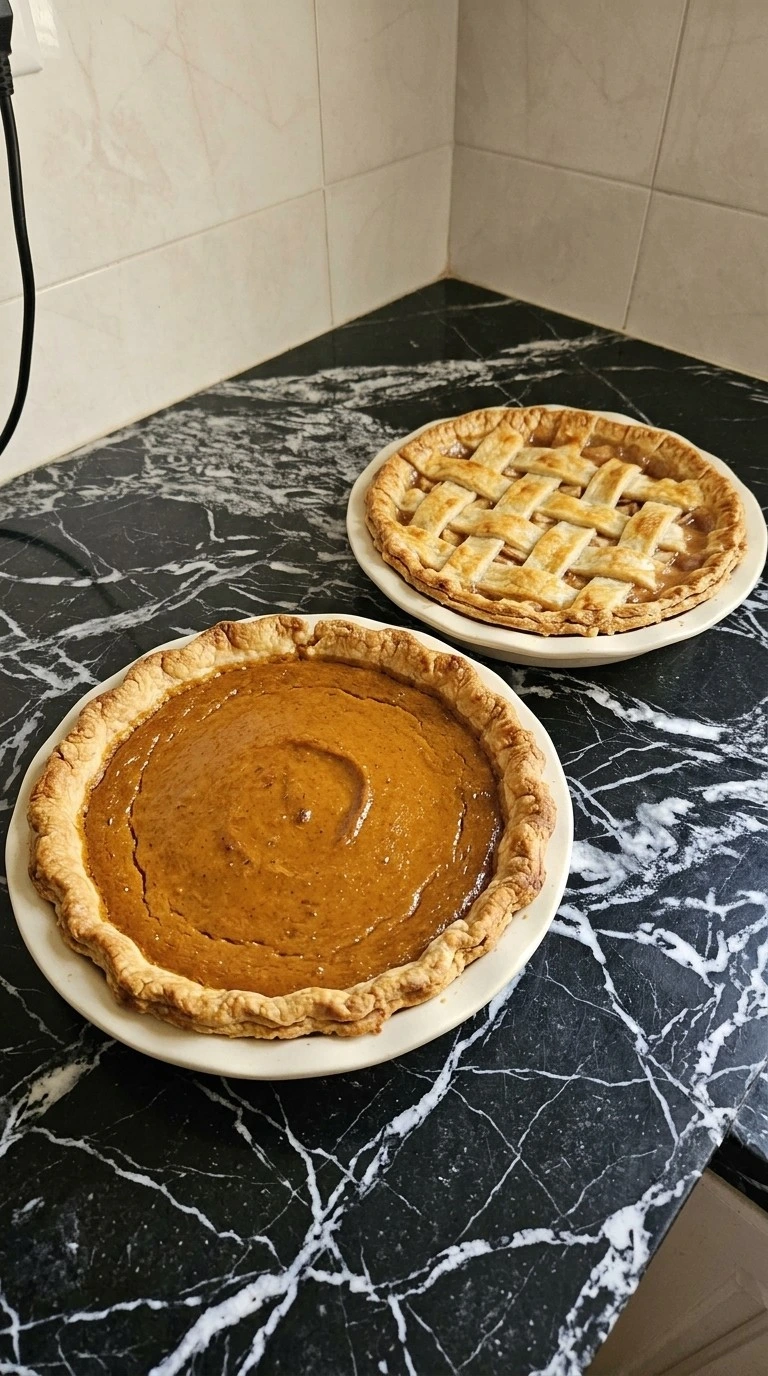
Bake the filled pies at 350°F for 35 to 45 minutes until the centers gently set. Rotate the pies halfway through using careful oven handling and check that the middle still has a slight wobble. (My first batch went too long and the custard cracked.
The gentle wobble is the cue. ) The crust edges turn deep golden and the filling develops a firm surface with a soft center. You’ll smell toasted spices when the pies approach the finish.
Go past the setting window and the texture becomes dry. Bake with controlled heat, gradual setting keeps the custard smooth.
Tip: Place pies on a flat surface after baking and avoid moving them while the filling is still loose.
Step 4: Cool and arrange the pie slices

Cool the baked pies at room temperature for 2 hours before slicing and serving. Use a gentle cutting motion with a clean blade and transfer portions carefully onto serving plates. Keep the slices slightly varied because homemade pies should not look identical.
The fillings become creamy and structured while the crust stays crisp around the edges. You’ll see different colors from pumpkin orange to pecan brown. Skip the cooling period and slices may collapse.
Cooling allows the fillings to finish setting without losing moisture.
Tip: Slice with a warm blade for cleaner cuts after dipping it in hot water for 10 seconds.
Tips for Perfect Friendsgiving Pie Party
- Chill filled pie crusts for 20 minutes before baking because colder dough keeps the edges flaky and reduces shrinking during the first 10 minutes in the oven.
- Choose canned pumpkin puree without added spices or sugar because the recipe already balances cinnamon and ginger at measured amounts for a cleaner seasonal flavor.
- Bake pies on the middle oven rack at 350°F and check the center after 35 minutes because gentle heat prevents cracks while the custard finishes setting.
- Cool each pie for at least 2 hours before slicing because the filling needs time to firm and hold a clean wedge shape.
- Avoid overmixing after the eggs go in because adding too much air creates bubbles that can leave small holes across the baked filling.
- Add whipped cream just before serving and keep portions slightly uneven because a homemade Friendsgiving Pie Party table looks more natural and inviting.
- Create a chocolate pecan version by adding 1 cup dark chocolate chips with the pecans before baking for a richer holiday dessert.
- Make a mini pie collection by dividing the filling into 6-inch crusts and reducing the baking time to about 25 minutes at 350°F.
- Add a maple twist by replacing 1/4 cup of granulated sugar with pure maple syrup for a deeper autumn flavor and softer filling.
- Build a lighter seasonal option by serving smaller slices with fresh berries instead of heavy toppings.
Substitutions & Variations
- evaporated milk: full-fat coconut milk — Use the same 12-ounce amount for a dairy-free option. The filling becomes slightly coconut flavored and a little softer because coconut milk has different water content.
- pie crust: gluten-free pie crust — Replace each 9-inch crust with a gluten-free version from a trusted brand. The texture can be more delicate, so chill the crust for 30 minutes before filling.
- large eggs: commercial egg replacer — Use the package ratio for 4 large eggs if needed. The filling may set less firmly because eggs provide the main custard structure.
- granulated sugar: light brown sugar — Use 1 cup light brown sugar for deeper caramel notes. The filling will become slightly darker and have a warmer molasses flavor.
- pumpkin puree: mashed roasted butternut squash — Use an equal 15-ounce amount after draining excess moisture. The result tastes sweeter and slightly nuttier than classic pumpkin filling. For another pumpkin option, try our Soft Gluten Free Pumpkin Cookies with Chocolate Chips.
How to Store & Reheat
Store Friendsgiving Pie Party pies in covered pie containers or airtight boxes in the refrigerator for up to 4 days. You can freeze individual slices for up to 2 months by wrapping each piece in plastic wrap and placing them inside a freezer bag.
Avoid freezing pies with fresh whipped cream because the topping texture changes after thawing. Reheat slices at 300°F for 10 to 15 minutes until the crust feels crisp again.
Add fresh whipped cream or a small spoonful of yogurt after warming for better texture. Discard any pie with sour odors, watery separation, or mold spots because those changes mean the dessert is no longer safe to enjoy.
Friendsgiving Pie Party
Ingredients
- 15 ounces pumpkin puree Used as the creamy seasonal base for the pumpkin filling.
- 4 large eggs large eggs Added for structure and a rich custard texture.
- 12 ounces evaporated milk Creates a smooth and creamy filling consistency.
- 1 cup granulated sugar Sweetens the fillings while helping the texture set.
- 2 teaspoons ground cinnamon Adds warm autumn spice flavor.
- 1 teaspoon ground ginger Adds gentle spice depth to the filling.
- 4 9 -inch crusts pie crust Provides the golden flaky base for each pie.
Instructions
- Preheat the oven to 350°F. Combine pumpkin puree, eggs, evaporated milk, sugar and spices at 350°F preparation conditions before baking. Whisk slowly for 3 to 5 minutes using a circular hand motion until the mixture becomes smooth and evenly colored. (I tried rushing this step once and the filling had spice pockets. Slow mixing fixed the texture.) You’ll see a glossy orange pumpkin mixture with tiny spice flecks evenly distributed. The aroma becomes warm and sweet from the cinnamon and ginger. Miss this mixing window and the filling can separate during baking. Blend the ingredients evenly, this keeps the custard structure stable while baking.
- Pour the prepared fillings into 9-inch pie crusts and arrange them evenly before baking at 350°F for 10 minutes of preparation. Use a slow pouring motion and gently tap the crust edges to remove air pockets. The filling should sit below the rim. The surface will look smooth and slightly shiny before entering the oven. You’ll notice a thick custard texture instead of a watery mixture. Skip removing air pockets and the baked pies may develop uneven cracks. Careful filling protects the crust shape and creates a cleaner slice later.

- Bake the filled pies at 350°F for 35 to 45 minutes until the centers gently set. Rotate the pies halfway through using careful oven handling and check that the middle still has a slight wobble. (My first batch went too long and the custard cracked. The gentle wobble is the cue.) The crust edges turn deep golden and the filling develops a firm surface with a soft center. You’ll smell toasted spices when the pies approach the finish. Go past the setting window and the texture becomes dry. Bake with controlled heat, gradual setting keeps the custard smooth.

- Cool the baked pies at room temperature for 2 hours before slicing and serving. Use a gentle cutting motion with a clean blade and transfer portions carefully onto serving plates. Keep the slices slightly varied because homemade pies should not look identical. The fillings become creamy and structured while the crust stays crisp around the edges. You’ll see different colors from pumpkin orange to pecan brown. Skip the cooling period and slices may collapse. Cooling allows the fillings to finish setting without losing moisture.

Notes
Nutrition
Reader Questions
Yes, you can bake the pies 1 to 2 days before serving and keep them covered in the refrigerator. Bring them out 60 minutes before guests arrive so the filling loses its chill and the flavors become more noticeable.
Store the pies in airtight containers or tightly wrapped pie plates for up to 4 days in the refrigerator. Watch for watery filling, sour smells, or crusts that become unusually soft because those are signs the pies are past their best.
You can replace evaporated milk with full-fat coconut milk using the same 12-ounce amount. The filling will set slightly softer, so bake it at 350°F and allow the full 2-hour cooling period before slicing.
Cracks usually happen when the custard stays too long in the oven or cools too quickly. Bake at 350°F until the center has a gentle wobble, then cool the pie slowly at room temperature before chilling.
Double the recipe by preparing two batches separately instead of making one oversized filling bowl. Multiple 9-inch pies bake more evenly and let guests choose different flavors during the party.
Yes, wrap individual slices tightly and freeze them for up to 2 months. Thaw overnight in the refrigerator, then warm slices at 300°F for about 10 minutes if you prefer a softer crust.
In Conclusion
This is the kind of recipe I wish I’d discovered years ago. It would’ve saved me from so many stressful holiday dessert moments.
Now that I have this Friendsgiving Pie Party idea, I come back to it often, and I think you’ll love making it too. If you enjoyed this recipe, take a look at some of my other favorites on the blog.
You can also try our Soft Gluten Free Pumpkin Cookies with Chocolate Chips and share your own pie party creations. Don’t forget to leave a comment because I read every one, and hearing from you truly makes my day.
Pumpkin pie became a Thanksgiving favorite because early American cooks combined native squash with simple custard fillings to make comforting seasonal desserts. Today, Friendsgiving pie tables often bring together pumpkin, apple, and pecan pies, since each one reflects a different regional baking tradition and adds its own classic flavor to the celebration.