Rum Balls
The first time I made these Rum Balls for Christmas, I barely had time to put the plate down before everyone started reaching for one! My mom took a bite and said the chocolate flavor reminded her of the little sweets we used to make during the holidays. I have to say, these have become one of my favorite no bake desserts! They’re rich and soft in the middle with a light coating of powdered sugar. And the best part? This version uses alcohol-free rum flavor, so everyone at the table can enjoy them.
I’ve always loved a good chocolate dessert, especially when I don’t have to turn on the oven. These easy rum balls use crushed vanilla wafers and toasted pecans to make a soft center that holds together beautifully. There’s cocoa in every bite and just enough syrup to keep the mixture from turning dry. If you love chocolate as much as I do, you’ll probably enjoy our Chewy Chocolate Gingerbread Cookies too. This recipe makes about 24 little balls, which is plenty for a small holiday gathering. But you can easily double it if you’re feeding a crowd!
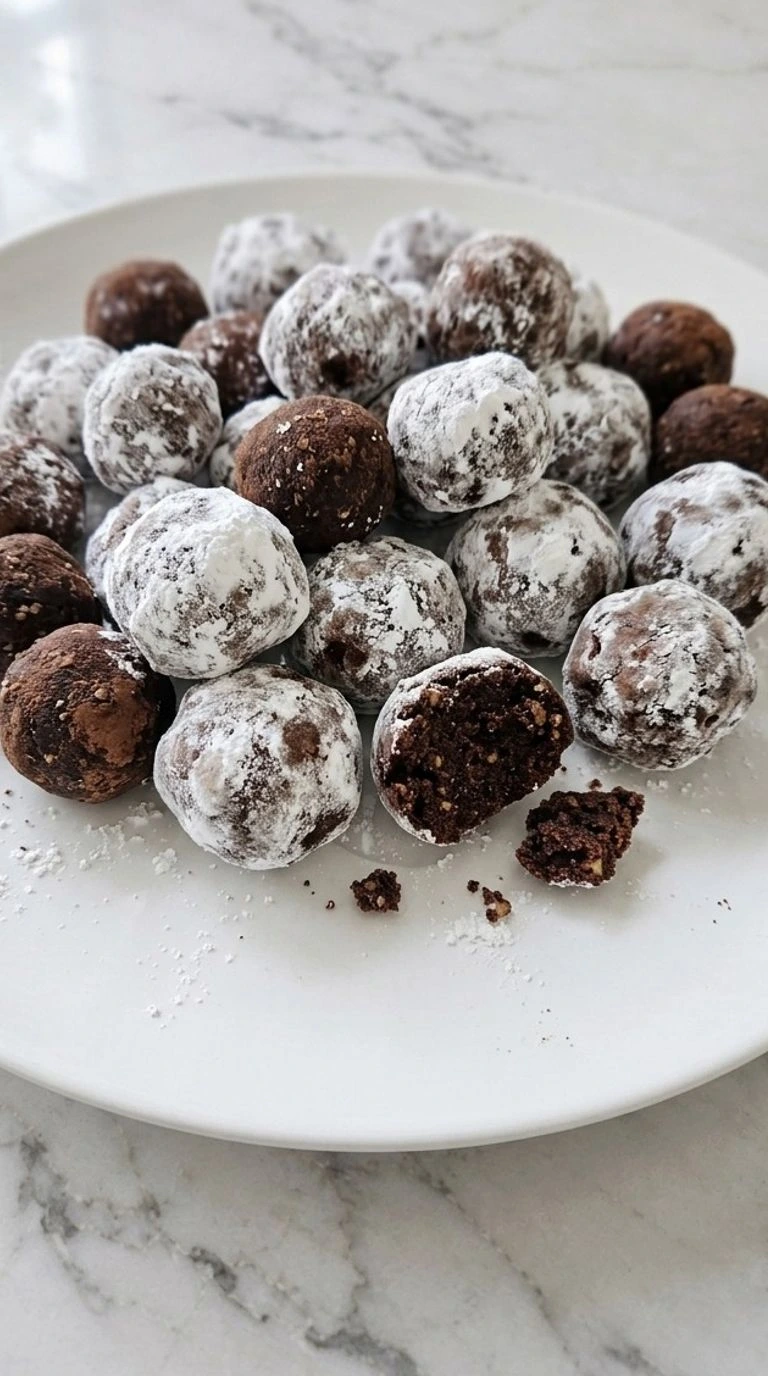
I especially like making these chocolate sweets a day before Christmas because they taste even better after resting in the fridge. The crumbs soften and the cocoa flavor gets deeper while the outside stays sweet and delicate. You can tuck them into a holiday cookie box or serve them after dinner with hot chocolate. They’re also great for sharing with friends and neighbors. No baking needed. Just mix and roll and let the fridge do the rest.
Why This Recipe Works
The reason these Rum Balls hold together without baking is the mix of finely crushed vanilla wafers and light corn syrup. The cookie crumbs absorb moisture while the syrup binds everything into a soft dough.
Grinding the pecans finely also keeps the center from breaking apart when you roll it. Then a full 60-minute chill at 40°F or below helps the mixture firm up and makes the flavor more even.
Ingredients
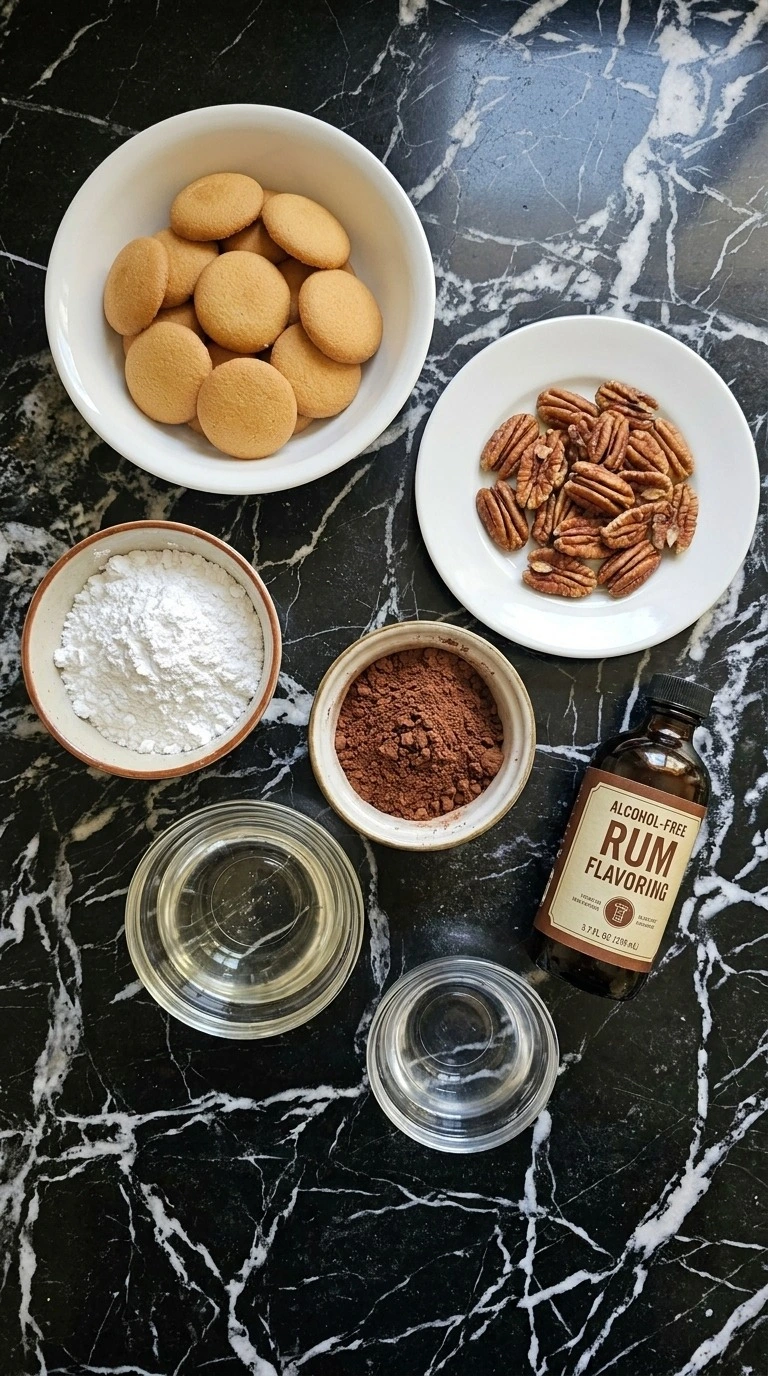
- vanilla wafer cookies: About 60 small cookies crushed into fine crumbs. They form the main structure and add a light vanilla flavor.
- pecans: Toasted and finely ground for a nutty flavor and a little texture in the chocolate center.
- confectioners sugar: Use 1/2 cup in the chocolate mixture and reserve 1/2 cup for coating the shaped balls.
- unsweetened natural cocoa powder: Adds a deep chocolate taste and helps absorb moisture from the syrup.
- light corn syrup: Binds the dry crumbs and creates a soft chewy texture without baking.
- water: Adds enough moisture to help the cookie crumbs bind without making the mixture runny.
- alcohol-free rum flavoring: Gives the dessert its familiar rum-style aroma without using alcoholic rum. Check the label to confirm the flavoring contains no alcohol.
Kitchen Equipment
- Food processor: A 7-cup food processor makes fine wafer and pecan crumbs quickly. A smaller processor works in batches, but overfilling leaves large chunks and uneven texture.
- Large mixing bowl: A 3-quart mixing bowl provides enough room to fold the cookie crumbs with cocoa and syrup without spilling. Choose a sturdy bowl with enough depth for firm stirring.
- Rubber spatula: A firm rubber spatula folds the sticky mixture and scrapes dry crumbs from the bowl. Choose one with a strong flexible head since a very soft spatula can bend under the thick dough.
- Tablespoon cookie scoop: A 1-tablespoon scoop helps divide the mixture into even portions. Choose a scoop with a release mechanism or use a measuring spoon if the mixture sticks.
- Rectangular baking tray: A standard 13-by-18-inch rimmed baking tray holds the shaped chocolate balls during chilling. A smaller tray also works if all 24 pieces fit without being stacked.
- Parchment paper: A sheet of nonstick parchment prevents the sticky chocolate balls from clinging to the tray. Use food-grade parchment rather than absorbent paper, which can tear during removal.
- Shallow coating bowl: A shallow bowl about 6 inches wide makes it easier to roll each chocolate ball through confectioners sugar. Avoid a narrow deep cup because the coating will gather in thick patches.
How to Make It
Step 1: Crush the vanilla wafers and pecans
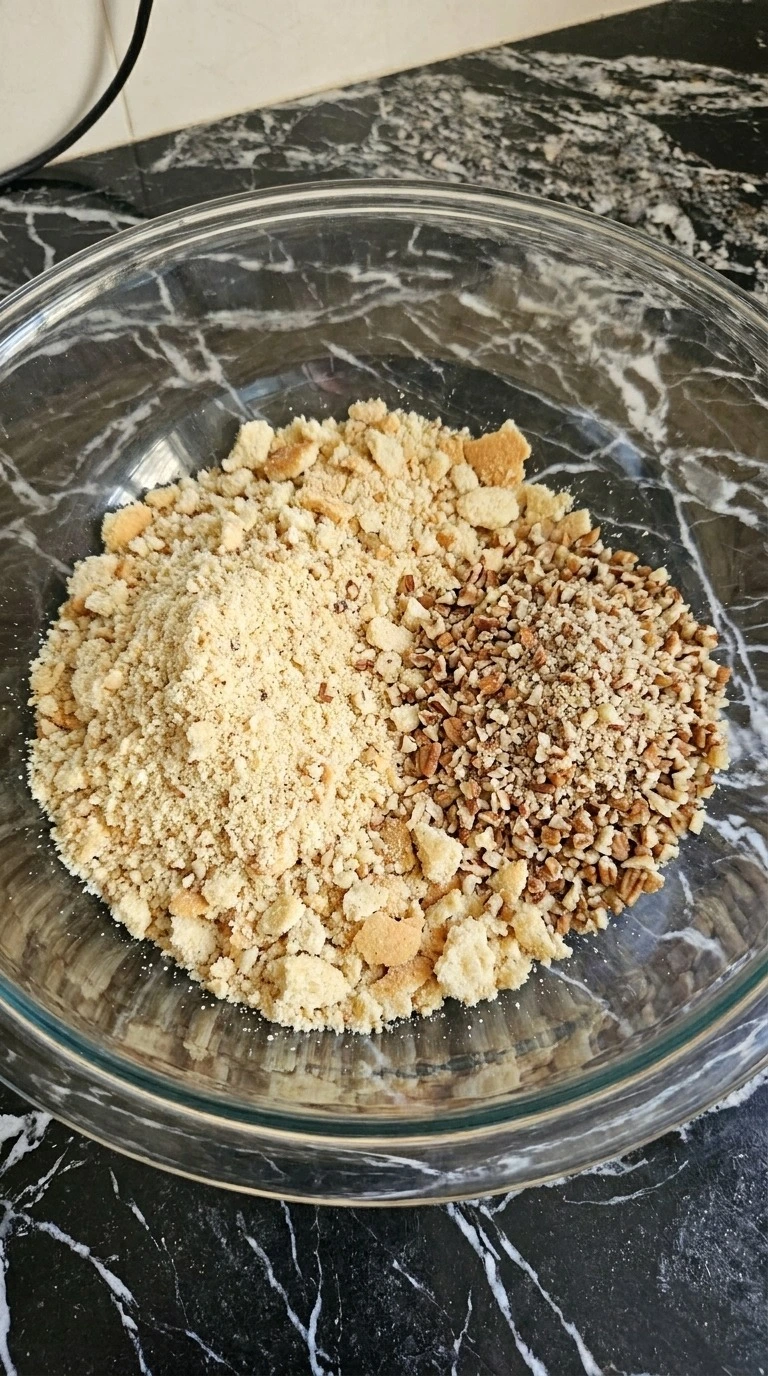
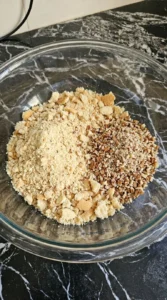
Start with 2 cups of finely crushed vanilla wafer cookies and 1 cup of toasted pecans. If you’re working with whole cookies and pecan halves, pulse them separately in a food processor until they turn into small and even crumbs. Use short pulses of 1 to 2 seconds and stop to check the texture after about 20 seconds. Keep the ingredients near 70°F while you work.
The cookie crumbs should look like coarse sand and the nuts should have tiny visible flecks. Don’t keep blending once the pecans are fine because they’ll start releasing oil and turn pasty. Next, spread the crumbs in a large mixing bowl so you can see whether any big cookie pieces remain. Break up any lumps before moving on.
The mixture should feel dry and loose between your fingers. Fine crumbs help the chocolate mixture hold together without gritty chunks.
Tip: Toast pecans at 325°F for 8 to 10 minutes and cool them fully before grinding for a deeper nutty flavor.
Step 2: Mix the cocoa and sweet syrup into the crumbs
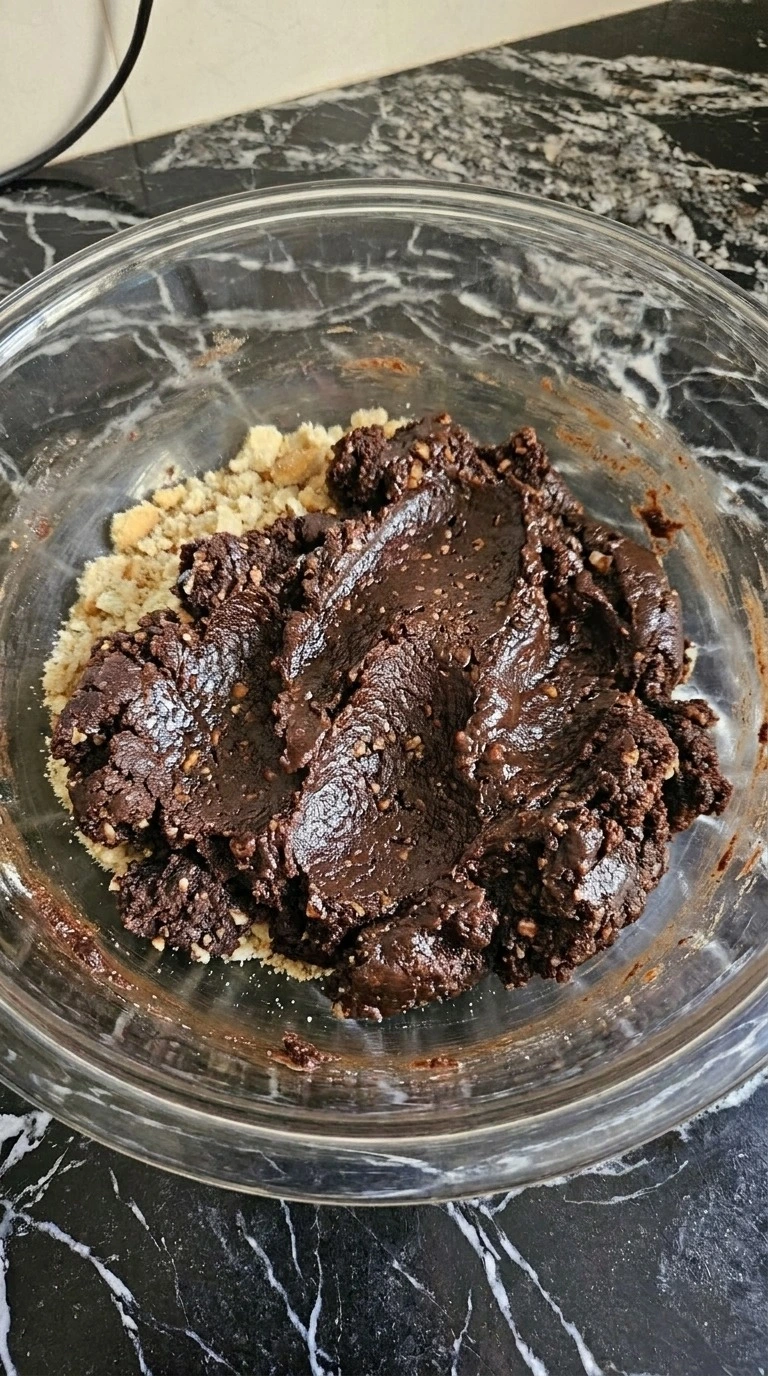
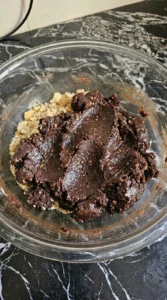
Add 1/2 cup of confectioners sugar and 1/4 cup of unsweetened natural cocoa powder to the crumb mixture. Stir with a rubber spatula until the cocoa spreads through the dry ingredients. Then pour in 1/3 cup of light corn syrup and 3 tablespoons of water mixed with 1 teaspoon of alcohol-free rum flavoring. Keep everything near 70°F and fold for 2 to 3 minutes.
Press the spatula against the side of the bowl to break up dry spots. The loose crumbs should slowly turn into a dark chocolate mixture that clumps when squeezed. Don’t rush this part. If the mixture still looks dusty after 3 minutes, keep pressing and folding until the syrup reaches every section.
(I once stopped mixing too soon and the first few balls crumbled in my hands. ) The right texture feels firm and a little tacky but doesn’t drip or spread. Even moisture keeps the centers from falling apart.
Tip: Use natural unsweetened cocoa rather than sweetened drinking chocolate, since the added sugar in cocoa mixes changes the texture.
Step 3: Roll the chocolate mixture into small balls
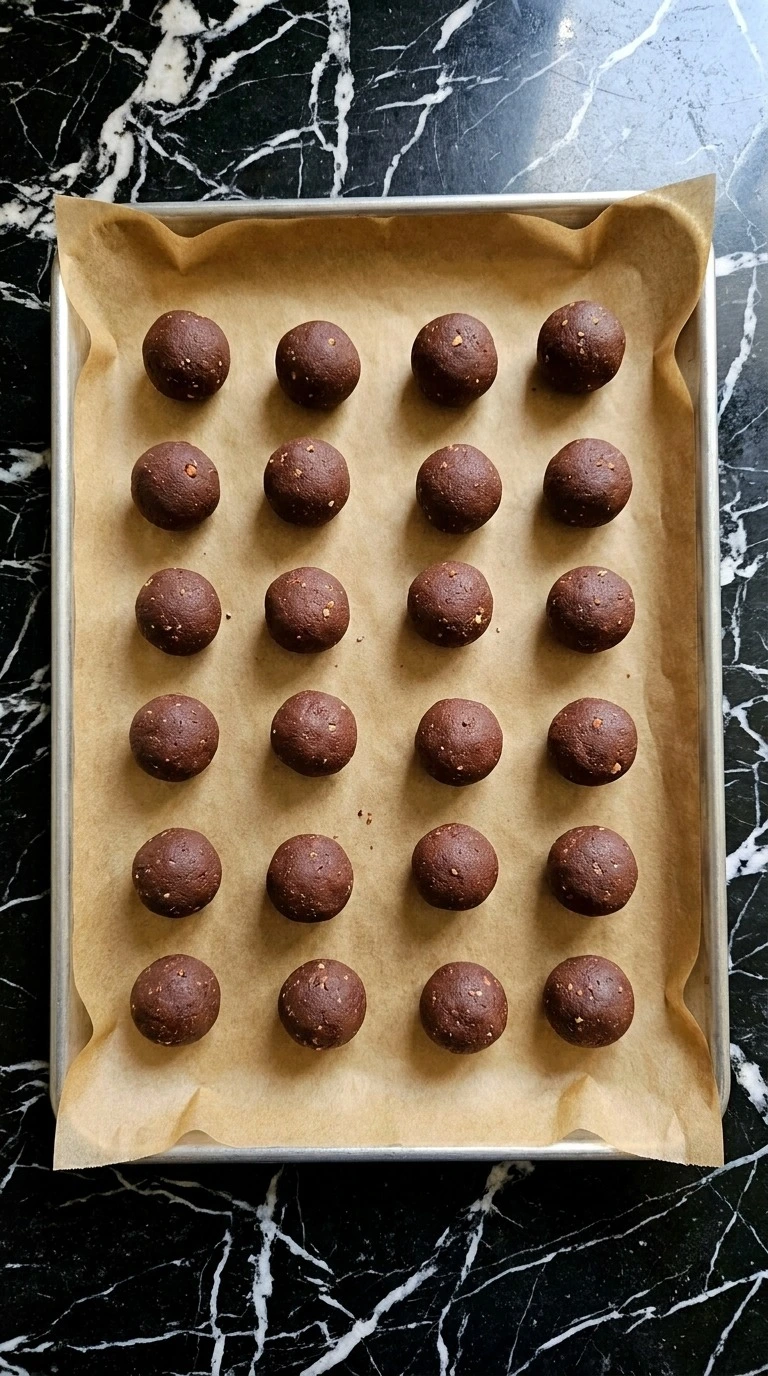
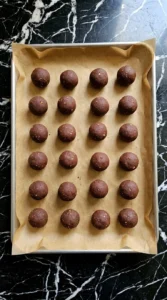
Scoop the chocolate mixture into 24 portions using about 1 level tablespoon per piece. Roll each portion between your palms with light pressure until it forms a small round ball about 1 inch across. Keep the dough around 70°F and work for 8 to 10 minutes. If you press too hard, the mixture can become dense and the outside may turn greasy.
Move the shaped pieces onto a parchment-lined tray and leave a little room between them. They don’t need to look identical. Slightly uneven shapes give them that homemade feel. As you roll, the surface should become smoother while a few tiny nut flecks remain visible.
If a piece cracks, press the edges together gently instead of squeezing it flat. The shaped Rum Balls should feel firm enough to lift without breaking. Gentle rolling keeps the centers tender rather than packed tight.
Tip: For cleaner portions, use a tablespoon scoop and wipe away sticky buildup after every 6 pieces so the sizes stay fairly consistent.
Step 4: Coat the balls in powdered sugar and chill
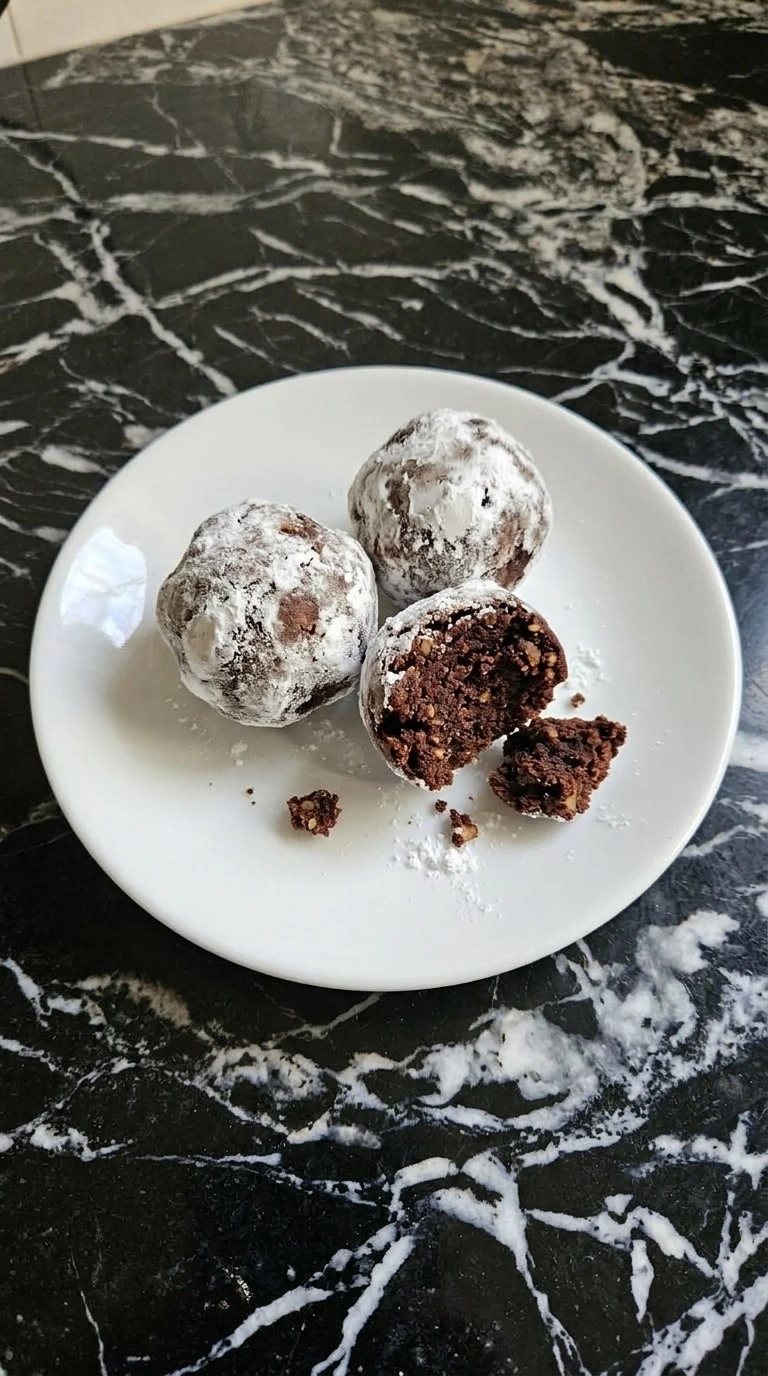
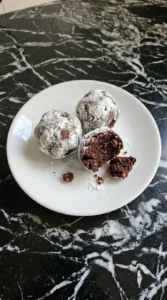
Place the remaining 1/2 cup of confectioners sugar in a shallow bowl. Roll each chocolate ball gently through the sugar until the surface has a thin white coating. Turn each piece two or three times so the sugar reaches the sides without forming thick clumps. Next, set the coated balls back on the parchment-lined tray with a little space between them.
Refrigerate at 40°F or below for at least 60 minutes. The sugar may turn slightly patchy as it absorbs a little moisture, which is normal for this soft chocolate dessert. Once chilled, the centers should feel firm but still give slightly when pressed. Serve a portion of three on a white dessert plate and leave the rest refrigerated until needed.
If the balls feel too soft, give them another 20 minutes in the fridge. Chilling firms the syrup-bound crumbs without drying out the center.
Tip: For a snowy finish, save 2 tablespoons of the measured coating sugar and lightly reroll the portions just before serving.
Pro Tips
- Grind the vanilla wafers until they resemble fine sand. Large pieces can make the chocolate mixture crack when you roll the 1-inch balls.
- Toast the pecans at 325°F for 8 to 10 minutes before grinding. Let them cool completely so their natural oils don’t make the crumbs greasy.
- Use a 1-tablespoon scoop for portioning. You’ll get about 24 small chocolate balls with less mess and fewer unevenly sized pieces.
- If the mixture feels too dry, add water 1 teaspoon at a time and fold thoroughly. Stop when a squeezed portion holds together without crumbling.
- Keep your hands clean while shaping the balls. If the chocolate mixture gets sticky, chill it at 40°F or below for 10 minutes before continuing.
- Roll the balls in confectioners sugar using a shallow 6-inch bowl. Turn each piece gently so the coating stays thin instead of forming heavy patches.
- Make these chocolate sweets 24 hours before serving. The extra resting time helps the vanilla wafer crumbs soften and lets the cocoa flavor deepen.
- For a fresh white finish, reserve 2 tablespoons of the measured coating sugar. Give each chilled ball a light second coating just before serving.
- For extra chocolate flavor, replace 2 tablespoons of the vanilla wafer crumbs with 2 tablespoons of additional unsweetened natural cocoa powder. The centers will taste darker and slightly less sweet.
- Make a coconut version by replacing 1/2 cup of the ground pecans with 1/2 cup of finely shredded unsweetened coconut. Add 1 teaspoon of water if the mixture feels dry.
- For a festive orange twist, add 1 teaspoon of finely grated orange zest to the chocolate mixture. The citrus brings a fresh flavor that goes well with the cocoa.
- Turn them into snowy Christmas chocolate bites by rolling the chilled balls in 1/2 cup of finely shredded unsweetened coconut instead of the confectioners sugar coating.
Substitutions & Variations
- vanilla wafer cookies: Use 2 cups of finely crushed gluten-free vanilla cookies. Choose crisp gluten-free cookies rather than soft ones because they absorb syrup more evenly. If the dough feels loose, add 1 tablespoon of extra crumbs. For another gluten-free holiday dessert, try our Gluten Free Gingerbread Cookies.
- pecans: Replace 1 cup of toasted pecans with 1 cup of finely crushed vanilla wafer cookies. This makes the chocolate centers nut-free if every ingredient is certified suitable. The balls will taste sweeter and have less crunch. Add 1 tablespoon of water if the mixture feels dry.
- light corn syrup: Use 1/3 cup of brown rice syrup. Brown rice syrup gives the mixture a mild caramel flavor and a slightly firmer texture. If the dough cracks while rolling, work in 1 teaspoon of water at a time.
- confectioners sugar: Use the same amount of certified vegan confectioners sugar. This keeps the recipe suitable for a dairy-free and egg-free diet when the cookies and other ingredients also meet those needs. The texture stays almost the same.
- alcohol-free rum flavoring: Replace 1 teaspoon of alcohol-free rum flavoring with 1 teaspoon of alcohol-free vanilla extract. The chocolate balls will taste more like vanilla truffles and won’t have the classic rum-style aroma. Don’t use regular rum extract unless its label confirms it’s alcohol-free.
Storage Instructions
Once the Rum Balls have chilled for at least 60 minutes, transfer them to an airtight container with parchment between the layers. Keep them refrigerated at 40°F or below for up to 7 days. For longer storage, freeze them in a single layer for 1 hour before placing them in a freezer-safe container.
They’ll keep their best texture for up to 2 months. Label the container with the date so you know when to use them. These sweets don’t need reheating.
Instead, thaw frozen portions overnight in the fridge and leave them out for about 10 minutes before serving. If the coating has faded, reroll them in a little confectioners sugar. Discard any pieces with mold or an unusual smell, and don’t leave them unrefrigerated for more than 2 hours.
Rum Balls
Ingredients
Method
- Start with 2 cups of finely crushed vanilla wafer cookies and 1 cup of toasted pecans. If you’re working with whole cookies and pecan halves, pulse them separately in a food processor until they turn into small and even crumbs. Use short pulses of 1 to 2 seconds and stop to check the texture after about 20 seconds. Keep the ingredients near 70°F while you work. The cookie crumbs should look like coarse sand and the nuts should have tiny visible flecks. Don’t keep blending once the pecans are fine because they’ll start releasing oil and turn pasty. Next, spread the crumbs in a large mixing bowl so you can see whether any big cookie pieces remain. Break up any lumps before moving on. The mixture should feel dry and loose between your fingers. Fine crumbs help the chocolate mixture hold together without gritty chunks.
- Add 1/2 cup of confectioners sugar and 1/4 cup of unsweetened natural cocoa powder to the crumb mixture. Stir with a rubber spatula until the cocoa spreads through the dry ingredients. Then pour in 1/3 cup of light corn syrup and 3 tablespoons of water mixed with 1 teaspoon of alcohol-free rum flavoring. Keep everything near 70°F and fold for 2 to 3 minutes. Press the spatula against the side of the bowl to break up dry spots. The loose crumbs should slowly turn into a dark chocolate mixture that clumps when squeezed. Don’t rush this part. If the mixture still looks dusty after 3 minutes, keep pressing and folding until the syrup reaches every section. (I once stopped mixing too soon and the first few balls crumbled in my hands.) The right texture feels firm and a little tacky but doesn’t drip or spread. Even moisture keeps the centers from falling apart.
- Scoop the chocolate mixture into 24 portions using about 1 level tablespoon per piece. Roll each portion between your palms with light pressure until it forms a small round ball about 1 inch across. Keep the dough around 70°F and work for 8 to 10 minutes. If you press too hard, the mixture can become dense and the outside may turn greasy. Move the shaped pieces onto a parchment-lined tray and leave a little room between them. They don’t need to look identical. Slightly uneven shapes give them that homemade feel. As you roll, the surface should become smoother while a few tiny nut flecks remain visible. If a piece cracks, press the edges together gently instead of squeezing it flat. The shaped Rum Balls should feel firm enough to lift without breaking. Gentle rolling keeps the centers tender rather than packed tight.
- Place the remaining 1/2 cup of confectioners sugar in a shallow bowl. Roll each chocolate ball gently through the sugar until the surface has a thin white coating. Turn each piece two or three times so the sugar reaches the sides without forming thick clumps. Next, set the coated balls back on the parchment-lined tray with a little space between them. Refrigerate at 40°F or below for at least 60 minutes. The sugar may turn slightly patchy as it absorbs a little moisture, which is normal for this soft chocolate dessert. Once chilled, the centers should feel firm but still give slightly when pressed. Serve a portion of three on a white dessert plate and leave the rest refrigerated until needed. If the balls feel too soft, give them another 20 minutes in the fridge. Chilling firms the syrup-bound crumbs without drying out the center.
Notes
Frequently Asked Questions
Yes! I actually prefer making them 1 or 2 days before Christmas because the chocolate flavor develops while they rest. After shaping and coating, place them in an airtight container and refrigerate at 40°F or below. Give them about 10 minutes out of the fridge before serving so the centers soften slightly.
Store them in an airtight container in the refrigerator for up to 7 days at 40°F or below. Place parchment paper between layers so the powdered sugar coating doesn’t rub off. If they develop an unusual smell or visible mold, throw them away instead of tasting them.
Yes, this version already uses 1 teaspoon of alcohol-free rum flavoring instead of traditional rum. Check the bottle carefully because some products sold as rum extract still contain alcohol. You can also substitute 1 teaspoon of alcohol-free vanilla extract, although the finished sweets will have a different flavor.
The most common reason is that the cookie crumbs haven’t absorbed enough moisture or they’re too coarse. Try pressing a tablespoon of the mixture firmly between your fingers. If it crumbles, add 1 teaspoon of water and mix for 30 seconds before testing again. Avoid adding too much liquid because the dough can turn sticky.
Absolutely! Double every ingredient to make about 48 pieces and use a mixing bowl that holds at least 5 quarts. Work the chocolate mixture in two batches if your bowl feels crowded. You’ll need about 15 to 20 minutes to shape the larger batch, followed by at least 60 minutes of chilling.
Yes, they freeze well for up to 2 months in an airtight freezer-safe container. Freeze them in a single layer for 1 hour first and then separate the layers with parchment. Thaw overnight in the fridge and refresh the powdered sugar coating before serving because some sugar may dissolve as the balls thaw.
I like serving three small balls per person with a cup of hot chocolate or warm milk. For a larger Christmas dessert spread, set them beside Chewy Chocolate Gingerbread Cookies and fresh fruit. Take the chilled sweets out about 10 minutes before serving so their centers aren’t too firm.
Final Thoughts
These little chocolate bites have earned a spot on my Christmas dessert plate! The Rum Balls have a soft cocoa center with tiny bits of toasted pecans and a sweet powdered sugar coating. What makes this version special is the alcohol-free rum flavoring, which keeps that familiar holiday taste without adding alcohol.
I love making a batch the night before and finding them all set in the fridge the next morning. Makes 24 small sweets, or 48 if you double the recipe for a party. Serve these christmas rum balls with our Gluten Free Gingerbread Cookies, and tell me how yours turn out!
It works just as well when you are after easy rum balls and rum balls recipe.
Traditional rum balls are a popular holiday sweet in several countries, including Germany and Australia. Many recipes use leftover cake or cookie crumbs, which makes them a clever no bake dessert. This version keeps the familiar chocolate flavor and soft texture but uses alcohol-free rum flavoring instead of alcoholic rum.