Halloween Pumpkin Designs
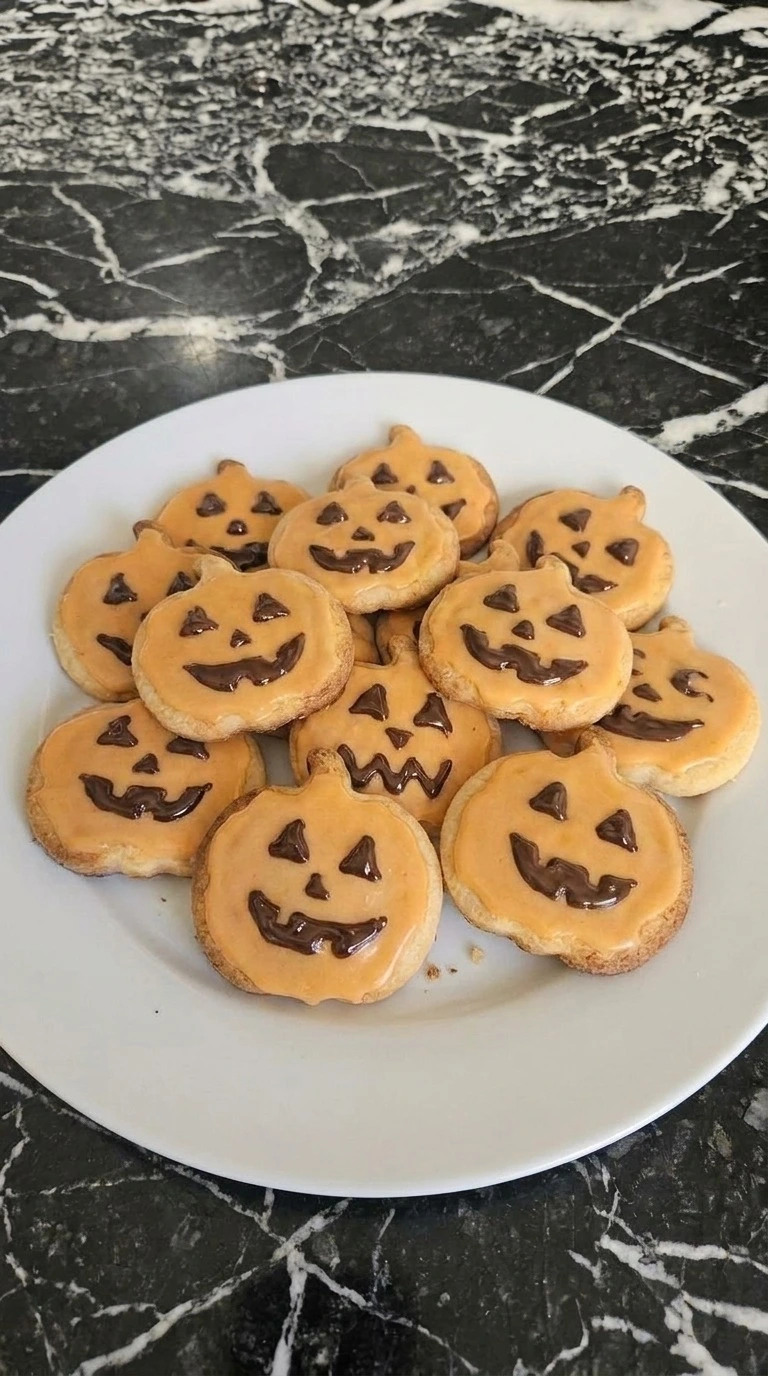
A rainy Saturday afternoon somehow turned my kitchen into a tiny cookie decorating table, and these Halloween Pumpkin Designs ended up being one of my favorite fall experiments. When my mom tried one she immediately went back for another. I have to say, these pumpkin cookies landed in my top five seasonal treats. They have crisp golden edges and soft centers with orange glaze and little chocolate faces.
The dough uses unsalted butter and all-purpose flour with just enough vanilla to keep the flavor simple. I’m usually the person reaching for chocolate first, but these pumpkin cookie designs completely won me over before the chocolate faces even went on. The recipe makes 12 cookies, which is a nice small batch, but you can double everything when you’ve got a bigger Halloween crowd. These jack-o’-lantern cookies work as dessert after dinner or as something fun to put out at a fall party.
And they’re handy for make-ahead baking because the undecorated cookies hold their shape well. You can bake them a day ahead, decorate them later and let everyone choose a different face.
Why This Recipe Works
Halloween Pumpkin Designs keep their clean pumpkin outline because the dough chills twice before it reaches the oven. The first 30-minute rest firms the butter, then the 10-minute chill after cutting keeps the 1/4-inch edges from spreading before the flour structure sets.
Baking at 350°F instead of 375°F gives the centers time to set before the thin stems turn too dark. And cooling the cookies completely before glazing keeps the orange icing thick enough to stay on top instead of soaking into warm crumbs.
Ingredients
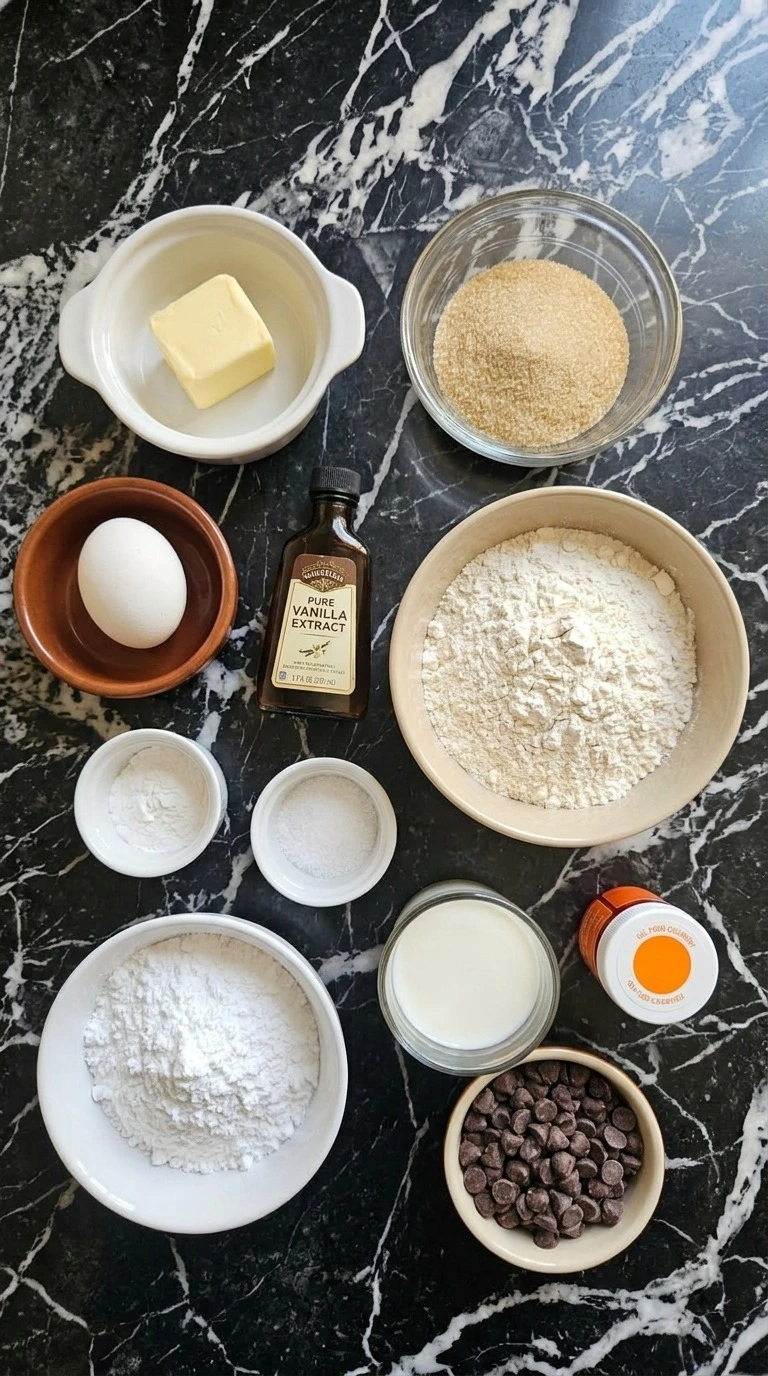
- unsalted butter: Soften to about 68°F to 72°F so it creams smoothly while still holding enough structure.
- granulated cane sugar: Use fine crystals so they blend evenly into the butter and help the cookie edges turn lightly golden.
- large egg: Bring close to room temperature before mixing so it blends into the creamed butter without curdling.
- pure vanilla extract: Use 1 1/2 teaspoons in the dough and reserve 1/2 teaspoon for the orange glaze.
- all-purpose flour: Spoon and level it before measuring so excess flour doesn’t make the cookies dry or crumbly.
- baking powder: Adds just enough lift for tender centers without making the pumpkin shapes puff excessively.
- kosher salt: Balances the sweetness and sharpens the butter and vanilla flavor in the cookie dough.
- powdered cane sugar: Sift before mixing so the orange glaze stays smooth instead of developing dry sugar lumps.
- whole milk: Adds enough moisture to make a thick glaze that settles slowly without running off the cookie edges.
- orange gel food coloring: Add gradually until the glaze reaches a deep pumpkin-orange shade without thinning the icing.
- semisweet chocolate chips: Melt gently for the jack-o’-lantern faces because semisweet chocolate stays dark against the orange glaze.
Kitchen Equipment
- Electric hand mixer or stand mixer: A mixer with low and medium speeds creams the butter evenly, while a single-speed high-power mixer can warm the butter too quickly and encourage spreading.
- Large mixing bowl: A bowl around 4 to 5 quarts leaves enough room to mix the dough without flour spilling over the edge, while a smaller bowl makes even mixing harder.
- Rolling pin: A straight 18-inch rolling pin gives better control over 1/4-inch dough thickness, while a very short pin can create thicker centers and thinner edges.
- 3-inch pumpkin cookie cutter: A sturdy 3-inch cutter creates twelve distinct pumpkin shapes from this batch, while oversized cutters change the yield and require a longer baking time.
- Two large baking sheets: Half-sheet pans around 13 by 18 inches give the cookies enough spacing for even airflow, while crowded smaller pans can cause uneven edges.
- Small piping bag: A small piping bag with a narrow opening gives better control over chocolate faces, while a large opening makes the eyes and mouths spread too wide.
How to Make It
Step 1: Cream the butter and sugar
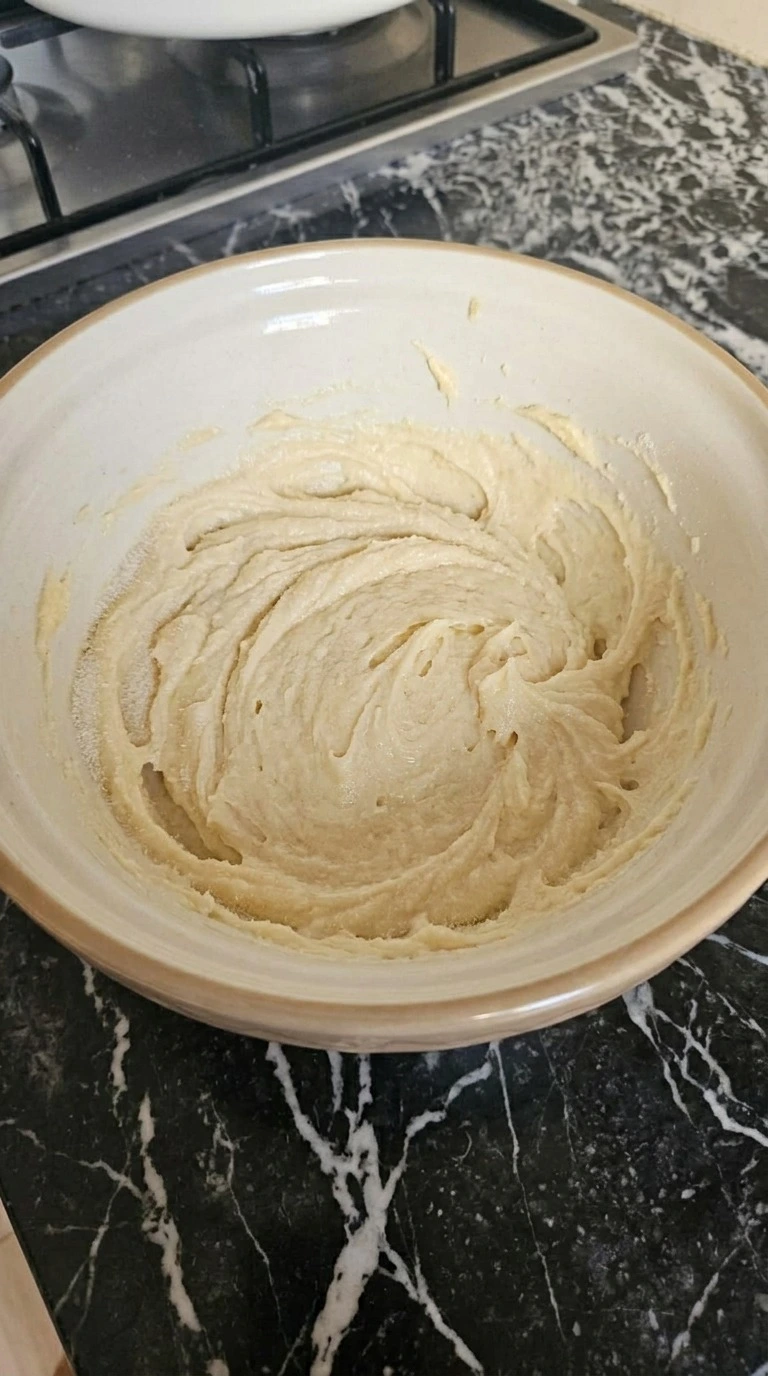
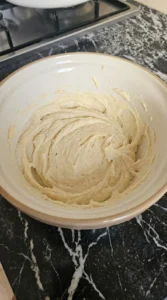
Keep the unsalted butter around 68°F to 72°F, then beat it with the granulated cane sugar for 2 to 3 minutes. Scrape the bowl halfway through and keep beating until the mixture looks pale and slightly fluffy. Add the large egg and 1 1/2 teaspoons vanilla, then beat for another 30 seconds.
The mixture should lose its grainy look and cling smoothly to the sides without appearing oily. Stop when you can still see a little structure from the butter. If you beat past 5 minutes the butter warms too much and the cookies can spread.
Keep the butter cool because trapped air helps the cookies stay tender.
Tip: If your kitchen runs above 75°F, chill the mixing bowl for 10 minutes before starting so the butter doesn’t soften too far.
Step 2: Mix and chill the cookie dough
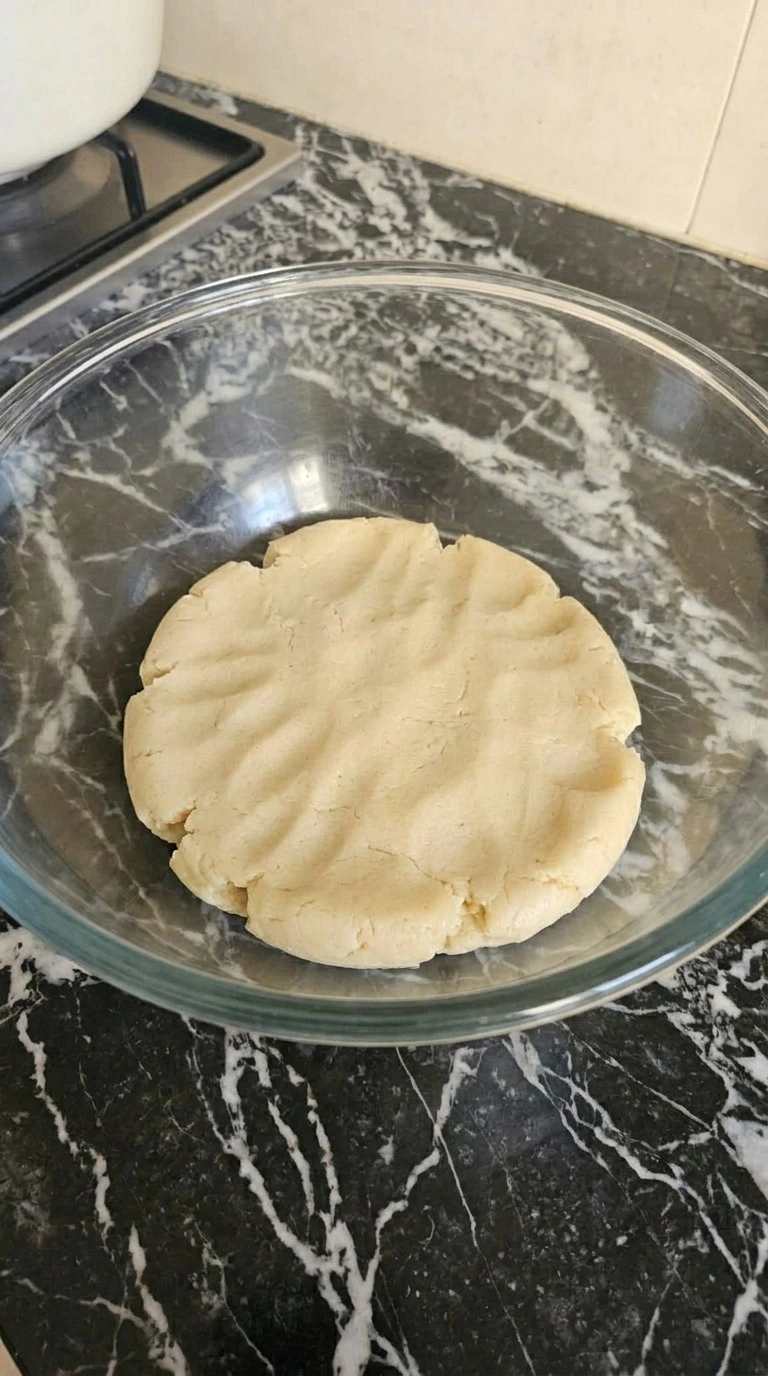
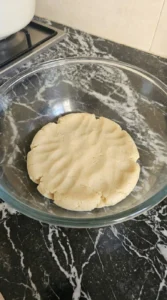
Whisk the all-purpose flour with baking powder and kosher salt for 20 seconds, then add it to the butter mixture in three additions. Mix on low for about 60 to 90 seconds total and stop as soon as no dry flour remains. Press the dough into a thick disk and chill it at about 38°F for 30 minutes.
The finished dough should feel smooth and firm enough to lift without sticking heavily to your fingers. A few tiny flour streaks can disappear as you press the disk together. Mix too long and the cookies get tough.
Chill the dough because firm butter prevents excessive spreading during baking.
Tip: If the dough cracks badly after chilling, leave it at room temperature for exactly 5 minutes before rolling instead of adding liquid.
Step 3: Roll and cut twelve pumpkin shapes
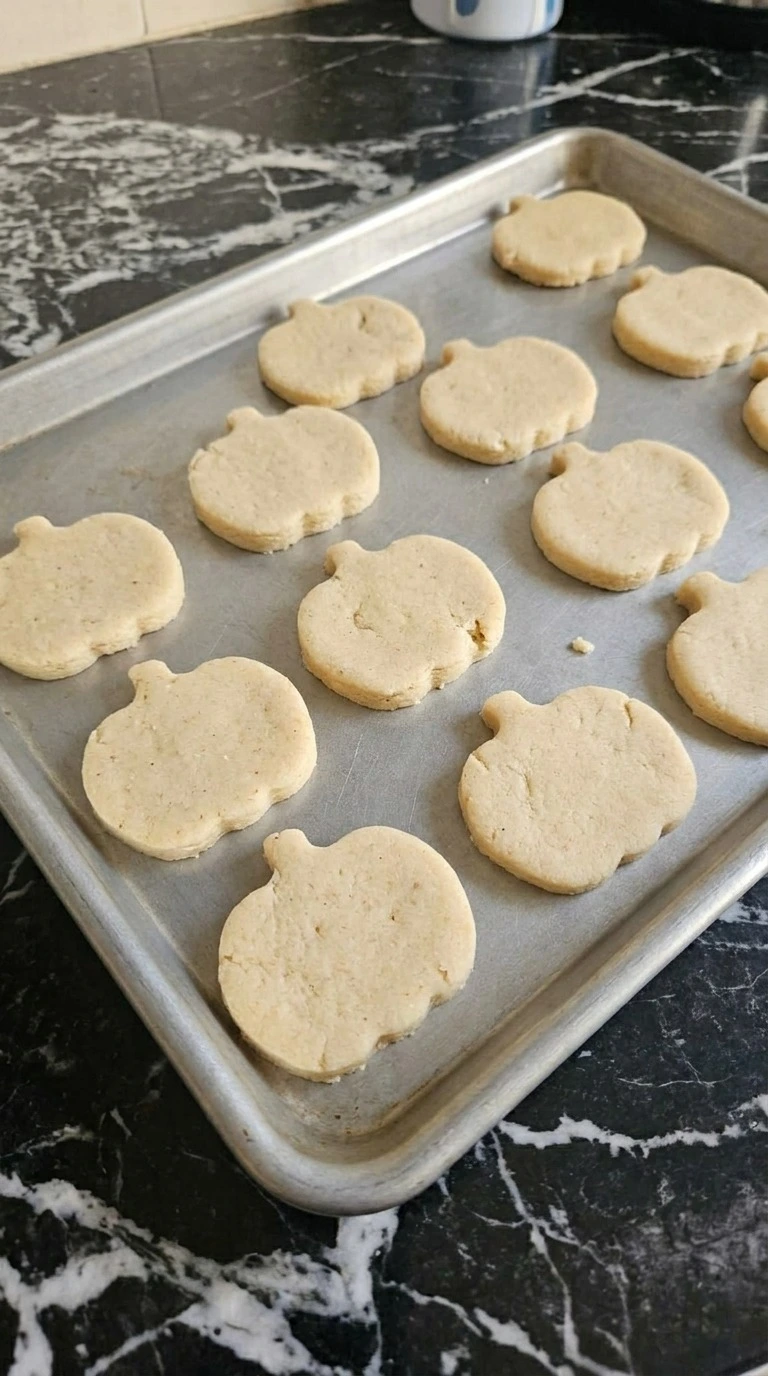
Roll the chilled dough to an even 1/4-inch thickness, then cut exactly 12 pumpkin shapes with a 3-inch cutter. Press scraps together only once and reroll gently so the second batch doesn’t become dense. Arrange all 12 shapes with about 2 inches between them and chill at 38°F for 10 minutes.
The Halloween Pumpkin Designs should look clean around the stems but not factory perfect. Small differences around the curves are fine. If the dough turns shiny while you’re cutting, the butter is warming and the shapes will spread.
Chill the cutouts because cold edges hold their pumpkin outline in the oven.
Tip: Dip only the cutting edge into 1 tablespoon of extra flour if sticking starts, then tap off excess so the cookie edges don’t dry out.
Step 4: Bake until the edges turn golden
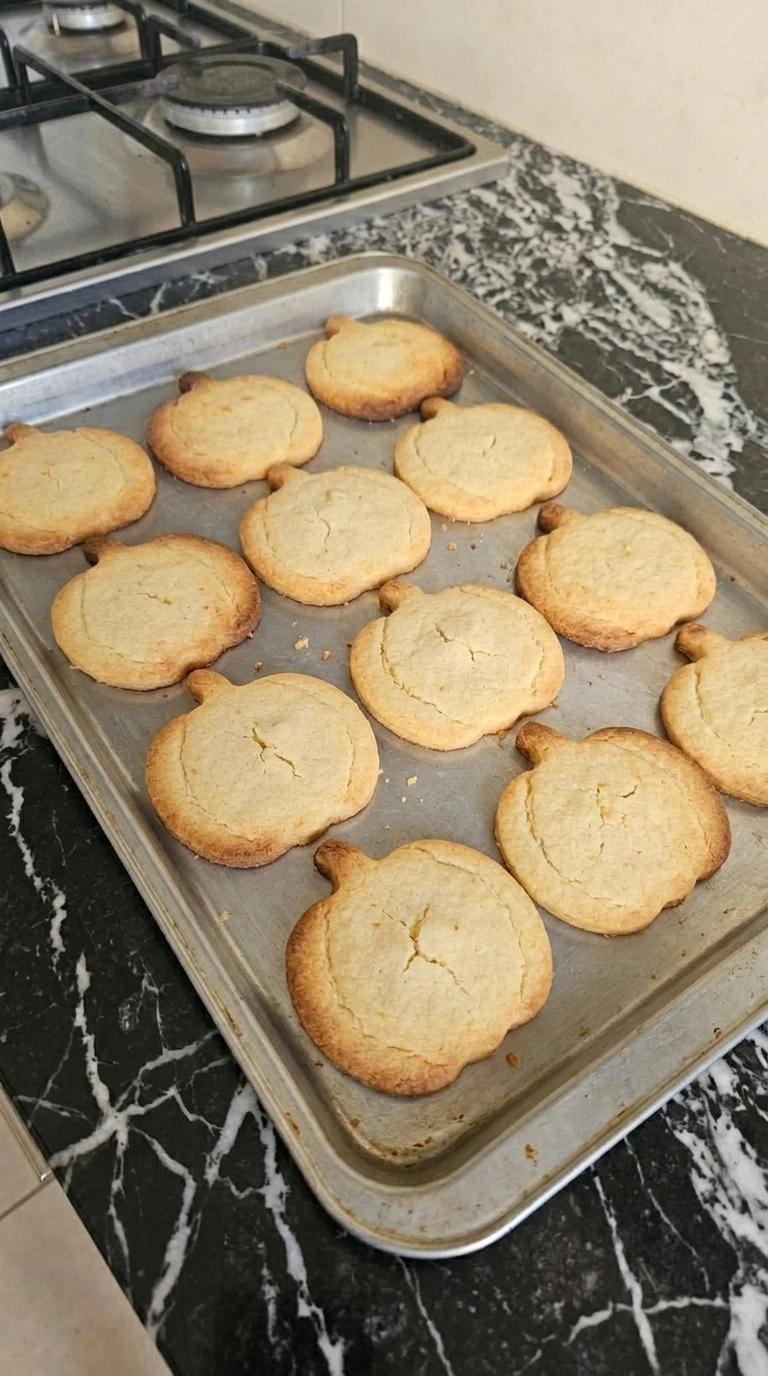
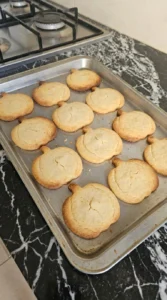
Bake the 12 chilled cookies at 350°F for 10 to 12 minutes and rotate the tray once at minute 6. Pull them when the outer curves turn light golden but the centers still look pale and matte. Leave them on the tray for 5 minutes, then cool them completely for about 25 minutes before glazing.
You’ll notice a buttery vanilla smell right as the edges start coloring. The Halloween Pumpkin Designs should remain mostly flat with only slight puffing through the centers. (I tried 375°F first and the stems browned too quickly.
350°F kept the shapes cleaner. ) Go past 12 minutes and the edges turn hard. Cool completely because warm cookies make the glaze run thin.
Tip: Bake one tray at a time on the center rack if your oven has hot spots, especially when the back edge browns several minutes early.
Step 5: Glaze the cooled pumpkin cookies
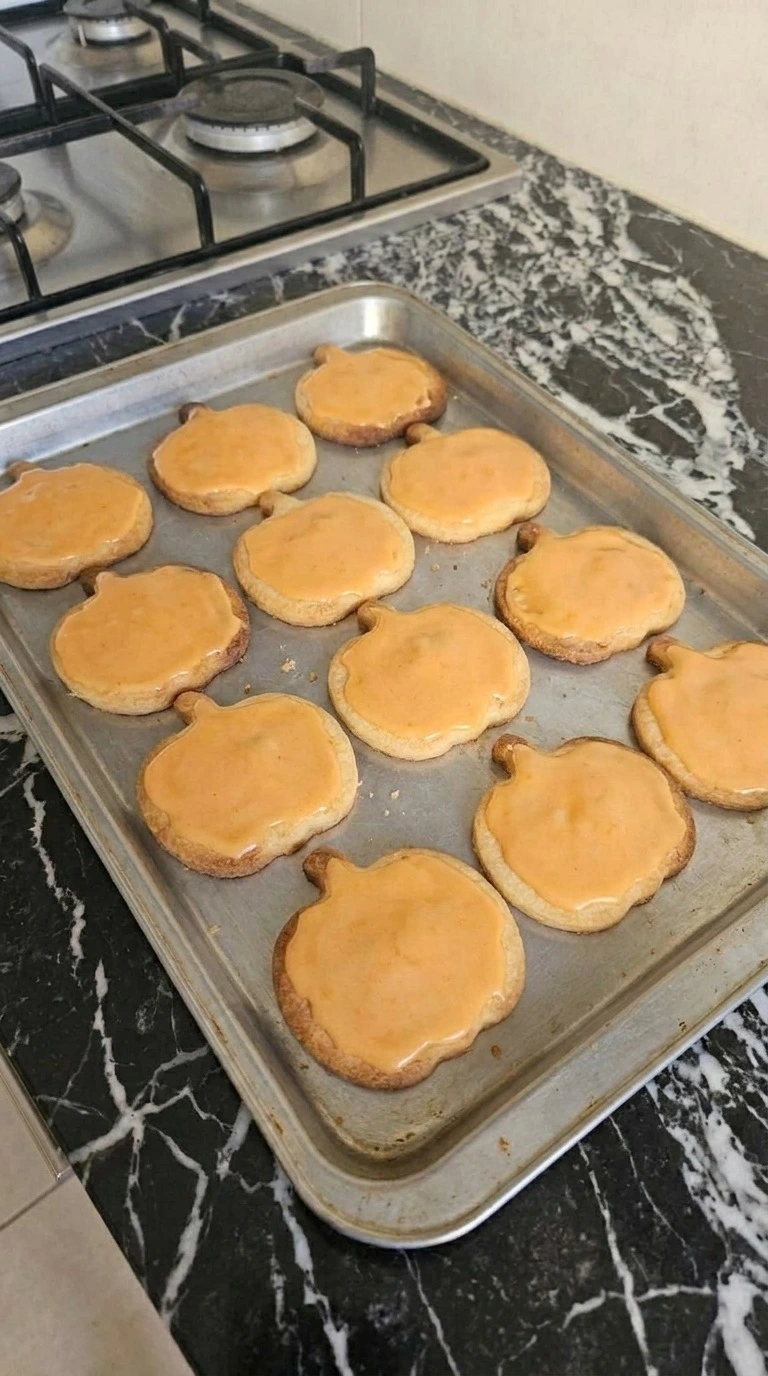
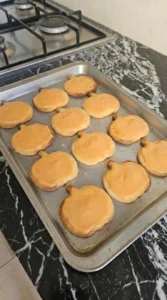
Whisk the powdered cane sugar with 3 tablespoons whole milk, the remaining 1/2 teaspoon vanilla and orange gel food coloring for 60 to 90 seconds at 68°F to 72°F. The glaze should fall in a thick ribbon and disappear back into itself in about 8 seconds. Spread a thin orange layer over each cooled cookie and leave the stem exposed if you like.
The surface should settle smooth but still show a few handmade ripples near the edges. Let all 12 cookies stand for 20 to 25 minutes until the glaze feels dry when lightly touched. If the glaze disappears instantly during mixing it’s too thin and can slide off the cookies.
Keep the glaze thick because a slow-set coating preserves clean pumpkin shapes.
Tip: Add orange gel coloring with the tip of a toothpick first because even 1/8 teaspoon can deepen the shade more than expected.
Step 6: Draw the chocolate jack-o’-lantern faces
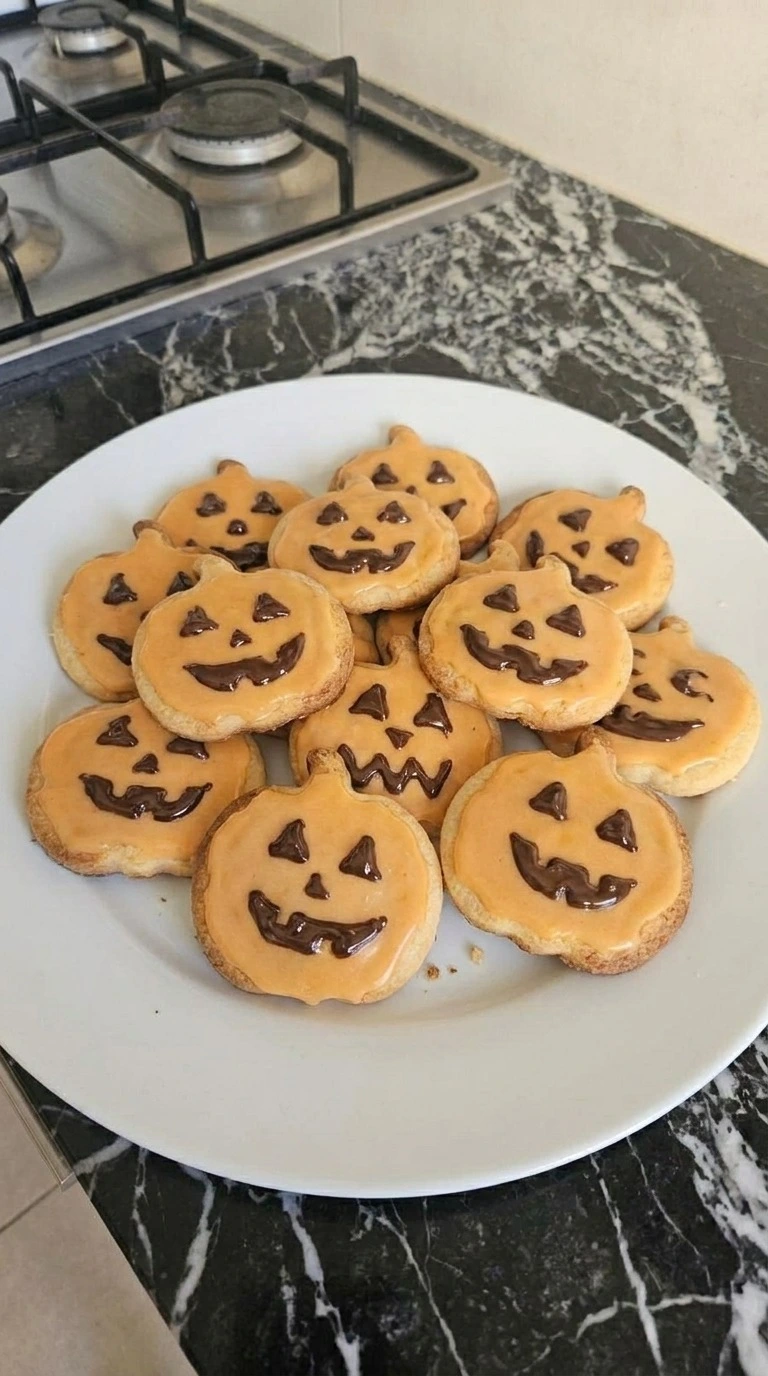
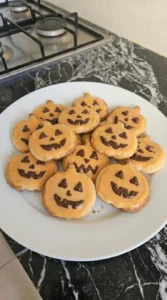
Melt the semisweet chocolate chips in 20-second bursts until the chocolate reaches about 95°F to 105°F, stirring between each burst. Pipe different eyes and mouths onto all 12 glazed cookies and keep the lines slightly uneven. Let the chocolate stand for 15 minutes at room temperature, then arrange the cookies on one serving plate.
The final Halloween Pumpkin Designs should have glossy dark faces over dry orange glaze with crisp golden cookie edges peeking around the sides. Some smiles can tilt and some eyes can differ in size. That’s the fun part.
Overheated chocolate turns thick and grainy, so stop heating once it’s fluid. Gentle heat keeps cocoa butter smooth enough for clean lines.
Tip: For thinner facial lines, let the melted chocolate cool for 3 minutes before piping so it flows slowly instead of spreading into wide blobs.
Pro Tips
- Keep the butter between 68°F and 72°F before creaming. If it looks shiny or greasy after 2 minutes, chill the bowl for 8 minutes.
- Roll the dough to a true 1/4 inch thickness so all 12 cookies bake evenly. Thin stems burn quickly when the center is much thicker.
- Chill the cut Halloween Pumpkin Designs for 10 minutes before baking. The cold butter delays spreading until the flour structure starts setting.
- Bake one tray at 350°F on the center rack and rotate it at minute 6. Pull the cookies when the outer curves turn light golden.
- Let the cookies cool for at least 25 minutes before glazing. Even slight warmth can thin the icing and make it slide toward the edges.
- Aim for an 8-second glaze consistency. If the ribbon vanishes faster, whisk in 1 tablespoon powdered cane sugar at a time.
- Melt the semisweet chocolate in 20-second bursts and stop near 100°F. Overheated chocolate gets thick and makes small jack-o’-lantern details harder to pipe.
- Add 1 teaspoon ground cinnamon and 1/4 teaspoon ground nutmeg to the flour for a warmer pumpkin spice version without changing the baking time.
- Tint half the glaze with black gel coloring and alternate orange and black Halloween Pumpkin Designs for a darker party tray.
- Replace 1/2 teaspoon of the vanilla with orange extract for a citrus note that cuts through the sweet glaze and semisweet chocolate.
- Use mini 2-inch pumpkin cutters and reduce the baking time to about 8 to 9 minutes for bite-size party cookies.
Substitutions & Variations
- whole milk: unsweetened oat milk — Use the same 3 tablespoons for a dairy-free glaze. The icing sets a little softer and tastes slightly less rich, so give it an extra 10 minutes to dry.
- all-purpose flour: 1-to-1 gluten-free baking flour with xanthan gum — Replace the flour cup for cup. The cookies will be slightly more fragile around the stems, so chill the cut shapes for 15 minutes instead of 10.
- large egg: 3 tablespoons aquafaba — Use 3 tablespoons of chickpea liquid for an egg-free batch. The cookies spread a little more and brown less, so keep the dough cold and start checking at minute 10.
- orange gel food coloring: red and yellow gel food coloring — Mix about 3 parts yellow gel with 1 part red gel until the glaze looks pumpkin orange. Add color gradually because too much gel can make the icing taste bitter.
- semisweet chocolate chips: dark chocolate chips — Use the same 1/2 cup if you want sharper chocolate faces. Dark chocolate tastes less sweet and sets a little firmer, which helps fine lines stay defined.
Storage Instructions
Store fully decorated Halloween Pumpkin Designs in an airtight container at room temperature for up to 4 days once the glaze and chocolate are completely set. For longer storage, freeze undecorated cookies with parchment between layers for up to 2 months, then thaw them inside the closed container so condensation forms outside instead of on the cookie surface.
If you prefer them slightly warm, reheat undecorated cookies at 275°F for 4 to 5 minutes and cool them again before adding glaze. Don’t reheat decorated cookies because the chocolate can smear and the icing can melt.
Discard any cookies that develop a sour smell, damp sticky patches or visible mold.
Halloween Pumpkin Designs
Ingredients
- 1 cup unsalted butter Soften to about 68°F to 72°F so it creams smoothly while still holding enough structure.
- 3/4 cup granulated cane sugar Use fine crystals so they blend evenly into the butter and help the cookie edges turn lightly golden.
- 1 large large egg Bring close to room temperature before mixing so it blends into the creamed butter without curdling.
- 2 teaspoons pure vanilla extract Use 1 1/2 teaspoons in the dough and reserve 1/2 teaspoon for the orange glaze.
- 2 1/2 cups all-purpose flour Spoon and level it before measuring so excess flour doesn’t make the cookies dry or crumbly.
- 1/2 teaspoon baking powder Adds just enough lift for tender centers without making the pumpkin shapes puff excessively.
- 1/2 teaspoon kosher salt Balances the sweetness and sharpens the butter and vanilla flavor in the cookie dough.
- 2 cups powdered cane sugar Sift before mixing so the orange glaze stays smooth instead of developing dry sugar lumps.
- 3 tablespoons whole milk Adds enough moisture to make a thick glaze that settles slowly without running off the cookie edges.
- 1/4 teaspoon orange gel food coloring Add gradually until the glaze reaches a deep pumpkin-orange shade without thinning the icing.
- 1/2 cup semisweet chocolate chips Melt gently for the jack-o’-lantern faces because semisweet chocolate stays dark against the orange glaze.
Instructions
- Keep the unsalted butter around 68°F to 72°F, then beat it with the granulated cane sugar for 2 to 3 minutes. Scrape the bowl halfway through and keep beating until the mixture looks pale and slightly fluffy. Add the large egg and 1 1/2 teaspoons vanilla, then beat for another 30 seconds. The mixture should lose its grainy look and cling smoothly to the sides without appearing oily. Stop when you can still see a little structure from the butter. If you beat past 5 minutes the butter warms too much and the cookies can spread. Keep the butter cool because trapped air helps the cookies stay tender.
- Whisk the all-purpose flour with baking powder and kosher salt for 20 seconds, then add it to the butter mixture in three additions. Mix on low for about 60 to 90 seconds total and stop as soon as no dry flour remains. Press the dough into a thick disk and chill it at about 38°F for 30 minutes. The finished dough should feel smooth and firm enough to lift without sticking heavily to your fingers. A few tiny flour streaks can disappear as you press the disk together. Mix too long and the cookies get tough. Chill the dough because firm butter prevents excessive spreading during baking.
- Roll the chilled dough to an even 1/4-inch thickness, then cut exactly 12 pumpkin shapes with a 3-inch cutter. Press scraps together only once and reroll gently so the second batch doesn’t become dense. Arrange all 12 shapes with about 2 inches between them and chill at 38°F for 10 minutes. The Halloween Pumpkin Designs should look clean around the stems but not factory perfect. Small differences around the curves are fine. If the dough turns shiny while you’re cutting, the butter is warming and the shapes will spread. Chill the cutouts because cold edges hold their pumpkin outline in the oven.
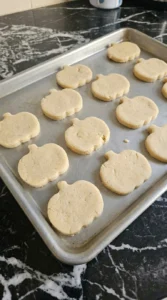
- Bake the 12 chilled cookies at 350°F for 10 to 12 minutes and rotate the tray once at minute 6. Pull them when the outer curves turn light golden but the centers still look pale and matte. Leave them on the tray for 5 minutes, then cool them completely for about 25 minutes before glazing. You’ll notice a buttery vanilla smell right as the edges start coloring. The Halloween Pumpkin Designs should remain mostly flat with only slight puffing through the centers. (I tried 375°F first and the stems browned too quickly. 350°F kept the shapes cleaner.) Go past 12 minutes and the edges turn hard. Cool completely because warm cookies make the glaze run thin.
- Whisk the powdered cane sugar with 3 tablespoons whole milk, the remaining 1/2 teaspoon vanilla and orange gel food coloring for 60 to 90 seconds at 68°F to 72°F. The glaze should fall in a thick ribbon and disappear back into itself in about 8 seconds. Spread a thin orange layer over each cooled cookie and leave the stem exposed if you like. The surface should settle smooth but still show a few handmade ripples near the edges. Let all 12 cookies stand for 20 to 25 minutes until the glaze feels dry when lightly touched. If the glaze disappears instantly during mixing it’s too thin and can slide off the cookies. Keep the glaze thick because a slow-set coating preserves clean pumpkin shapes.
- Melt the semisweet chocolate chips in 20-second bursts until the chocolate reaches about 95°F to 105°F, stirring between each burst. Pipe different eyes and mouths onto all 12 glazed cookies and keep the lines slightly uneven. Let the chocolate stand for 15 minutes at room temperature, then arrange the cookies on one serving plate. The final Halloween Pumpkin Designs should have glossy dark faces over dry orange glaze with crisp golden cookie edges peeking around the sides. Some smiles can tilt and some eyes can differ in size. That’s the fun part. Overheated chocolate turns thick and grainy, so stop heating once it’s fluid. Gentle heat keeps cocoa butter smooth enough for clean lines.
Notes
Frequently Asked Questions
Yes. Make the dough up to 2 days ahead and keep it tightly wrapped at about 38°F in the refrigerator. Let it sit at room temperature for 5 to 8 minutes before rolling, then cut and bake as directed so the butter stays firm enough to hold the pumpkin shapes.
Store fully set cookies in an airtight container at room temperature for 4 days with parchment between layers. If your kitchen stays above 75°F, move them to the refrigerator and let them sit out for 15 minutes before serving so the texture softens again.
Use a cup-for-cup gluten-free baking flour that already contains xanthan gum and replace the all-purpose flour at a 1-to-1 ratio. Chill the cut cookies for 15 minutes before baking because gluten-free dough can soften faster and the narrow pumpkin stems may spread or crack.
The dough was probably too warm when it entered the oven. Chill the cut shapes at about 38°F for 10 to 15 minutes and bake at 350°F, then rotate the tray once at minute 6. Soft butter spreads before the flour structure firms up.
Yes, double every ingredient exactly and expect about 24 cookies from a 3-inch cutter. Mix the dough in two batches if your bowl is smaller than 5 quarts, then bake one tray at a time at 350°F for the most even edges.
Freeze undecorated baked cookies for up to 2 months after they cool completely. Stack them with parchment between layers and seal them inside a freezer-safe container, then thaw at room temperature for about 45 minutes before glazing so condensation doesn’t thin the icing.
Final Thoughts
This batch turned into one of those Halloween projects I wanted to keep decorating long after the cookies were finished. Halloween Pumpkin Designs stay recognizable because the chilled dough holds its shape, while the orange glaze and hand-drawn chocolate faces make every cookie feel a little different.
You get 12 generous cookies from one batch, and doubling it gives you enough for a bigger party without changing the method. Try your own expressions and share the funniest jack-o’-lantern face you make.
Pumpkin carving traditions became closely tied to Halloween in North America after pumpkins replaced smaller root vegetables because their larger hollow shape was easier to carve.