Baked Ziti Recipe
Some nights you just want a big, comforting pan of pasta that feels like it’s been cooking all day. This baked ziti hits that mark without turning your kitchen upside down. It’s hearty, saucy, and just messy enough in the best way. I make this when I need something reliable.
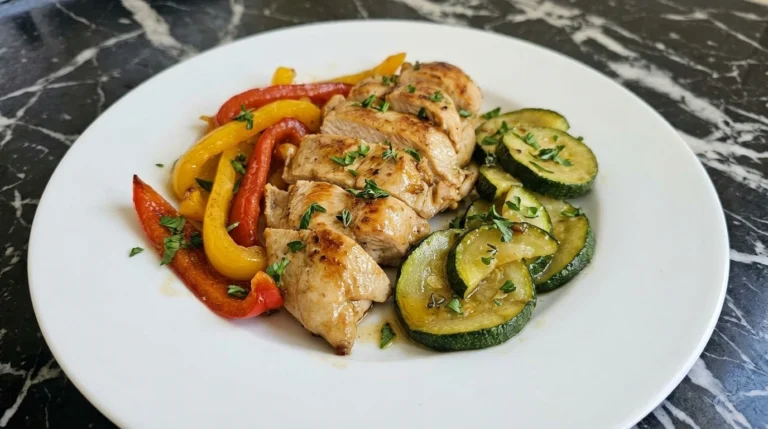
Weeknights, holidays, or when people show up hungry. And if you like a lighter side with it, I usually pair it with something like Grilled Chicken Salad to balance things out.
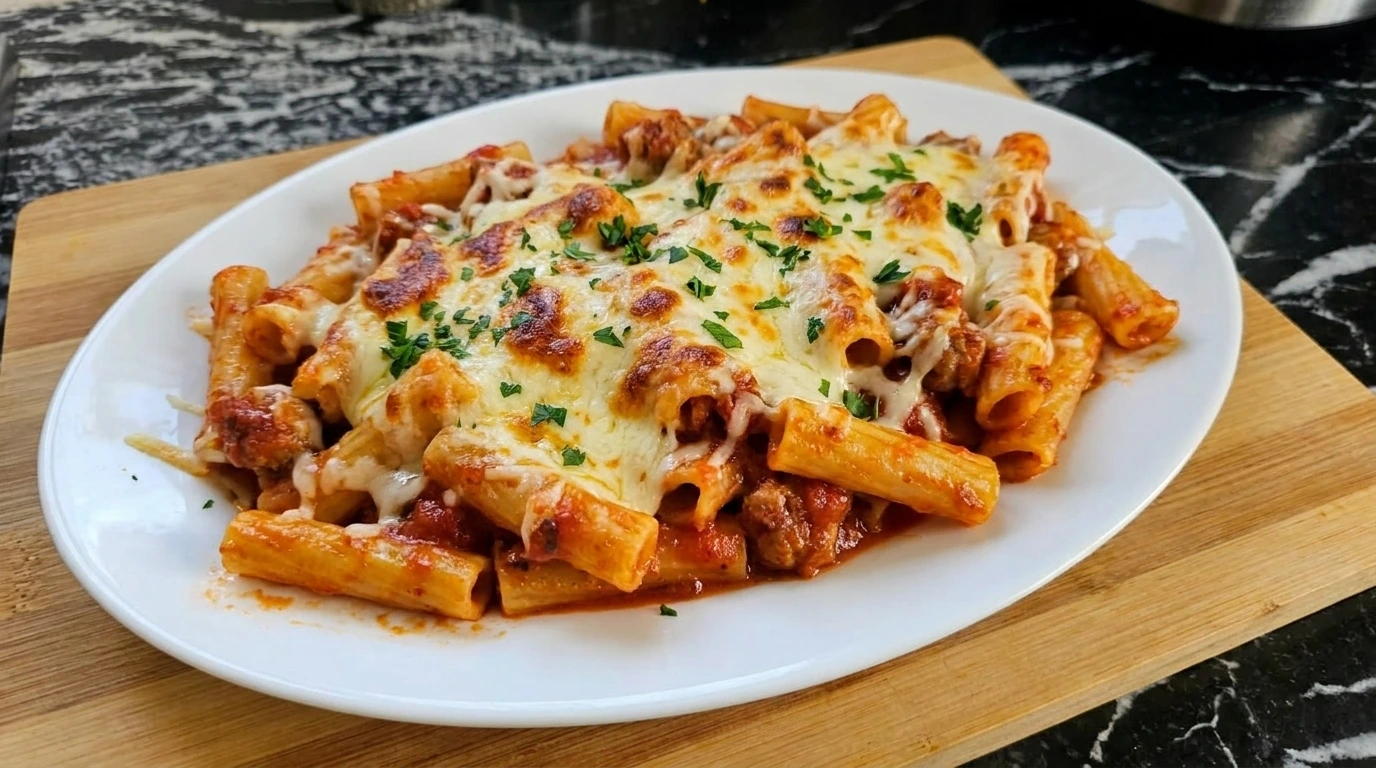
When it comes out of the oven bubbling and golden, everyone suddenly appears in the kitchen. That’s how you know it worked.
The Secret to This Recipe
Cooking the pasta just shy of tender and finishing it in a 375°F oven lets it soak up sauce without going mushy. The egg in the ricotta sets gently as it bakes, so you get creamy layers that still hold. Letting the sauce simmer until thick prevents watery pockets later.
What You Will Need
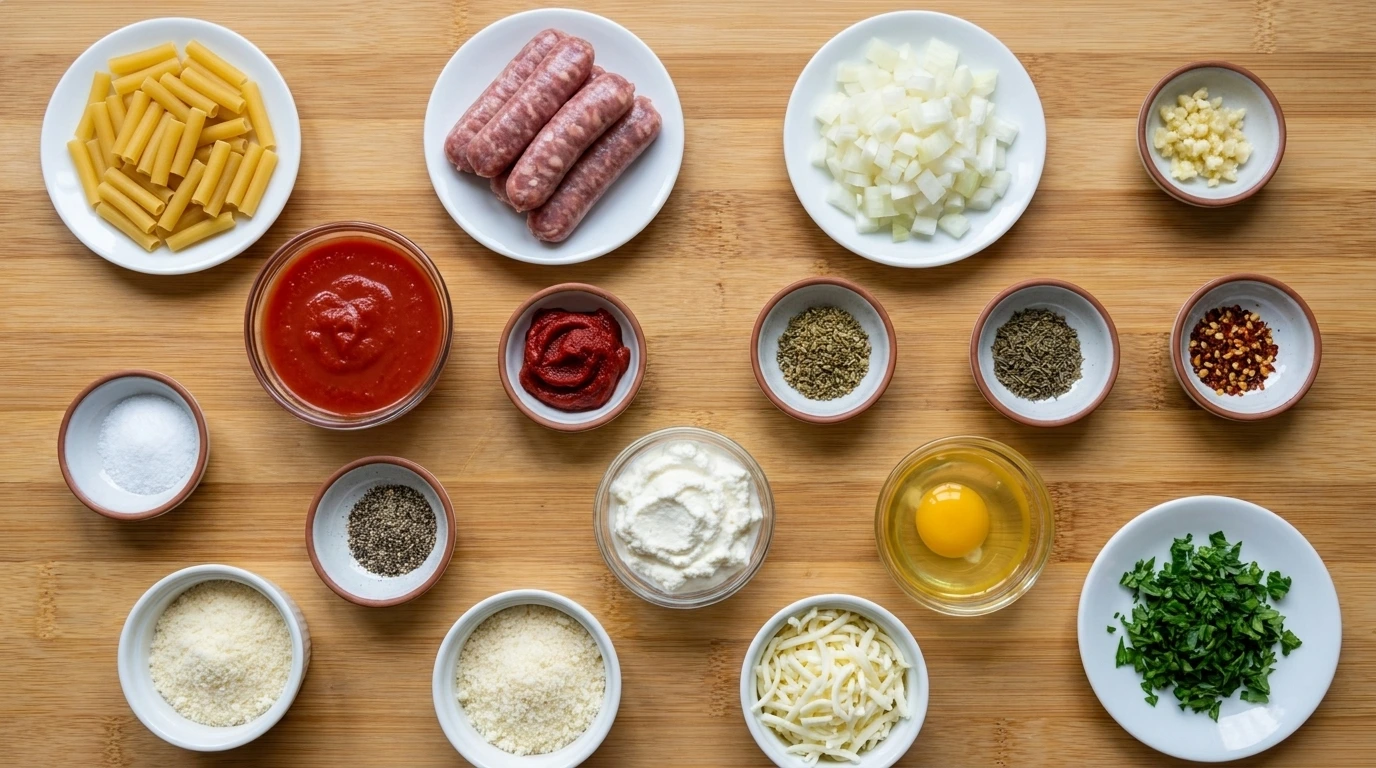
- ziti rigati: Ridges and hollow centers grab onto sauce and melted cheese.
- mild Italian sausage: Loose, seasoned meat that melts into the sauce as it cooks.
- yellow onion: Softens and sweetens as it cooks down with the sausage.
- garlic cloves: Minced for a strong aroma that builds the base flavor.
- crushed San Marzano tomatoes: Smooth, slightly sweet tomatoes that form the body of the sauce.
- tomato paste: Thickens and deepens the tomato flavor quickly.
- dried oregano: Adds a warm, slightly peppery herbal note.
- dried basil: Brings a subtle sweetness to balance the tomatoes.
- red pepper flakes: A small pinch adds gentle heat in the background.
- kosher salt: Seasons the pasta water and sharpens every layer.
- ground black pepper: Adds mild heat and depth throughout.
- whole milk ricotta: Thick and creamy for soft pockets in the bake.
- large egg: Helps the ricotta set so it doesn’t run.
- finely grated Parmesan cheese: Salty and nutty, melts into both filling and topping.
- shredded low moisture mozzarella: Melts smoothly and gives that classic stretch.
- chopped fresh parsley: Adds a fresh finish and a little color.
Kitchen Equipment
Step by Step
Step 1: Boil the ziti rigati
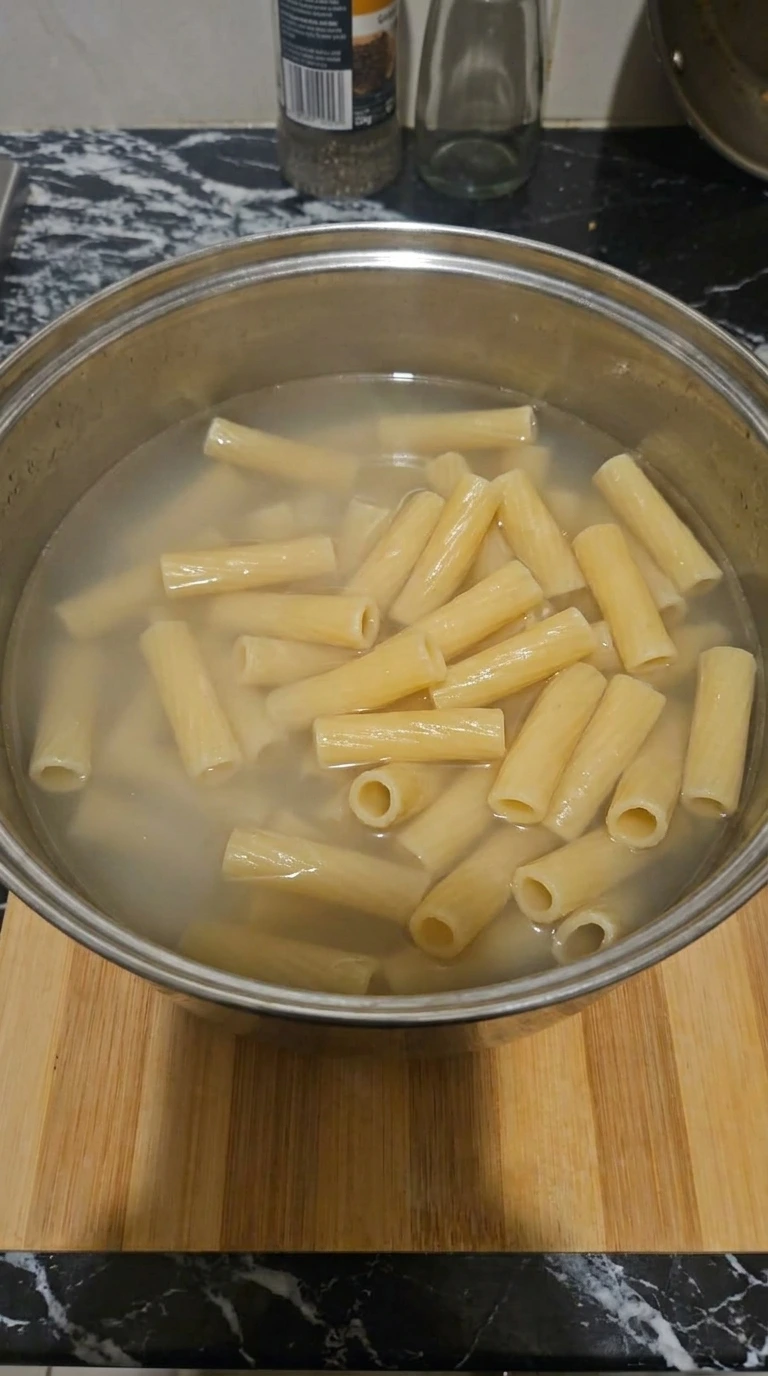
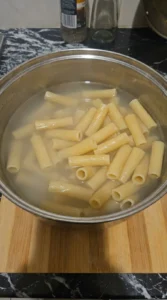
Bring a large pot of water to a rolling boil at 212°F and salt it until it tastes like the sea. Drop in the ziti and stir once with a wooden spoon so nothing sticks. Cook for 8 to 10 minutes, stirring again at minute 4. Watch for the pasta to turn slightly glossy and bend just a bit when lifted. You want it just shy of fully tender, still with a little bite in the center. Go past 10 minutes and it softens too much, which means it’ll fall apart later in the oven.
Tip: Reserve a small cup of pasta water in case you need to loosen the sauce later.
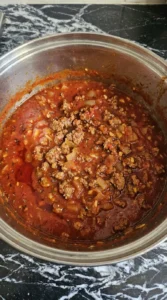
Step 2: Simmer the sausage tomato sauce

Heat a pan over medium heat, about 5 on a 10-dial, and cook the sausage with onion for 6 to 8 minutes. Break the meat up with the edge of your spoon as it cooks, pressing and scraping so you get small crumbles. Add garlic and stir for 60 seconds until fragrant. Stir in the tomatoes, paste, and spices, then lower to medium-low around 3 and simmer for 15 to 20 minutes. Give it a slow stir every 5 minutes, scraping the bottom. You’ll see it thicken and turn a deeper red, and it should coat the back of a spoon. If you rush this, the sauce stays thin and the final dish turns watery. (I used to skip the full simmer and always ended up with loose layers.)
Tip: Taste the sauce at the end and adjust salt before layering.
Step 3: Mix the ricotta filling

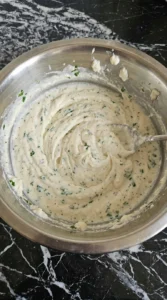
In a bowl, combine ricotta, egg, Parmesan, and parsley. Use a spoon to fold everything together with a gentle scoop-and-turn motion for about 1 to 2 minutes. You’re looking for a thick, smooth mixture with small curds still visible and green flecks throughout. It should hold its shape when scooped. Overmix it and it turns dense, which makes the baked layers feel heavy instead of soft.
Tip: Let the ricotta sit at room temp for 10 minutes so it mixes more evenly.
Step 4: Layer the pasta and cheeses

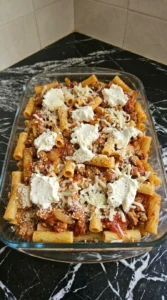
Preheat the oven to 375°F. Spread a thin layer of sauce on the bottom of your dish, then add half the pasta. Spoon ricotta in dollops, then scatter mozzarella and more sauce. Repeat once more. Use the back of a spoon to lightly nudge things into place without pressing down. The layers should look uneven with pockets of sauce and cheese. If you pack it too tightly, the bake turns dense and doesn’t bubble properly.
Tip: Finish with a generous top layer of mozzarella and a sprinkle of Parmesan.
Step 5: Bake until bubbly and serve

Place the dish in the 375°F oven and bake for 25 to 30 minutes. At minute 20, rotate the pan once so it browns evenly. You’ll see the edges bubbling and the cheese turning golden with darker spots. Pull it out when the top is fully melted and lightly browned. Let it rest for 10 minutes before serving so it sets slightly. Cut too soon and everything slides apart instead of holding together.
Tip: If the top browns too fast, loosely cover with foil for the last 10 minutes.
Pro Tips
- Salt your water well so the pasta has flavor from the start.
- Let the sauce cook down until thick, not watery.
- Scatter mozzarella loosely for better melt and texture.
- Give it a short rest so the layers hold when serving.
Substitutions & Variations
- mild Italian sausage: ground turkey — leaner and lighter, but you’ll lose some richness
- ricotta: cottage cheese — slightly tangier and looser texture, still works
- ziti rigati: penne — similar shape, just a bit firmer when baked
- mozzarella: provolone — more flavor, less stretch
- Parmesan: pecorino romano — saltier and sharper, use a little less
- sausage: roasted vegetables — makes it vegetarian, lighter overall. Try pairing with <a href=”https://leagueofcooking.com/healthy-quinoa-salad/”>Healthy Quinoa Salad</a> for balance
Storage Instructions
Let the baked ziti cool for about 20 minutes before storing. This keeps the layers from collapsing in the container. Store in an airtight container in the fridge for up to 4 days. When reheating, add a splash of water or extra sauce and warm at 325°F for 15 to 20 minutes so it stays soft and creamy.
Baked Ziti Recipe
Ingredients
- 12 ounces ziti rigati
- 1 pound mild Italian sausage
- 1 medium diced yellow onion
- 3 minced garlic cloves
- 28 ounces crushed San Marzano tomatoes
- 2 tablespoons tomato paste
- 1 teaspoon dried oregano
- 1 teaspoon dried basil
- 1/4 teaspoon red pepper flakes
- 1 1/2 teaspoons divided kosher salt
- 1/2 teaspoon ground black pepper
- 1 cup whole milk ricotta
- 1 large egg
- 3/4 cup divided finely grated Parmesan cheese
- 2 cups divided shredded low moisture mozzarella
- 2 tablespoons chopped fresh parsley
Instructions
-
Drop the dry ziti rigati into salted water and cook until just tender. The pale rigid tubes turn glossy and plump and the shape softens while still holding its hollow center. By the end the ziti rigati looks fuller and slightly curved with a smoother surface and a hydrated texture. This is the first big visual shift because the pasta moves from dry and chalky to tender and flexible.
-
Cook the mild Italian sausage with diced yellow onion and minced garlic cloves until the meat breaks into uneven crumbles and the onion turns soft. Then stir in crushed San Marzano tomatoes and tomato paste with the dried herbs and let everything simmer until the sauce thickens. The mixture changes from separate raw pieces into a deep red sauce with browned sausage bits throughout. It looks looser at first and then becomes richer and more cohesive as the tomatoes darken and the surface turns softly glossy.
-
Stir the whole milk ricotta with the large egg and some finely grated Parmesan cheese and chopped fresh parsley until the filling becomes smooth yet softly textured. The separate ingredients disappear into one pale mixture with green flecks scattered through it. This step creates a lighter creamy layer that contrasts with the red sauce. Instead of loose curds and streaks you now have a thick spoonable filling that will settle into uneven pockets between the pasta.
-
Spread some sausage tomato sauce into the baking dish and add the cooked ziti rigati then spoon in the ricotta filling and scatter shredded low moisture mozzarella and more sauce between the layers. The dish changes from separate components into a structured casserole with red and white patches and pasta peeking through. Nothing looks perfectly even here and that is exactly right. The layers should look loosely assembled with sauce tucked between the pasta and cheese scattered in irregular pockets rather than pressed into neat lines.
-
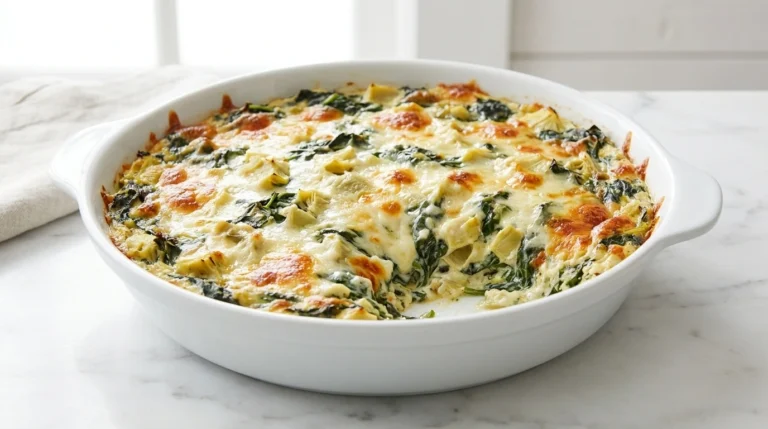
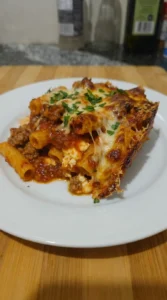
Bake the layered ziti until the shredded low moisture mozzarella melts into uneven blankets and the top develops browned spots. The sauce bubbles up around the edges and the whole dish settles into a more unified bake with soft pasta and creamy pockets inside. Scoop one portion onto a white plate so the layers open slightly and show the red sauce and ricotta and melted cheese. The finished serving should look rustic and rich with stretched cheese and browned patches and a few scattered bits of chopped fresh parsley on top.
Notes
Nutrition
Common Questions
Yes, assemble it fully and cover tightly. Keep it in the fridge up to 24 hours. Bake at 375°F and add 5 to 10 extra minutes since it starts cold.
Yes, both before and after baking. Wrap it tightly and freeze up to 2 months. Thaw overnight in the fridge, then reheat at 350°F until hot through.
Hot sausage works if you want more heat. Ground chicken or turkey also works, though it’s lighter and less rich.
Make sure your sauce is thick but not reduced too far. Don’t overbake, and cover loosely if the top browns too quickly.
Not usually. But if your oven runs hot, cover loosely for the first 15 minutes to keep moisture in.
Final Thoughts
This is one of those recipes you end up making on repeat without thinking twice. It’s reliable, filling, and always hits the spot.
If you want more cozy dinner ideas, try Spaghetti and Meatballs or Creamy Tomato Pasta next. I’d love to hear how this one turns out for you.
Ziti means “bride” in Italian, and this pasta was traditionally served at wedding feasts.