Grinch Cookies
The first batch of Grinch Cookies happened because I wanted something bright green on our Christmas cookie tray without spending the whole afternoon decorating. I had red heart sprinkles left from another baking day and thought they’d look cute on green cookies. The first tray spread too much. The next one worked because I chilled the dough before baking. Now I make these every December. They’re soft in the middle and have those little snowy cracks that make everyone reach for one.
Mark always picks the cookies with the biggest red hearts. Emma likes rolling the dough through the powdered sugar because she says it looks like snow. These easy grinch cookies have become one of our favorite holiday baking projects because the dough is simple and nobody needs to pipe frosting. If you want something with a little more spice on the same cookie tray, our Chewy Chocolate Gingerbread Cookies are a good match. The dark chocolate looks lovely beside the bright green cookies. You’ll need about 20 minutes of hands-on work and a short chill before the dough goes into the oven.
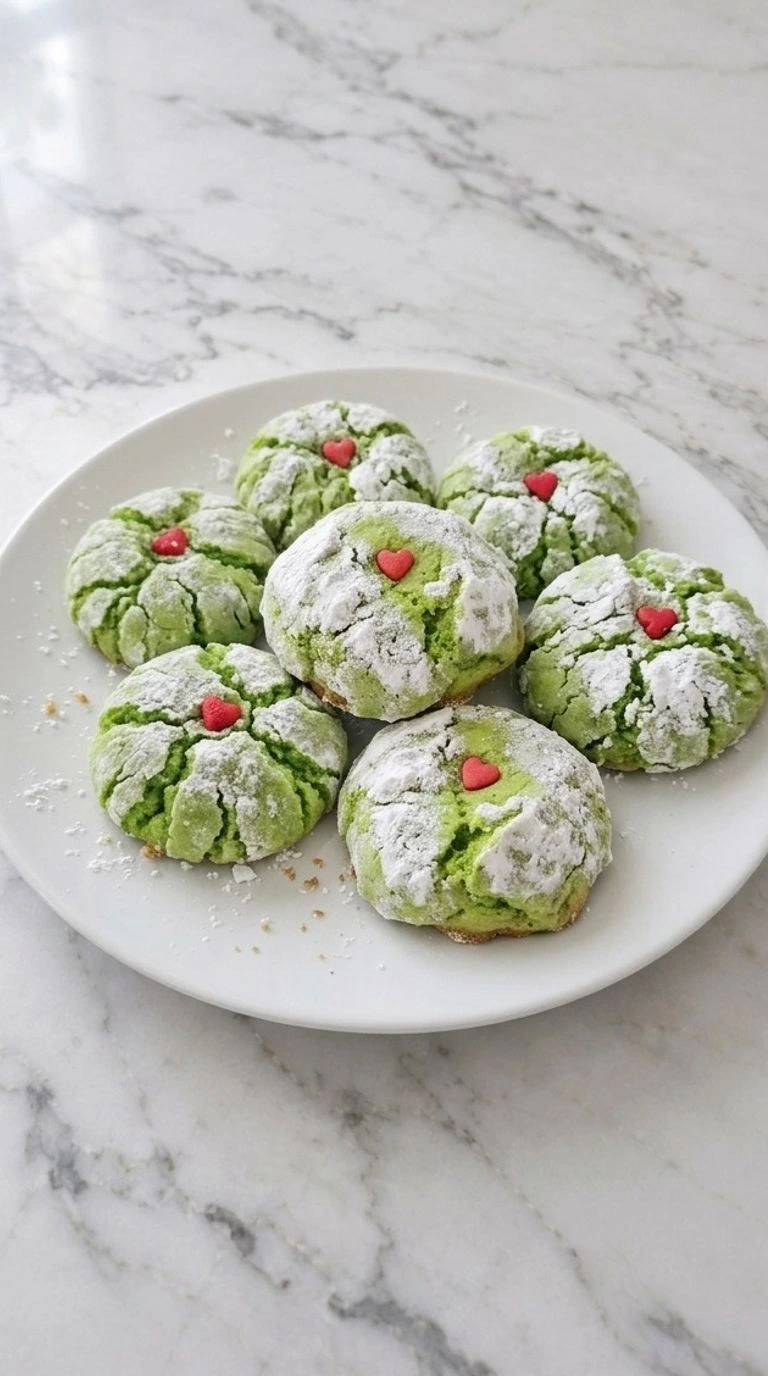
No cake mix needed. Just a simple vanilla cookie dough with green gel food coloring and a small red heart pressed into each warm cookie. The edges stay tender while the tops get a fine crackled coat. They’re especially fun for school Christmas parties and cookie exchanges because the color does most of the decorating for you.
Why This Recipe Works
These Grinch Cookies stay thick because the dough chills for 30 minutes before baking. The firm butter melts more slowly at 350°F and that gives the edges time to set before the centers spread too far.
A thick coat of powdered sugar splits as the dough rises and creates those snowy white cracks. The red hearts go on just after baking so they stick without losing their shape.
Ingredients
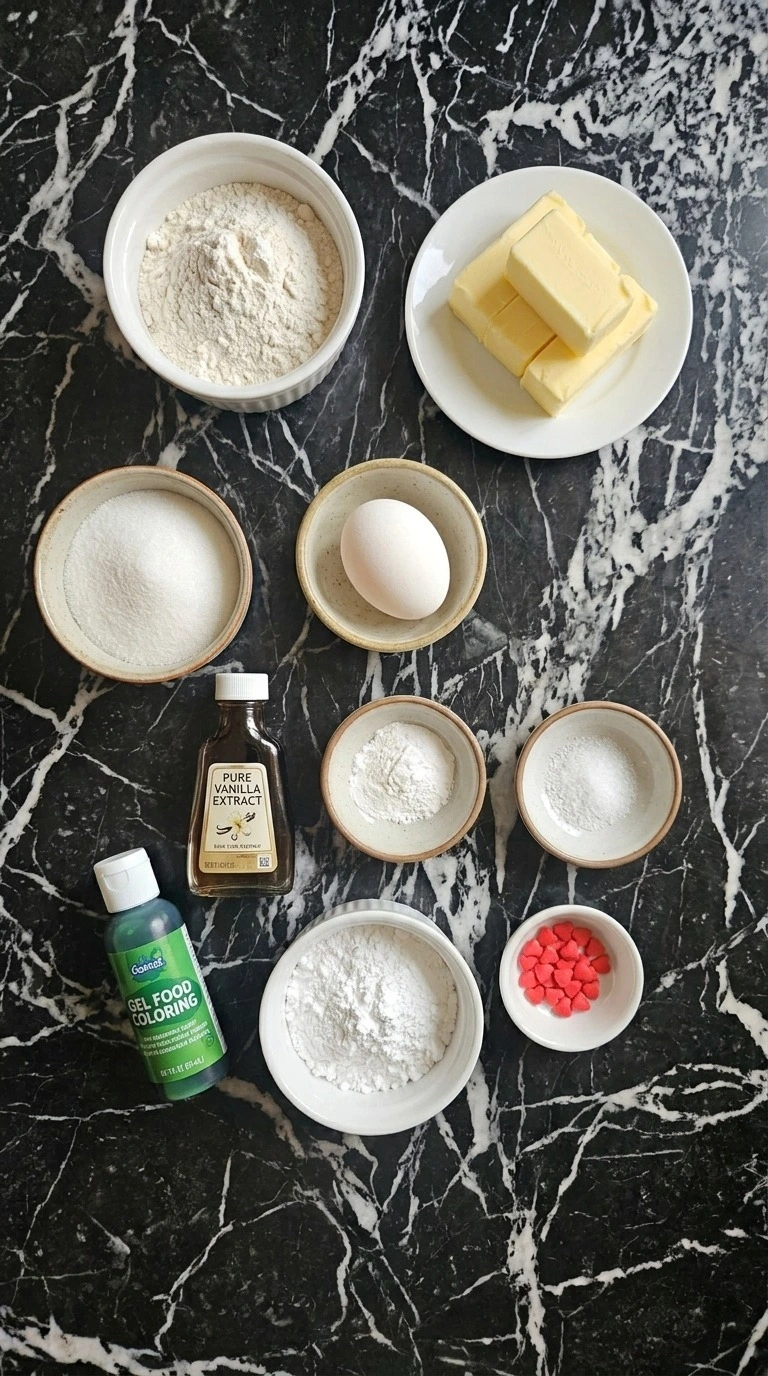
- unsalted butter: Softened to about 68°F so it creams easily and gives the cookies a tender buttery center.
- granulated white sugar: Beaten with the butter to add sweetness and help the cookies spread gently while baking.
- large chicken egg: Added after creaming to bind the dough and give the baked cookies a soft structure.
- pure vanilla extract: Mixed into the butter base to give the green cookies a warm vanilla flavor.
- all-purpose wheat flour: Spooned and leveled before measuring to give the dough enough structure without making the cookies dry.
- baking powder: Mixed with the flour to help the cookies rise and form cracks across their tops.
- fine sea salt: Added with the dry ingredients to bring out the vanilla and balance the sweetness.
- green gel food coloring: Folded into the dough to create a vivid lime-green shade without adding much liquid.
- powdered confectioners’ sugar: Used to coat the chilled dough balls and create white snowy cracks as the cookies spread.
- miniature red heart-shaped sugar candies: Pressed gently into the warm cookies for the small red heart that gives each cookie its Grinch look.
Kitchen Equipment
- Electric hand mixer: A hand mixer with at least three speed settings creams the butter evenly, while a whisk takes longer and may leave dense butter lumps.
- Large mixing bowl: A sturdy 3-quart mixing bowl gives the dough enough room for folding, while a smaller bowl makes flour spill over the rim.
- Rubber spatula: A flexible silicone spatula with a broad head folds the green coloring through the dough without leaving dry flour along the sides.
- Cookie scoop: A 1 1/2-tablespoon cookie scoop makes evenly sized portions, while a regular spoon needs careful measuring to prevent mixed baking times.
- Rimmed baking sheets: Two light-colored 13-by-18-inch rimmed baking sheets give the cookies room to spread, while dark trays may brown their bottoms too quickly.
- Parchment paper: Oven-safe parchment rated to at least 425°F helps the soft cookies release without sticking, while wax paper isn’t safe for baking.
- Wire cooling rack: A wire rack at least 12 inches wide lets air reach the cookie bottoms, while cooling on a solid plate may trap moisture.
- Small shallow bowl: A 5-inch shallow bowl holds the powdered sugar for rolling and gives each dough ball space to turn without crushing its shape.
How to Make It
Step 1: Cream the butter and sugar into a fluffy base
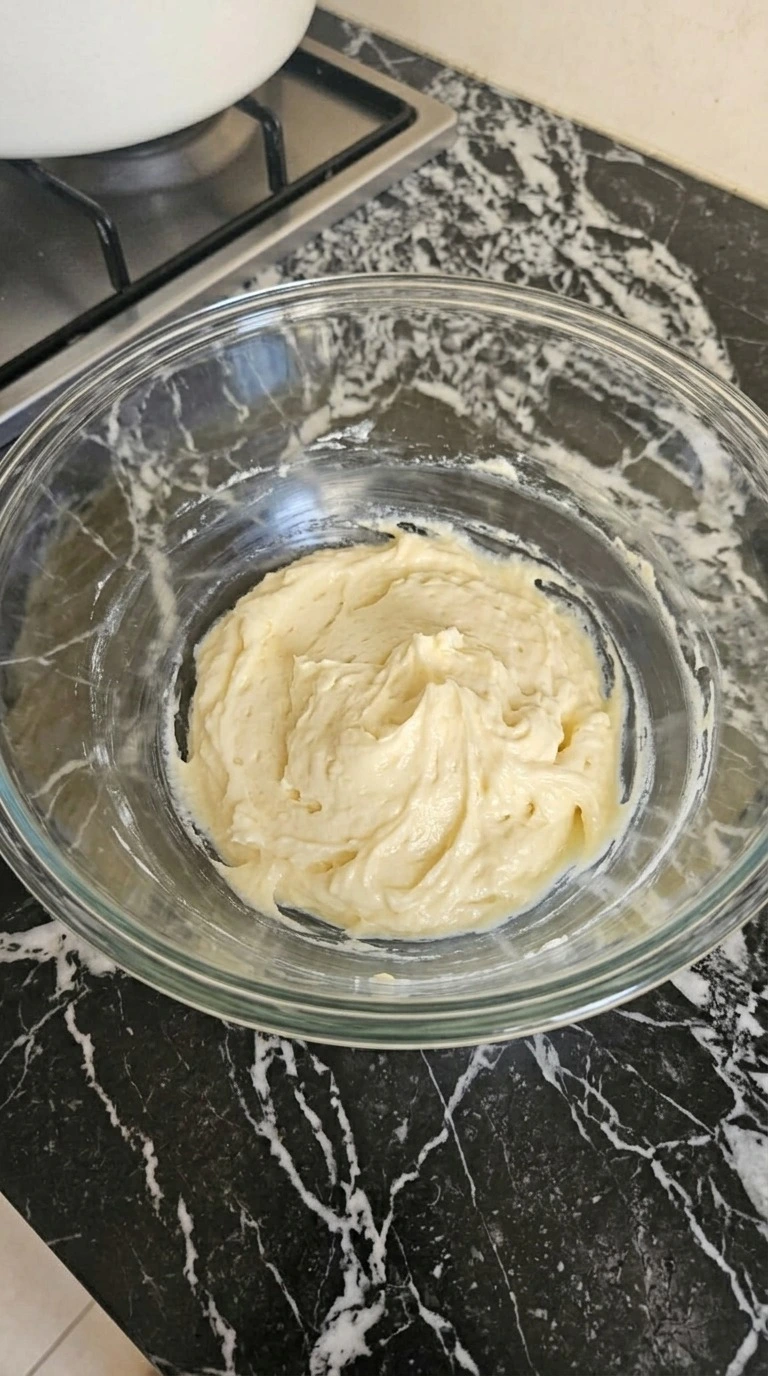
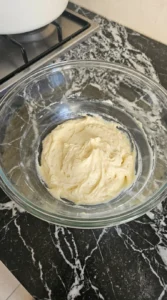
Place 1/2 cup softened unsalted butter and 3/4 cup granulated white sugar in a large mixing bowl. Beat them together for 2 to 3 minutes on medium speed until the mix looks pale and fluffy. Scrape down the sides halfway through so no thick streaks of butter stay near the edge. Next add 1 large chicken egg and 1 teaspoon pure vanilla extract.
Beat for another 30 to 45 seconds until the egg blends into the butter mixture. Keep the butter near 68°F before you start because warm butter makes the dough spread too fast. The mixture should look creamy and a bit thicker than cake batter. You’ll see fine air pockets and soft ridges.
Stop mixing once the egg blends in because too much beating can make the cookies puff and fall. Those small air pockets help keep the centers tender.
Tip: Choose unsalted butter with at least 80% butterfat and soften it for about 30 minutes before mixing for smoother creaming.
Step 2: Fold in the flour and tint the dough green
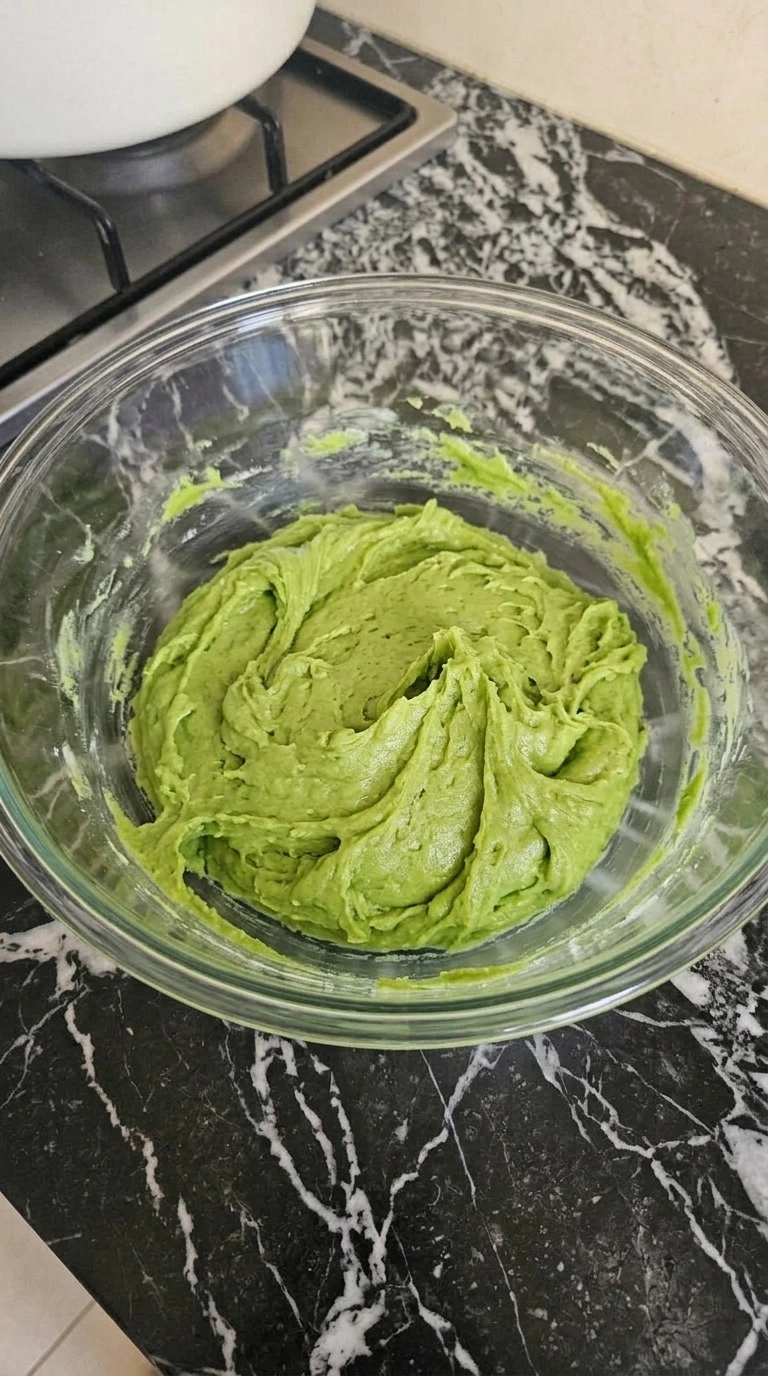
Add 1 3/4 cups all-purpose wheat flour with 1 teaspoon baking powder and 1/4 teaspoon fine sea salt to the butter mixture. Mix on low speed for 30 to 45 seconds and stop when only a few dry streaks remain. Add 1/2 teaspoon green gel food coloring and fold the dough gently until the color spreads through it. Use a few broad strokes with a rubber spatula rather than stirring hard.
The dough should feel soft but thick enough to hold a mound. If your kitchen is above 75°F, work quickly so the butter doesn’t melt. At first you’ll see white streaks through the green dough. Then the color turns mostly even and the surface looks soft with a slight sheen.
Don’t keep mixing after the flour disappears or the cookies may turn tough. Gentle folding limits gluten formation.
Tip: Use concentrated green gel coloring rather than liquid coloring because half a teaspoon gives stronger color without adding much moisture.
Step 3: Chill and roll the dough in powdered sugar
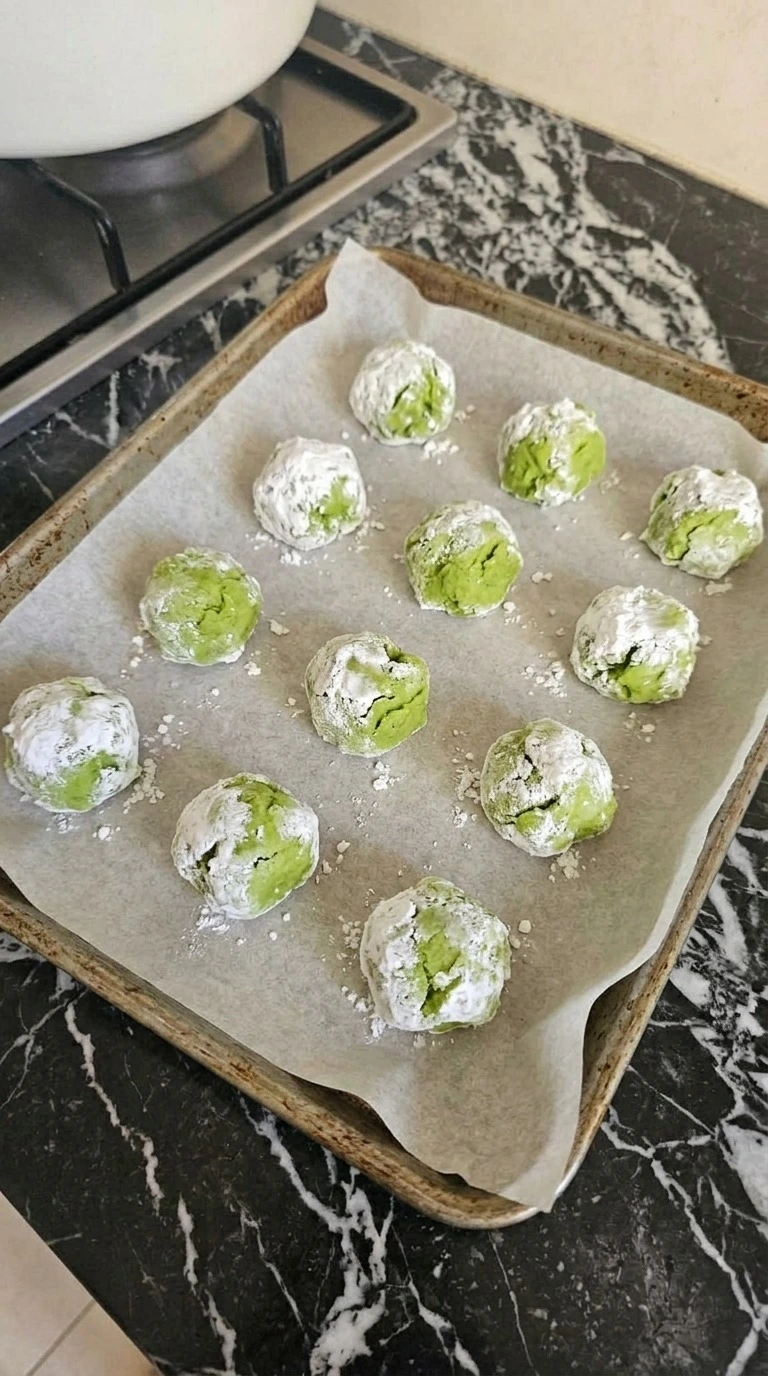
Cover the bowl and chill the green dough at 40°F or below for 30 minutes. Then scoop it into 24 portions using about 1 1/2 tablespoons per cookie. Roll each portion lightly between your palms until it forms a rough ball. Pour 1/2 cup powdered confectioners’ sugar into a shallow bowl and roll the balls through it until every side has a thick white coat.
Don’t press the sugar into the dough because you want the outside to crack when the cookies rise. Place the coated balls on a parchment-lined baking sheet with about 2 inches between them. The balls should look snowy with bits of bright green showing through uneven patches. (I once skipped the chill and the cookies spread into thin green puddles.
) Don’t leave the shaped dough in a warm kitchen for more than 10 minutes before baking. Cold butter slows the spread.
Tip: For a thicker white crackle, roll each dough ball in 2 tablespoons of extra granulated white sugar before the powdered sugar coating.
Step 4: Bake until the green tops crack and the edges set
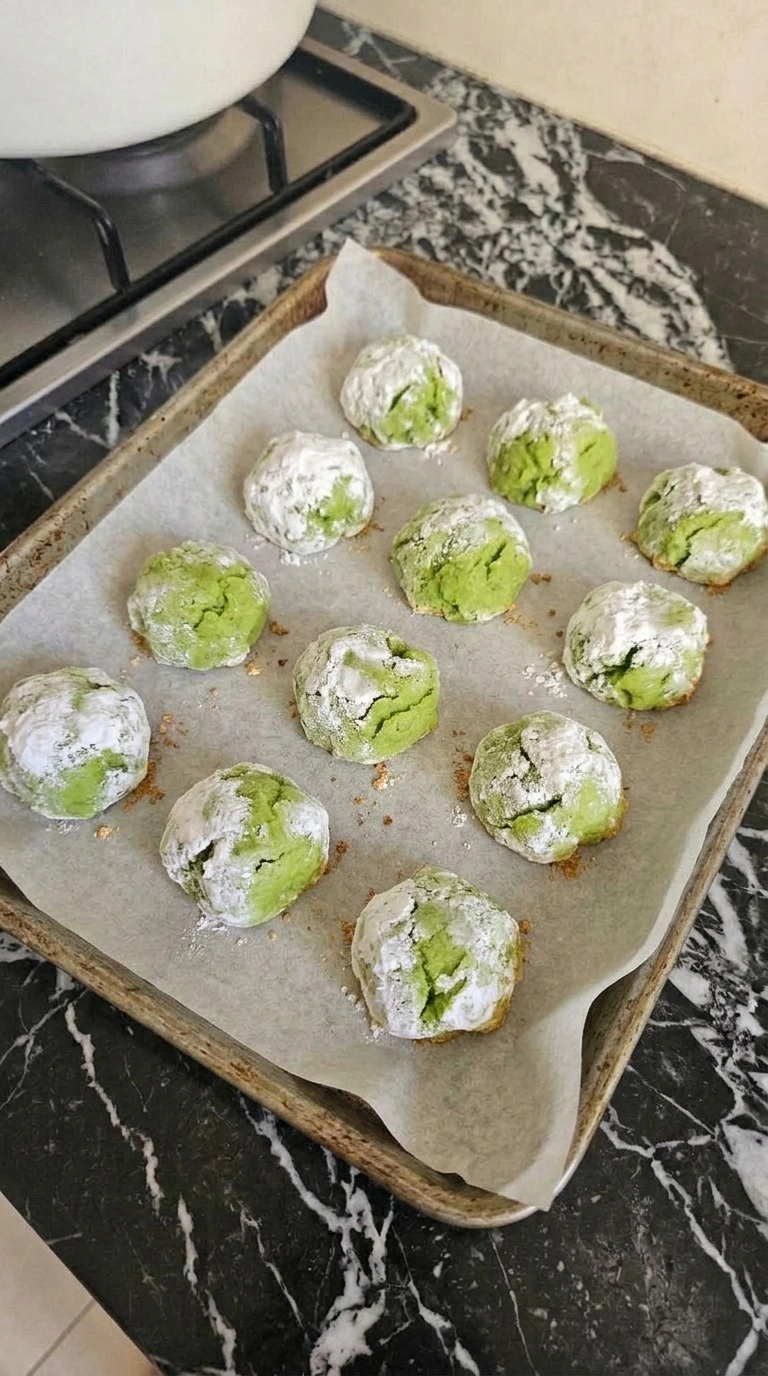
Heat the oven to 350°F and place a rack in the center. Bake one sheet of 12 cookies for 10 to 12 minutes while the second batch stays chilled. Watch for the white sugar coating to split into uneven cracks as the dough spreads into thick round cookies. The edges should look set while the centers stay slightly raised and soft.
Don’t wait for the green tops to turn golden because they’ll lose their bright color and the middles will dry out. Keep the baking sheet level so the dough spreads at a similar rate. At minute 10 you’ll see green cracks opening between the white patches. The edges should no longer look wet.
Remove the tray by minute 12 if those signs appear because the centers keep setting after baking. Gentle heat preserves the soft middle.
Tip: Check the first batch at 9 minutes if your oven runs hot, then adjust the second tray by 1 minute.
Step 5: Press on the red hearts and let the cookies cool
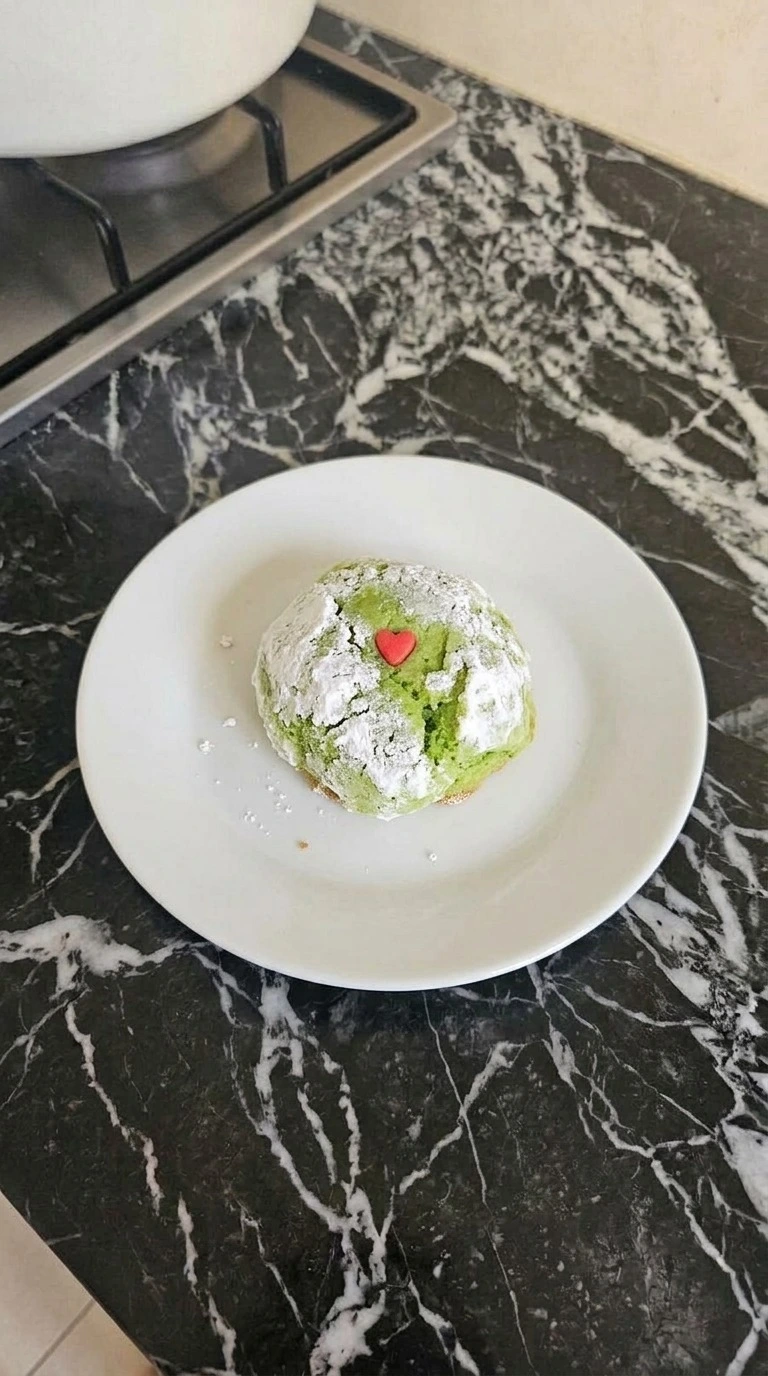
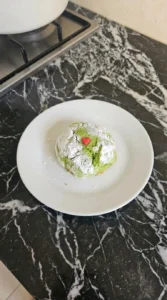
Let the baked cookies rest on the baking sheet for 2 minutes. Then press one miniature red heart-shaped sugar candy gently into the center of each warm cookie. Use 24 hearts for the full batch. Press just enough to make each heart stick without crushing the soft top or closing the sugar cracks.
Move the cookies to a cooling rack and leave them for 15 to 20 minutes before serving. The green centers will firm slightly as they cool but should still feel tender when you break one open. Each red heart should sit in a small shallow dent while the white cracks stay clear around it. Don’t press too hard because warm cookies can split.
Let them cool before stacking so the sugar won’t smear. Cooling firms the centers without drying them out.
Tip: If the red hearts slide off, attach each one with a tiny dab of cooled melted white chocolate after the cookies reach 70°F.
Pro Tips
- Weigh the all-purpose wheat flour at 220 g instead of packing it into a measuring cup. Too much flour makes the cookies dry and dull.
- Keep the unsalted butter near 68°F before creaming. It should dent under your finger but shouldn’t look shiny or greasy.
- Use a light-colored baking sheet at 350°F because dark metal absorbs more heat and can brown the cookie bottoms before the centers set.
- Scoop 24 portions before the oven finishes heating so each batch is ready to bake. Keep the second tray chilled while the first bakes.
- Don’t flatten the 1 1/2-tablespoon dough balls before baking. Their rounded shape helps create thick centers and wider cracks across the powdered sugar.
- Choose concentrated green gel food coloring and begin with 1/2 teaspoon. The shade may deepen slightly after mixing so don’t keep adding color.
- Check the cookies through the oven door at minute 10. When the edges look set and the centers remain slightly raised, they’re close to finished.
- Press one red heart into each cookie about 2 minutes after baking. The warm surface helps it stick without needing a layer of frosting.
- Make lemon Grinch cookies by adding 1 teaspoon finely grated lemon zest with the vanilla for a bright citrus note.
- For a peppermint version, replace 1/4 teaspoon of the vanilla extract with peppermint extract and keep the same baking time.
- Make orange-scented Christmas cookies by adding 1 teaspoon finely grated orange zest to the dough before chilling.
- For a dairy-free holiday batch, replace the 1/2 cup unsalted butter with equal-weight dairy-free baking sticks and chill for 40 minutes if the dough feels soft.
Substitutions & Variations
- unsalted butter: Use 1/2 cup (113 g) dairy-free baking butter sticks instead. Choose a plant-based butter with at least 75% fat. Softer spreads contain more water and may cause extra spreading. Chill the dough for 40 minutes instead of 30 if it feels sticky.
- all-purpose wheat flour: Use 1 3/4 cups (220 g) gluten-free 1-to-1 baking flour with xanthan gum. The cookies may turn slightly more crumbly and less chewy. Let the mixed dough rest for 15 minutes before chilling so the flour can absorb moisture. For another holiday baking option, try our Gluten Free Gingerbread Cookies.
- large chicken egg: Use 3 tablespoons aquafaba from unsalted canned chickpeas instead of 1 large egg. The dough may spread a little more and the centers can feel less rich. Chill for 45 minutes and check the cookies after 10 minutes at 350°F. This swap hasn’t been tested with the other substitutions.
- green gel food coloring: Use about 1 teaspoon liquid green food coloring or 1/2 teaspoon matcha powder. Liquid coloring gives a lighter shade and may soften the dough. Matcha makes the cookies more muted green and adds an earthy taste. Start with the listed amounts and don’t add extra liquid just for a brighter color.
- miniature red heart-shaped sugar candies: Use 24 small red heart-shaped fondant decorations instead. Fondant hearts feel softer than crunchy sugar candies and may look less shiny. Press them onto fully cooled cookies with a tiny dab of melted white chocolate so they keep their shape.
Storage Instructions
Let the Grinch Cookies cool fully for 20 minutes before packing them into an airtight container. They’ll keep for up to 4 days at a cool room temperature or 7 days in the refrigerator at 40°F or below. Place a piece of parchment between layers to protect the red hearts and sugar coating. For longer storage, freeze fully cooled cookies in a single layer until firm and then pack them into a freezer-safe container for up to 2 months.
Keep the lid closed while thawing so the cookies don’t collect moisture on their surfaces. These cookies don’t need reheating. However, you can warm one at 250°F for 3 to 4 minutes if you’d like a softer center. Let it rest for 2 minutes before eating.
Don’t warm it too long or the powdered sugar may melt into the green top. Discard cookies that develop mold, an unusual smell or a damp and sticky surface that wasn’t present when stored.
Grinch Cookies
Ingredients
Method
- Place 1/2 cup softened unsalted butter and 3/4 cup granulated white sugar in a large mixing bowl. Beat them together for 2 to 3 minutes on medium speed until the mix looks pale and fluffy. Scrape down the sides halfway through so no thick streaks of butter stay near the edge. Next add 1 large chicken egg and 1 teaspoon pure vanilla extract. Beat for another 30 to 45 seconds until the egg blends into the butter mixture. Keep the butter near 68°F before you start because warm butter makes the dough spread too fast. The mixture should look creamy and a bit thicker than cake batter. You’ll see fine air pockets and soft ridges. Stop mixing once the egg blends in because too much beating can make the cookies puff and fall. Those small air pockets help keep the centers tender.
- Add 1 3/4 cups all-purpose wheat flour with 1 teaspoon baking powder and 1/4 teaspoon fine sea salt to the butter mixture. Mix on low speed for 30 to 45 seconds and stop when only a few dry streaks remain. Add 1/2 teaspoon green gel food coloring and fold the dough gently until the color spreads through it. Use a few broad strokes with a rubber spatula rather than stirring hard. The dough should feel soft but thick enough to hold a mound. If your kitchen is above 75°F, work quickly so the butter doesn’t melt. At first you’ll see white streaks through the green dough. Then the color turns mostly even and the surface looks soft with a slight sheen. Don’t keep mixing after the flour disappears or the cookies may turn tough. Gentle folding limits gluten formation.
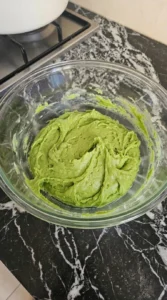
- Cover the bowl and chill the green dough at 40°F or below for 30 minutes. Then scoop it into 24 portions using about 1 1/2 tablespoons per cookie. Roll each portion lightly between your palms until it forms a rough ball. Pour 1/2 cup powdered confectioners’ sugar into a shallow bowl and roll the balls through it until every side has a thick white coat. Don’t press the sugar into the dough because you want the outside to crack when the cookies rise. Place the coated balls on a parchment-lined baking sheet with about 2 inches between them. The balls should look snowy with bits of bright green showing through uneven patches. (I once skipped the chill and the cookies spread into thin green puddles.) Don’t leave the shaped dough in a warm kitchen for more than 10 minutes before baking. Cold butter slows the spread.
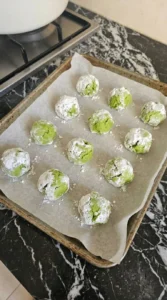
- Heat the oven to 350°F and place a rack in the center. Bake one sheet of 12 cookies for 10 to 12 minutes while the second batch stays chilled. Watch for the white sugar coating to split into uneven cracks as the dough spreads into thick round cookies. The edges should look set while the centers stay slightly raised and soft. Don’t wait for the green tops to turn golden because they’ll lose their bright color and the middles will dry out. Keep the baking sheet level so the dough spreads at a similar rate. At minute 10 you’ll see green cracks opening between the white patches. The edges should no longer look wet. Remove the tray by minute 12 if those signs appear because the centers keep setting after baking. Gentle heat preserves the soft middle.
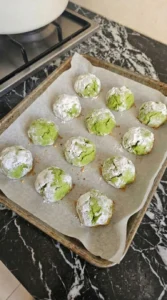
- Let the baked cookies rest on the baking sheet for 2 minutes. Then press one miniature red heart-shaped sugar candy gently into the center of each warm cookie. Use 24 hearts for the full batch. Press just enough to make each heart stick without crushing the soft top or closing the sugar cracks. Move the cookies to a cooling rack and leave them for 15 to 20 minutes before serving. The green centers will firm slightly as they cool but should still feel tender when you break one open. Each red heart should sit in a small shallow dent while the white cracks stay clear around it. Don’t press too hard because warm cookies can split. Let them cool before stacking so the sugar won’t smear. Cooling firms the centers without drying them out.
Notes
Frequently Asked Questions
Yes, you can mix the dough up to 48 hours before baking and keep it tightly covered in the refrigerator at 40°F or below. If it’s very firm after chilling, leave it on the counter for 5 to 10 minutes before scooping. Roll the portions in powdered sugar just before baking so the white coating stays thick and doesn’t turn damp.
Warm butter or loosely measured flour can make the dough spread into thin cookies. Keep the butter near 68°F before mixing and use 220 g of all-purpose wheat flour for the full batch. Chill the dough for at least 30 minutes and bake on a cool sheet at 350°F. A hot baking sheet can melt the dough before the edges begin to set.
You can leave out the green gel coloring and bake the same vanilla dough at 350°F for 10 to 12 minutes. The cookies will look pale golden with white sugar cracks instead of bright green. For a natural green shade, try 1/2 teaspoon matcha powder, but expect a muted color and a mild earthy flavor.
Store the completely cooled cookies in an airtight container for up to 4 days at a cool room temperature or 7 days in the refrigerator. Place parchment between layers so the red hearts don’t press into neighboring cookies. If you refrigerate them, let a serving sit out for 15 to 20 minutes before eating because chilled butter makes the centers firmer.
Yes, double every ingredient to make about 48 cookies, including 440 g flour, 226 g butter and 48 red heart candies. Mix the dough in a bowl that holds at least 5 quarts so you can fold it without spilling. Bake 12 cookies per sheet at 350°F for 10 to 12 minutes and chill the remaining portions between batches.
You can freeze the uncoated dough balls for up to 2 months in an airtight freezer bag. Roll them in powdered sugar while frozen and bake at 350°F for about 12 to 14 minutes. Fully baked cookies can also be frozen for 2 months with parchment between layers. Thaw them in their closed container so moisture collects outside rather than directly on the cookies.
Serve two cookies per guest alongside chilled milk or warm cocoa at about 140°F for a simple dessert table. For more variety, add our Cranberry White Chocolate Cookies and Chewy Chocolate Gingerbread Cookies. Their different colors and flavors make the platter more interesting without extra decoration.
Final Thoughts
The little red hearts get me every time! These Grinch Cookies use a buttery vanilla dough with a snowy sugar crust and soft green centers. No cake mix or frosting needed.
The 30-minute chill makes the difference because it helps the cookies stay thick while the tops crack in the oven. Makes 24 cookies with one red heart on each. I always save a few with the biggest cracks for our Christmas cookie plate.
For a bigger holiday spread, add our Butter Pecan Cookies and Gluten Free Gingerbread Cookies. Try this grinch cookies recipe and share your favorite batch! The same batch covers christmas grinch cookies and easy grinch cookies without a single change.
The Grinch first appeared in Dr. Seuss’s 1957 book How the Grinch Stole Christmas! His heart famously grows three sizes when he discovers that Christmas means more than gifts. That’s why a tiny red heart looks so fitting on each bright green cookie. A simple detail that tells the whole story.