Halloween Party Food Pretzels
A rainy October evening gave me my first excuse to make Halloween Party Food Pretzels, and the kitchen was already crowded with costume bits and half packed treat bags. What saved that batch was keeping the white chocolate cooler than I expected. Since then it’s become my go to when I want something playful that still tastes like a real salty sweet snack.
Mark always reaches for the orange ones first, and Emma inspects every candy eye before choosing hers. She used to be suspicious of anything with too many decorations, but the crisp pretzel underneath won her over. Now she asks to place the eyes herself.
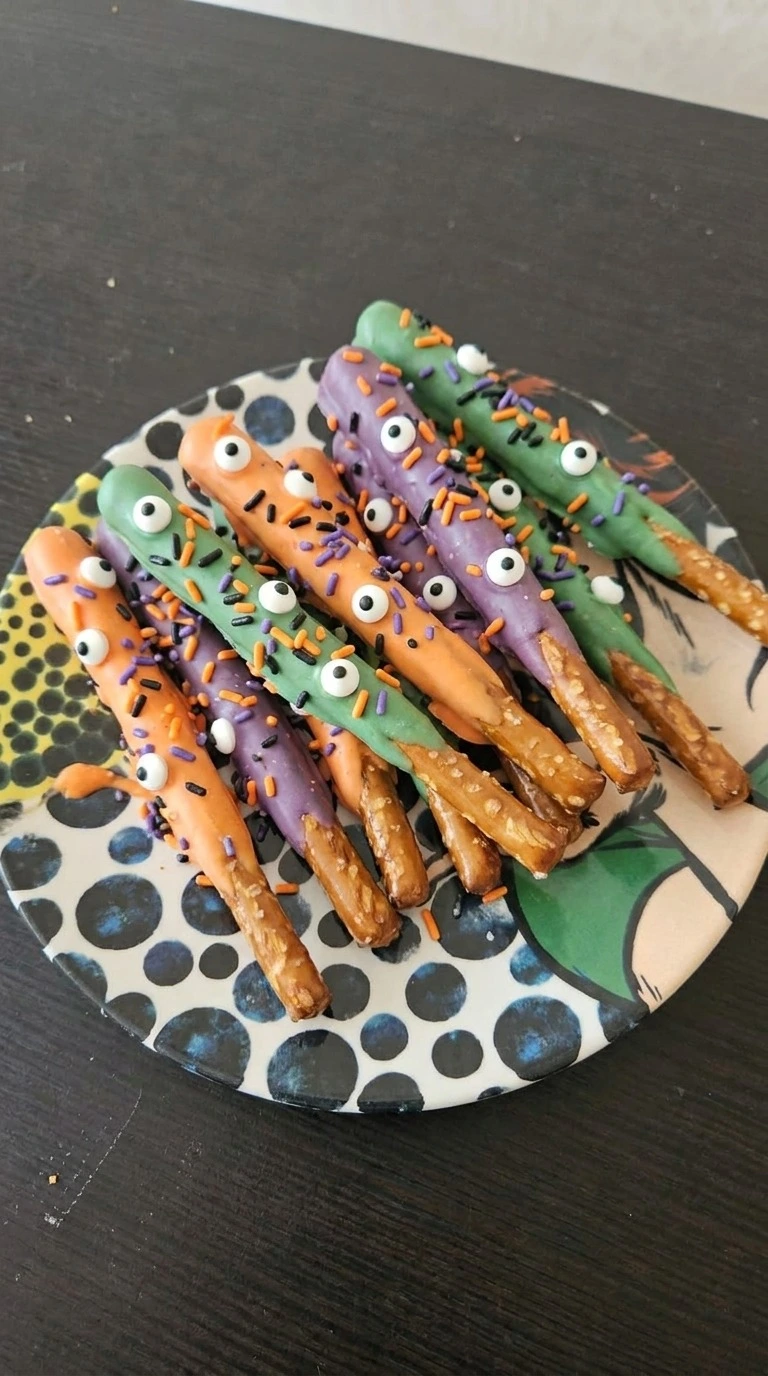
Ready in about 30 minutes. No baking needed. These Halloween pretzel rods stay thin enough to bite cleanly because the coating never gets overheated, and the salt keeps the sweetness from taking over.
Why This Recipe Works
Keeping white chocolate between 86°F and 90°F during dipping matters because overheated cocoa butter turns the coating thick, while cooler chocolate starts setting before each pretzel is covered. That narrow range keeps it fluid.
It also preserves the crisp ridges instead of burying them under a heavy shell. Halloween Party Food Pretzels hold their candy details best when you decorate within 3 minutes and let the shell set 15 to 20 minutes at 68°F to 72°F.
Ingredients
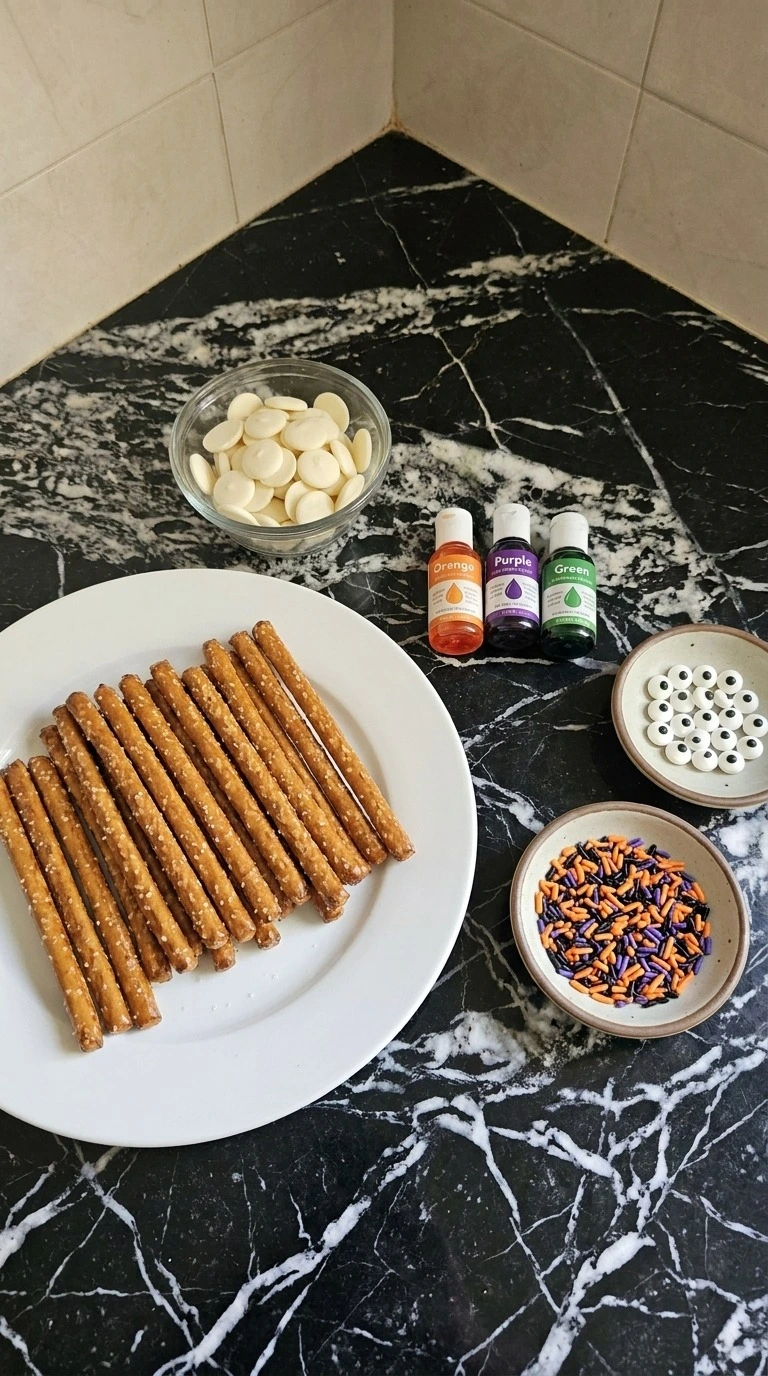
- salted pretzel rods: Use sturdy full length rods so they stay crisp under the coating and leave enough bare handle for serving.
- white chocolate melting wafers: Melt gently and divide into three equal portions for smooth orange, purple and green coatings.
- orange oil based candy color: Use an oil based color so the white chocolate stays smooth instead of seizing.
- purple oil based candy color: Use an oil based color for a deep purple coating without adding water to the chocolate.
- green oil based candy color: Add just enough for a bright green coating while keeping the white chocolate fluid.
- candy eyeballs: Plan on two eyes per pretzel rod for a playful monster look.
- orange black and purple jimmies: Scatter lightly over the tacky coating for color and crunch without covering every bit of chocolate.
Kitchen Equipment
- Microwave safe mixing bowl: A 2 quart microwave safe bowl gives the white chocolate room to melt evenly, while a narrow or very small bowl can create hot spots that make it scorch.
- Three small heat safe bowls: Three 1 cup heat safe bowls keep the colored coatings separate and deep enough for dipping, while shallow dishes make it hard to cover two thirds of each rod.
- Silicone spatula: A flexible 10 to 12 inch silicone spatula scrapes melted coating cleanly from the bowl, while a rigid spoon leaves unmixed color and hot chocolate around the sides.
- Instant read thermometer: A digital thermometer that reads from 80°F to 120°F helps keep white chocolate below scorching range, while guessing by touch can leave it thick or overheated.
- Rimmed sheet pan: A 13 by 18 inch rimmed sheet pan holds all 16 dipped rods in one layer, while a smaller pan crowds the coatings together and causes accidental sticking.
How to Make It
Step 1: Melt the white chocolate slowly
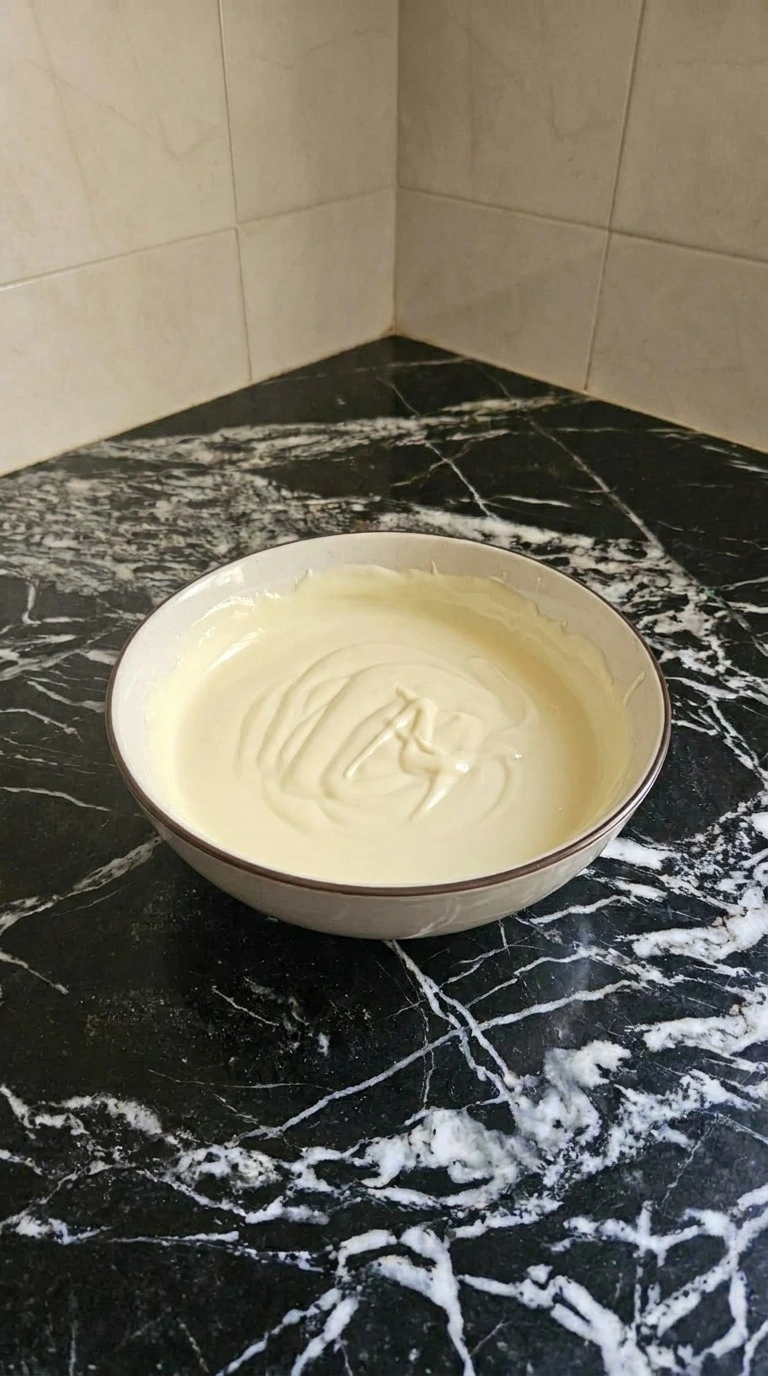
Place the white chocolate melting wafers in a microwave safe bowl and heat at 50 percent power for 30 seconds. Stir from the center outward with a silicone spatula, then repeat in 20 second bursts for 1 to 2 minutes total until the chocolate reaches 105°F to 110°F. Scrape the sides halfway through so no hot spots hide along the edge.
Stop early if needed. (I tested one batch at 120°F and it turned pasty, so staying under 110°F fixed it. ) The wafers should fall from the spatula in a smooth ribbon and smell lightly of cocoa butter.
If you push past 110°F, the coating can thicken or scorch. Gentle heat protects the cocoa butter structure so the coating stays fluid.
Tip: If the melted coating seems thick, stir in 1 teaspoon of finely chopped unmelted white chocolate and wait 60 seconds before heating again.
Step 2: Tint three Halloween colors
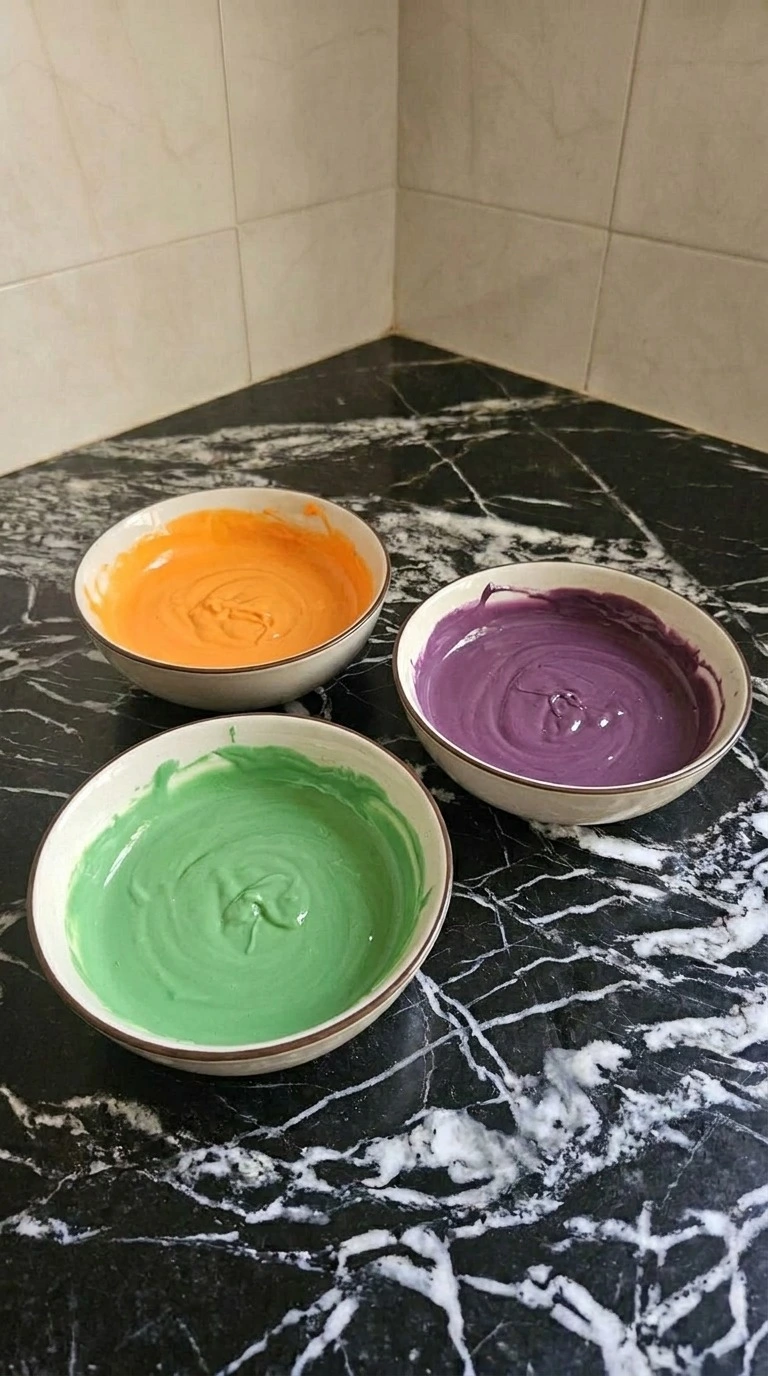
Divide the melted white chocolate evenly into three small bowls while it sits between 88°F and 92°F. Add 4 drops of orange oil based candy color to one bowl, 4 drops of purple to the second and 3 drops of green to the third. Fold each portion slowly for 30 to 45 seconds and scrape the bottom every few turns so no pale streaks hide underneath.
Work for no more than 3 minutes. Keep it glossy. Each coating should look streak free, with orange, purple and green staying bright instead of muddy.
If the chocolate drops below 84°F, it starts dragging and forms thick ridges. Keeping it near 90°F lets the coating spread in a thin even shell.
Tip: Use oil based candy color only. Even 1 teaspoon of water based liquid color can make white chocolate seize into a stiff paste.
Step 3: Dip the pretzel rods
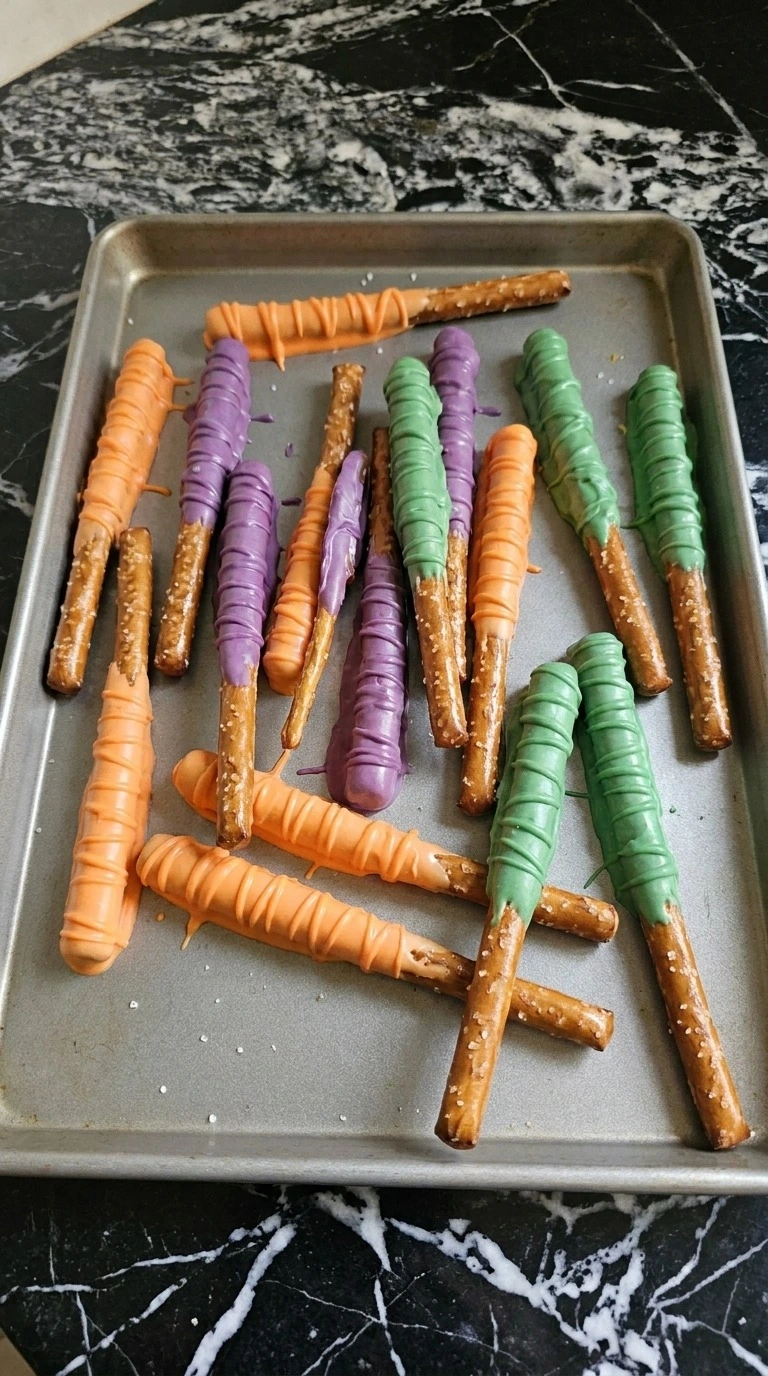
Dip all 16 salted pretzel rods one at a time while the coatings stay between 86°F and 90°F. Lower each rod about two thirds into a color, rotate it once and lift slowly, then let the extra coating run back for 5 seconds before setting it down. Set each dipped rod apart so the wet shells don’t touch.
Finish all 16 within 6 to 8 minutes so the first rods haven’t set before decorating begins. Work briskly. You should still see each ridged pretzel beneath a thin glossy shell, and the bare ends should stay dry.
If dipping drags on, the coating thickens and leaves heavy lumps. This temperature window keeps Halloween Party Food Pretzels thinly coated and crisp.
Tip: Keep the bare handle at least 2 inches long so guests can pick up each rod without touching the chocolate coating.
Step 4: Add candy eyes and sprinkles
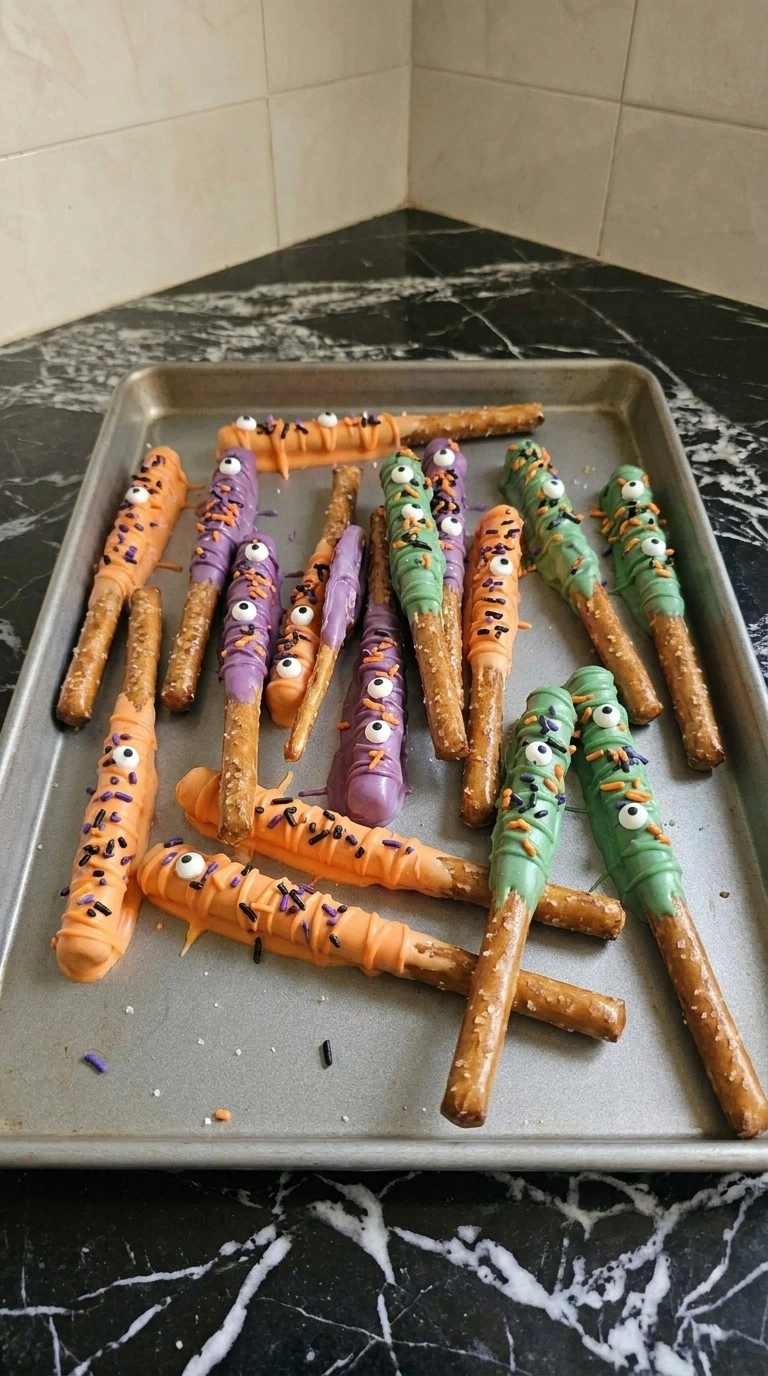
While the dipped coating is still tacky, press 2 candy eyeballs onto each of the 16 rods and scatter the orange black and purple jimmies over the coated sections. Finish decorating each rod within 3 minutes of dipping it. Then let the batch set at 68°F to 72°F for 15 to 20 minutes, or chill at 40°F for 8 to 10 minutes when the room is warm.
Press decorations lightly. Don’t bury them. The shell should lose its wet shine and feel firm near the edge.
You’ll hear a clean snap when one test rod breaks. Wait too long and the toppings won’t stick. Full setting keeps Halloween Party Food Pretzels crisp under the firm shell.
Tip: For a less sweet finish, keep orange black and purple jimmies to about 1 teaspoon per four rods so the salted pretzel flavor still comes through.
Step 5: Plate the pretzels for serving
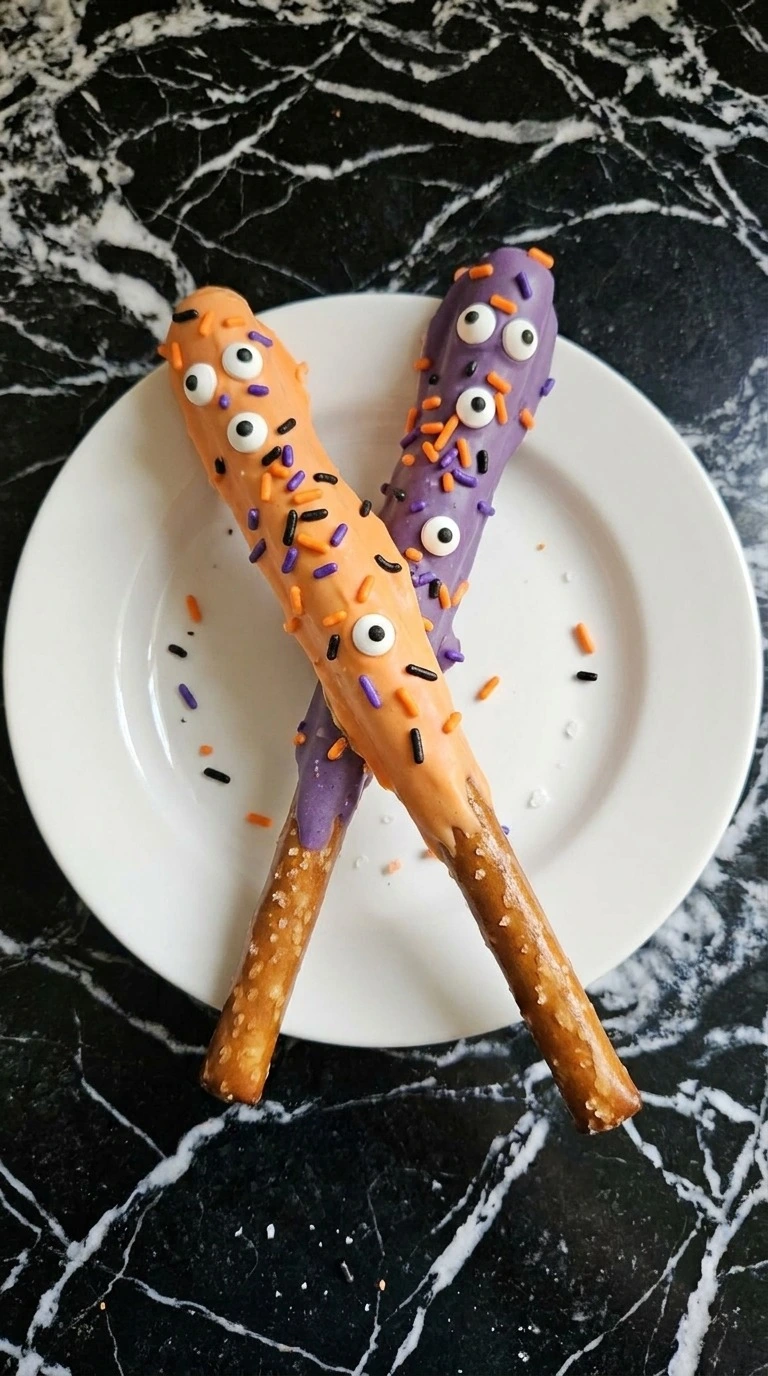
Let chilled rods stand at 68°F to 72°F for 5 minutes so the coating isn’t fridge hard, then arrange 2 rods per serving on small white plates. Alternate colors and let the rods overlap at different angles instead of lining them up. Keep the bare ends pointing outward so they’re easy to grab.
Plate all 8 servings in about 2 minutes and keep them below 75°F. Use clean plates for each serving. Keep it casual.
The shell should crack cleanly while the pretzel stays dry and crisp. Serve it straight from deep chill and the flavor stays muted. A 5 minute warmup gives Halloween Party Food Pretzels their cleanest bite.
Tip: If you’re setting out a buffet, replenish 4 to 6 rods at a time every 20 minutes instead of piling the whole batch high.
Pro Tips
- Keep the coating between 86°F and 90°F while dipping because cooler chocolate thickens fast and hotter chocolate can lose its smooth finish.
- Choose thick salted pretzel rods about 7 inches long because thin sticks can snap when you rotate them through the melted coating.
- Decorate each rod within 3 minutes of dipping. The candy eyes should sink slightly into the coating without sliding down the pretzel.
- Use 4 ounces of coating per color so each bowl stays deep enough to cover about two thirds of every pretzel rod.
- Let the finished rods set for 15 to 20 minutes at 68°F to 72°F before moving them onto a serving plate.
- If your kitchen is above 75°F, chill the tray for 8 to 10 minutes so the coating firms before the decorations shift.
- For Halloween Party Food Pretzels with better salty sweet balance, use about 1 teaspoon of jimmies for every four dipped rods.
- Make mummy pretzels by drizzling 2 ounces of melted white chocolate across eight coated rods and adding two candy eyes before it sets.
- Create pumpkin rods by using only orange coating and pressing one green candy sprinkle near the top of each of the 16 pretzels.
- For a cookies and cream version, scatter 1/4 cup finely crushed chocolate sandwich cookies over the wet white coating before it firms.
- Turn half the batch into ghost pretzels by using plain white coating and three mini chocolate chips for two eyes and one mouth.
Substitutions & Variations
- white chocolate melting wafers: dairy free white chocolate melting wafers — Use the same 12 ounce amount. The coating may set softer, so chill the decorated rods for 10 to 12 minutes.
- salted pretzel rods: gluten free pretzel rods — Replace them one for one. Gluten free rods can break more easily, so dip and rotate them gently instead of pressing them against the bowl.
- candy eyeballs: mini dairy free chocolate chips — Use 32 mini chips and press two onto each rod. The monster look becomes simpler, but the chocolate flavor gets deeper.
- oil based candy color: naturally colored oil based candy color — Use 3 to 5 drops per 4 ounces of coating. Natural colors often look softer, so expect muted orange, purple and green shades.
- orange black and purple jimmies: Halloween sanding sugar — Use about 3 tablespoons because sanding sugar covers more surface. It adds extra crunch and makes the finished coating noticeably sweeter.
Storage Instructions
Store Halloween Party Food Pretzels in a rigid airtight container for up to 5 days at 68°F to 72°F. Place parchment between layers so the candy eyes don’t rub against neighboring rods.
Freezing isn’t ideal, but tightly wrapped rods can stay frozen for 1 month. These pretzels don’t need reheating.
If chilled, leave them sealed at room temperature for 5 to 10 minutes before serving. Discard any rods with a stale smell, soft pretzel centers or visible moisture beneath the coating.
Halloween Party Food Pretzels
Ingredients
- 16 rods salted pretzel rods Use sturdy full length rods so they stay crisp under the coating and leave enough bare handle for serving.
- 12 ounces white chocolate melting wafers Melt gently and divide into three equal portions for smooth orange, purple and green coatings.
- 4 drops orange oil based candy color Use an oil based color so the white chocolate stays smooth instead of seizing.
- 4 drops purple oil based candy color Use an oil based color for a deep purple coating without adding water to the chocolate.
- 3 drops green oil based candy color Add just enough for a bright green coating while keeping the white chocolate fluid.
- 32 small candy eyeballs Plan on two eyes per pretzel rod for a playful monster look.
- 1/4 cup orange black and purple jimmies Scatter lightly over the tacky coating for color and crunch without covering every bit of chocolate.
Instructions
- Place the white chocolate melting wafers in a microwave safe bowl and heat at 50 percent power for 30 seconds. Stir from the center outward with a silicone spatula, then repeat in 20 second bursts for 1 to 2 minutes total until the chocolate reaches 105°F to 110°F. Scrape the sides halfway through so no hot spots hide along the edge. Stop early if needed. (I tested one batch at 120°F and it turned pasty, so staying under 110°F fixed it.) The wafers should fall from the spatula in a smooth ribbon and smell lightly of cocoa butter. If you push past 110°F, the coating can thicken or scorch. Gentle heat protects the cocoa butter structure so the coating stays fluid.
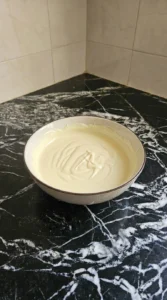
- Divide the melted white chocolate evenly into three small bowls while it sits between 88°F and 92°F. Add 4 drops of orange oil based candy color to one bowl, 4 drops of purple to the second and 3 drops of green to the third. Fold each portion slowly for 30 to 45 seconds and scrape the bottom every few turns so no pale streaks hide underneath. Work for no more than 3 minutes. Keep it glossy. Each coating should look streak free, with orange, purple and green staying bright instead of muddy. If the chocolate drops below 84°F, it starts dragging and forms thick ridges. Keeping it near 90°F lets the coating spread in a thin even shell.

- Dip all 16 salted pretzel rods one at a time while the coatings stay between 86°F and 90°F. Lower each rod about two thirds into a color, rotate it once and lift slowly, then let the extra coating run back for 5 seconds before setting it down. Set each dipped rod apart so the wet shells don’t touch. Finish all 16 within 6 to 8 minutes so the first rods haven’t set before decorating begins. Work briskly. You should still see each ridged pretzel beneath a thin glossy shell, and the bare ends should stay dry. If dipping drags on, the coating thickens and leaves heavy lumps. This temperature window keeps Halloween Party Food Pretzels thinly coated and crisp.

- While the dipped coating is still tacky, press 2 candy eyeballs onto each of the 16 rods and scatter the orange black and purple jimmies over the coated sections. Finish decorating each rod within 3 minutes of dipping it. Then let the batch set at 68°F to 72°F for 15 to 20 minutes, or chill at 40°F for 8 to 10 minutes when the room is warm. Press decorations lightly. Don’t bury them. The shell should lose its wet shine and feel firm near the edge. You’ll hear a clean snap when one test rod breaks. Wait too long and the toppings won’t stick. Full setting keeps Halloween Party Food Pretzels crisp under the firm shell.

- Let chilled rods stand at 68°F to 72°F for 5 minutes so the coating isn’t fridge hard, then arrange 2 rods per serving on small white plates. Alternate colors and let the rods overlap at different angles instead of lining them up. Keep the bare ends pointing outward so they’re easy to grab. Plate all 8 servings in about 2 minutes and keep them below 75°F. Use clean plates for each serving. Keep it casual. The shell should crack cleanly while the pretzel stays dry and crisp. Serve it straight from deep chill and the flavor stays muted. A 5 minute warmup gives Halloween Party Food Pretzels their cleanest bite.

Notes
Frequently Asked Questions
Yes. Make them up to 3 days before your party and let the coating set fully for 20 minutes before packing. Store them in a sealed container with parchment between layers and keep the container below 72°F so the coating stays firm.
The coating probably cooled below about 84°F or was overheated earlier. Warm it at 50 percent power for 10 seconds, then stir for 30 seconds before checking again. Don’t add water because even a small amount can make white chocolate seize.
Yes. Use 32 pretzel rods and 24 ounces of white chocolate melting wafers. Melt the coating in two batches instead of one large bowl. This keeps each portion near 90°F and gives you enough time to decorate before it sets.
They stay crisp for about 5 days in a tightly sealed container at a cool room temperature. Keep them away from steam and humidity. Refrigeration can cause condensation, which may soften the pretzel and leave pale marks on the chocolate.
Don’t use standard water based liquid coloring in melted white chocolate. Even 1 teaspoon can make the coating grainy or stiff. Choose oil based candy color and start with 3 drops per 4 ounces, then add one more drop if needed.
Freezing isn’t my first choice because condensation can soften the rods after thawing. If needed, wrap each one tightly and freeze for 1 month. Thaw them inside the closed container for 30 to 45 minutes before opening it.
Pair two rods per guest with apple slices, grapes or popcorn for a mix of crisp and fresh textures. Set the pretzels out in batches of 4 to 6 every 20 minutes if your room is warm.
Final Thoughts
By Halloween night, this is the kind of treat I always wish I’d started making sooner. It would have saved me from plenty of last minute party snacks.
But now that Halloween Party Food Pretzels are in our rotation, I make them every October and the uneven little monster faces are half the fun. Their crisp salted centers and thin chocolate shells make this version feel worth repeating.
Try them for your next party, share your favorite color and tag your batch if you decorate the rods differently.
Pretzels have been shaped in many ways for centuries, but candy coated rods became a playful shortcut because their long shape is easy to dip and decorate.