Easy Fudge with Condensed Milk
A good piece of fudge should taste like real chocolate from the first bite. Not like a lump of sugar that happens to be brown. That’s why I keep coming back to Easy Fudge with Condensed Milk when I want something rich and creamy without spending half the afternoon watching a candy thermometer. It’s thick. It’s chocolatey. And it has that soft bite that makes you reach for another small square.
I used to think homemade fudge meant boiling sugar to just the right temperature and hoping it would set without turning grainy. Then I started making it with sweetened condensed milk and chocolate chips. Much easier. But I found that too much heat could still make the chocolate thick and dull. And adding extra milk to loosen it only made the finished pieces softer than I wanted. Even a simple recipe has a few things worth getting right.
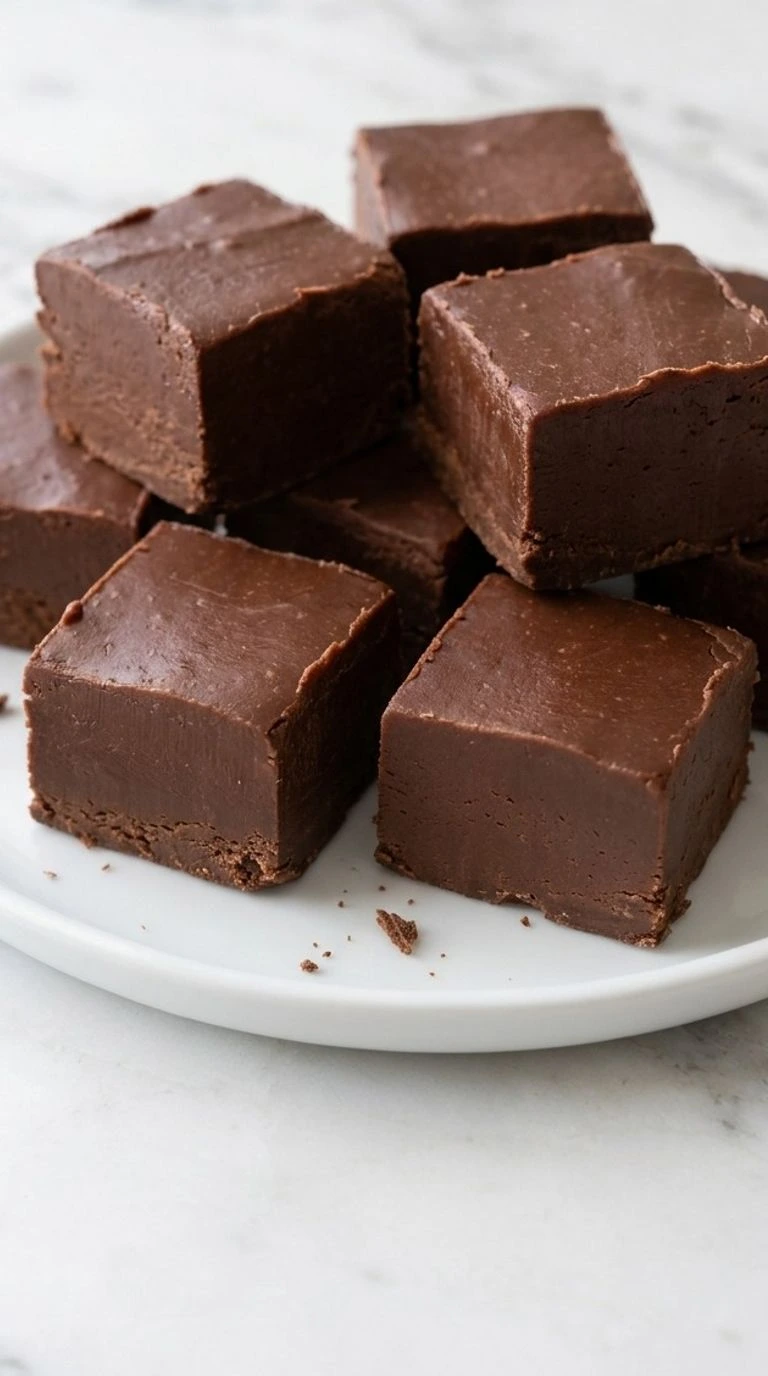
So this is the version I make when the Christmas baking list gets long. Some people search for easy easy fudge with condensed milk because they want the shortest path from chocolate chips to a tray of sweets. I get that. This version needs just a few pantry ingredients and a short spell on the stove before the fridge takes over. If you’re putting together a holiday dessert tray, our Gluten Free Gingerbread Cookies add a nice bit of spice beside the chocolate.
Why This Recipe Works
Easy Fudge with Condensed Milk works because the sweetened condensed milk already contains concentrated milk solids and dissolved sugar. So you don’t need to boil a sugar syrup to the soft-ball stage.
Melt the chocolate slowly over low heat and stir until smooth because too much heat can make the mixture thick and grainy. Then give the slab at least 2 hours at 37°F so the cocoa butter and other fats can firm up.
You’ll get a dense slice without making old-fashioned cooked sugar fudge.
Ingredients
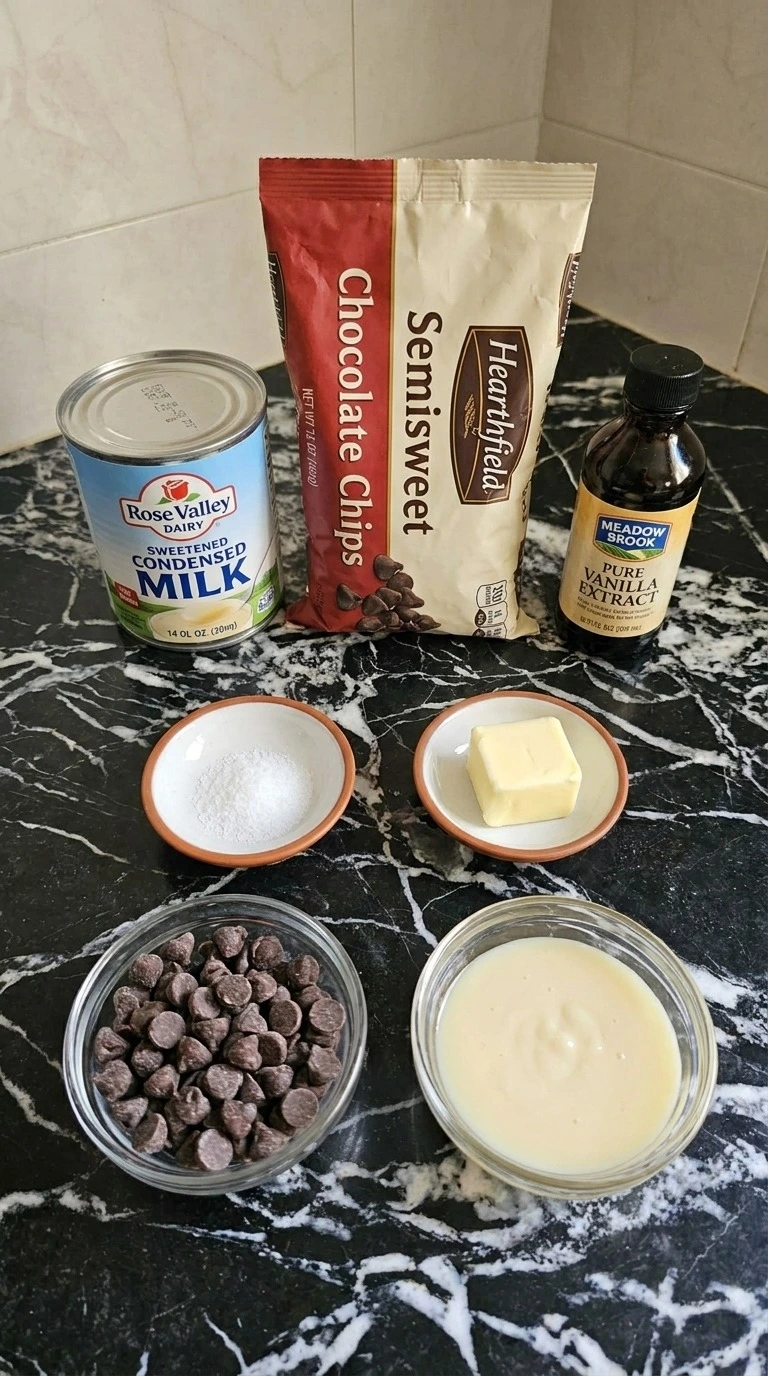
- semisweet chocolate chips: Use good-quality semisweet chips with cocoa butter for a rich chocolate flavor and a smooth set. They form the main body of the fudge.
- sweetened condensed milk: Use full-fat sweetened condensed milk rather than evaporated milk. Its thick sweet base helps the melted chocolate set into soft fudge.
- pure vanilla extract: Stir into the melted mixture after removing it from the heat to add warmth and round out the chocolate flavor.
- fine sea salt: Mix into the warm chocolate to soften the sharp sweetness and bring out the cocoa flavor.
- unsalted butter: Use to lightly grease the baking pan before adding parchment so the paper stays in place while you spread the fudge.
Kitchen Equipment
- Heavy-bottomed saucepan: A 2-quart heavy-bottomed saucepan spreads heat evenly as the chocolate melts, while a thin pan can create hot spots that scorch the mixture.
- Silicone spatula: A heat-resistant silicone spatula with a flexible edge scrapes the base and corners thoroughly, while a stiff utensil can leave chocolate behind to burn.
- 8-inch square baking pan: An 8-inch square pan gives the fudge a thick slab for cutting, while a 9-inch pan spreads the same mixture into thinner pieces.
- Parchment paper: A sheet wide enough to line the pan with 2-inch overhangs helps lift the cooled slab out cleanly, while wax paper may stick to warm fudge.
- Sharp kitchen knife: A long straight-edged knife makes clean cuts through the chilled slab, while a short serrated knife can leave ragged edges.
- Measuring cups and spoons: A standard dry measuring cup and a teaspoon set keep the chocolate and flavoring amounts consistent, while rough estimates can affect the final texture.
- Cutting board: A stable board at least 10 inches wide supports the chilled slab during slicing, while a flexible mat can bend and crack the fudge.
How to Make It
Step 1: Melt the chocolate chips with condensed milk
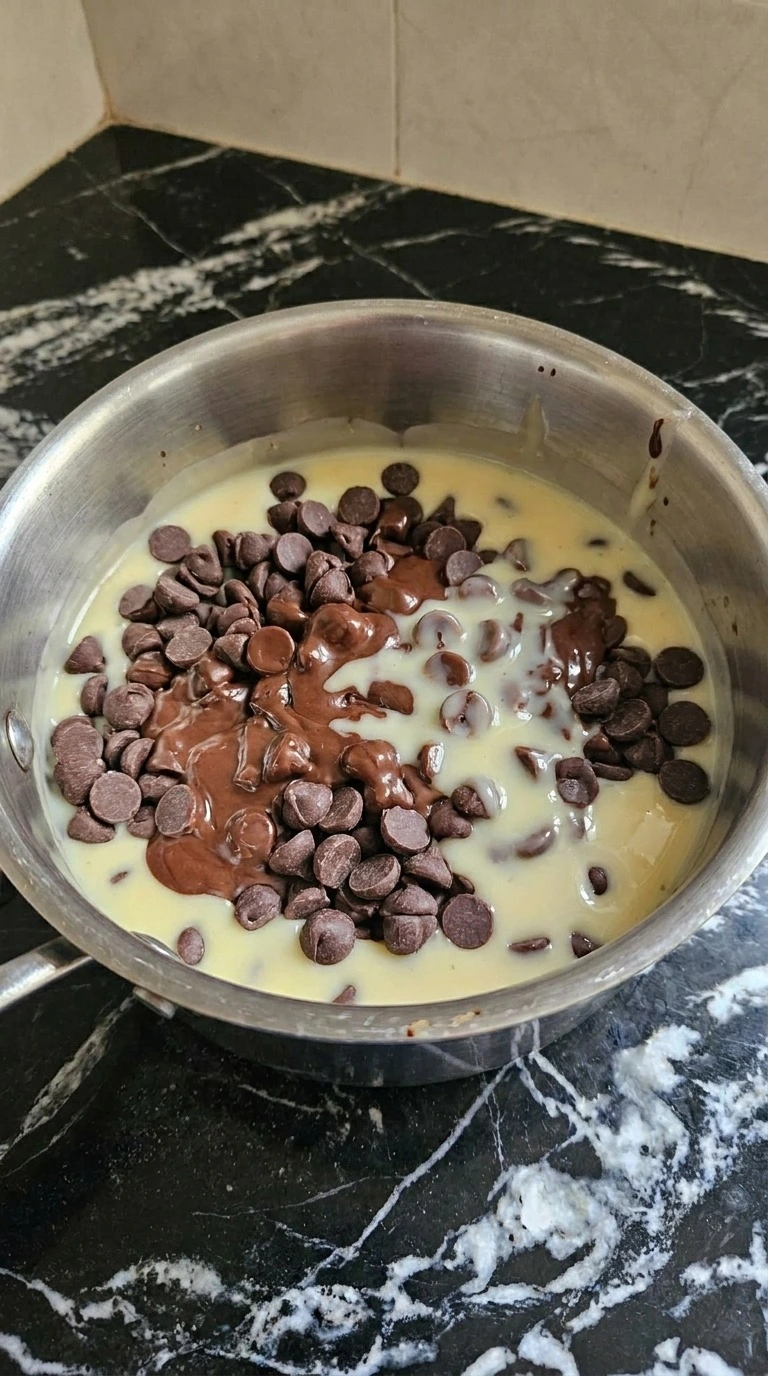
Put 3 cups of semisweet chocolate chips and one 14-ounce can of sweetened condensed milk into a heavy-bottomed saucepan. Set the heat to low, about 2 on a 10-setting dial, and stir with a silicone spatula for 2 to 3 minutes. Sweep across the base and into the corners as you stir because that’s where chocolate can catch first. At the start you’ll see pale condensed milk running between separate chocolate chips.
Then the edges of the chips will soften and dark streaks will spread through the milk. Don’t rush it. Next, watch for a thick mixture with plenty of soft chocolate pieces still visible. The milk should look streaked rather than fully brown.
If you leave the pan still for too long, the chocolate touching the base may scorch. Keep the heat low because gentle melting protects the chocolate from overheating.
Tip: Choose chocolate chips with cocoa butter in the ingredient list. Some cheaper chocolate coatings contain other fats and can leave a waxier finish.
Step 2: Stir until smooth and add the vanilla
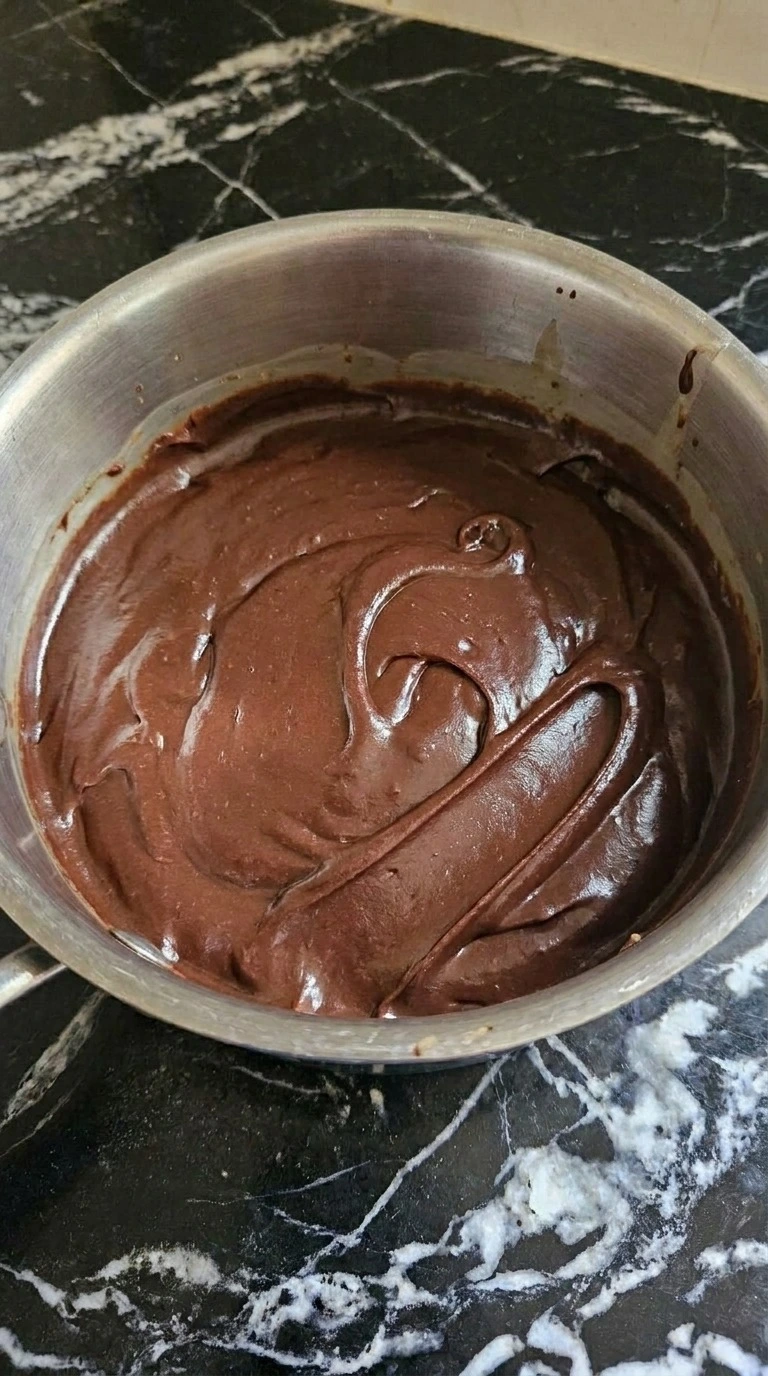
Keep the saucepan over low heat for another 1 to 2 minutes and draw the spatula through the thick chocolate in slow figure-eight motions. Scrape the base after each pass. Once the last solid chips disappear, take the saucepan off the heat and add 1 teaspoon of pure vanilla extract and 1/8 teaspoon of fine sea salt. Fold them through for 20 to 30 seconds.
Easy Fudge with Condensed Milk should now look smooth and dark with a soft sheen. Stop stirring as soon as the mixture looks even. You’ll notice the chocolate pulls away from the sides in thick ribbons instead of flowing like a thin sauce. That’s your cue.
(I once kept heating a batch to make it thinner and ended up with a dull, stiff mixture. ) Extra heat can make the fudge grainy. Remove it promptly because the chocolate holds enough heat to finish melting.
Tip: If a few small chips remain after removing the pan, let the mixture stand for 20 seconds before folding again. Residual heat often melts them.
Step 3: Spread the warm fudge into the lined pan
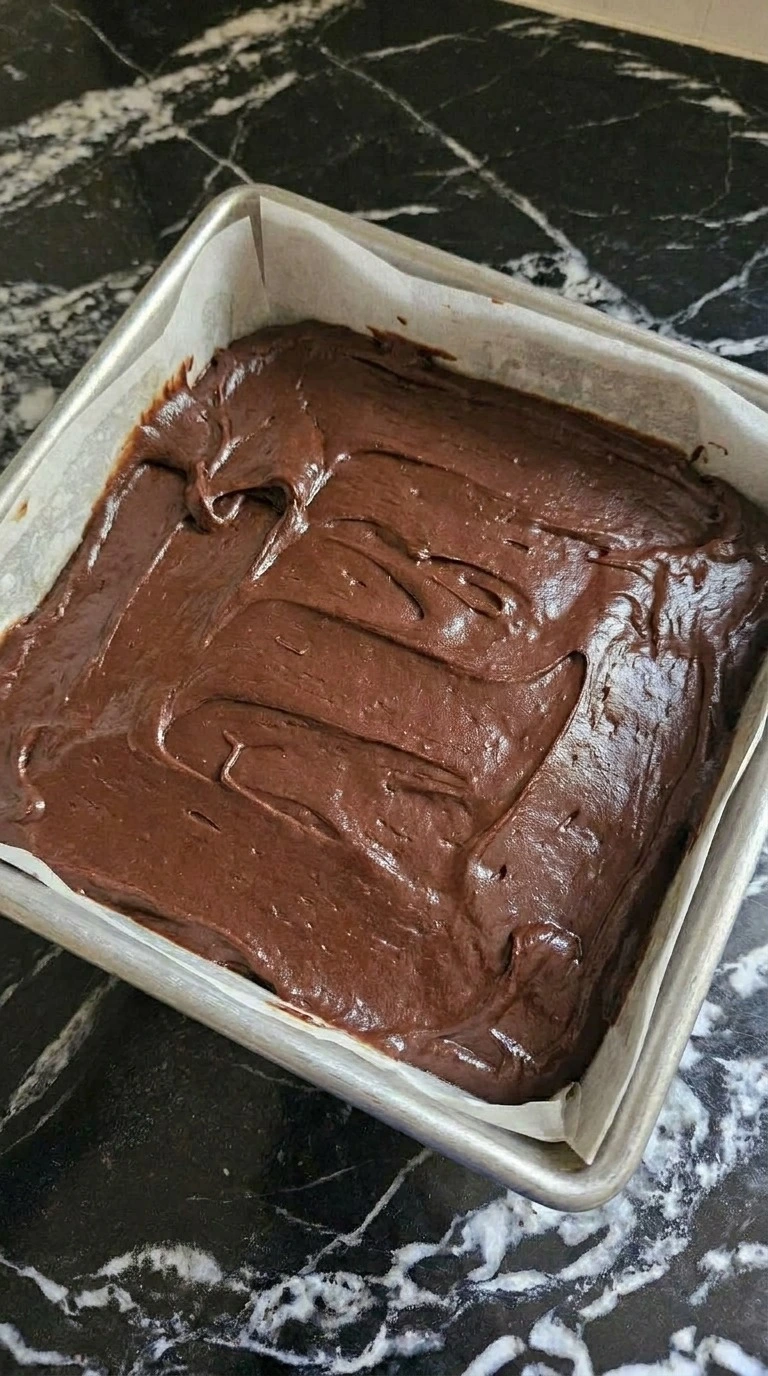
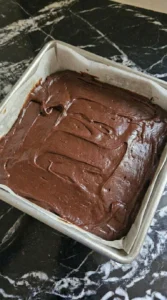
Lightly grease an 8-inch square baking pan with 1 teaspoon of unsalted butter. Press a sheet of parchment paper into the pan and leave enough paper over two sides to lift the fudge later. Then scrape the warm chocolate mixture into the center and spread it toward the corners with the spatula. Work while it’s still soft, ideally within 2 minutes of leaving the heat, because it grows firmer as it cools.
Push the thicker areas toward the edges and smooth the top with broad strokes. A few shallow swirls are fine. The fudge should form a thick dark layer about 3/4 inch deep with a slightly rippled top and no gaps in the corners. Don’t keep pressing once it starts to hold its shape.
That can leave rough patches. Spread it promptly because cooling chocolate becomes harder to level.
Tip: Leave about 2 inches of parchment extending above each side. The extra length gives you enough grip to lift the slab without cracking it.
Step 4: Chill the fudge and cut it into squares
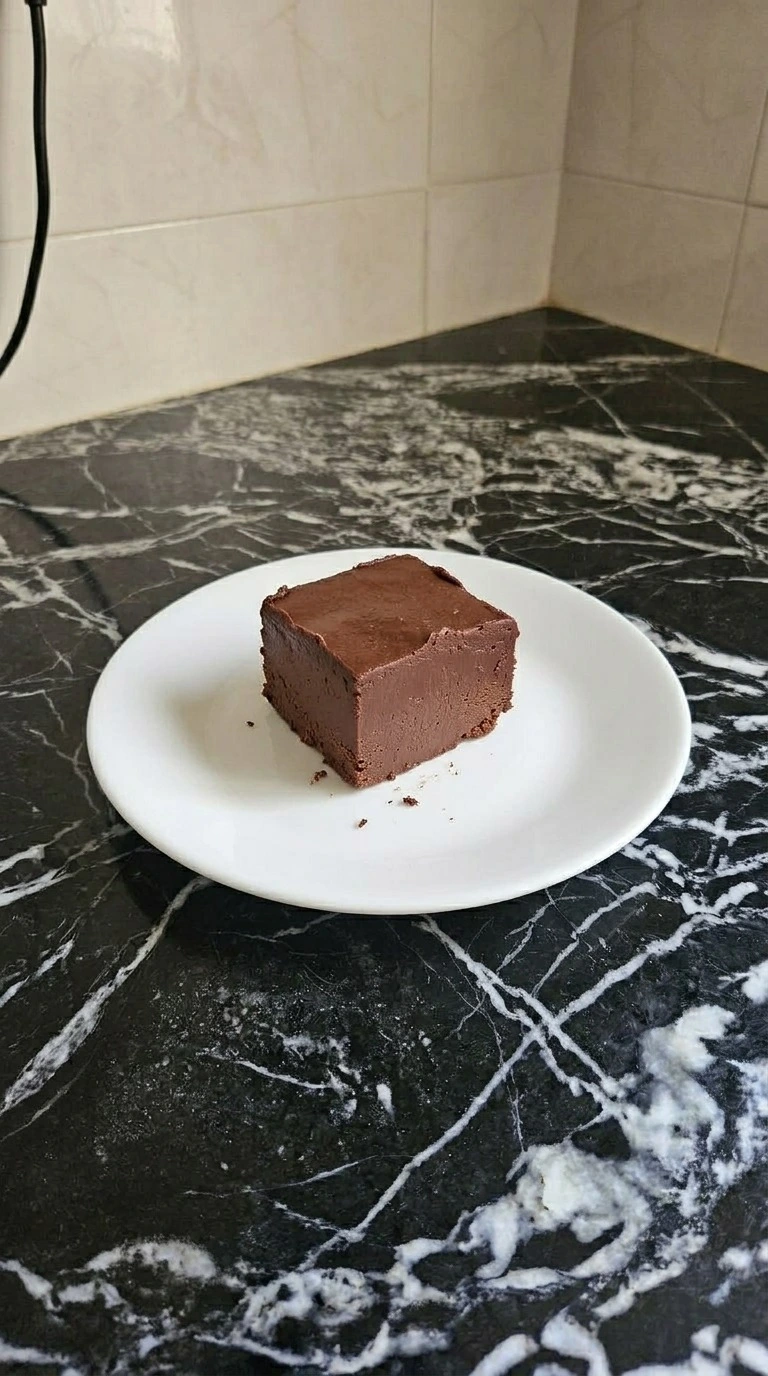
Place the filled pan in the fridge at about 37°F for 2 to 3 hours. Keep it level so the fudge sets to an even depth. When the center feels firm under a light fingertip press, lift the slab out by the parchment overhang. Set it on a cutting board and let it stand for 5 minutes if it’s too firm to slice cleanly.
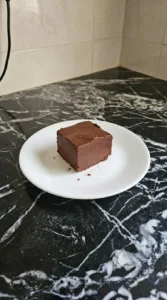
Cut the slab into four rows each way with a long sharp knife to make 16 squares. Wipe the blade between cuts and use a firm downward motion rather than sawing through the chocolate. Then place one square on a small white serving plate with its cut face showing. You’ll see a dense chocolate center without wet streaks.
If you slice before the middle has set, the pieces may slump. Chill fully because the chocolate needs time to firm into clean portions.
Tip: For gift boxes, place a small square of parchment between fudge pieces. It helps stop the soft surfaces from sticking during transport.
Pro Tips
- Use a full 14-ounce can of sweetened condensed milk. Evaporated milk looks similar but lacks the sugar and thickness needed for this fudge.
- Keep the heat around 2 on a 10-setting dial and stir along the saucepan’s base. If the chocolate sticks or smells burnt, remove it immediately.
- Measure 18 ounces of semisweet chocolate chips by weight when possible. Different chip sizes can make volume measurements less reliable.
- Line the 8-inch pan with parchment before melting anything. The chocolate thickens as it cools and becomes harder to spread after several minutes.
- Chill the fudge for at least 2 hours before cutting. If the center still dents easily, give it another 30 minutes.
- Warm a sharp knife under hot water and dry it completely before slicing. Wipe the blade between cuts to reduce ragged chocolate edges.
- For a deeper chocolate flavor, replace 1 teaspoon of the vanilla with 1/2 teaspoon of instant espresso powder dissolved in 1 teaspoon of warm water.
- Make the fudge 1 or 2 days before a Christmas party. Keep it chilled and cut it shortly before arranging the dessert tray.
- For peppermint Christmas fudge, replace the vanilla with 1/2 teaspoon of peppermint extract and sprinkle 2 tablespoons of finely crushed peppermint candy over the warm surface before chilling.
- Make walnut chocolate fudge by folding 3/4 cup of toasted chopped walnuts into the melted chocolate just before spreading it in the pan. The nuts add crunch and a slightly earthy flavor.
- For a peanut butter swirl, warm 1/3 cup of smooth conventional peanut butter until loose and spoon it over the fudge after spreading. Drag a knife through the top four or five times to create uneven swirls.
- Make orange chocolate fudge by stirring 1 teaspoon of finely grated orange zest into the warm mixture with the vanilla. The citrus adds a fresh scent without changing the creamy texture much.
Substitutions & Variations
- semisweet chocolate chips: Use 3 cups (18 ounces) of bittersweet chocolate chips with 60% to 70% cocoa. The fudge will taste darker and less sweet with a firmer bite. Keep the same amount of sweetened condensed milk and melt over low heat. Chocolate with a higher cocoa content can thicken faster, so stop heating as soon as it’s smooth.
- sweetened condensed milk: Use one 11.25-ounce can of sweetened condensed coconut milk for a dairy-free variation. Reduce the semisweet chocolate chips to approximately 2 1/2 cups (15 ounces) and choose certified dairy-free chips. The fudge may taste slightly of coconut and set a little softer. Chill for at least 3 hours before slicing. Don’t replace condensed milk with plain coconut milk because it won’t provide the same thick base.
- pure vanilla extract: Use 1/2 teaspoon of pure peppermint extract instead of 1 teaspoon of vanilla extract. Peppermint makes the chocolate taste cooler and sharper. Start with 1/4 teaspoon if your extract is especially strong because too much can overwhelm the chocolate. It’s a lovely holiday variation alongside our Gluten Free Gingerbread Cookies.
- fine sea salt: Use 1/8 teaspoon of fine table salt or approximately 1/4 teaspoon of Diamond Crystal kosher salt. Both options help control the sweetness without changing the texture. Fine table salt tastes slightly sharper while Diamond Crystal kosher salt has larger flakes. Avoid measuring coarse salts by the same volume because their crystal sizes vary.
- semisweet chocolate chips: Use 3 cups (18 ounces) of certified gluten-free semisweet chocolate chips. The flavor and texture should stay close to the original. This recipe contains no flour or eggs, so it’s naturally egg-free and can be gluten-free when all packaged ingredients are verified. Check labels for gluten ingredients and cross-contact warnings.
Storage Instructions
Keep Easy Fudge with Condensed Milk in an airtight container in the refrigerator at 40°F or below for up to 7 days. Separate stacked pieces with parchment so they don’t stick together. For longer storage, wrap the pieces well and place them in a freezer-safe container for up to 3 months. Freeze in small portions so you can take out only what you need.
For the best texture, thaw the sealed container overnight in the fridge before serving. You don’t need to reheat this fudge. Let a refrigerated square stand for 10 to 15 minutes if you prefer a softer bite. If it becomes too warm and starts losing its shape, return it to the fridge for 20 minutes.
Discard any fudge with mold, an unusual sour smell or signs of spoilage. Don’t leave the pieces at room temperature for more than 2 hours during a party.
Easy Fudge with Condensed Milk
Ingredients
Method
- Put 3 cups of semisweet chocolate chips and one 14-ounce can of sweetened condensed milk into a heavy-bottomed saucepan. Set the heat to low, about 2 on a 10-setting dial, and stir with a silicone spatula for 2 to 3 minutes. Sweep across the base and into the corners as you stir because that’s where chocolate can catch first. At the start you’ll see pale condensed milk running between separate chocolate chips. Then the edges of the chips will soften and dark streaks will spread through the milk. Don’t rush it. Next, watch for a thick mixture with plenty of soft chocolate pieces still visible. The milk should look streaked rather than fully brown. If you leave the pan still for too long, the chocolate touching the base may scorch. Keep the heat low because gentle melting protects the chocolate from overheating.
- Keep the saucepan over low heat for another 1 to 2 minutes and draw the spatula through the thick chocolate in slow figure-eight motions. Scrape the base after each pass. Once the last solid chips disappear, take the saucepan off the heat and add 1 teaspoon of pure vanilla extract and 1/8 teaspoon of fine sea salt. Fold them through for 20 to 30 seconds. Easy Fudge with Condensed Milk should now look smooth and dark with a soft sheen. Stop stirring as soon as the mixture looks even. You’ll notice the chocolate pulls away from the sides in thick ribbons instead of flowing like a thin sauce. That’s your cue. (I once kept heating a batch to make it thinner and ended up with a dull, stiff mixture.) Extra heat can make the fudge grainy. Remove it promptly because the chocolate holds enough heat to finish melting.
- Lightly grease an 8-inch square baking pan with 1 teaspoon of unsalted butter. Press a sheet of parchment paper into the pan and leave enough paper over two sides to lift the fudge later. Then scrape the warm chocolate mixture into the center and spread it toward the corners with the spatula. Work while it’s still soft, ideally within 2 minutes of leaving the heat, because it grows firmer as it cools. Push the thicker areas toward the edges and smooth the top with broad strokes. A few shallow swirls are fine. The fudge should form a thick dark layer about 3/4 inch deep with a slightly rippled top and no gaps in the corners. Don’t keep pressing once it starts to hold its shape. That can leave rough patches. Spread it promptly because cooling chocolate becomes harder to level.
- Place the filled pan in the fridge at about 37°F for 2 to 3 hours. Keep it level so the fudge sets to an even depth. When the center feels firm under a light fingertip press, lift the slab out by the parchment overhang. Set it on a cutting board and let it stand for 5 minutes if it’s too firm to slice cleanly. Cut the slab into four rows each way with a long sharp knife to make 16 squares. Wipe the blade between cuts and use a firm downward motion rather than sawing through the chocolate. Then place one square on a small white serving plate with its cut face showing. You’ll see a dense chocolate center without wet streaks. If you slice before the middle has set, the pieces may slump. Chill fully because the chocolate needs time to firm into clean portions.
Notes
Frequently Asked Questions
Yes. You can make Easy Fudge with Condensed Milk up to 5 days before serving and keep it refrigerated in an airtight container. Give the slab at least 2 to 3 hours to set before cutting it into 16 squares. For a Christmas party, I like making it the day before because the pieces hold their shape well once they’ve chilled overnight.
The most common cause is using too much condensed milk or not enough chocolate. This recipe needs 18 ounces of semisweet chocolate chips for one 14-ounce can of sweetened condensed milk. Refrigerate the pan at about 37°F for 3 hours before judging the texture. If the middle still flows or spreads, chilling longer may not fix an incorrect ingredient ratio.
You can, but the fudge will taste much sweeter and may be softer because milk chocolate has a different balance of cocoa solids and milk ingredients. For a firmer result, try 2 cups of semisweet chips with 1 cup of milk chocolate chips rather than replacing everything. Keep the total chocolate amount at 18 ounces and check the texture after 3 hours of chilling.
Yes. Use 6 cups (36 ounces) of semisweet chocolate chips and two 14-ounce cans of sweetened condensed milk. You’ll also need 2 teaspoons of vanilla and 1/4 teaspoon of fine sea salt. Divide the mixture between two parchment-lined 8-inch square pans rather than pouring everything into one deep pan. You’ll get 32 squares with a similar thickness and setting time.
Yes. Once the fudge is fully set, separate the squares with parchment and seal them in a freezer-safe container. Freeze for up to 3 months for the best texture. Move the sealed container into the fridge overnight before opening it so moisture doesn’t settle on the cold chocolate. The surface may look slightly dull after thawing, but the flavor should remain good.
Cut the chilled slab into 16 squares or 25 smaller bites if you’re serving several desserts. Arrange them on a serving plate about 10 to 15 minutes before guests arrive so they’re slightly softer when eaten. They pair nicely with fresh strawberries and Chewy Chocolate Gingerbread Cookies. Keep the fudge chilled until close to serving time.
Yes. Put the chocolate chips and condensed milk in a microwave-safe bowl and heat at 50% power in 20-second bursts. Stir well after each burst because chocolate can hold its shape even after softening. Stop when a few small pieces remain and use the residual heat to melt them. Add the vanilla and salt afterward. Overheating can make the mixture stiff or grainy.
Final Thoughts
A little chocolate goes a long way in this one. Easy Fudge with Condensed Milk is my kind of homemade Christmas sweet because it gives you that rich and creamy bite without boiling sugar or watching a candy thermometer.
The condensed milk keeps the center soft while the chilled chocolate gives each square enough structure to hold its shape. One batch makes 16 generous pieces or 25 smaller bites for a crowded dessert tray.
Serve this easy fudge with condensed milk recipe alongside our Gluten Free Gingerbread Cookies and Christmas Fruit Salad. Give it a try and tell me how your first batch turns out. The same batch covers christmas easy fudge with condensed milk and easy easy fudge with condensed milk without a single change.
Traditional fudge relies on sugar crystals forming as a hot syrup cools. But this condensed milk version takes another route. Melted chocolate firms as its fats cool, so you can make thick chocolate squares without reaching the usual soft-ball sugar stage of about 234°F to 240°F. That’s why the fridge does most of the work.