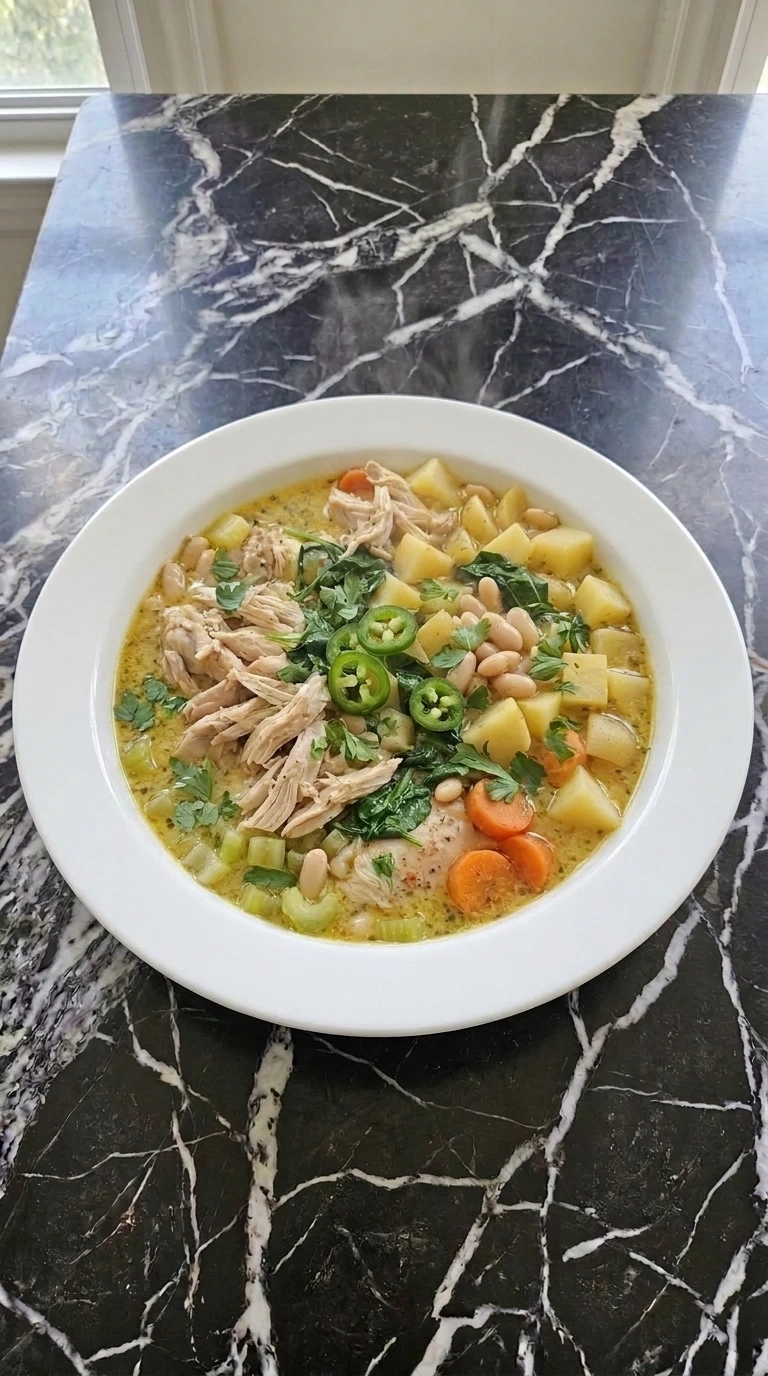
Garlic Bread
I honestly haven’t really shared many yeast based recipes on my blog, but this Garlic Bread recipe was one I had to share. This recipe is inspired by casual home baking and is easy to prepare and make. It’s a super tasty side packed full of flavor and is quite filling.
If you need a complete meal plan then pair it with our Ground Beef Meal Prep for the ultimate comfort dinner. When people think about baking bread at home they probably avoid making it since it takes time to rise. But trust me on this when it’s prepared in the right way it offers a rich and savory taste that’s very satisfying.

You get that perfect crunch on the outside while the inside stays beautifully soft and fluffy. This recipe is super tasty and quick to make, I recommend this meal for those who want to experience the cozy warmth of fresh baking.
The Secret to This Recipe
Baking at 375°F instead of 400°F prevents the outer crust from setting before the center cooks through completely. Rolling the dough into a tight spiral log traps the garlic butter and shredded mozzarella cheese inside the structure.
The fat melts during baking and steams the inner dough layers while the outer surface develops a beautiful deep golden crunch. If you enjoy rich savory bakes then try our crunchy Mozzarella Sticks for another crowd-pleasing appetizer.
Ingredient List
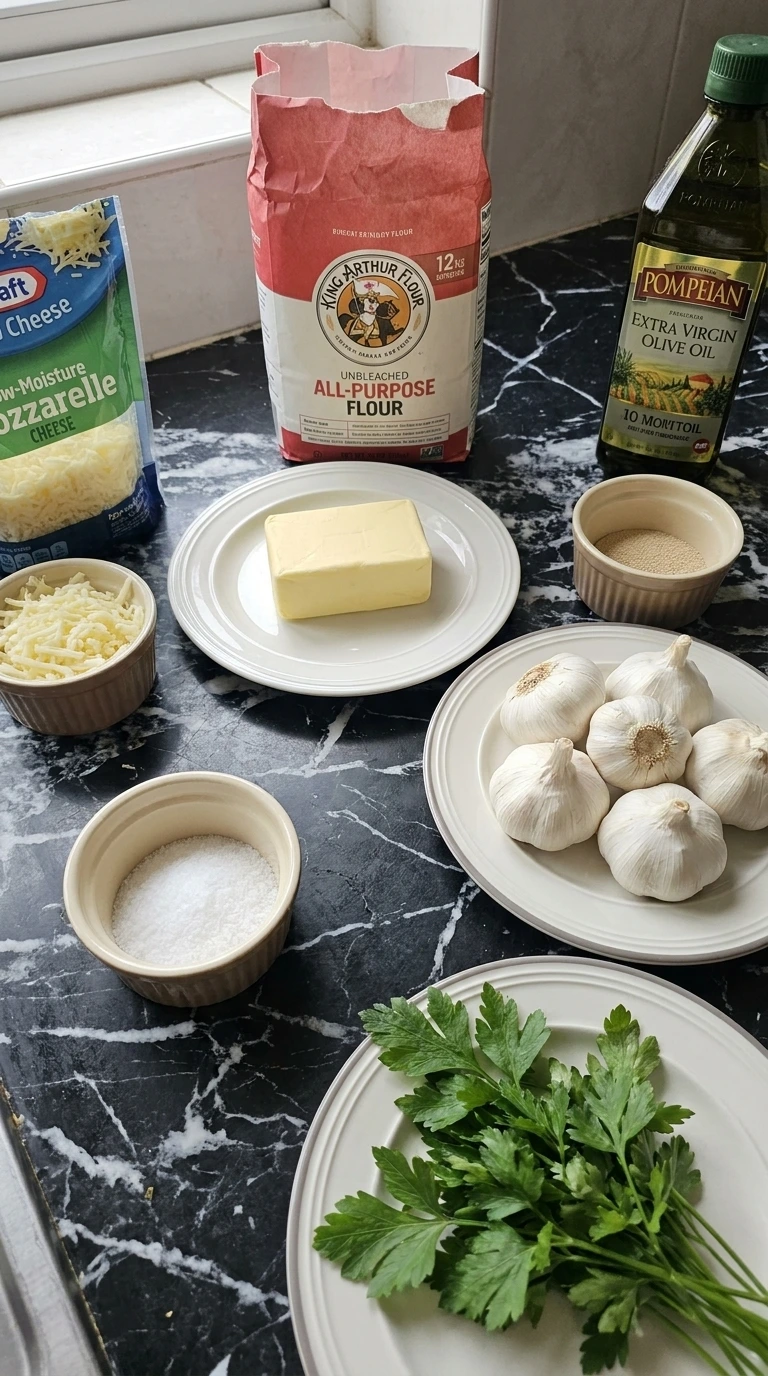
- unbleached all-purpose flour: Provides the structural gluten base needed for a soft chewy crumb.
- active dry yeast: Leavens the dough to create a light and fluffy interior texture.
- fine sea salt: Enhances the natural flavors of the dough and regulates yeast growth.
- unsalted butter: Softened to room temperature for smooth spreading across the dough sheet.
- white garlic: Finely minced to deliver a sharp and classic savory aroma.
- low-moisture mozzarella cheese: Shredded finely to create gooey melted pockets between the bread layers.
- Italian flat-leaf parsley: Finely chopped to add a fresh earthy color contrast at the very end.
- warm water: Kept around 110°F to hydrate the flour and wake up the yeast.
Tools You’ll Need
- large clear glass mixing bowl: A spacious bowl gives you plenty of room to mix the dough thoroughly without spilling flour over the sides.
- rectangular metal baking pan: A heavy metal pan conducts heat quickly to create a crisp bottom crust whereas glass pans can bake unevenly.
- wooden rolling pin: A classic straight rolling pin provides even pressure so you can flatten the dough into a perfect uniform rectangle.
- sharp chef knife: A sharp blade slices through the filled dough log cleanly without squishing the delicate spiral layers inside.
Method
Step 1: Mix and knead the dough
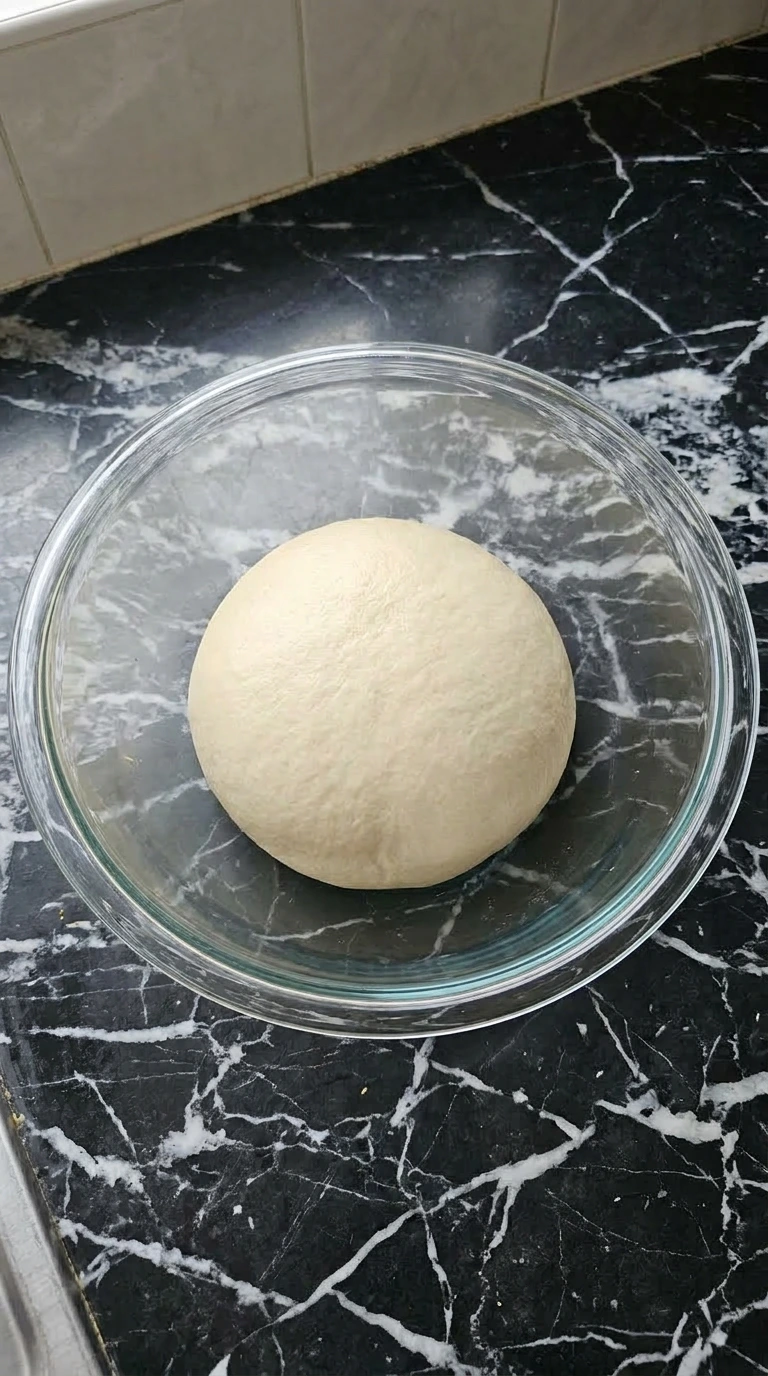
Combine the warm water and active dry yeast in your mixing bowl. Let it sit at a warm room temperature of about 75°F for exactly 5 minutes until it bubbles. Whisk the unbleached all-purpose flour and fine sea salt together before adding them to the liquid. Turn the dough onto a clean surface and press firmly with the heel of your hand. Push forward then fold the dough back over itself in a smooth rhythmic motion.
You will see the wet shaggy mixture slowly transform into a smooth elastic ball over 8 to 10 minutes. The surface will lose its stickiness and it will spring back when pressed gently. You will smell the sweet earthy scent of active yeast developing as you work the flour proteins. (I tried using cold water during my first test run and the yeast completely refused to activate. Stick to warm water around 110°F for the best results.
) Miss this kneading window and the gluten network will not develop properly. Your finished bread will turn out dense and flat instead of light and airy. Knead the dough thoroughly until smooth, strong gluten structures trap carbon dioxide gas so the bread rises high.
Tip: Test your yeast freshness by checking for a thick layer of foam after five minutes in warm water.
Step 2: Roll and fill the dough sheet

Dust your work surface with a small handful of flour so the dough does not stick. Press the proofed dough flat with your hands then use a rolling pin to flatten it into a large rectangle. Roll from the center outward with even downward pressure until the sheet is about one-quarter inch thick. Use a pastry brush to spread the softened unsalted butter evenly across the entire surface.
Sprinkle the minced white garlic and shredded low-moisture mozzarella cheese edge to edge. The pale dough rectangle will look heavily textured once you scatter the white cheese strands. The golden bits of minced garlic will speckle the surface while the soft butter creates a glossy sheen underneath. You will immediately smell the sharp pungent aroma of fresh garlic mixing with the rich dairy notes of the butter.
Roll the dough too thin and the heavy filling will tear through the bottom layer during assembly. Keep the thickness consistent across the entire sheet, uniform dough sheets ensure the rolls bake at the exact same rate in the oven.
Tip: Leave a tiny half-inch border along the top edge of the dough sheet to help seal it cleanly.
Step 3: Roll into a log and slice into rounds

Lift the long edge of the dough sheet closest to you and fold it tightly over the cheese filling. Roll the dough upward away from yourself into a snug cylinder shape while keeping the tension firm. Pinch the final seam tightly against the log with your fingers to lock the cheese inside.
Use a sharp chef knife to slice the log into twelve equal rounds using gentle sawing motions. You will see a long smooth beige log transform into individual circular rounds with distinct concentric spirals. The white lines of shredded cheese and yellow garlic bits will show clearly between the coiled layers of pale dough.
A small amount of cheese might tumble onto the cutting board during slicing. Squeeze the log too hard while cutting and you will crush the delicate internal layers together. Use a very sharp knife with minimal downward force, clean cuts preserve the spiral definition so the rolls bake into beautiful distinct shapes.
Tip: Slide a piece of unflavored dental floss under the log and cross the ends to slice cleanly without squishing.
Step 4: Bake until golden and bubbly
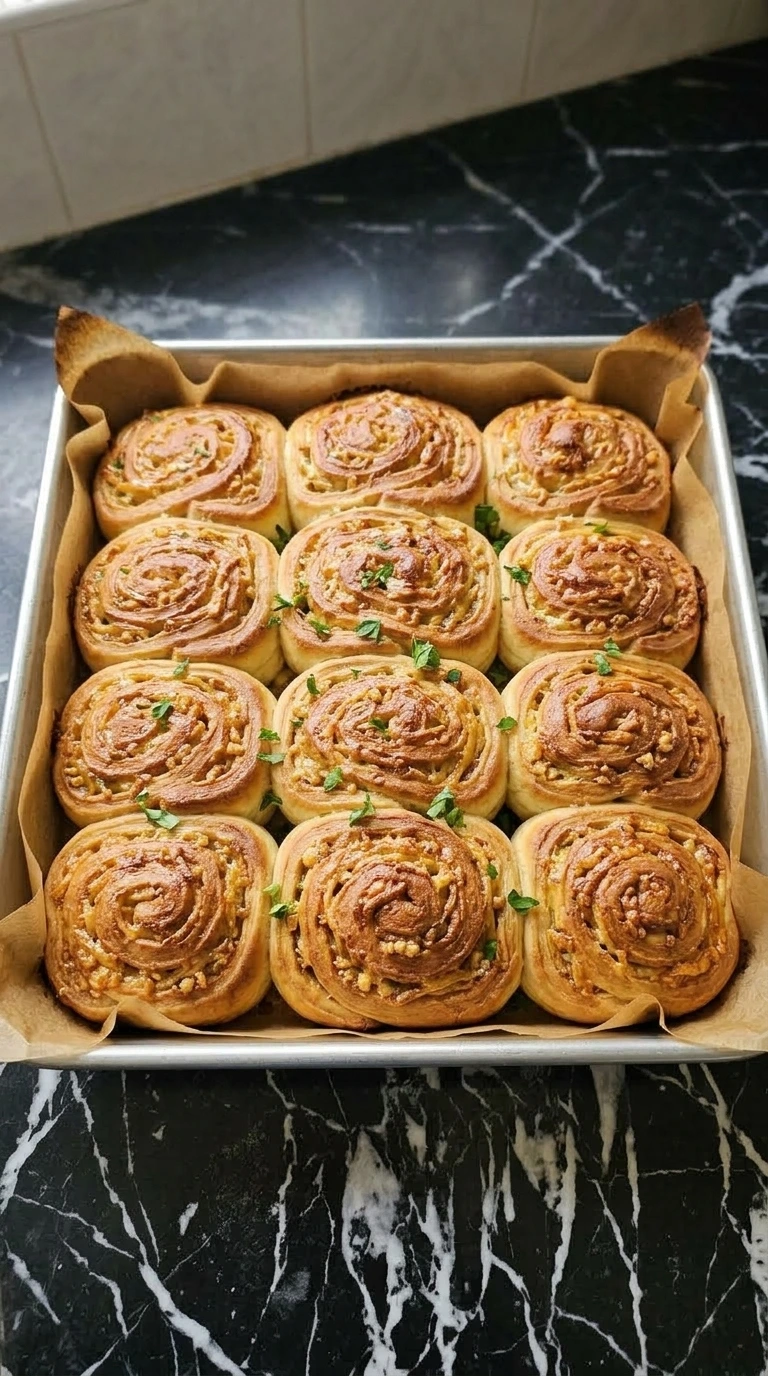
Slide the baking pan into the center of your 375°F preheated oven. Bake the rolls for exactly 25 to 30 minutes without opening the oven door during the first half of cooking. The high heat will trigger a rapid rise before the crust sets permanently. Remove the pan from the oven when the internal temperature of the center dough reaches 190°F.
Scatter the finely chopped Italian flat-leaf parsley across the hot surface immediately. The pale unbaked rounds will swell and crowd together until they form a solid sheet of beautiful rolls. The tops will turn a deep golden-brown color while the exposed mozzarella cheese bubbles and caramelizes into dark amber spots. You will hear a soft sizzling sound from the rendered butter and the rich smell of toasted garlic will fill the room.
(My first batch went into a 425°F oven and the top set before the center cooked through. 375°F is the fix. ) Pull the bread out too early and the inner layers will remain doughy and wet. Let the crust color deepen significantly before removing from heat, high baking temperatures caramelize the surface sugars to build deep savory flavors.
Tip: Let the hot bread rest in the pan for five minutes so the melted cheese sets slightly before serving.
Tips and Tricks
- Keep your water temperature between 105°F and 115°F because hot water kills yeast instantly.
- Mince fresh garlic cloves right before assembly to preserve the strongest flavor compounds.
- Spoon your flour into the measuring cup instead of scooping directly to avoid dense heavy dough.
- Bake the bread until the internal center temperature hits 190°F to ensure it is fully set.
- Use low-moisture cheese rather than fresh mozzarella because fresh cheese releases too much liquid during baking.
- Let the dough rise in a completely draft-free spot like an unlit oven with the light turned on.
- Add one tablespoon of dried Italian seasoning to the butter mixture for a more complex herbal .
- Sprinkle one-quarter cup of grated parmesan cheese over the top during the last five minutes of baking.
- Mix one teaspoon of red pepper flakes into the garlic filling to create a subtle spicy kick.
Variations to Try
- unbleached all-purpose flour: Bob’s Red Mill 1-to-1 gluten-free baking flour — The dough becomes noticeably less elastic and slightly more delicate to roll out because it lacks natural gluten proteins.
- unsalted butter: extra virgin olive oil — Use three tablespoons instead of a half cup because the liquid fat absorbs differently and yields a crispier texture.
- low-moisture mozzarella cheese: sharp cheddar cheese — The flavor becomes much bolder and tangier while the melting profile changes to a oilier consistency.
- warm water: whole milk — The fats and sugars in the milk create a softer crumb structure and a richer dairy flavor profile.
Storage Tips
Store any leftover garlic bread rolls in an airtight container at room temperature for up to three days. Do not refrigerate the bread because the cool air draws out moisture and makes the crumb stale quickly.
You can freeze the baked rolls for up to two months by wrapping them tightly in heavy-duty aluminum foil. Reheat individual rolls in a 350°F oven for 8 to 10 minutes until the cheese melts completely.
Avoid using the microwave because it makes the dough rubbery and tough within minutes. Check for any small gray mold spots or a sour off-smell before eating older leftovers.
Garlic Bread
Ingredients
- 3.25 cups unbleached all-purpose flour Provides the structural gluten base needed for a soft chewy crumb.
- 2.25 teaspoons active dry yeast Leavens the dough to create a light and fluffy interior texture.
- 1.5 teaspoons fine sea salt Enhances the natural flavors of the dough and regulates yeast growth.
- 0.5 cup unsalted butter Softened to room temperature for smooth spreading across the dough sheet.
- 6 cloves white garlic Finely minced to deliver a sharp and classic savory aroma.
- 1.5 cups low-moisture mozzarella cheese Shredded finely to create gooey melted pockets between the bread layers.
- 0.25 cup Italian flat-leaf parsley Finely chopped to add a fresh earthy color contrast at the very end.
- 1.25 cups warm water Kept around 110°F to hydrate the flour and wake up the yeast.
Instructions
- Combine the warm water and active dry yeast in your mixing bowl. Let it sit at a warm room temperature of about 75°F for exactly 5 minutes until it bubbles. Whisk the unbleached all-purpose flour and fine sea salt together before adding them to the liquid. Turn the dough onto a clean surface and press firmly with the heel of your hand. Push forward then fold the dough back over itself in a smooth rhythmic motion. You will see the wet shaggy mixture slowly transform into a smooth elastic ball over 8 to 10 minutes. The surface will lose its stickiness and it will spring back when pressed gently. You will smell the sweet earthy scent of active yeast developing as you work the flour proteins. (I tried using cold water during my first test run and the yeast completely refused to activate. Stick to warm water around 110°F for the best results.) Miss this kneading window and the gluten network will not develop properly. Your finished bread will turn out dense and flat instead of light and airy. Knead the dough thoroughly until smooth, strong gluten structures trap carbon dioxide gas so the bread rises high.

- Dust your work surface with a small handful of flour so the dough does not stick. Press the proofed dough flat with your hands then use a rolling pin to flatten it into a large rectangle. Roll from the center outward with even downward pressure until the sheet is about one-quarter inch thick. Use a pastry brush to spread the softened unsalted butter evenly across the entire surface. Sprinkle the minced white garlic and shredded low-moisture mozzarella cheese edge to edge. The pale dough rectangle will look heavily textured once you scatter the white cheese strands. The golden bits of minced garlic will speckle the surface while the soft butter creates a glossy sheen underneath. You will immediately smell the sharp pungent aroma of fresh garlic mixing with the rich dairy notes of the butter. Roll the dough too thin and the heavy filling will tear through the bottom layer during assembly. Keep the thickness consistent across the entire sheet, uniform dough sheets ensure the rolls bake at the exact same rate in the oven.

- Lift the long edge of the dough sheet closest to you and fold it tightly over the cheese filling. Roll the dough upward away from yourself into a snug cylinder shape while keeping the tension firm. Pinch the final seam tightly against the log with your fingers to lock the cheese inside. Use a sharp chef knife to slice the log into twelve equal rounds using gentle sawing motions. You will see a long smooth beige log transform into individual circular rounds with distinct concentric spirals. The white lines of shredded cheese and yellow garlic bits will show clearly between the coiled layers of pale dough. A small amount of cheese might tumble onto the cutting board during slicing. Squeeze the log too hard while cutting and you will crush the delicate internal layers together. Use a very sharp knife with minimal downward force, clean cuts preserve the spiral definition so the rolls bake into beautiful distinct shapes.

- Slide the baking pan into the center of your 375°F preheated oven. Bake the rolls for exactly 25 to 30 minutes without opening the oven door during the first half of cooking. The high heat will trigger a rapid rise before the crust sets permanently. Remove the pan from the oven when the internal temperature of the center dough reaches 190°F. Scatter the finely chopped Italian flat-leaf parsley across the hot surface immediately. The pale unbaked rounds will swell and crowd together until they form a solid sheet of beautiful rolls. The tops will turn a deep golden-brown color while the exposed mozzarella cheese bubbles and caramelizes into dark amber spots. You will hear a soft sizzling sound from the rendered butter and the rich smell of toasted garlic will fill the room. (My first batch went into a 425°F oven and the top set before the center cooked through. 375°F is the fix.) Pull the bread out too early and the inner layers will remain doughy and wet. Let the crust color deepen significantly before removing from heat, high baking temperatures caramelize the surface sugars to build deep savory flavors.

Notes
Nutrition
FAQ
Yes you can prepare the yeast dough up to 24 hours in advance. Place the kneaded dough inside a greased bowl and cover it tightly with plastic wrap before storing it in the refrigerator. The cool temperature slows the fermentation process while developing a deeper . Bring the dough back to room temperature for about one hour before rolling it out.
This common problem usually happens if your water was too hot or if you did not knead the dough long enough. Water above 120°F kills the yeast completely so the bread cannot rise. Skipping the full 8 minutes of kneading prevents the gluten network from forming properly. Make sure your yeast bubbles during the initial activation step.
Yes you can freeze the fully baked rolls for up to three months with great results. Let the bread cool completely to room temperature before wrapping the entire pan tightly in two layers of plastic wrap. Add a final layer of aluminum foil to prevent freezer burn. Thaw the bread on the counter before reheating it in the oven.
You can substitute two teaspoons of garlic powder mixed directly into the softened butter if fresh cloves are unavailable. The flavor will be more uniformly distributed but it will lack the sharp pungent bite of fresh minced garlic. Avoid using garlic salt because it will make the bread far too salty.
Brush the tops of the rolls with a extra tablespoon of melted butter immediately after pulling them out of the oven. Cover the hot baking pan loosely with a clean kitchen towel for five minutes. The trapped steam softens the outer crust while keeping the interior wonderfully moist and tender.
In Conclusion
One of my signature recipes! This is a garlic bread made the traditional home-baked way, with a slow proofed dough and a rich garlic butter sauce. No generic store-bought loaves, that’s the quick shortcut version.
Though it requires patience to rise, it is worth every minute. The interior crumb is melt-in-your-mouth tender and the cheese topping is rich and thick. Makes 12 individual rolls or 6 normal servings.
This bread has 12 gorgeous layers of dough spirals packed tightly with savory garlic and cheese, then finished with a fresh parsley topping. You could stretch it to 16 smaller rolls. If making a larger batch for a crowd, scale up the recipe by fifty percent and use a very large pan!
You might not know this, but modern garlic bread actually started in the United States. Italian immigrants couldn’t find the traditional olive oil they used back home, but local butter was everywhere. So, they made a quick swap and changed dinner forever.