Burgers
When you’re greedy like me and want proper beefy flavour in every bite, not just a faint whiff of “vaguely tastes like meat …. maybe? ”, making the perfect backyard burger suddenly becomes harder than it sounds. I really thought it would be simple: throw some ground meat together, shape it, and toss it on the heat.
But every option had problems. Lean meat dried out instantly while thick patties stayed raw in the middle. Adding egg or breadcrumbs turned the texture into rubbery meatloaf and buying pre-made patties from the store always left me with bland, hockey-puck results. Grilling them over open flames sometimes caused massive flare-ups that charred the outside before the cheese could even start to sweat.
That is why I started experimenting with a hot cast iron surface and high-fat meat blends to change the game entirely. If you want a complete meal for your next weekend gathering, pair these with my crispy Loaded Fries or a fresh bowl of deli-style Coleslaw to balance out the rich flavors.
The Science Behind It
Using an 80/20 ground chuck blend guarantees there is enough fat to keep the meat juicy while cooking over intense heat. Searing at medium-high heat on cast iron triggers the Maillard reaction rapidly, which locks in flavor and creates a thick crust.
The trapped steam method melts the cheddar instantly without overcooking the beef underneath. If you want to master more classic comfort food techniques, check out my recipe for a perfectly crusted Steak with Garlic Butter to see how heat control transforms simple proteins.
Ingredient List

- ground chuck beef: Look for an 80/20 lean-to-fat ratio to ensure maximum juiciness during searing.
- sharp cheddar: Real block cheese sliced thick for a rich, gooey melt over the hot meat.
- thick-cut bacon: Cooked until completely crispy to add a smoky crunch to the layers.
- brioche buns: Split and toasted lightly in butter for a soft, pillowy structure.
- green leaf lettuce: Washed and dried thoroughly to act as a crisp barrier for the bun.
- red onion: Cut into thin, sharp rings to cut through the rich fats.
- barbecue sauce: A smoky, sweet variety used to glaze the top and bottom layers.
- avocado oil: Used to coat the skillet due to its extremely high smoke point.
- fine sea salt: Applied generously to the raw exterior to build a savory crust.
- coarse black pepper: Cracked fresh to provide a sharp, rustic bite to the meat.
Equipment
- Cast iron skillet: A heavy-bottomed 10-inch cast iron skillet distributes intense heat evenly across the surface so the beef doesn’t scorch — a thin-walled aluminum pan will create hot-spots and burn the surface before the interior cooks.
- Metal spatula: A sturdy metal spatula with a sharp, flat edge allows you to slide completely under the searing patty to flip it cleanly — a flimsy plastic spatula will bend and tear away that beautiful caramelized outer crust.
How to Make It
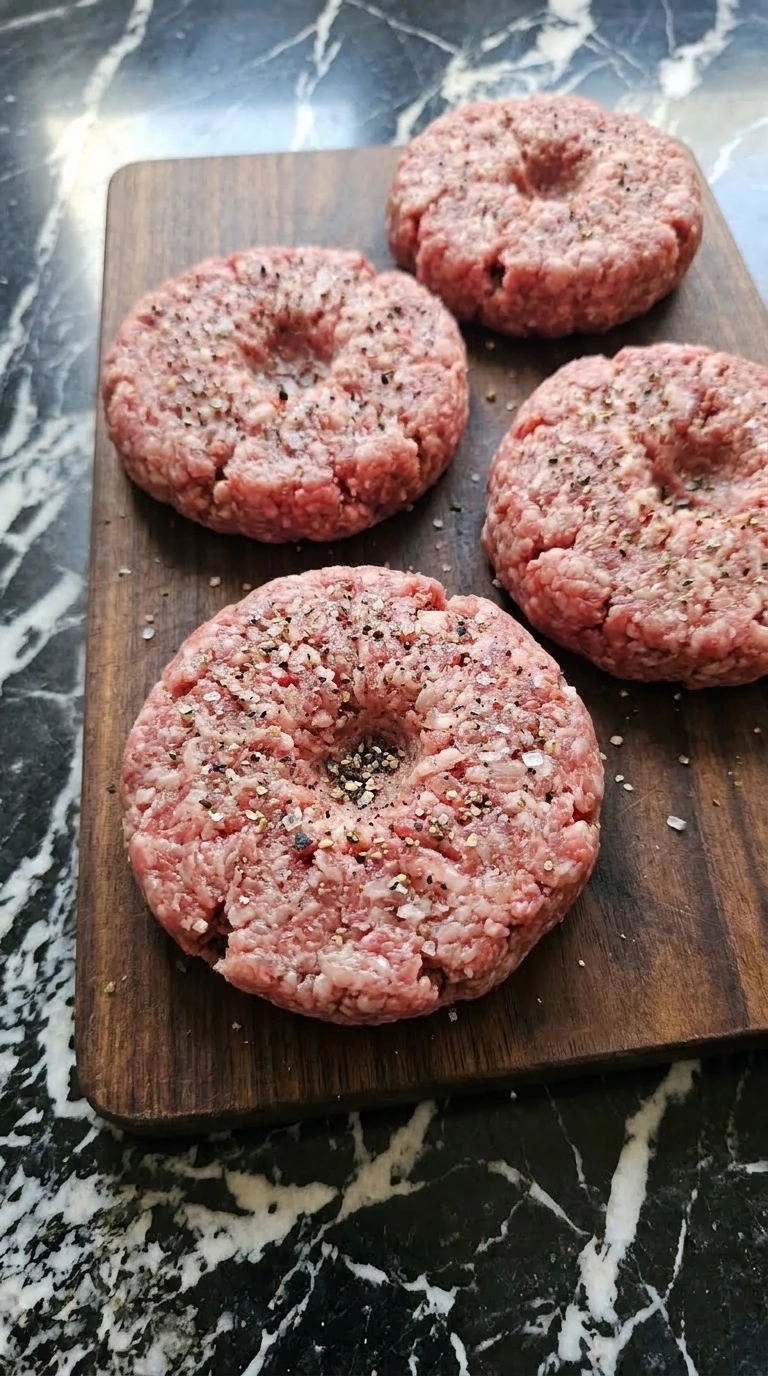
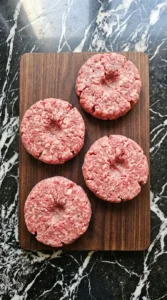
Step 1: Shape the beef patties
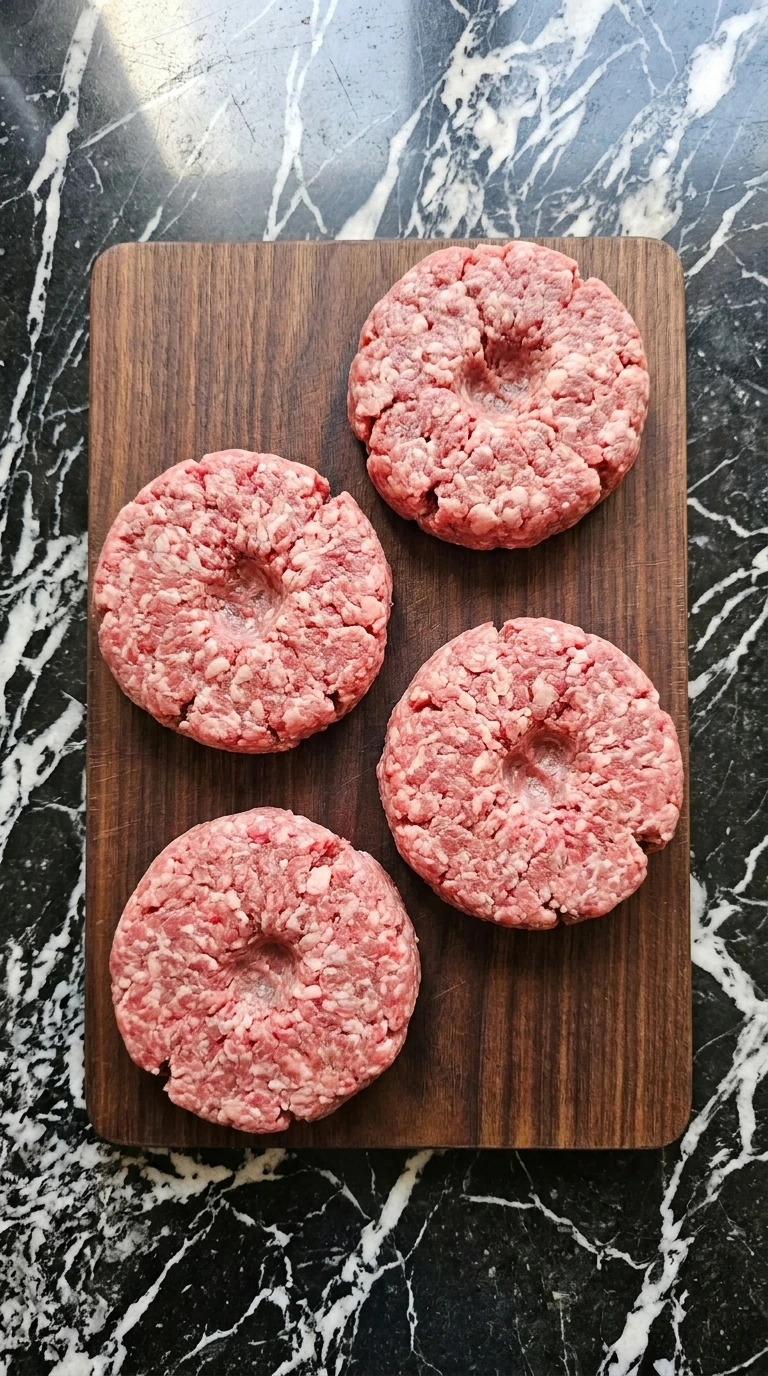
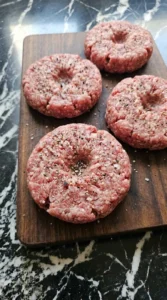
Divide your chilled ground chuck beef into four equal portions on a clean wooden cutting board. Press each portion gently into a ball, then flatten it into a uniform disc that is roughly 4. 5 inches wide and 1 inch thick.
Do not overwork the meat during this process or the proteins will bind too tightly. Use your thumb to press a shallow indentation right into the center of each patty. This little dimple keeps the meat from puffing up into a basketball shape while it cooks.
(I tried skipping the dimple on my first batch and the burgers swelled up so much that all the toppings slid right off into the pan. ) Forming the discs slightly wider than your buns ensures a perfect fit after cooking. The meat naturally shrinks as the fat renders out over the high heat.
Tip: Keep your hands wet with cold water while shaping the patties to stop the fat from sticking to your skin.
Step 2: Season the meat generously
Sprinkle your fine sea salt and coarse black pepper evenly over both sides of the shaped patties. Hold your hand about 10 inches above the meat to get a perfectly uniform scatter instead of heavy clumps. Do this step right before the meat hits the hot skillet.
Letting salt sit on raw meat too long draws out moisture and alters the proteins. It creates a dry, cured texture that stops you from getting a tender bite. (My first kitchen test involved salting the meat an hour early and the resulting patties turned out completely dry and dense.
) Apply the seasoning liberally until the surface is covered in fine crystals. This aggressive crust builds a deeply savory exterior during the high-heat searing process.
Tip: Only season the outside of the patties rather than mixing salt into the ground beef to keep the interior tender.
Step 3: Sear the beef patties
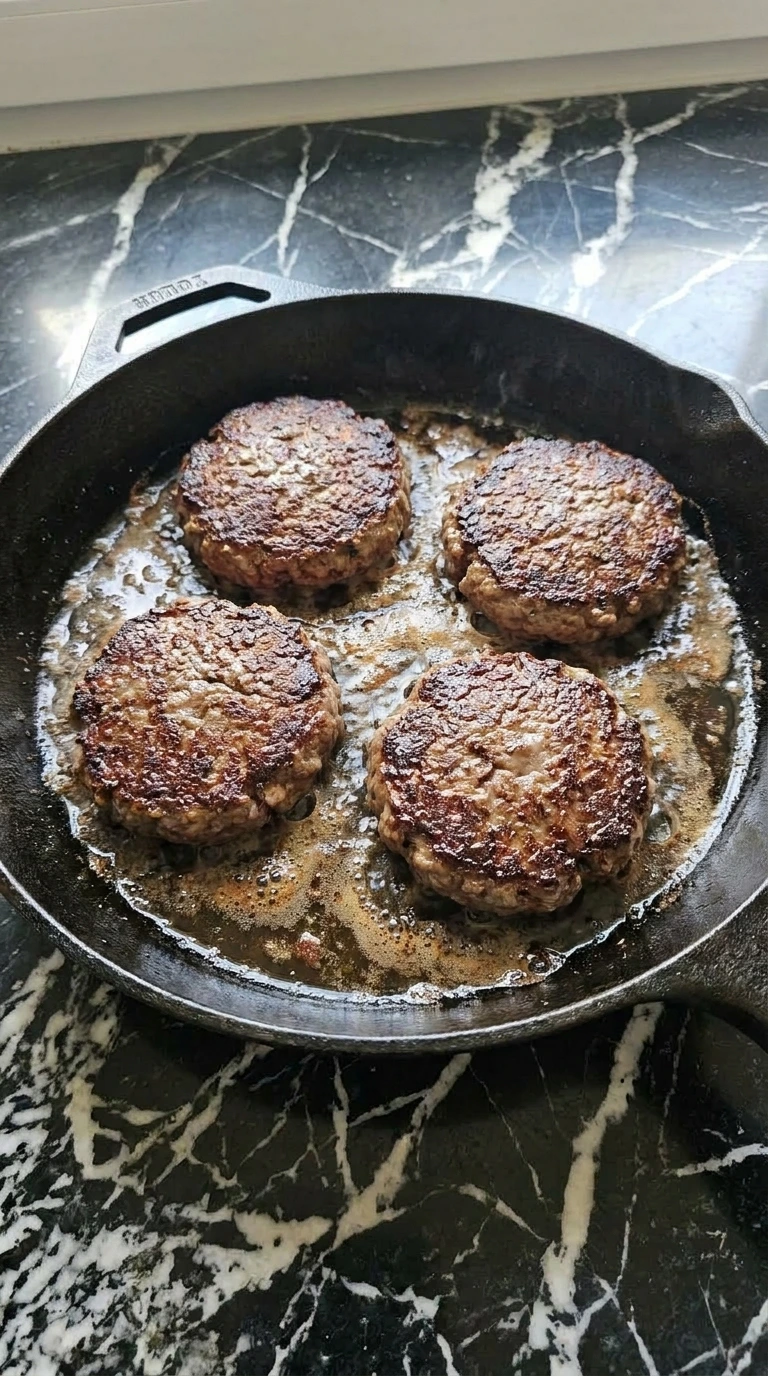
Place the seasoned patties into a preheated 10-inch round cast-iron skillet over medium-high heat (about 7 on a 10-dial) with a splash of avocado oil. Cook the meat without moving it for exactly 3 minutes until a deep, dark brown crust forms on the bottom. You will hear a loud, aggressive sizzle the moment the beef contacts the hot metal surface.
Flip the patties carefully using a sturdy metal spatula to reveal the beautifully browned exterior. The edges should look crisp and caramelized while the fat renders and bubbles rapidly around the base of each disc. Miss this timing window and you will lose the crust entirely or scorch the delicate juices.
Cook for another 2 minutes on the second side to reach a safe, juicy medium-rare finish. Cooking over high heat triggers the Maillard reaction rapidly without drying out the inside.
Tip: Never press down on the patties with your spatula while they cook or you will squeeze out all the juices.
Step 4: Melt the cheddar cheese
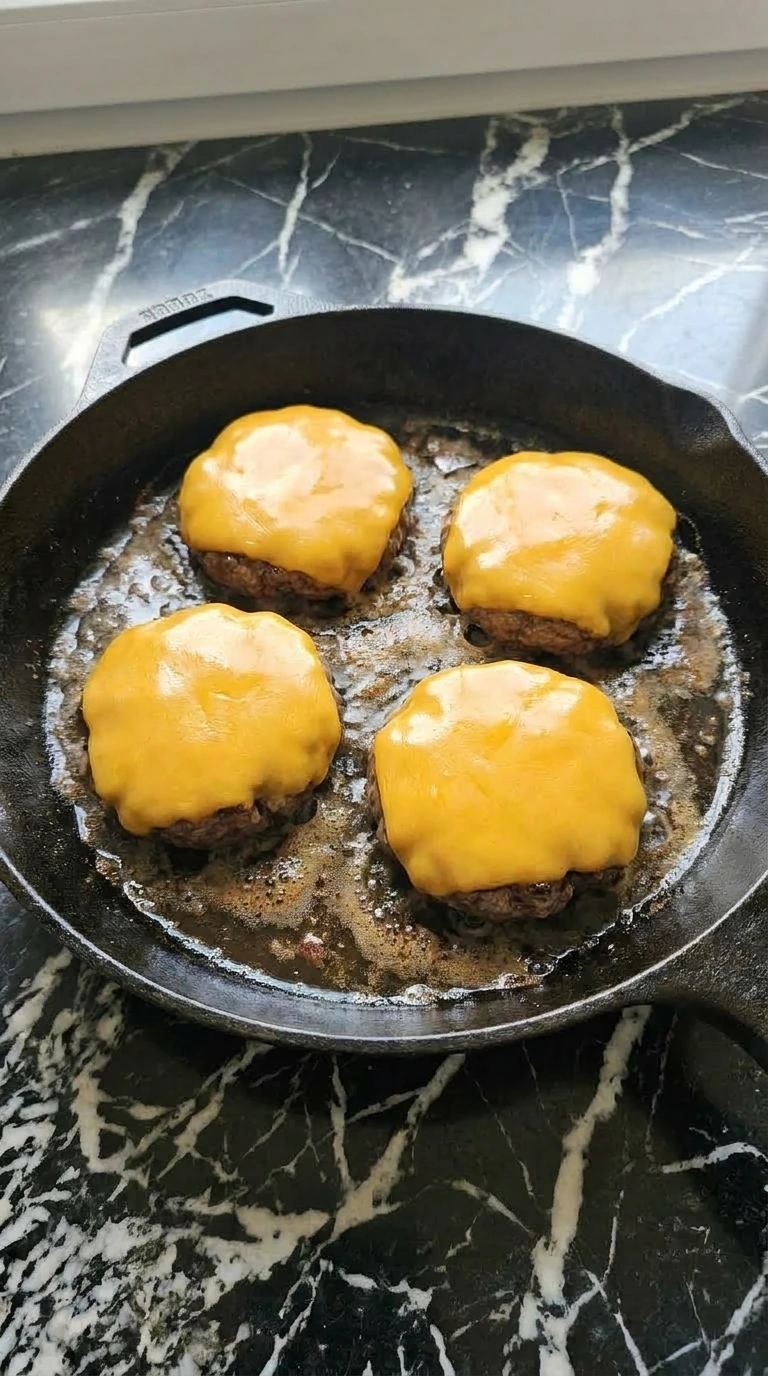
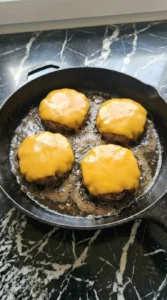
Lay a thick slice of sharp cheddar cheese over the top of each hot beef patty inside the skillet. Pour a single tablespoon of water directly into the empty space of the pan and cover it immediately with a tight lid. The trapped steam will melt the dairy into a smooth, glossy blanket in exactly 45 seconds.
Remove the skillet from the heat source completely once the cheese is fully melted and draped over the sides of the meat. The cheddar should look velvety and molten, hugging the contours of the deeply browned crust perfectly. Go past 60 seconds and the cheese will separate into a greasy mess.
Let the burgers rest right in the warm pan for 2 minutes before assembling. Resting off the heat gives the internal juices time to redistribute throughout the meat fibers.
Tip: Use a splash of water and a lid to create instant steam for that perfect restaurant-style melt.
Step 5: Assemble the final burgers

Place the toasted bottom brioche buns onto individual white ceramic plates and spread a thin layer of barbecue sauce across the surface. Layer a single leaf of fresh green leaf lettuce and two thin rings of red onion onto each base. This green barrier keeps the bottom bun from turning soggy from the meat drippings.
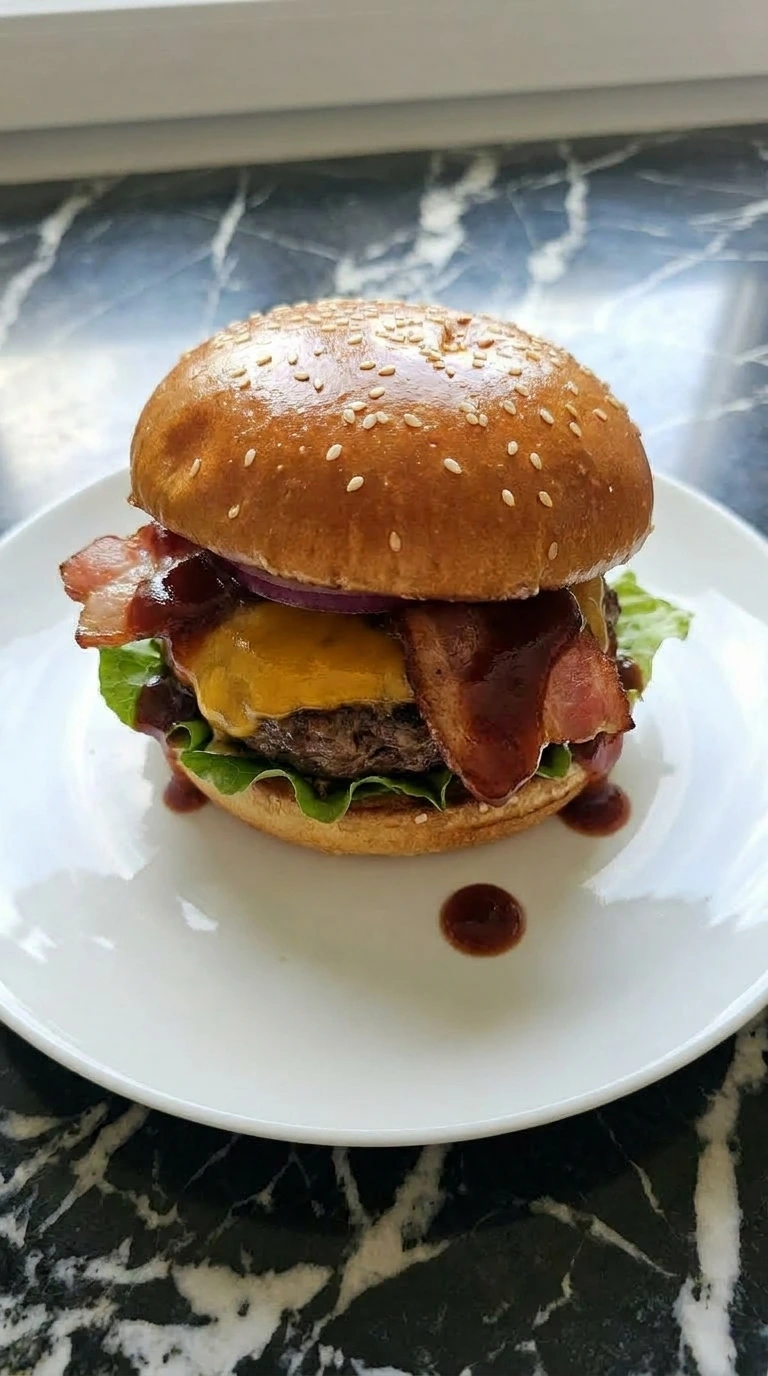
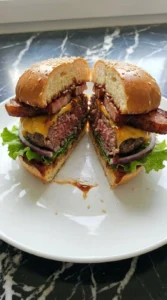
Transfer the cheese-covered beef patties carefully from the skillet and rest them right on top of the onions. Pile two crispy strips of thick-cut bacon over the melted cheddar and drizzle a final spoonful of sweet barbecue sauce across the top. Crown each assembly with the top bun and press down gently to anchor the layers.
The final stack should look tall and rustic with the melted cheese, dark sauce, and wavy bacon edges peeking out naturally. Eat these immediately while the buns are warm and the juices are flowing freely.
Tip: Putting the lettuce under the hot patty creates a waterproof shield that preserves your crispy bun texture.
My Favorite Tips
- Keep the ground beef as cold as possible right up until you shape it because warm fat smears and creates a dense burger.
- Press a deep dimple into the center of each raw disc to stop the patty from dome-shaping during cooking.
- Toast the brioche buns in a dry pan for exactly 60 seconds until a golden ring forms around the rim.
- Only salt the patties immediately before they hit the hot cast iron skillet to preserve the tender meat texture.
- Use a heavy metal turner to scrape directly under the meat crust so you do not leave the flavor behind.
- Add a splash of water and cover the pan to create a steam chamber that melts cheese in seconds flat.
- Rest the cooked cheeseburgers for two minutes before assembly to let the savory juices settle back into the meat.
- Place the fresh lettuce underneath the beef patty to keep the bottom bun from absorbing moisture and going soggy.
- Add a tablespoon of spicy chili flakes and sliced jalapeños to the onion layer for a hot pepper jack twist.
- Mix a spoonful of truffle oil into the mayonnaise and swap cheddar for swiss cheese to create an upscale mushroom burger.
- Drizzle sweet honey glaze and top with grilled pineapple rings for a tropical island variation that kids love.
Make It Your Own
- ground chuck beef: ground turkey — Use a 93/7 blend but add a tablespoon of grated butter because turkey dries out much faster than beef.
- sharp cheddar: provolone — Melts even smoother than cheddar but offers a milder, less tangy flavor profile.
- brioche buns: gluten-free buns — Toast them longer with extra butter because they tend to be denser and crumble easily when wet.
- barbecue sauce: yellow mustard — Provides a sharp, acidic punch instead of sweet smokiness, which pairs wonderfully with my savory Grilled Sausage recipe.
How to Store
Store any leftover cooked beef patties inside an airtight glass container in the refrigerator for up to three days. Do not store the burgers with the buns or fresh toppings already attached because the lettuce will wilt and the bread will absorb liquid.
You can also freeze the cooked patties by wrapping them tightly in plastic wrap for up to two months. Reheat the cold patties inside a preheated oven at 350°F for roughly 8 to 10 minutes until the center is warm.
Add two tablespoons of beef broth to the bottom of the baking dish and cover it with foil to keep the meat from drying out. Check the surface carefully for any sour odors or slimy textures before serving because those are clear indicators of spoilage.
Burgers
Ingredients
- 1.5 pounds ground chuck beef Look for an 80/20 lean-to-fat ratio to ensure maximum juiciness during searing.
- 4 thick slices sharp cheddar Real block cheese sliced thick for a rich, gooey melt over the hot meat.
- 8 strips thick-cut bacon Cooked until completely crispy to add a smoky crunch to the layers.
- 4 whole brioche buns Split and toasted lightly in butter for a soft, pillowy structure.
- 4 large leaves green leaf lettuce Washed and dried thoroughly to act as a crisp barrier for the bun.
- 1 medium red onion Cut into thin, sharp rings to cut through the rich fats.
- 0.5 cups barbecue sauce A smoky, sweet variety used to glaze the top and bottom layers.
- 1 tablespoon avocado oil Used to coat the skillet due to its extremely high smoke point.
- 1 tablespoon fine sea salt Applied generously to the raw exterior to build a savory crust.
- 1 teaspoon coarse black pepper Cracked fresh to provide a sharp, rustic bite to the meat.
Instructions
- Divide your chilled ground chuck beef into four equal portions on a clean wooden cutting board. Press each portion gently into a ball, then flatten it into a uniform disc that is roughly 4.5 inches wide and 1 inch thick. Do not overwork the meat during this process or the proteins will bind too tightly. Use your thumb to press a shallow indentation right into the center of each patty. This little dimple keeps the meat from puffing up into a basketball shape while it cooks. (I tried skipping the dimple on my first batch and the burgers swelled up so much that all the toppings slid right off into the pan.) Forming the discs slightly wider than your buns ensures a perfect fit after cooking. The meat naturally shrinks as the fat renders out over the high heat.
- Sprinkle your fine sea salt and coarse black pepper evenly over both sides of the shaped patties. Hold your hand about 10 inches above the meat to get a perfectly uniform scatter instead of heavy clumps. Do this step right before the meat hits the hot skillet. Letting salt sit on raw meat too long draws out moisture and alters the proteins. It creates a dry, cured texture that stops you from getting a tender bite. (My first kitchen test involved salting the meat an hour early and the resulting patties turned out completely dry and dense.) Apply the seasoning liberally until the surface is covered in fine crystals. This aggressive crust builds a deeply savory exterior during the high-heat searing process.
- Place the seasoned patties into a preheated 10-inch round cast-iron skillet over medium-high heat (about 7 on a 10-dial) with a splash of avocado oil. Cook the meat without moving it for exactly 3 minutes until a deep, dark brown crust forms on the bottom. You will hear a loud, aggressive sizzle the moment the beef contacts the hot metal surface. Flip the patties carefully using a sturdy metal spatula to reveal the beautifully browned exterior. The edges should look crisp and caramelized while the fat renders and bubbles rapidly around the base of each disc. Miss this timing window and you will lose the crust entirely or scorch the delicate juices. Cook for another 2 minutes on the second side to reach a safe, juicy medium-rare finish. Cooking over high heat triggers the Maillard reaction rapidly without drying out the inside.

- Lay a thick slice of sharp cheddar cheese over the top of each hot beef patty inside the skillet. Pour a single tablespoon of water directly into the empty space of the pan and cover it immediately with a tight lid. The trapped steam will melt the dairy into a smooth, glossy blanket in exactly 45 seconds. Remove the skillet from the heat source completely once the cheese is fully melted and draped over the sides of the meat. The cheddar should look velvety and molten, hugging the contours of the deeply browned crust perfectly. Go past 60 seconds and the cheese will separate into a greasy mess. Let the burgers rest right in the warm pan for 2 minutes before assembling. Resting off the heat gives the internal juices time to redistribute throughout the meat fibers.
- Place the toasted bottom brioche buns onto individual white ceramic plates and spread a thin layer of barbecue sauce across the surface. Layer a single leaf of fresh green leaf lettuce and two thin rings of red onion onto each base. This green barrier keeps the bottom bun from turning soggy from the meat drippings. Transfer the cheese-covered beef patties carefully from the skillet and rest them right on top of the onions. Pile two crispy strips of thick-cut bacon over the melted cheddar and drizzle a final spoonful of sweet barbecue sauce across the top. Crown each assembly with the top bun and press down gently to anchor the layers. The final stack should look tall and rustic with the melted cheese, dark sauce, and wavy bacon edges peeking out naturally. Eat these immediately while the buns are warm and the juices are flowing freely.
Notes
Questions I Get Asked
Meat fibers naturally contract and tighten as they heat up, which forces the center to puff upward into a dome shape. You can easily fix this common mistake by pressing a wide, shallow thumb indentation into the middle of each raw patty before cooking. The dimple flattens out perfectly as the meat cooks, leaving you with a level burger that holds toppings without sliding.
You can easily prep and shape the beef discs up to 24 hours before you plan to cook them. Arrange the raw patties in a single layer on a sheet tray separated by squares of wax paper, then wrap the entire tray tightly in plastic film. Keep them chilled in the coldest part of your fridge and do not add any salt until right before they hit the heat.
Heavy smoke means your pan temperature is exceeding the smoke point of your cooking oil or the rendered beef fat. Immediately lower your stovetop heat down by two increments and slide the skillet partially off the burner to cool the metal slightly. Always use high-smoke oils like avocado or canola oil rather than extra virgin olive oil for this high-heat process.
These raw chuck patties freeze beautifully for quick weeknight dinner options later in the month. Wrap each individual disc tightly in heavy-duty aluminum foil, then store them together inside a zip-top freezer bag for up to three months. Thaw the meat completely inside the refrigerator overnight before seasoning and searing on the hot cast iron surface.
The safest and most accurate method is to insert an instant-read digital meat thermometer straight through the side into the center of the patty. Look for a reading of 135°F for a juicy medium-rare center or 145°F for a traditional medium finish. Avoid cutting into the meat while it cooks because that opens an escape path for all the savory internal moisture.
Final Thoughts
Every time I make this I think about the first time I tried it, nervous about screwing it up, convinced I’d need more experience. Turns out it’s one of those dishes that forgives you for being a beginner.
You can mess up the timing like I did those first three attempts and it still turns out good. If you try it, leave me a comment below, I read every single one.
And if you enjoyed this, check out some of my other recipes that use similar techniques.
Did you know the very first American burgers weren’t actually served on those classic round buns? It’s true. Back then, specialized burger buns hadn’t even been invented yet, so people just slapped their meat right between two simple slices of regular white sandwich bread.