Grilled Chicken Wraps
You need a fast lunch option that actually tastes good and keeps you full until dinner time. These grilled chicken wraps are my absolute favorite solution when the afternoon gets chaotic and everyone is starving. We make them at least twice a week because they are incredibly fast but they still feel like a proper meal. I used to buy pre-made wraps at the grocery store deli counter but they always ended up soggy and sad.
The secret to a truly great wrap is building it with hot charred meat and crisp cold vegetables. If you are planning a bigger weekend spread you can serve these alongside my classic Coleslaw for the perfect crunchy pairing.
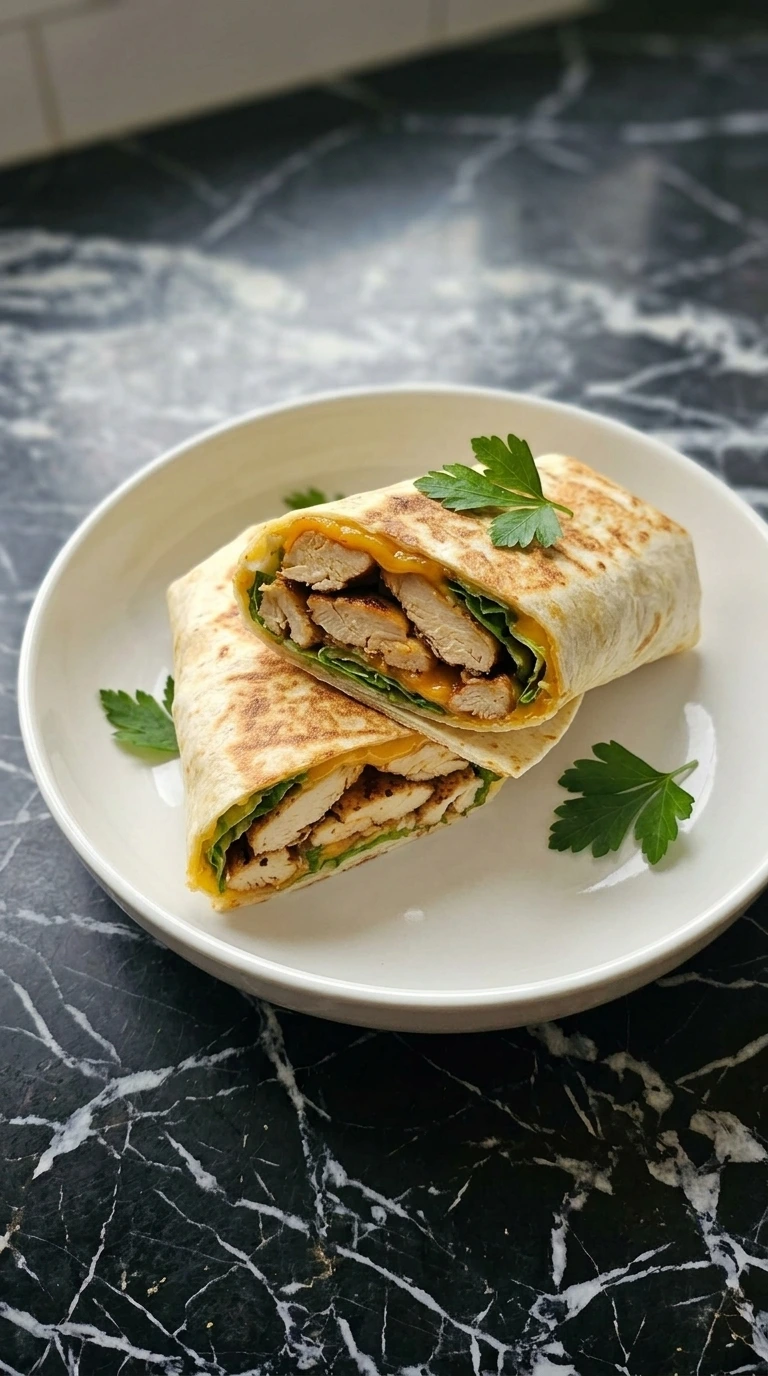
This version uses a simple marinade that builds a beautiful crust on the meat in just a few minutes. You don’t need to spend hours prepping ingredients or waiting for things to chill. Just season the meat then sear it hot and roll everything into a tight flour tortilla.
Why This Recipe Works
Searing the boneless chicken breast at medium-high heat on a cast iron surface creates rapid browning without drying out the interior meat.
Slicing the meat against the grain after a strict five minute rest preserves the internal juices so they stay inside the wrap.
Adding a layer of sharp cheddar cheese directly against the warm meat creates a partial melt that anchors the loose romaine lettuce.
Shopping List

- boneless chicken breast: Cut into thin half inch strips for fast even cooking on the hot pan surface.
- large flour tortilla: Ten inch size to provide enough surface area for rolling without tearing the sides.
- romaine lettuce: Washed and roughly chopped to add a clean crisp crunch to every single bite.
- sharp cheddar cheese: Finely shredded to ensure it melts smoothly against the warm grilled meat strips.
- extra virgin olive oil: Used to coat the meat strips so the dry spices stick perfectly during searing.
- garlic powder: Provides a deep savory base flavor that permeates the meat during the hot cook.
- smoked paprika: Adds a rich reddish color and a subtle backyard grill aroma to the stovetop meat.
Kitchen Equipment
- cast iron skillet: Retains heavy heat to create deep dark char marks on the seasoned meat strips.
- wooden cutting board: Provides a sturdy stable surface for slicing meat and chopping fresh green vegetables.
- metal tongs: Allows you to flip the hot meat strips quickly without scratching the pan surface.
How to
Step 1: Coat the chicken strips
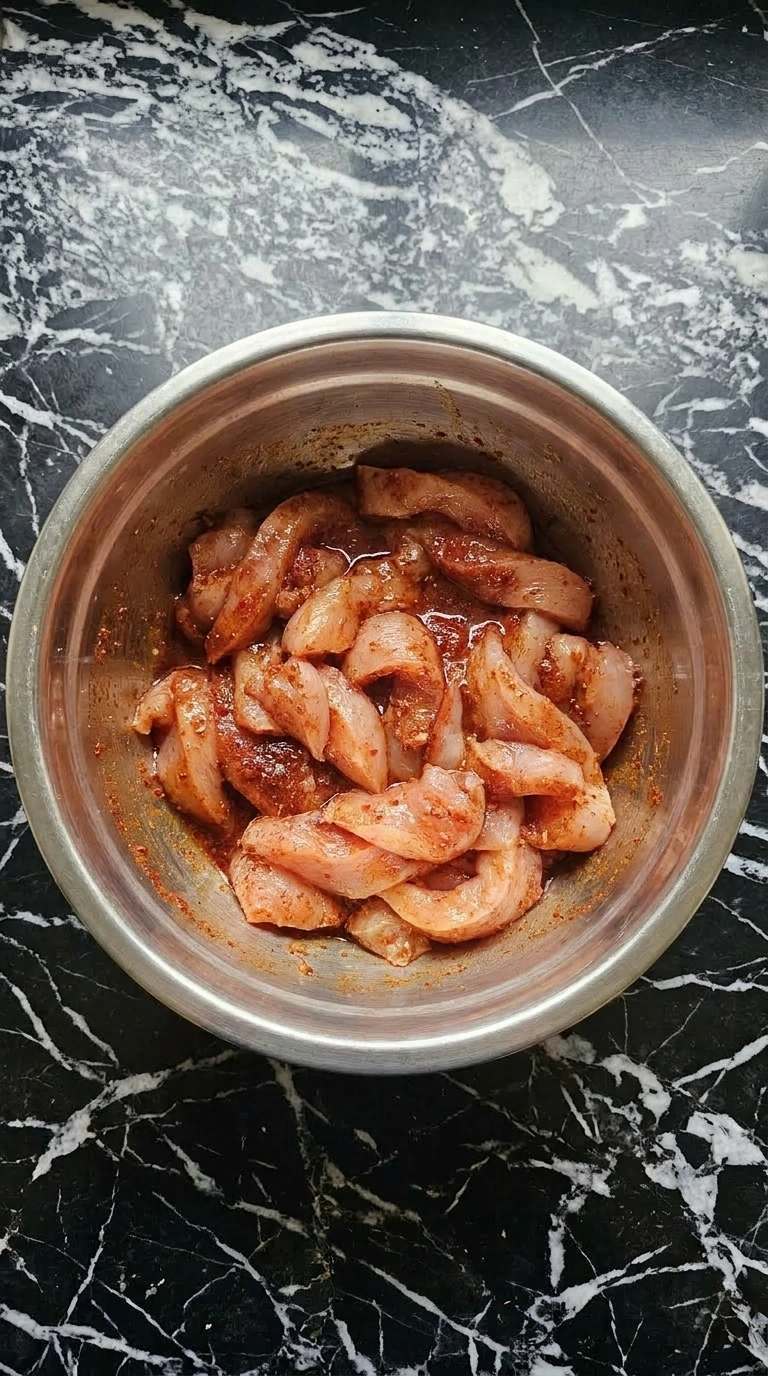
Place the sliced boneless chicken breast strips into the mixing bowl and pour the extra virgin olive oil right over the top. Sprinkle the garlic powder and smoked paprika evenly across the surface before tossing.
(I tried skipping the oil once and the spices clumped up terribly so make sure you coat every piece thoroughly). Use your hands or metal tongs to turn the meat over several times until the spice mixture forms a thick reddish paste.
You want every square inch covered so the flavors bake directly into the protein. This quick coating step replaces a long marinade time because the thin cuts absorb the seasonings instantly.
Tip: Make sure the meat strips are completely dry before adding the oil so the spices adhere tightly.
Step 2: Sear the seasoned meat
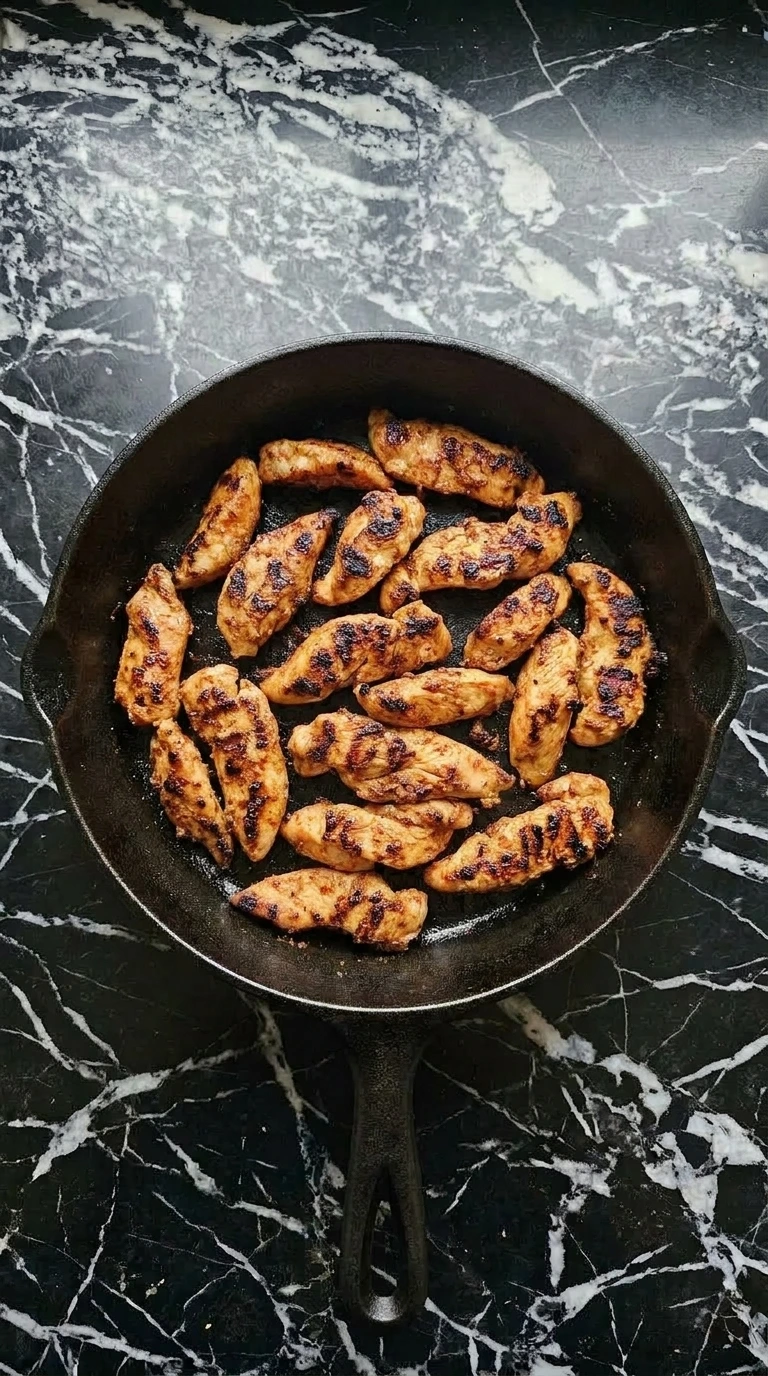
Heat your cast iron skillet over medium-high heat until a drop of water flicked onto the surface sizzles instantly. Arrange the seasoned boneless chicken breast strips in a single layer with clear space between each piece. Cook them without moving for exactly three minutes so a deep golden crust forms.
Flip each piece using your metal tongs and let the second side cook for another three minutes until firm. You will see the edges turn opaque and dark brown char spots will develop across the reddish surface. (My first batch stuck to the pan because I tried to flip them too early but they will release naturally once the crust sets).
Cook until the thickest piece reads 165°F on a digital thermometer. Remove the meat to a clean surface and let it rest for five minutes so the juices redistribute instead of leaking out.
Tip: Cook in two separate batches if your pan is small because crowding the meat will steam it instead of searing it.
Step 3: Assemble the wrap layers

Lay one large flour tortilla flat on your wooden cutting board and scatter a quarter cup of sharp cheddar cheese across the center third. Arrange four or five warm grilled boneless chicken breast strips directly over the shredded cheese.
The residual heat from the meat will soften the dairy within seconds. Pile a handful of the chopped romaine lettuce right along the top of the meat layer.
Leave a clean two inch border on the left and right sides of the round wrap. This open space is crucial because it allows you to fold the edges inward without squeezing the filling out.
Tip: Warm the tortillas in the microwave for ten seconds before building so they become pliable and won’t split.
Step 4: Roll into a tight cylinder
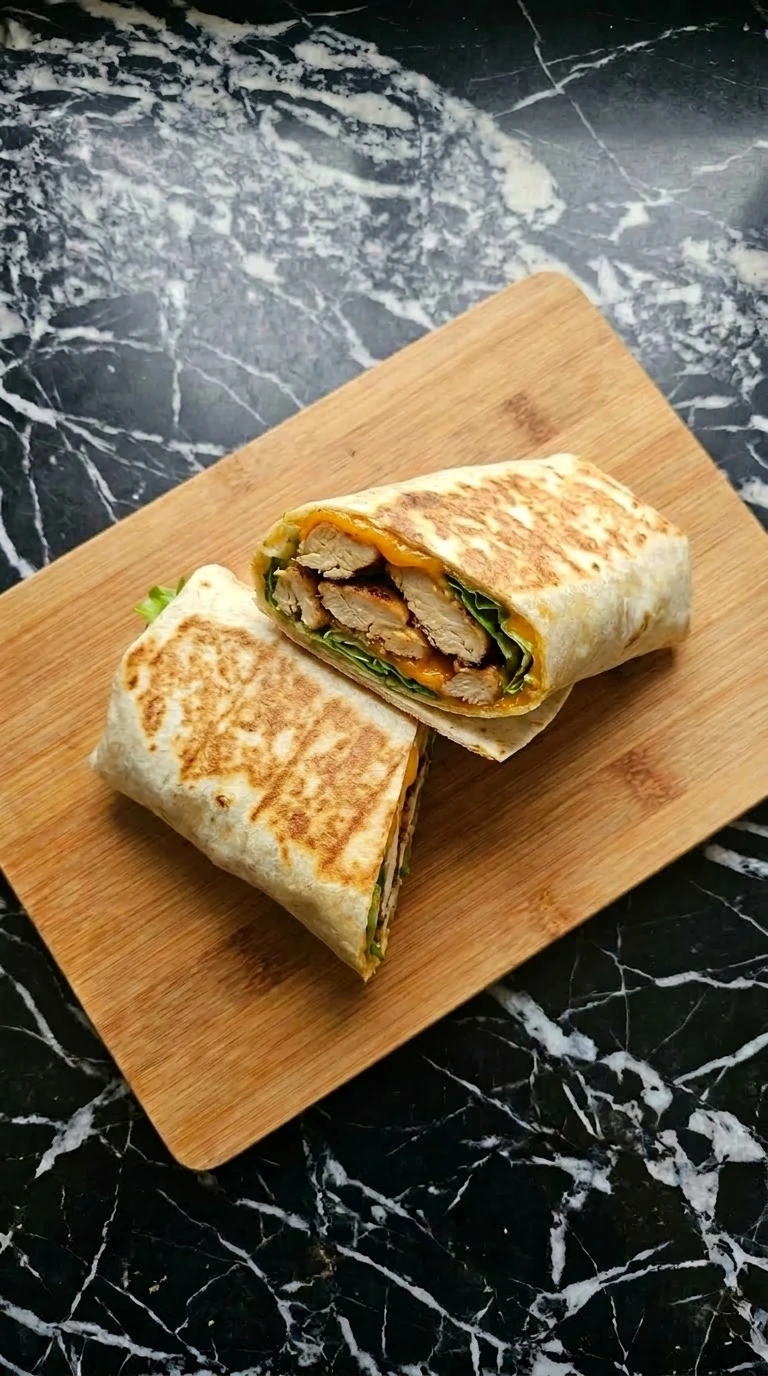
Fold the left and right sides of the large flour tortilla inward over the central filling stack. Hold those edges down with your thumbs while using your fingers to pull the bottom flap up and over the ingredients.
Tuck the tortilla tightly around the romaine lettuce and roll forward into a smooth cylinder. Press down gently on the finished wrap to seal the edge against the moist filling.
Cut the cylinder diagonally through the center using a sharp chef knife to reveal the colorful interior layers. You should see a clear distinction between the white chicken meat and the bright green lettuce.
Tip: Keep your fingers tucked tight like a burrito roll to ensure the wrap holds its shape during slicing.
Ingredient Swaps
- boneless chicken breast: boneless chicken thighs — Thighs contain more fat so they stay juicier but they require an extra two minutes of cook time to render properly.
- sharp cheddar cheese: provolone cheese slices — Provolone melts faster and offers a milder flavor profile but it lacks the sharp bite of aged cheddar.
- large flour tortilla: gluten-free wraps — Gluten-free alternatives are much less flexible so you must warm them thoroughly or they will crack during the rolling process.
- romaine lettuce: shredded green cabbage — Cabbage provides a much heavier crunch that holds up for hours making it perfect if you love my [Coleslaw](https://leagueofcooking.com/best-creamy-homemade-coleslaw/) style.
- extra virgin olive oil: avocado oil — Avocado oil has a higher smoke point which allows you to crank the heat even higher without generating kitchen smoke.
How to Store & Reheat
Store the cooked chicken strips and the fresh chopped romaine lettuce in separate airtight containers in the refrigerator for up to four days. Do not assemble the wraps ahead of time because the moisture from the greens will soften the tortilla overnight.
When you are ready to eat heat the meat strips in a dry skillet over medium heat for three minutes until warm. Assemble the wrap fresh with cold lettuce and cheese for the best texture experience.
Flour tortillas do not freeze well after rolling so consume them fresh.
Grilled Chicken Wraps
Ingredients
- 1.5 pounds boneless chicken breast Cut into thin half inch strips for fast even cooking on the hot pan surface.
- 4 count large flour tortilla Ten inch size to provide enough surface area for rolling without tearing the sides.
- 2 cups romaine lettuce Washed and roughly chopped to add a clean crisp crunch to every single bite.
- 1 cup sharp cheddar cheese Finely shredded to ensure it melts smoothly against the warm grilled meat strips.
- 2 tablespoons extra virgin olive oil Used to coat the meat strips so the dry spices stick perfectly during searing.
- 1 tablespoon garlic powder Provides a deep savory base flavor that permeates the meat during the hot cook.
- 1 teaspoon smoked paprika Adds a rich reddish color and a subtle backyard grill aroma to the stovetop meat.
Instructions
- Place the sliced boneless chicken breast strips into the mixing bowl and pour the extra virgin olive oil right over the top. Sprinkle the garlic powder and smoked paprika evenly across the surface before tossing. (I tried skipping the oil once and the spices clumped up terribly so make sure you coat every piece thoroughly). Use your hands or metal tongs to turn the meat over several times until the spice mixture forms a thick reddish paste. You want every square inch covered so the flavors bake directly into the protein. This quick coating step replaces a long marinade time because the thin cuts absorb the seasonings instantly.

- Heat your cast iron skillet over medium-high heat until a drop of water flicked onto the surface sizzles instantly. Arrange the seasoned boneless chicken breast strips in a single layer with clear space between each piece. Cook them without moving for exactly three minutes so a deep golden crust forms. Flip each piece using your metal tongs and let the second side cook for another three minutes until firm. You will see the edges turn opaque and dark brown char spots will develop across the reddish surface. (My first batch stuck to the pan because I tried to flip them too early but they will release naturally once the crust sets). Cook until the thickest piece reads 165°F on a digital thermometer. Remove the meat to a clean surface and let it rest for five minutes so the juices redistribute instead of leaking out.

- Lay one large flour tortilla flat on your wooden cutting board and scatter a quarter cup of sharp cheddar cheese across the center third. Arrange four or five warm grilled boneless chicken breast strips directly over the shredded cheese. The residual heat from the meat will soften the dairy within seconds. Pile a handful of the chopped romaine lettuce right along the top of the meat layer. Leave a clean two inch border on the left and right sides of the round wrap. This open space is crucial because it allows you to fold the edges inward without squeezing the filling out.
- Fold the left and right sides of the large flour tortilla inward over the central filling stack. Hold those edges down with your thumbs while using your fingers to pull the bottom flap up and over the ingredients. Tuck the tortilla tightly around the romaine lettuce and roll forward into a smooth cylinder. Press down gently on the finished wrap to seal the edge against the moist filling. Cut the cylinder diagonally through the center using a sharp chef knife to reveal the colorful interior layers. You should see a clear distinction between the white chicken meat and the bright green lettuce.

Notes
Nutrition
Questions I Get Asked
You can prep the individual components ahead of time but do not roll the wrap until the morning you plan to eat it. Storing an assembled wrap for more than twelve hours causes the flour tortilla to absorb moisture and turn completely mushy. Keep the meat and greens in separate containers and build the wrap in under two minutes before leaving.
Cold tortillas lose their elasticity and split along the seams when stretched around heavy fillings. Microwave the wrap on a plate covered with a damp paper towel for ten seconds to soften the starches before building. This quick steam treatment makes the wrap incredibly pliable so you can roll it tightly without any structural failure.
Rubbery meat is always the result of overcooking past the safe internal threshold. Pull the strips out of the cast iron skillet the exact moment a digital meat thermometer reads 165°F in the thickest part. Letting the meat rest for five minutes on a cutting board allows the fibers to relax and lock in the natural moisture.
Leftover pre-cooked chicken works wonderfully for a shortcut meal that requires zero pan frying. Toss the shredded rotisserie meat with a teaspoon of olive oil and the spices then warm it in a skillet for two minutes. This quick toss wakes up the aromatics and melts the cheese during assembly.
Avoid using the microwave because it heats unevenly and turns poultry fibers tough and dry. Warm the meat strips in a seasoned skillet over medium heat with a tablespoon of water for three minutes. The steam recreates a juicy texture and prevents the exterior spices from burning on the pan bottom.
A Final Note
These grilled chicken wraps are the ultimate proof that quick meals don’t have to taste boring or bland. The heavy cast iron sear gives the meat an incredible backyard flavor that pairs perfectly with the cool crunch of romaine lettuce.
I love making a big batch on Sunday afternoons so we have fast protein ready for the entire week. Grab some fresh tortillas and try this simple recipe for your next busy lunch hour.