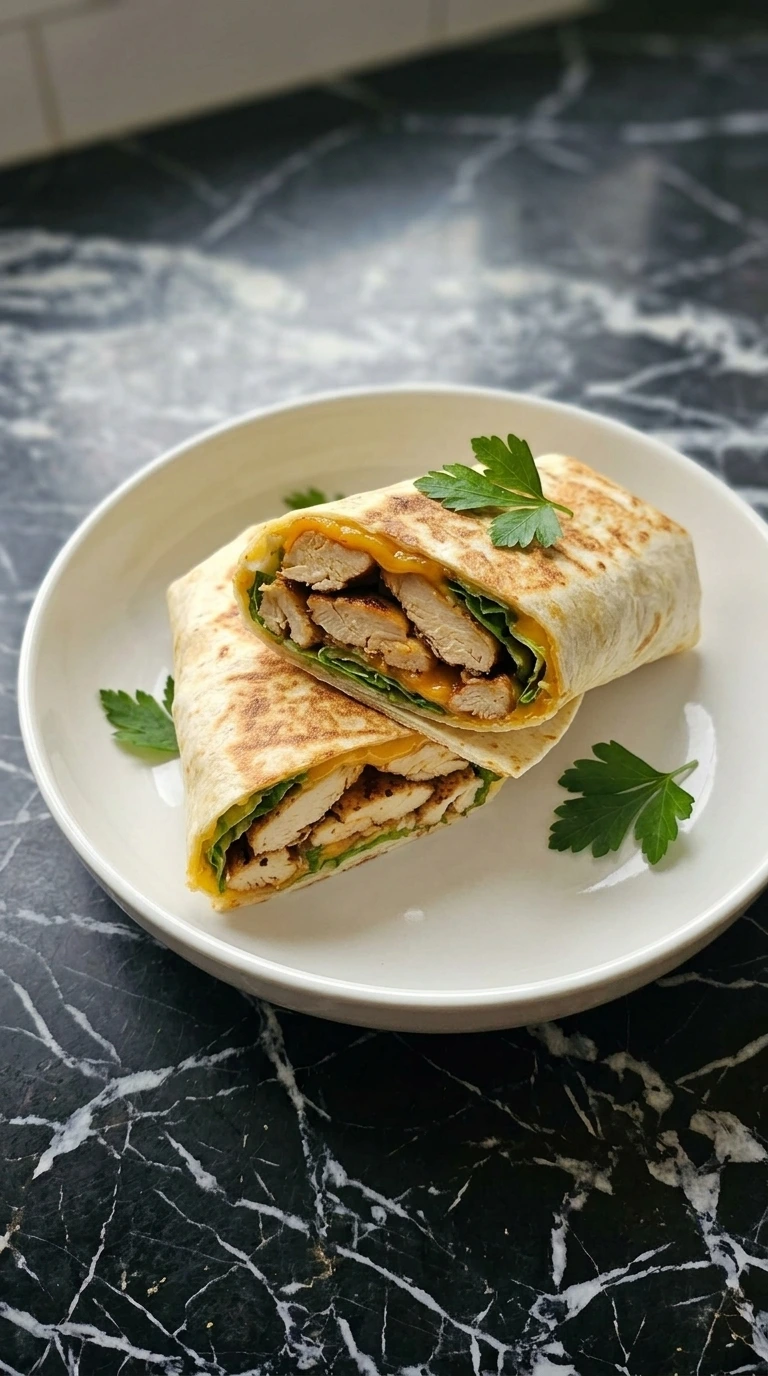
Grilled Chicken Wraps
Last summer we were visiting my in-laws and my mother-in-law made this dish three nights in a row because the kids kept asking for it. I must have watched her make it four times before I figured out her little secret, she tastes the marinade after adding each ingredient instead of waiting until the end. Now it’s on heavy rotation in our house too. Honestly it took me three tries to get the balance right because the first time I used too much garlic and it drowned everything else.
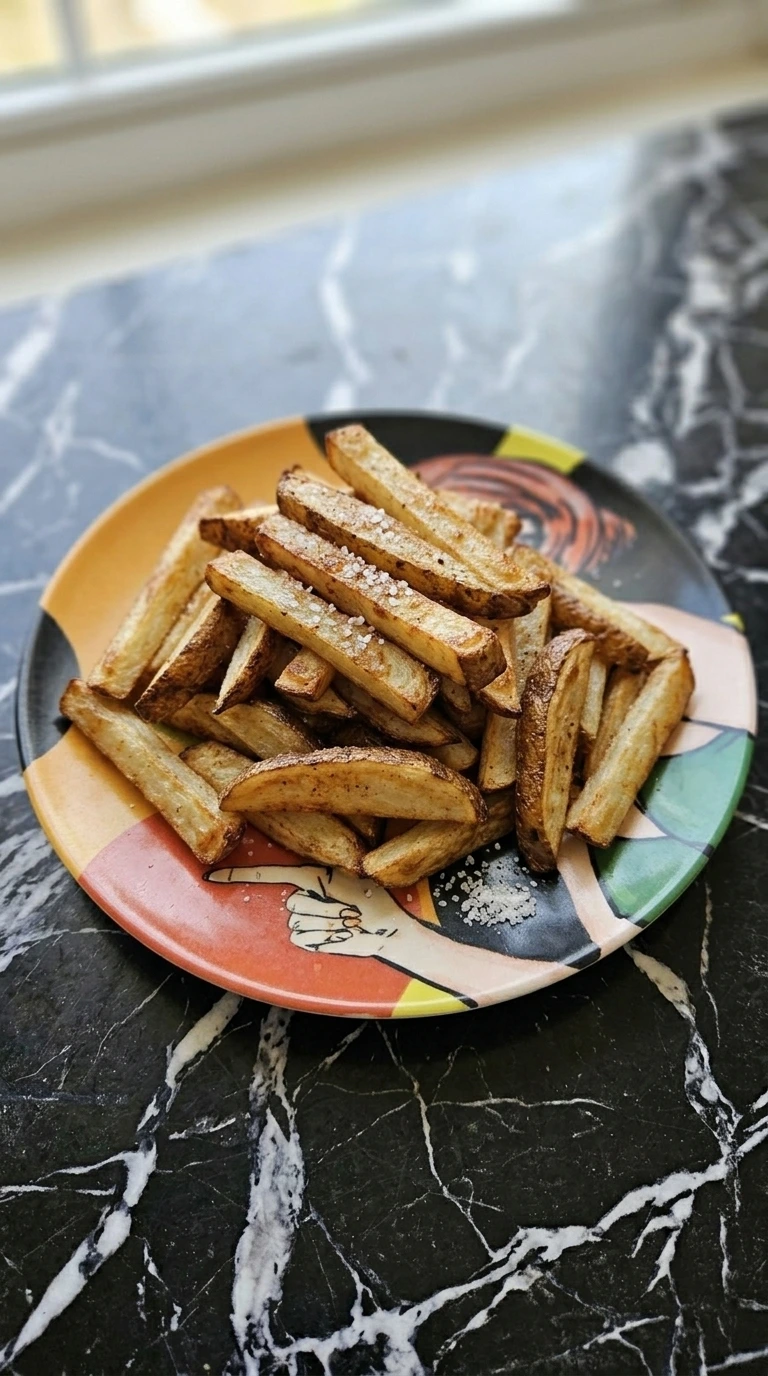
You want a fast midday meal that actually fills you up and tastes awesome. These grilled chicken wraps hit that spot perfectly. If you want something crispy on the side, you should totally pair them with my [Loaded Fries](https://leagueofcooking. com/?
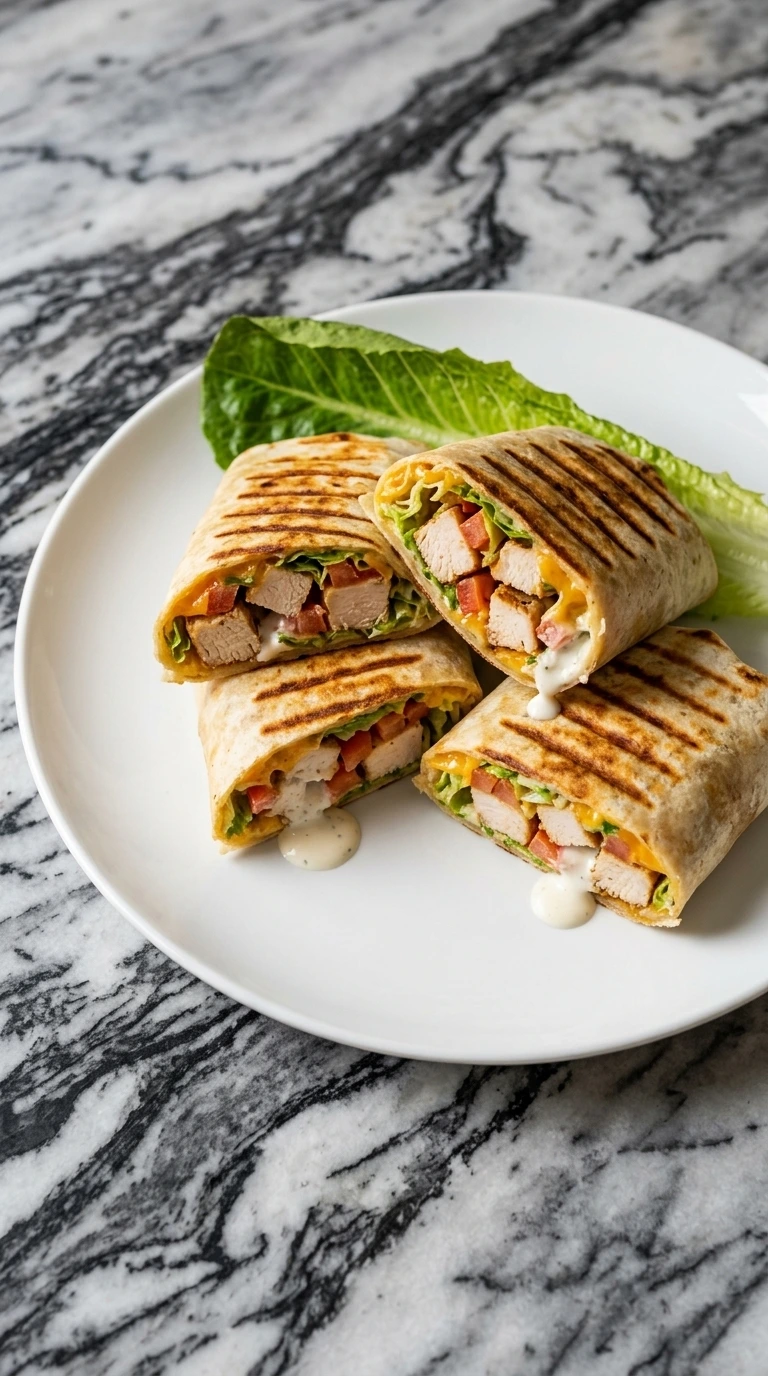
p=4191) for a killer lunch combination. Everything comes down to keeping the meat juicy and getting a nice crisp on the outside. We are skipping the heavy drive-thru options today. You are going to get clean flavors and a satisfying crunch in every single bite.
Why This Recipe Works
Grilling the chicken at medium-high heat on cast iron triggers the Maillard reaction quickly. This creates a deep savory crust while keeping the interior inside the meat juicy. Leaving the chicken to rest for 5 minutes prevents the structural cells from leaking moisture upon slicing.
Toasting the assembled wraps seam-side down seals the flour tortilla dough. This technique locks the filling inside and melts the sharp cheddar cheese into a uniform binding layer. If you love smoky flavors, you should check out my [Grilled Corn](https://leagueofcooking.
com/? p=4107) for another perfect summer cookout addition.
The Ingredients
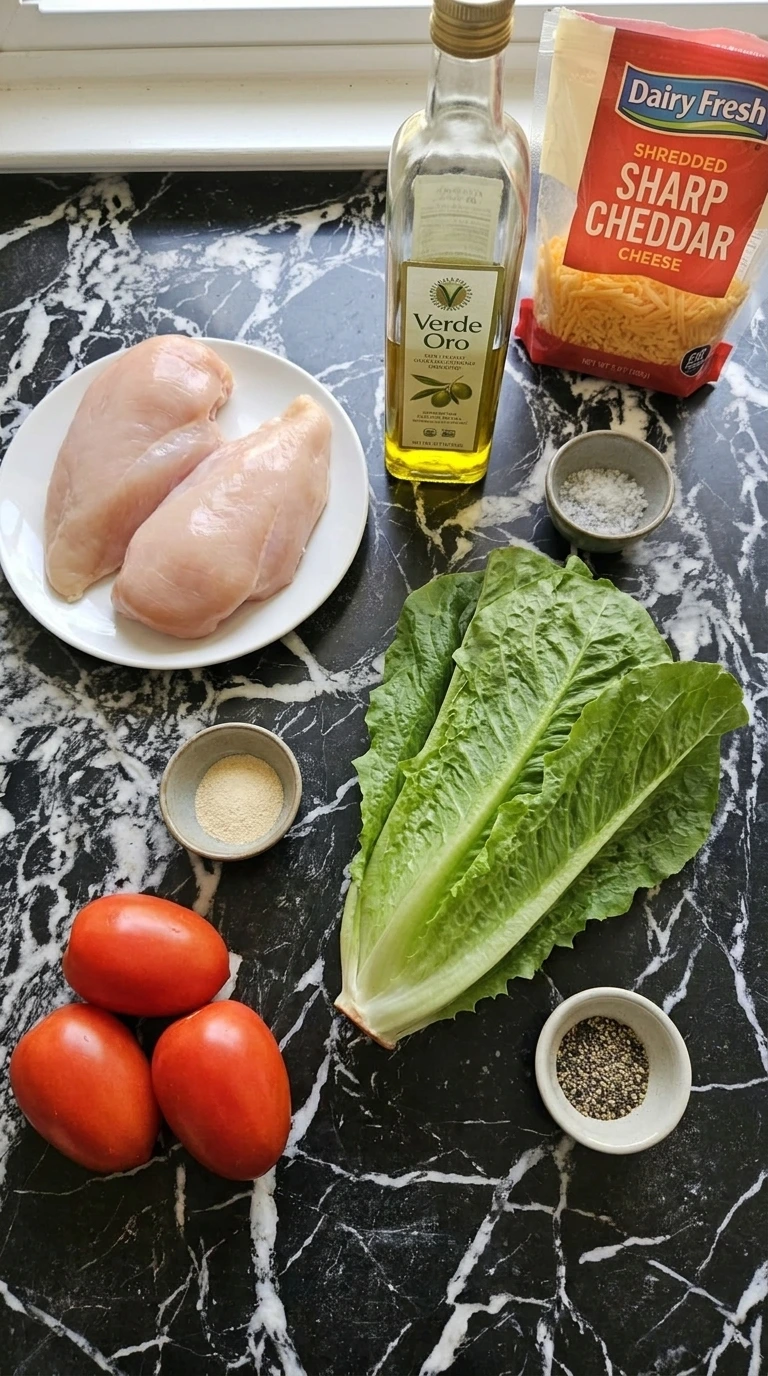
- boneless skinless chicken breast: Pat completely dry with paper towels to ensure spices adhere tightly to the meat.
- olive oil: Rubbed over the meat to conduct heat and build a savory caramelized crust.
- coarse sea salt: Distributed evenly to draw out surface moisture and enhance the natural savory flavors.
- cracked black pepper: Adds a sharp pungent kick to the spice rub on the breast meat.
- garlic powder: Provides a deep aromatic background note without burning like fresh garlic would.
- flour tortilla: Warm slightly before rolling to increase flexibility and prevent the dough from tearing.
- mayonnaise: Spread evenly as a rich moisture barrier against the fresh salad ingredients.
- romaine lettuce: Shredded finely and dried completely to provide a clean crisp bite inside the wrap.
- roma tomato: Diced small and drained of excess seed moisture to keep the filling from getting watery.
- sharp cheddar cheese: Shredded coarsely from a block so it melts into a smooth rich binding layer.
Kitchen Equipment
- Cast-iron grill pan: A heavy-bottomed 10-inch cast-iron grill pan distributes heat evenly and creates perfect dark char marks — a thin aluminum skillet will hot-spot and burn the tortilla before the cheese inside melts.
- Wooden cutting board: A large maple wooden cutting board provides a stable surface for dicing juicy chicken breasts — plastic boards can slip easily and dull your chef knife quickly during heavy prep work.
- Digital meat thermometer: An instant-read digital meat thermometer ensures your chicken breasts reach exactly 165°F safely — guessing by eye usually results in overcooked dry meat or dangerous undercooked centers.
How to Make It
Step 1: Season the chicken breasts
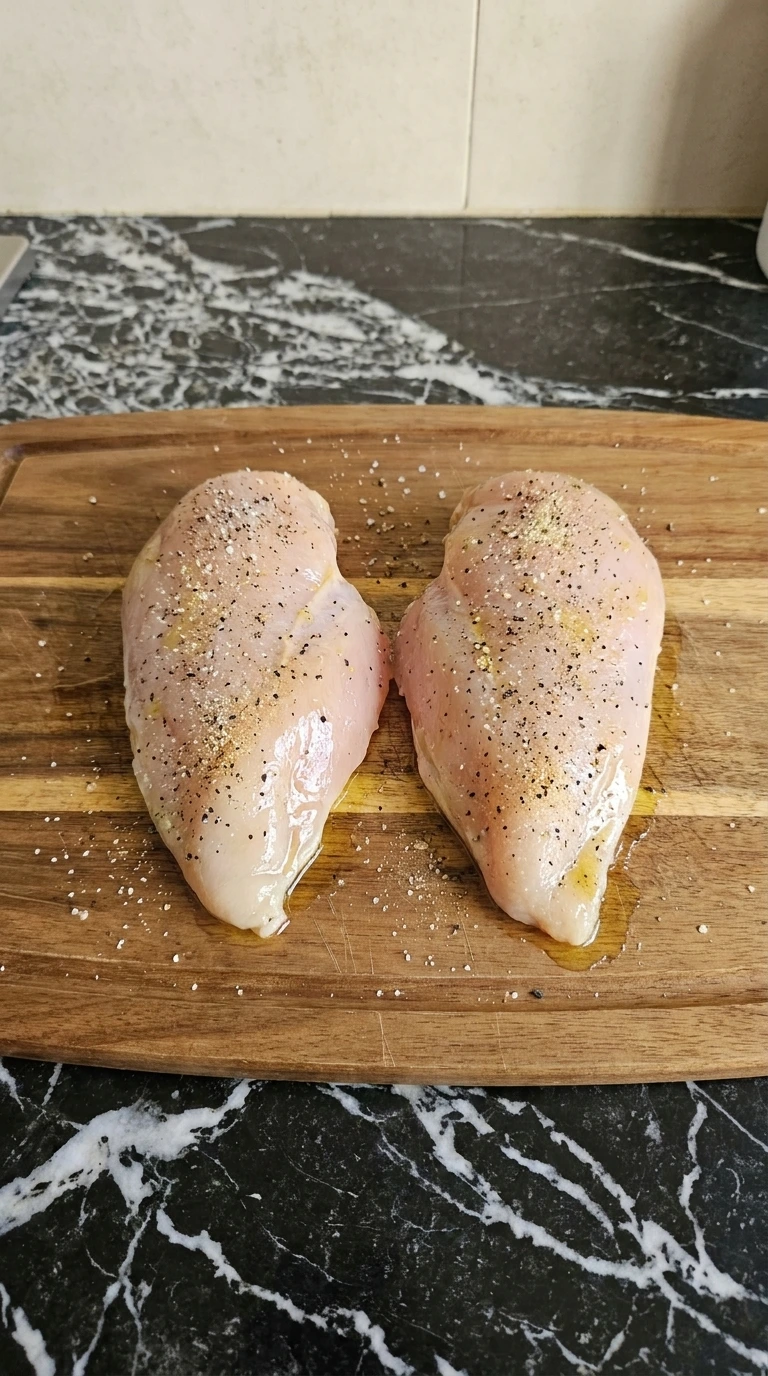
Place the 2 whole boneless skinless chicken breasts onto a large wooden cutting board. Pat them completely dry with a paper towel. Drizzle 1 tablespoon of olive oil evenly over both sides of the meat. Sprinkle 1 teaspoon of coarse sea salt, 1/2 teaspoon of cracked black pepper, and 1 teaspoon of garlic powder across the surfaces.
Rub the spices into the meat using your hands to ensure full coverage. You want the seasoning to form a tight uniform layer over the pale-pink chicken. (I tried skipping the paper towel step once and the spices just clumped up instead of sticking properly. ) Make sure the surface is coated well before cooking.
The dry surface allows the oil and spices to adhere tightly to the skinless meat. This step builds the savory crust during searing.
Tip: Patting the chicken completely dry is essential because surface moisture creates steam and prevents a good sear.
Step 2: Sear the seasoned chicken
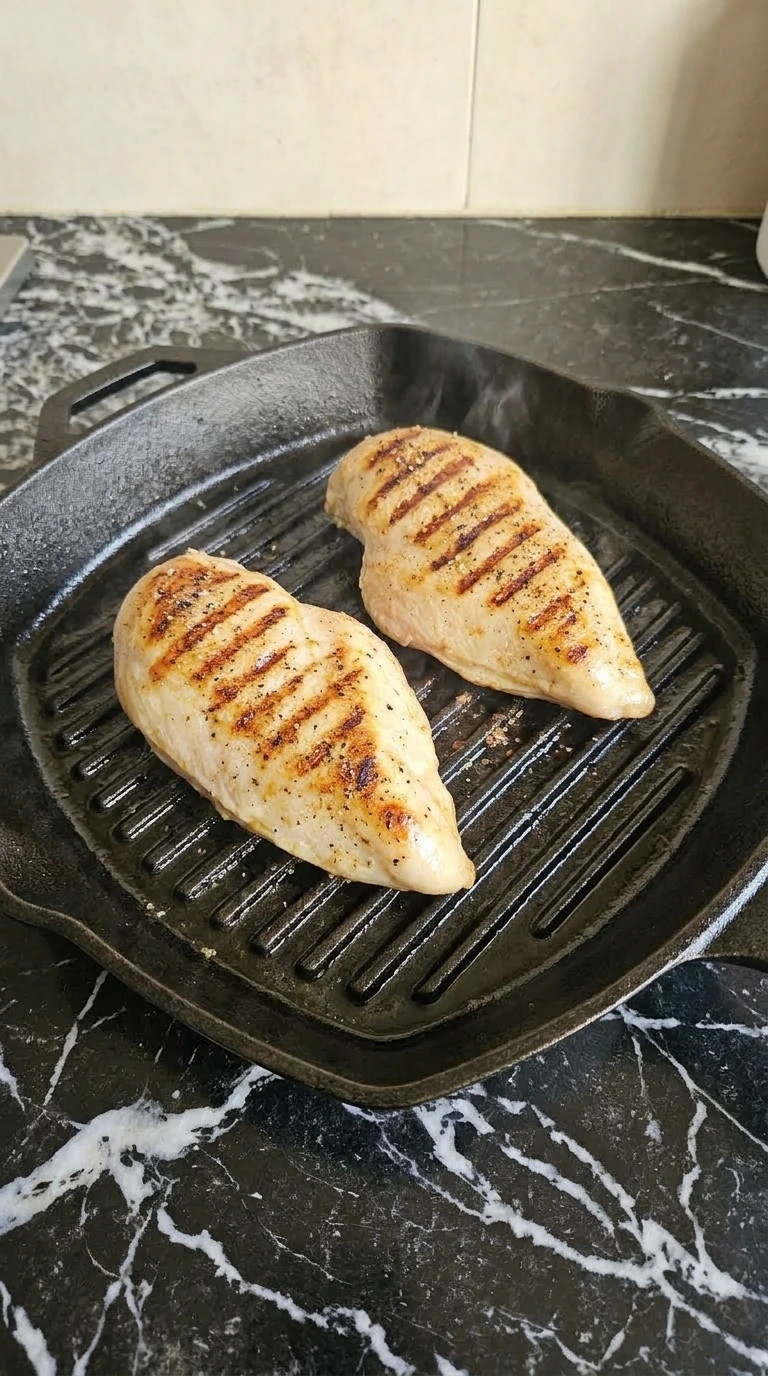
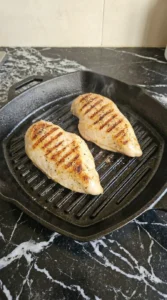
Place a 10-inch cast-iron grill pan over medium-high heat until the surface is hot but not smoking. Lay the 2 seasoned chicken breasts down carefully onto the hot ridges. Cook them without moving for exactly 6 minutes on the first side. Flip the chicken pieces over using tongs to reveal deep dark-brown char marks on the cooked side.
Cook for another 5 to 6 minutes on the second side. You’ll hear a loud sizzling sound as the fat renders and the crust caramelizes. The meat is ready when it reaches an internal temperature of 165°F. Miss this window by going too long and the breast meat becomes chalky and dry.
Cook hot and fast on the heavy ridges. The intense heat locks in the moisture while creating deep smoky lines. This builds flavor without drying out the center.
Tip: Use a digital meat thermometer to pull the chicken exactly at 165°F so it stays incredibly juicy.
Step 3: Dice the grilled chicken

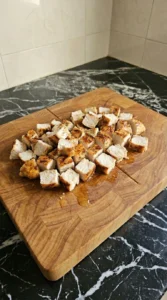
Transfer the 2 cooked chicken breasts back to the wooden cutting board. Let the meat rest for 5 minutes off the heat before touching it. Slice each breast lengthwise into thin strips then cut across to create half-inch cubes. You will see steam rise as you cut through the deep amber crust.
The interior should look completely white and opaque but glistening with juices. Skip the rest and the juices run out the moment you cut. That leaves the meat dry inside the wrap. Rest 5 minutes before slicing.
This gives the internal juices time to redistribute throughout the meat fibers. It guarantees every single bite stays tender.
Tip: Never skip the resting period because cutting hot chicken immediately forces all the moisture onto your board.
Step 4: Assemble the wrap filling
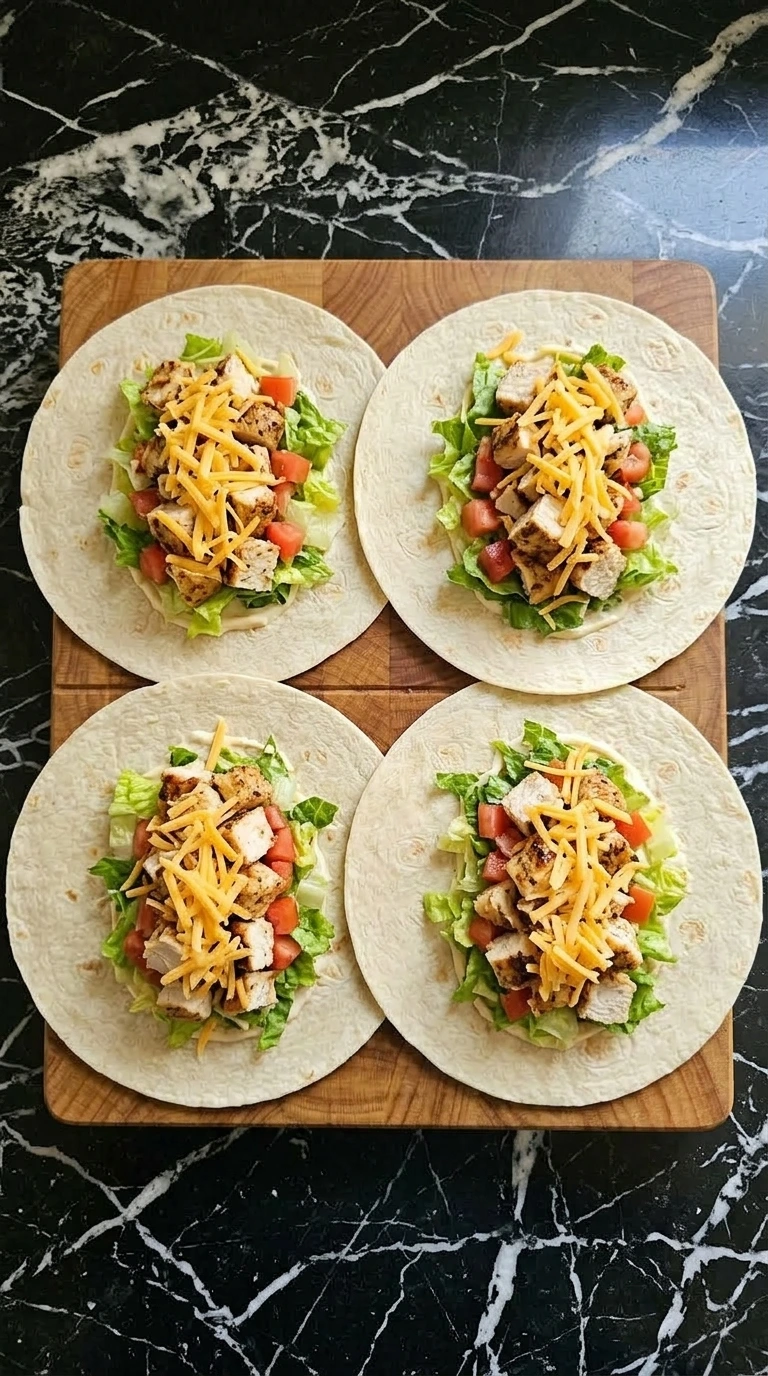
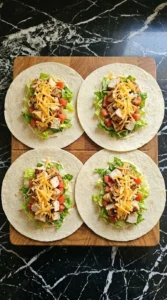
Lay 4 large flour tortillas flat on a clean workspace. Spread 1 tablespoon of creamy mayonnaise across the center of each tortilla. Divide 2 cups of shredded romaine lettuce and 1 cup of diced roma tomatoes evenly among the wraps. Scatter the diced grilled chicken pieces over the vegetables in an irregular pile.
Top each with 1 cup of shredded sharp cheddar cheese. The ingredients should form a colorful layered strip down the middle of the soft beige dough. (I tried using wet tomatoes once and it made the bottom soggy so drain them well first. ) Layer the cool vegetables beneath the warm chicken.
The residual heat from the meat starts to soften the sharp cheddar slightly. This creates a cohesive filling before folding.
Tip: Keep the filling concentrated in the center third of the tortilla to make folding much easier later.
Step 5: Fold and grill the wraps
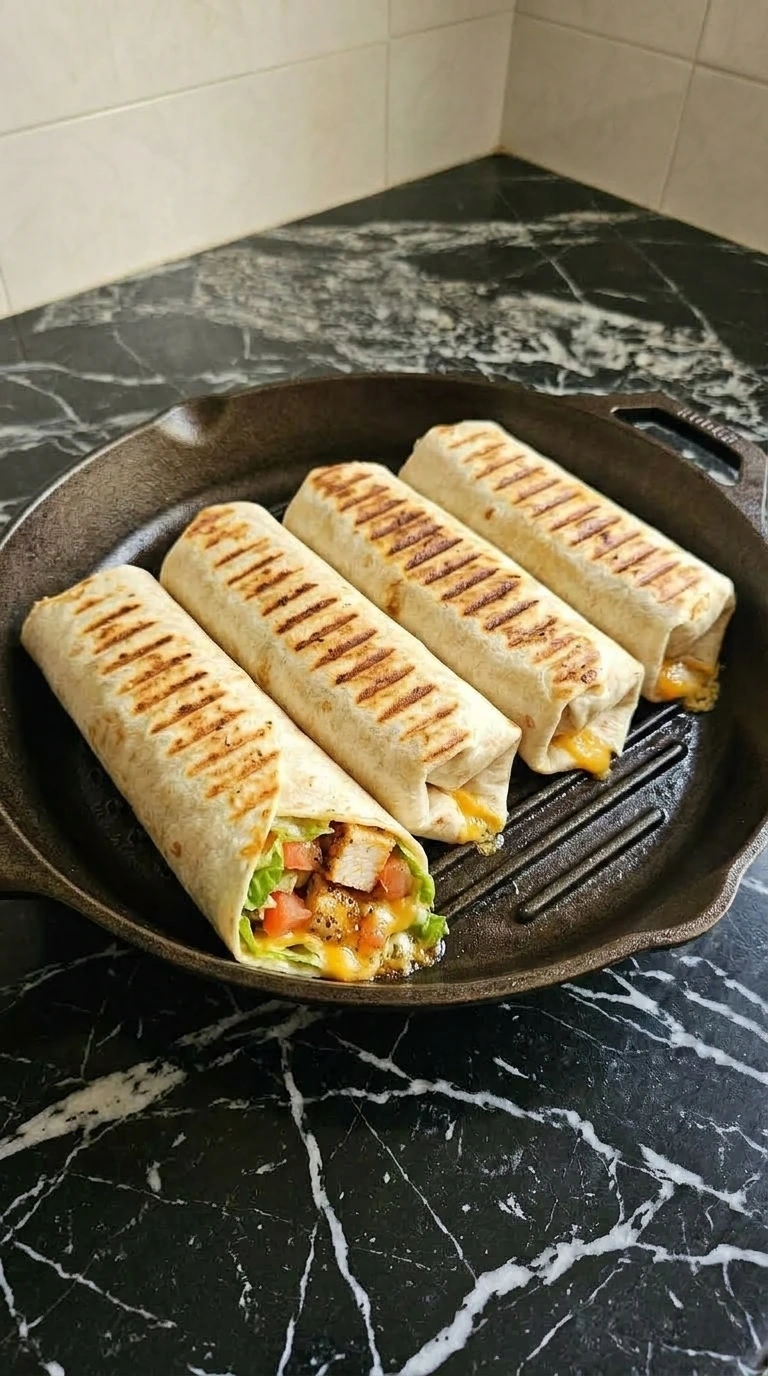
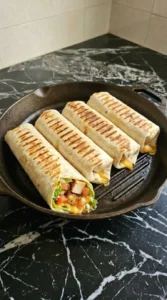
Fold the left and right sides of each tortilla inward over the filling. Roll the bottom edge up tightly over the sides and continue rolling until you form a neat bundle. Place the 4 assembled wraps seam-side down back into the hot 10-inch cast-iron grill pan. Press down gently with a flat spatula for 2 minutes over medium heat.
Flip each wrap carefully and toast the top side for another 2 minutes. You’ll watch the pale tortilla turn a beautiful golden-brown with dark parallel char marks. The sharp cheddar inside will melt completely into the warm chicken. Go past 3 minutes per side and the outer wrap scorches.
Grill seam-side down first. The heat seals the overlapping dough edges together instantly. This prevents the wrap from opening up while eating.
Tip: Placing the wrap seam-side down acts like glue because the heat toasts the edges together.
Make It Your Own
- boneless skinless chicken breast: boneless chicken thighs — Use the same quantity but increase the cook time by 2 minutes per side because dark meat contains more fat and takes longer to fully cook.
- sharp cheddar cheese: provocative pepper jack — Swap in an equal ratio to add a spicy kick and a creamier melt texture to the interior filling.
- mayonnaise: plain Greek yogurt — Use a 1:1 replacement but expect a tangier flavor profile and a slightly lighter consistency throughout the wrap. If you prefer a lighter version try our [Fruit Smoothies](https://leagueofcooking.com/fruit-smoothies/).
- flour tortilla: gluten-free wraps — Use with caution because they tear easily when cold and require extra warming time before rolling tightly.
Storage Tips
Store any leftover unassembled grilled chicken in an airtight glass container in the refrigerator for up to 4 days. Do not store fully assembled wraps because the wet vegetables will ruin the dough overnight.
You can freeze the cooked cubed meat in a heavy plastic freezer bag for up to 3 months safely. Reheat the chicken pieces in a skillet over medium heat with 1 tablespoon of water for 3 minutes until warm.
Assemble the wrap with fresh ingredients then toast in a hot pan until the wrap turns golden. Look for any sour smells or slimy textures on the meat as clear signs of spoilage.
Grilled Chicken Wraps
Ingredients
- 2 whole boneless skinless chicken breast Pat completely dry with paper towels to ensure spices adhere tightly to the meat.
- 1 tablespoon olive oil Rubbed over the meat to conduct heat and build a savory caramelized crust.
- 1 teaspoon coarse sea salt Distributed evenly to draw out surface moisture and enhance the natural savory flavors.
- 1/2 teaspoon cracked black pepper Adds a sharp pungent kick to the spice rub on the breast meat.
- 1 teaspoon garlic powder Provides a deep aromatic background note without burning like fresh garlic would.
- 4 large flour tortilla Warm slightly before rolling to increase flexibility and prevent the dough from tearing.
- 4 tablespoons mayonnaise Spread evenly as a rich moisture barrier against the fresh salad ingredients.
- 2 cups romaine lettuce Shredded finely and dried completely to provide a clean crisp bite inside the wrap.
- 1 cup roma tomato Diced small and drained of excess seed moisture to keep the filling from getting watery.
- 1 cup sharp cheddar cheese Shredded coarsely from a block so it melts into a smooth rich binding layer.
Instructions
- Place the 2 whole boneless skinless chicken breasts onto a large wooden cutting board. Pat them completely dry with a paper towel. Drizzle 1 tablespoon of olive oil evenly over both sides of the meat. Sprinkle 1 teaspoon of coarse sea salt, 1/2 teaspoon of cracked black pepper, and 1 teaspoon of garlic powder across the surfaces. Rub the spices into the meat using your hands to ensure full coverage. You want the seasoning to form a tight uniform layer over the pale-pink chicken. (I tried skipping the paper towel step once and the spices just clumped up instead of sticking properly.) Make sure the surface is coated well before cooking. The dry surface allows the oil and spices to adhere tightly to the skinless meat. This step builds the savory crust during searing.
- Place a 10-inch cast-iron grill pan over medium-high heat until the surface is hot but not smoking. Lay the 2 seasoned chicken breasts down carefully onto the hot ridges. Cook them without moving for exactly 6 minutes on the first side. Flip the chicken pieces over using tongs to reveal deep dark-brown char marks on the cooked side. Cook for another 5 to 6 minutes on the second side. You’ll hear a loud sizzling sound as the fat renders and the crust caramelizes. The meat is ready when it reaches an internal temperature of 165°F. Miss this window by going too long and the breast meat becomes chalky and dry. Cook hot and fast on the heavy ridges. The intense heat locks in the moisture while creating deep smoky lines. This builds flavor without drying out the center.
- Transfer the 2 cooked chicken breasts back to the wooden cutting board. Let the meat rest for 5 minutes off the heat before touching it. Slice each breast lengthwise into thin strips then cut across to create half-inch cubes. You will see steam rise as you cut through the deep amber crust. The interior should look completely white and opaque but glistening with juices. Skip the rest and the juices run out the moment you cut. That leaves the meat dry inside the wrap. Rest 5 minutes before slicing. This gives the internal juices time to redistribute throughout the meat fibers. It guarantees every single bite stays tender.
- Lay 4 large flour tortillas flat on a clean workspace. Spread 1 tablespoon of creamy mayonnaise across the center of each tortilla. Divide 2 cups of shredded romaine lettuce and 1 cup of diced roma tomatoes evenly among the wraps. Scatter the diced grilled chicken pieces over the vegetables in an irregular pile. Top each with 1 cup of shredded sharp cheddar cheese. The ingredients should form a colorful layered strip down the middle of the soft beige dough. (I tried using wet tomatoes once and it made the bottom soggy so drain them well first.) Layer the cool vegetables beneath the warm chicken. The residual heat from the meat starts to soften the sharp cheddar slightly. This creates a cohesive filling before folding.
- Fold the left and right sides of each tortilla inward over the filling. Roll the bottom edge up tightly over the sides and continue rolling until you form a neat bundle. Place the 4 assembled wraps seam-side down back into the hot 10-inch cast-iron grill pan. Press down gently with a flat spatula for 2 minutes over medium heat. Flip each wrap carefully and toast the top side for another 2 minutes. You’ll watch the pale tortilla turn a beautiful golden-brown with dark parallel char marks. The sharp cheddar inside will melt completely into the warm chicken. Go past 3 minutes per side and the outer wrap scorches. Grill seam-side down first. The heat seals the overlapping dough edges together instantly. This prevents the wrap from opening up while eating.
Notes
Nutrition
Questions I Get Asked
Yes you can prep the ingredients early. Store the grilled diced chicken and fresh chopped vegetables in separate airtight containers in the fridge for up to 4 days. Assemble and toast the wraps right before serving so the tortilla stays crisp and the lettuce doesn’t get soggy.
Warm the large flour tortillas in the microwave for exactly 15 seconds before assembling. The brief heat softens the gluten structures and makes the dough incredibly pliable. This simple trick prevents any cracking or tearing along the outer folds.
Place the leftover wrap into a dry skillet over medium-low heat for about 3 to 4 minutes per side. This restores the crispy texture of the outer crust while warming the chicken through. Avoid the microwave because it turns the tortilla rubbery and makes the lettuce watery.
This happens when the chopped roma tomatoes or washed romaine lettuce still carry too much surface moisture. Make sure to spin your green lettuce completely dry and drain the diced tomatoes in a strainer before adding them to the tortilla.
Freezing is not recommended for fully assembled wraps because fresh romaine lettuce and raw tomatoes turn mushy when thawed. You can easily freeze the cooked diced chicken alone in a sealed freezer bag for up to 3 months instead.
A Final Note
Every time I make this I think about the first time I tried it, nervous about screwing it up, convinced I’d need more experience. Turns out it’s one of those dishes that forgives you for being a beginner. You can mess up the timing like I did those first three attempts and it still turns out good.
If you try it, leave me a comment below, I read every single one. And if you enjoyed this, check out my [Cheeseburgers] which uses similar hot searing techniques.
Did you know that the modern wrap actually blew up in California back in the early 1990s? People wanted a fresh, healthy alternative to those super heavy traditional burritos, so it’s no surprise they caught on so fast.