Stuffing
I made this stuffing for the first time the week we moved into our house in 2019, boxes everywhere, no proper kitchen setup, and somehow it turned out better than expected. What saved me that night was keeping the baking heat lower than I thought I should so the bread soaked up all the flavor without burning. Since then it has become my go-to side dish when I am exhausted but still want something that tastes real. Mark always says it is better than anything from a box and Emma asks for seconds.
It pairs perfectly with our classic Roast Turkey for a complete comforting meal. Ready in about 45 minutes, one baking dish, no fancy techniques required.

You do not need to wait for a massive holiday to enjoy this dish. It works wonderfully for a cozy Sunday meal or simple prep. The texture is soft on the inside but beautifully golden and crisp on top.
The Secret to This Recipe
Drying the sourdough bread completely before mixing is the key interaction that prevents a soggy texture. The dry starch acts like a sponge to absorb the butter and rich broth without collapsing.
Baking at 375°F creates a perfect balance because it toasts the exposed tips while keeping the center soft. If you want a fun autumn variation try adding a few spoonfuls of our [Pumpkin Muffins](https://leagueofcooking.
com/? p=4554) crumble right into the mix.
The Ingredients
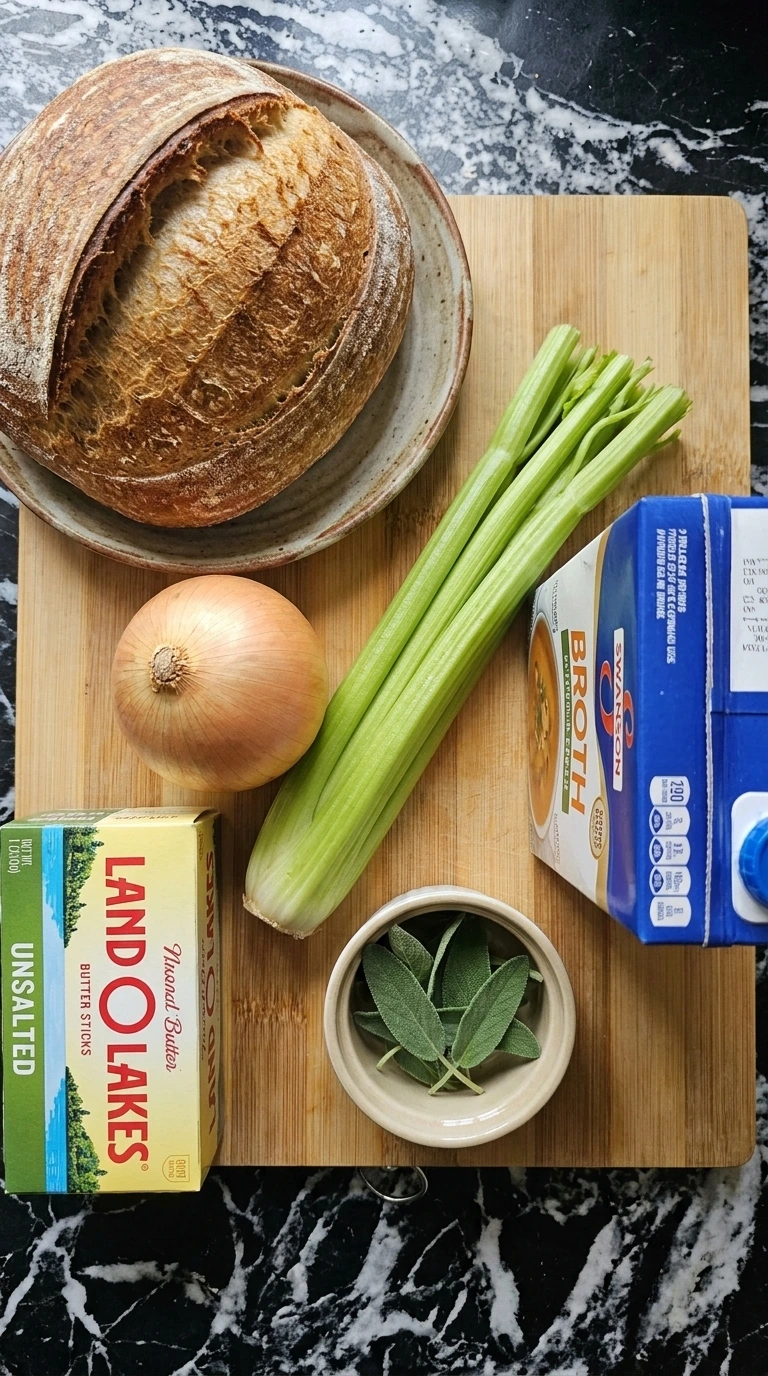
- sourdough bread: Crusty style, cut into one-inch cubes and dried overnight for structure.
- yellow onion: Finely diced to create a sweet savory flavor base.
- celery stalk: Sliced thin to add a necessary clean crunch to the dish.
- unsalted butter: Melted down to richness and coat the dried bread cubes.
- fresh sage: Finely chopped to deliver that classic holiday aroma.
- fresh thyme: Leaves stripped from stems for an earthy background note.
- chicken broth: Low-sodium chicken broth used to moisten the bread thoroughly.
The Gear
- 10-inch cast-iron skillet: A heavy-bottomed ten-inch cast-iron skillet distributes heat evenly so the butter and onions do not scorch.
- Rectangular white ceramic baking dish: A standard nine-by-thirteen ceramic baking dish provides enough surface area for the top to crisp nicely.
- Large clear glass mixing bowl: A wide eight-quart glass mixing bowl allows plenty of room to fold the bread without crushing it.
Step-by-Step Instructions
Step 1: Dice the vegetables
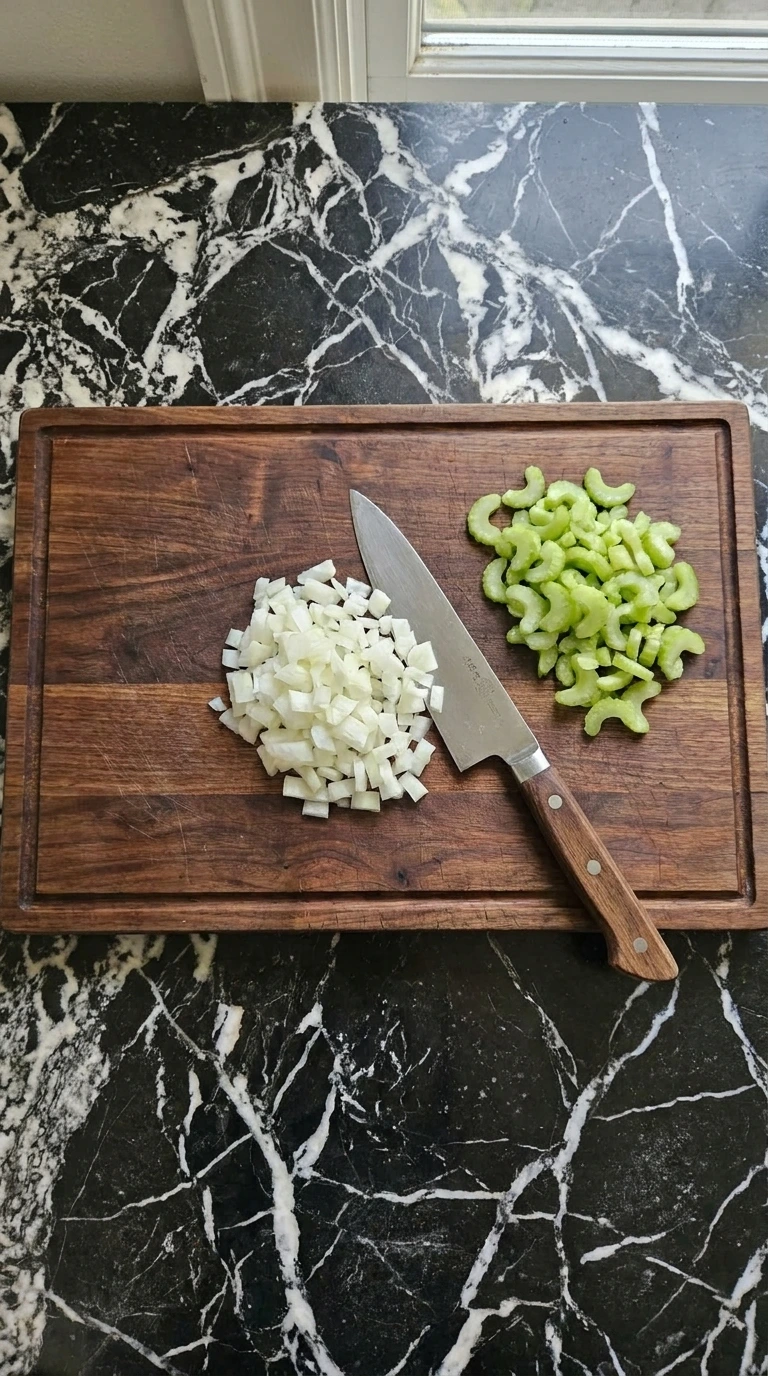
Chop the yellow onion and celery stalks on a wooden cutting board using a sharp chef knife. Aim for uniform pieces about one-quarter inch thick so they cook evenly later on. You will smell the sharp aroma of the fresh onion immediately as you work.
The celery should look bright green and feel completely crisp under your knife blade. Keep the sizes irregular to add a nice homemade feel to the final texture. (I tried using a food processor once but it turned the vegetables into mush and ruined the dish.
) Small knife cuts are the fix.
Tip: Keep your celery leaves because chopping them right in with the stalks adds a massive boost of earthy herbal flavor.
Step 2: Sauté the aromatics
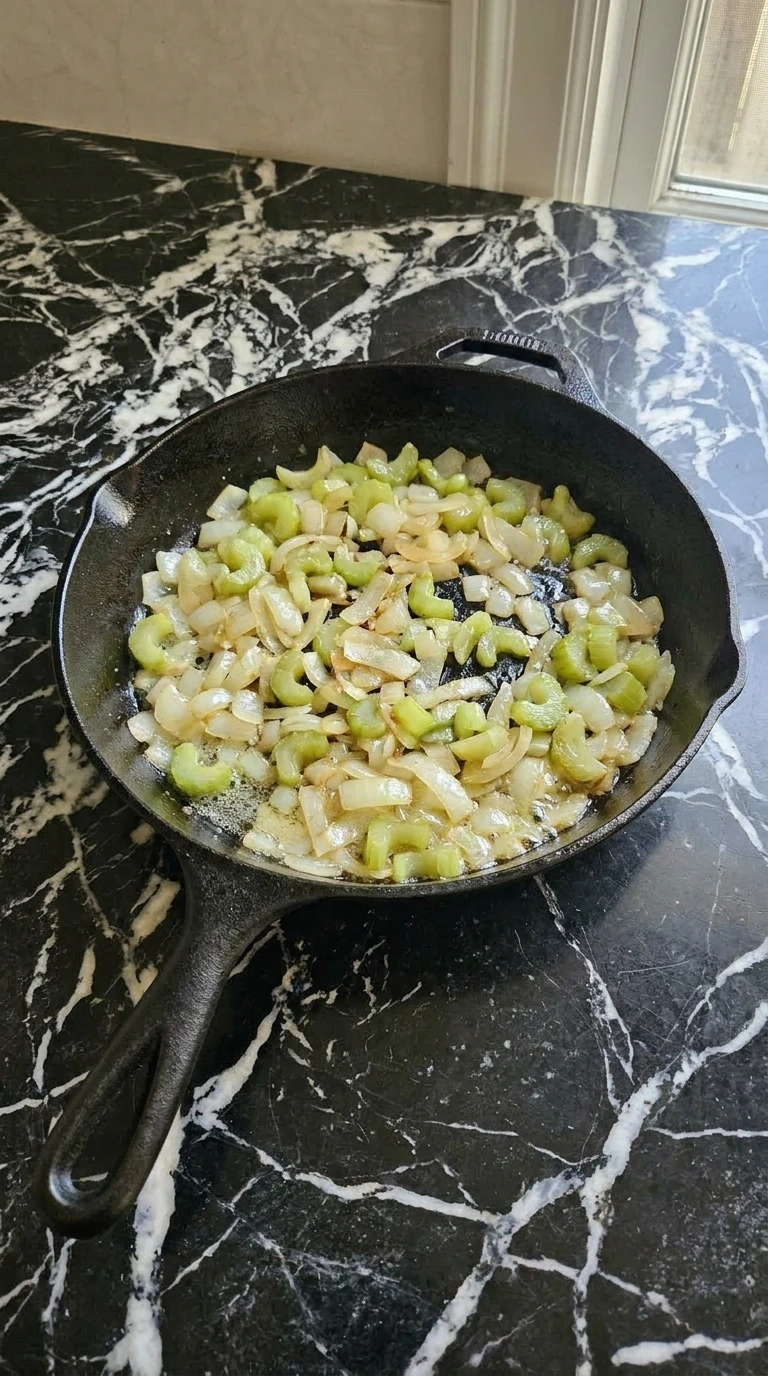
Melt the unsalted butter in a ten-inch cast-iron skillet over medium heat (about 5 on a 10-dial). Add the diced yellow onion and celery then cook for 8 to 10 minutes while stirring frequently with a wooden spoon.
You will hear a gentle sizzling sound as the water escapes and the vegetables begin to soften. The onion pieces will look translucent and glossy while the celery turns a slightly deeper shade of green.
Do not let the vegetables brown or get dark edges during this phase. Cook gently over medium heat, soft vegetables blend seamlessly into the liquid base later.
Tip: If the butter starts to turn brown just lower the heat slightly because you want to sweat the vegetables not fry them.
Step 3: Toss bread and herbs

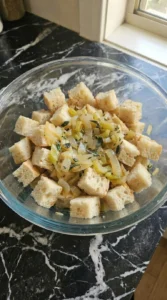
Place the cubed sourdough bread into a large clear glass mixing bowl and add the chopped fresh sage and fresh thyme. Pour the warm sautéed vegetables and melted butter directly over the bread cubes then fold gently with a rubber spatula in a J-shaped motion.
You will notice the dry bread immediately starts soaking up the rich melted butter. The bright green flecks of sage and thyme will distribute unevenly across the surfaces of the white bread cubes.
Work slowly so you do not crush the bread cubes into crumbs. Combine thoroughly in the bowl, even distribution ensures every single bite has plenty of herbal flavor.
Tip: Use stale bread or dry your fresh bread cubes in a low oven beforehand so they do not turn soggy from the butter.
Step 4: Moisten with chicken broth

Pour the chicken broth over the bread mixture in three separate additions while tossing lightly between each pour. Let the mixture rest for 5 minutes off the heat so the liquid absorbs fully into the center of each cube.
The bread will shrink slightly in volume and look wet but it should not be swimming in a pool of liquid. You will smell the rich chicken stock blending with the sage and buttery onions.
Miss this absorption window and the broth will simply collect at the bottom of your baking pan. Rest 5 minutes before baking, this gives the liquid time to saturate the starch so it stays moist.
Tip: Squeeze a bread cube with your fingers. it should feel like a damp sponge but still hold its general shape.
Step 5: Bake until golden brown
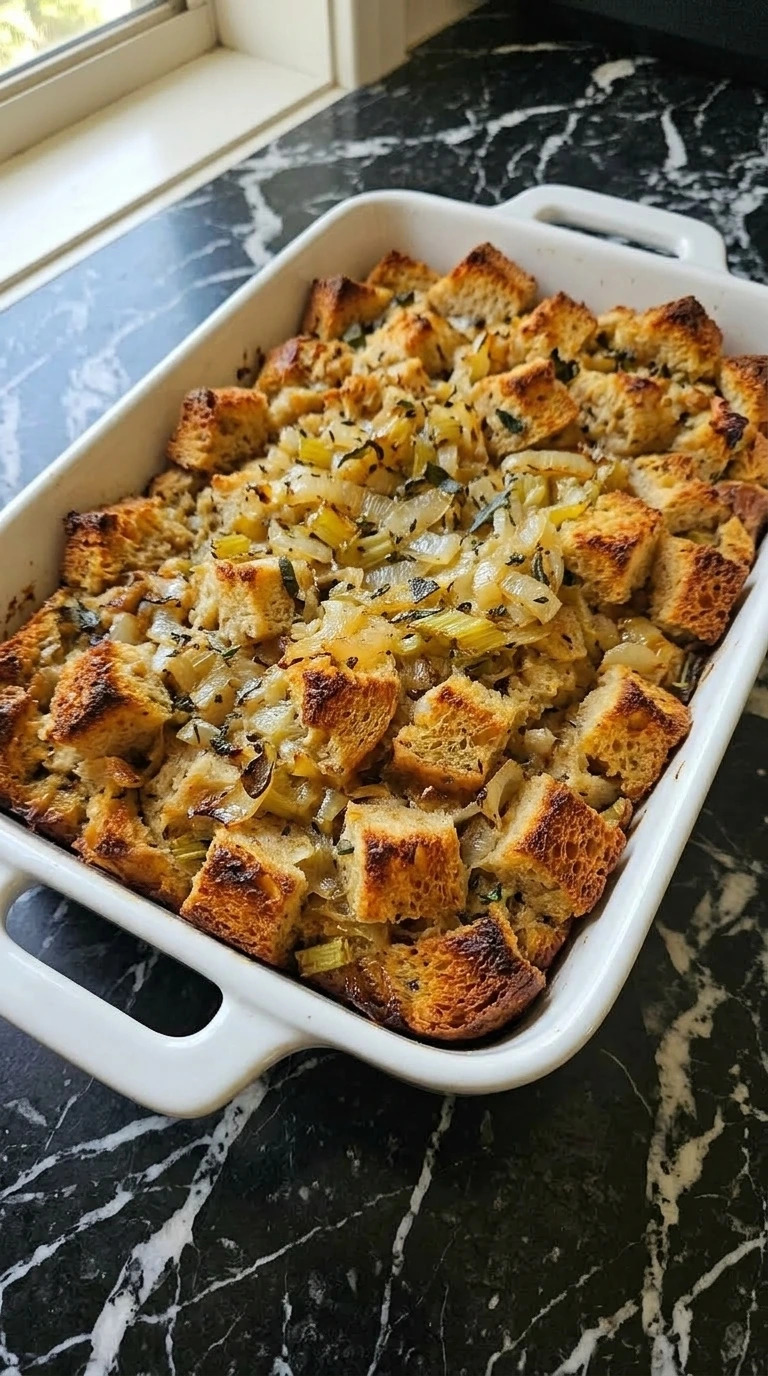
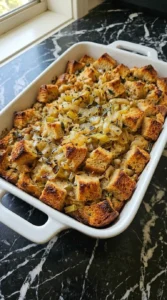
Transfer the mixture into a rectangular white ceramic baking dish and spread it into an uneven layer. Bake at 375°F for exactly 30 minutes until the top turns deep golden brown.
You will hear the edges bubbling gently and a thin crisp crust will form on the exposed bread tops. The kitchen will fill with an incredibly warm roasted poultry and herb aroma.
Go past 35 minutes and the top will scorch and turn bitter. Bake at 375°F, steady heat crisps the top while keeping the inside perfectly soft.
Tip: Leave the top surface rough and uneven because those protruding bread points turn into the best crispy crunchy bits.
My Favorite Tips
- Stale bread is absolutely essential so leave your bread cubes out on a baking sheet for a full twenty-four hours.
- Melt the butter slowly over medium heat to prevent the milk solids from separating and burning early.
- Pour the chicken broth in stages because rushing the liquid will leave you with a waterlogged base.
- Use fresh herbs instead of dried options because the oils provide a much cleaner aroma during baking.
- Leave the baking dish uncovered for the last fifteen minutes to ensure a deeply browned top crust.
- Taste your broth before pouring it to ensure it has enough salt to season the bread interiors.
- Add one cup of dried cranberries and chopped pecans for a sweet crunchy autumn twist.
- Mix in a half pound of cooked brown sausage meat to create a hearty main dish version.
- Stir in chopped tart apples during the last minutes of cooking the onions for a bright fruity lift.
Ingredient Swaps
- chicken broth: vegetable stock — Works well but the overall flavor profile becomes slightly sweeter and less deeply savory.
- sourdough bread: gluten-free white bread — Use three-quarters of the amount because it is denser and crumbles much faster when wet.
- unsalted butter: olive oil — Changes the flavor significantly by removing the dairy richness but keeps the stuffing dairy-free.
- fresh sage: poultry seasoning — Use one teaspoon because dried spices are highly concentrated and can easily overwhelm the bread.
Keeping Leftovers
Store any leftover stuffing in an airtight glass container in your refrigerator for up to four days. If you want to freeze it wrap the portions tightly in plastic wrap and then aluminum foil for three months.
Reheat the stuffing in a preheated 350°F oven for fifteen minutes until warm. Add two tablespoons of fresh chicken broth over the surface before heating to keep it moist and watch for sour smells as a sign of spoilage.
Stuffing
Ingredients
- 1 loaf sourdough bread Crusty style, cut into one-inch cubes and dried overnight for structure.
- 1 medium yellow onion Finely diced to create a sweet savory flavor base.
- 3 large celery stalk Sliced thin to add a necessary clean crunch to the dish.
- 0.5 cups unsalted butter Melted down to richness and coat the dried bread cubes.
- 2 tablespoons fresh sage Finely chopped to deliver that classic holiday aroma.
- 1 tablespoon fresh thyme Leaves stripped from stems for an earthy background note.
- 2 cups chicken broth Low-sodium chicken broth used to moisten the bread thoroughly.
Instructions
- Chop the yellow onion and celery stalks on a wooden cutting board using a sharp chef knife. Aim for uniform pieces about one-quarter inch thick so they cook evenly later on. You will smell the sharp aroma of the fresh onion immediately as you work. The celery should look bright green and feel completely crisp under your knife blade. Keep the sizes irregular to add a nice homemade feel to the final texture. (I tried using a food processor once but it turned the vegetables into mush and ruined the dish.) Small knife cuts are the fix.

- Melt the unsalted butter in a ten-inch cast-iron skillet over medium heat (about 5 on a 10-dial). Add the diced yellow onion and celery then cook for 8 to 10 minutes while stirring frequently with a wooden spoon. You will hear a gentle sizzling sound as the water escapes and the vegetables begin to soften. The onion pieces will look translucent and glossy while the celery turns a slightly deeper shade of green. Do not let the vegetables brown or get dark edges during this phase. Cook gently over medium heat, soft vegetables blend seamlessly into the liquid base later.

- Place the cubed sourdough bread into a large clear glass mixing bowl and add the chopped fresh sage and fresh thyme. Pour the warm sautéed vegetables and melted butter directly over the bread cubes then fold gently with a rubber spatula in a J-shaped motion. You will notice the dry bread immediately starts soaking up the rich melted butter. The bright green flecks of sage and thyme will distribute unevenly across the surfaces of the white bread cubes. Work slowly so you do not crush the bread cubes into crumbs. Combine thoroughly in the bowl, even distribution ensures every single bite has plenty of herbal flavor.

- Pour the chicken broth over the bread mixture in three separate additions while tossing lightly between each pour. Let the mixture rest for 5 minutes off the heat so the liquid absorbs fully into the center of each cube. The bread will shrink slightly in volume and look wet but it should not be swimming in a pool of liquid. You will smell the rich chicken stock blending with the sage and buttery onions. Miss this absorption window and the broth will simply collect at the bottom of your baking pan. Rest 5 minutes before baking, this gives the liquid time to saturate the starch so it stays moist.
- Transfer the mixture into a rectangular white ceramic baking dish and spread it into an uneven layer. Bake at 375°F for exactly 30 minutes until the top turns deep golden brown. You will hear the edges bubbling gently and a thin crisp crust will form on the exposed bread tops. The kitchen will fill with an incredibly warm roasted poultry and herb aroma. Go past 35 minutes and the top will scorch and turn bitter. Bake at 375°F, steady heat crisps the top while keeping the inside perfectly soft.
Notes
Nutrition
Common Questions
You can easily assemble the entire dish up to twenty-four hours before baking. Keep it tightly wrapped with plastic wrap in your refrigerator. Bring it to room temperature for twenty minutes before putting it in a 375°F oven.
The baked stuffing stays fresh for up to four days when sealed in an airtight container. Make sure it cools completely before sealing to prevent excess moisture buildup. Reheat slices in an oven to restore the crispiness.
This usually happens if your bread cubes were extra dense or if you baked it too long. Fix this by splashing three tablespoons of warm chicken stock over the top before reheating. It will sink in and restore moisture.
Yes you can freeze the baked stuffing for up to three months. Wrap the cooled dish securely in heavy aluminum foil to prevent freezer burn. Thaw it completely overnight in the refrigerator before warming it back up.
Pop the leftovers into a 350°F oven for about fifteen minutes. Add two tablespoons of fresh broth over the top before heating to keep it from drying out. This method brings back that incredible crunchy texture.
Before You Go
If you make this on a weekend afternoon with music playing, the way I do, you will understand why it has been in our family rotation for years now. The little trick I mentioned about not rushing the final soaking step is honestly the difference between okay and really good stuffing.
Tag me on Instagram if you make it, I love seeing what you cook. And Liam says hi (he ate almost half of this when I tested it, which is the highest endorsement you will get from a 5-year-old).
Did you know stuffing was actually called dressing first? That changed during the Victorian era because people thought the new name sounded a bit more proper.