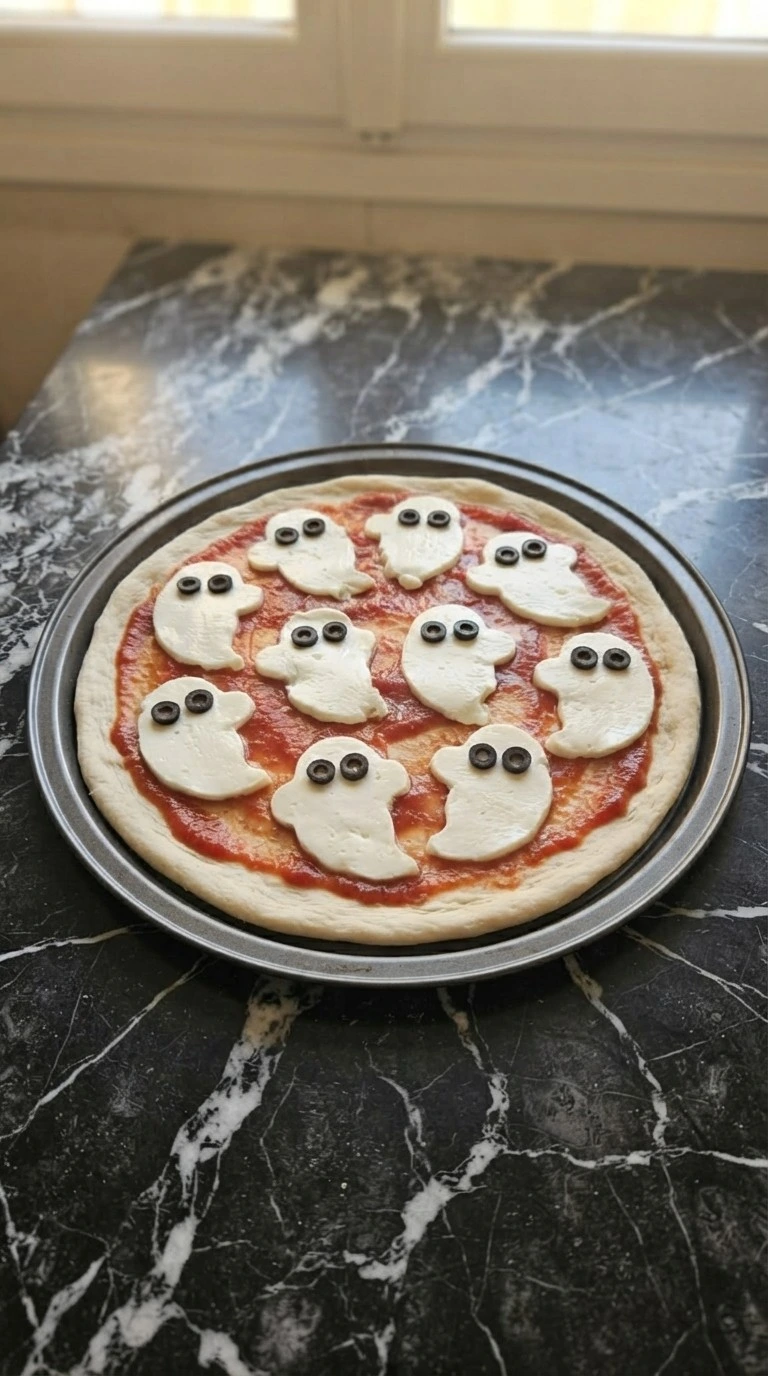
Mini Pizzas
Last summer we were visiting my in-laws and my mother-in-law made this dish three nights in a row because the kids kept asking for it. I must have watched her make it four times before I figured out her little secret, she tastes the sauce after adding each ingredient instead of waiting until the end. Now it’s on heavy rotation in our house too.
Honestly it took me three tries to get the balance right (the first time I used too much of one ingredient and it drowned everything else). If you’re looking for another simple lunch or dinner idea that satisfies everyone then try our comforting Creamy Tomato Pasta next week. These tiny crusts are incredibly fun to customize with different toppings.

You’ll love how fast they bake in a hot oven and the edges get beautifully golden and crisp. It’s the ultimate crowd-pleaser for parties or quiet Friday nights at home.
Why This Recipe Works
Par-baking the dough circles for 5 minutes at 425°F before adding any toppings is the secret method that ensures a crispy base. The brief initial blast of dry heat sets the starch molecules on the surface of the dough and creates a firm moisture barrier.
This barrier prevents the liquid tomato sauce from soaking into the raw dough during the final bake which completely avoids a soggy or gummy interior texture. Shredded low-moisture mozzarella melts smoothly into gooey strings without releasing excess water unlike fresh cheese varieties.
If you love crispy cheesy appetizers then you will definitely adore our crowd-pleasing Loaded Fries for your next weekend gathering.
Shopping List

- King Arthur unbleached all-purpose flour: Provides the essential protein content needed to create a sturdy structural network for a chewy crust.
- Fleischmann’s active dry yeast: Leavens the dough to create small airy pockets inside the crust during the warm rest period.
- warm water: Brings the moisture required to hydrate the flour particles and activate the dormant yeast cells. Keep it at 105°F.
- Pompeian olive oil: Adds richness to the dough mixture and coats the bowl to prevent sticking during the fermentation stage.
- fine sea salt: Tightens the gluten strands and enhances the natural savory flavors of the baked wheat crust.
- Mutti pizza sauce: A seasoned tomato paste blend spread over the crusts to provide a bright acidic contrast to the rich dairy toppings.
- shredded low-moisture mozzarella cheese: Melts smoothly into gooey stretching pools without releasing excess water that could soften the par-baked crust.
- mini pepperoni slices: Small cured meat rounds scattered over the cheese layer that crisp up into tiny flavorful cups when baked.
- Kraft parmesan cheese: Finely grated cheese dusted over the top before baking to provide a sharp salty finish to the profile.
What You’ll Use
- large clear glass mixing bowl: A spacious 4-quart glass bowl provides plenty of room to stir the sticky dough without spilling flour over the sides — thin plastic bowls can flex and slip on the counter while mixing.
- large aluminum sheet pan: A heavy-gauge rimmed baking sheet distributes oven heat evenly across the bottom of the crusts — cheap thin trays will warp in high heat and cause the cheese to slide off.
- wooden cutting board: A thick hardwood board provides a stable non-slip surface for kneading dough and shaping rounds — glass boards will dull your tools and cause the sticky dough to slide around.
How to Make It
Step 1: Mix the dough ingredients

Combine the King Arthur unbleached all-purpose flour and Fleischmann’s active dry yeast and fine sea salt in a large clear glass mixing bowl. Pour in the warm water at exactly 105°F along with the Pompeian olive oil. Use a sturdy wooden spoon to stir the mixture with a firm circular hand-motion for about 2 to 3 minutes until the dry ingredients absorb the liquid.
You’ll see the loose powder transform into a shaggy sticky mass that pulls away from the sides of the glass bowl. You will smell the faint earthy aroma of the activated yeast mixing with the flour. (I tried using colder water during my first test batch, the yeast refused to wake up and the dough stayed flat as a board so stick to the thermometer measurement.
) Miss this window and leave dry flour pockets at the bottom then the dough won’t hydrate properly. Stir firmly until no dry flour remains, proper hydration develops the gluten structure for a chewy crust.
Tip: Check your water temperature with a digital probe thermometer before mixing because water that is hotter than 115°F will instantly kill your yeast.
Step 2: Knead and rest the dough
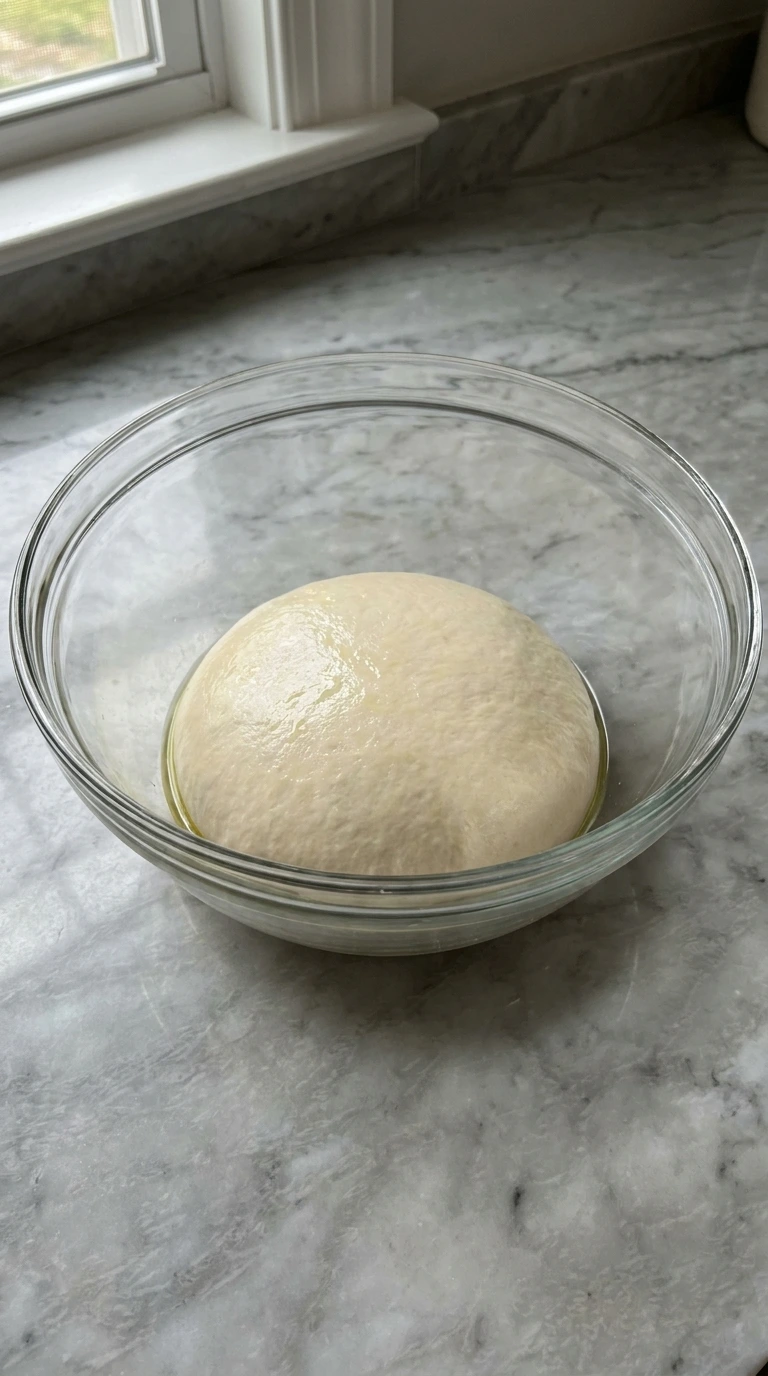
Turn the sticky mass out onto a lightly floured wooden cutting board. Press the dough firmly away from you using the heel of your hand and then fold it back over itself. Rotate the dough 90 degrees after each fold and repeat this rhythmic kneading process for exactly 8 to 10 minutes until the surface is completely smooth.
The dough will change from a lumpy wet paste into a smooth taut elastic sphere that bounces back when pressed with a finger. You will hear a soft slapping sound against the wood as the dough develops its strength. Shape it into a neat round ball and place it back inside the oiled bowl then cover it with a damp kitchen towel to rest for 45 minutes.
Skip this long rest and the gluten networks will stay tight so the crust will snap back like a rubber band when you try to shape it later. Rest the dough until doubled, time relaxes the proteins so you can stretch the dough easily.
Tip: If the dough sticks to your hands like glue while kneading then dust your fingers with a single teaspoon of extra flour at a time.
Step 3: Shape the mini dough rounds

Punch down the risen dough to release the trapped gas. Transfer the dough back to the wooden cutting board and use a bench scraper to divide it into 4 equal pieces. Take one piece and use the palms of your hands to flatten it out into a 5-inch circle with an uneven rustic border.
Press gently from the center outward to create a slightly thicker rim around the edges of each circle. Arrange the 4 shaped rounds onto a large aluminum sheet pan lined with parchment paper leaving about 2 inches of space between them. (My first attempt looked like a perfect grid but baking them with irregular rustic edges feels way more authentic.
) If you don’t leave enough space between the rounds on the pan they will expand and bake into each other during the par-bake phase. Space the circles unevenly on the pan, room allows the hot air to circulate so the borders crisp evenly.
Tip: Avoid using a rolling pin because it presses out all the tiny air bubbles that create a light airy crumb in your baked crust.
Step 4: Par-bake the empty crusts

Slide the aluminum sheet pan into a preheated oven at exactly 425°F. Bake the plain dough rounds for exactly 5 to 6 minutes without any toppings. Use a heavy oven mitt to rotate the pan 180 degrees halfway through the baking time to ensure even heat distribution.
You’ll see the pale dough puff up slightly and the surface will turn from wet and shiny to a dry matte finish. The kitchen will fill with the comforting aroma of baking bread as the outer crust sets. Remove the pan from the oven using your mitts and place it on a heat-safe surface.
If you skip this step and top raw dough with sauce the moisture will soak deep into the starch and create a gummy layer. Bake at 425°F for 5 minutes, par-baking creates a crisp moisture barrier so the sauce never makes the crust soggy.
Tip: Look for a dry matte surface on the dough which is the ultimate visual indicator that your crust is ready for the toppings.
Step 5: Layer the sauce and toppings

Spoon exactly 2 tablespoons of Mutti pizza sauce into the center of each par-baked crust. Spread the red sauce in a gentle circular motion using the back of the spoon while leaving a half-inch border around the edge. Scatter the shredded low-moisture mozzarella cheese unevenly over the sauce layer.
Arrange the mini pepperoni slices over the cheese allowing a few pieces to overlap naturally. Sprinkle the finely grated Kraft parmesan cheese over the top to add a sharp savory finish. The red sauce will contrast sharply against the stark white shreds of cheese.
If you pack the toppings too thick in the center the weight will prevent the dough from crisping and the cheese won’t melt evenly. Scatter the ingredients loosely edge-to-edge, thin layers allow the cheese to melt quickly before the bottom crust burns.
Tip: Leave that half-inch border of exposed dough around the edges because it gives the crust room to puff and brown beautifully.
Step 6: Bake until cheese melts and browns
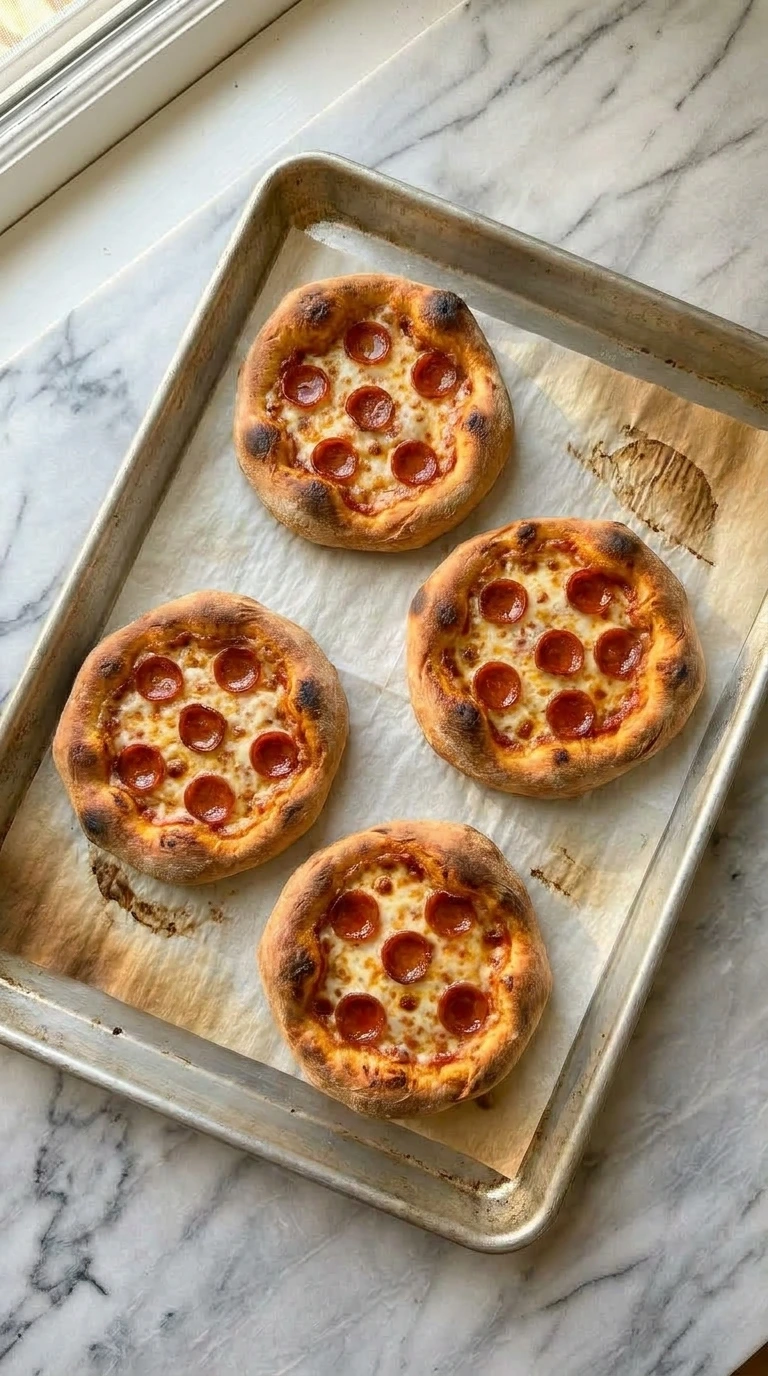
Return the loaded aluminum sheet pan into the hot oven at 425°F. Bake for another 8 to 10 minutes until the cheese is completely melted and bubbly. Watch closely through the oven window during the final 2 minutes so the toppings do not scorch.
You’ll see the shredded mozzarella transform into a glossy molten sheet with scattered toasted amber spots. The mini pepperoni slices will curl upward at the edges and release tiny amounts of savory glistening oil. You’ll hear the cheese loudly sizzling as you pull the pan out of the hot oven.
Go past 10 minutes in the oven and the delicate dairy fats will separate completely which leaves your pizza greasy and dry. Bake until bubbling and toasted, high heat bubbles the cheese quickly so the mozzarella stays gooey and strings perfectly.
Tip: Let the hot pizzas rest on the baking sheet for exactly 2 minutes before slicing so the gooey cheese sets slightly.
Pro Tips
- Measure your flour using a digital kitchen scale instead of a measuring cup because scooping directly from the bag packs the flour and makes the dough dry.
- Warm your water to exactly 105°F because anything over 115°F kills the yeast while cold water prevents the dough from rising within the 45-minute window.
- Knead the dough for a full 8 minutes until a smooth skin forms because skipping this step results in a crumbly crust that cracks during shaping.
- Use low-moisture mozzarella shreds instead of fresh buffalo mozzarella because fresh cheese contains too much water and turns the mini pizzas into a soggy mess.
- Par-bake the empty crusts on the sheet pan at 425°F for 5 minutes because this creates the ultimate crunchy texture that supports heavy sauce and toppings.
- Rotate your baking sheet 180 degrees halfway through the final bake because home ovens have uneven hot spots that can burn the back pizzas.
- Let the pizzas rest for 2 minutes on a cooling rack after baking because this gives the bubbling cheese time to set so it doesn’t slide off.
- Add 1 tablespoon of basil pesto and 1/2 cup of diced grilled chicken breast for a savory green twist that tastes incredible.
- Scatter 1/4 cup of drained pineapple tidbits and 1/4 cup of diced cooked ham over the cheese for a classic sweet and savory Hawaiian profile.
- Mix 1 teaspoon of red pepper flakes into the tomato sauce and top with hot honey for an updated spicy kick that adults love.
Substitutions & Variations
- King Arthur unbleached all-purpose flour: Bob’s Red Mill 1-to-1 Gluten-Free Baking Flour — Use the exact same measurement but reduce the water by 2 tablespoons because gluten-free flour absorbs less moisture and the crust will feel denser.
- shredded low-moisture mozzarella cheese: Violife Just Like Mozzarella Shreds — Swap evenly for a dairy-free alternative but note that plant-based cheese needs a light spray of olive oil to melt smoothly without drying out.
- mini pepperoni slices: sliced cremini mushrooms — Use an equal amount of thinly sliced mushrooms for a vegetarian option but sauté them first to remove excess water so they don’t make the pizza watery.
- Mutti pizza sauce: homemade cheese dip sauce — If you ran out of tomato sauce try using a base inspired by our rich Cheese Dip for a decadent white pizza variant.
How to Store & Reheat
Got leftovers? Toss your mini pizzas into an airtight plastic container lined with a paper towel so they don’t get soggy. They’ll stay fresh in the fridge for up to 4 days.
If you want to keep them longer, just wrap each cooled pizza tightly in aluminum foil and slide them into a freezer bag. They’ll freeze beautifully for up to 3 months. When you’re ready to eat, reheat them right on the center rack of a preheated 375°F oven for 6 to 8 minutes.
Please don’t use the microwave. It just traps steam and turns the crust super rubbery and tough. You’ll know they’re ready when the cheese starts sizzling and those little pepperoni edges curl right up.
Mini Pizzas
Ingredients
- 2 cups King Arthur unbleached all-purpose flour Provides the essential protein content needed to create a sturdy structural network for a chewy crust.
- 1 packet Fleischmann’s active dry yeast Leavens the dough to create small airy pockets inside the crust during the warm rest period.
- 0.75 cup warm water Brings the moisture required to hydrate the flour particles and activate the dormant yeast cells. Keep it at 105°F.
- 2 tablespoons Pompeian olive oil Adds richness to the dough mixture and coats the bowl to prevent sticking during the fermentation stage.
- 1 teaspoon fine sea salt Tightens the gluten strands and enhances the natural savory flavors of the baked wheat crust.
- 0.5 cup Mutti pizza sauce A seasoned tomato paste blend spread over the crusts to provide a bright acidic contrast to the rich dairy toppings.
- 1.5 cups shredded low-moisture mozzarella cheese Melts smoothly into gooey stretching pools without releasing excess water that could soften the par-baked crust.
- 0.5 cup mini pepperoni slices Small cured meat rounds scattered over the cheese layer that crisp up into tiny flavorful cups when baked.
- 2 tablespoons Kraft parmesan cheese Finely grated cheese dusted over the top before baking to provide a sharp salty finish to the profile.
Instructions
- Combine the King Arthur unbleached all-purpose flour and Fleischmann’s active dry yeast and fine sea salt in a large clear glass mixing bowl. Pour in the warm water at exactly 105°F along with the Pompeian olive oil. Use a sturdy wooden spoon to stir the mixture with a firm circular hand-motion for about 2 to 3 minutes until the dry ingredients absorb the liquid. You’ll see the loose powder transform into a shaggy sticky mass that pulls away from the sides of the glass bowl. You will smell the faint earthy aroma of the activated yeast mixing with the flour. (I tried using colder water during my first test batch, the yeast refused to wake up and the dough stayed flat as a board so stick to the thermometer measurement.) Miss this window and leave dry flour pockets at the bottom then the dough won’t hydrate properly. Stir firmly until no dry flour remains, proper hydration develops the gluten structure for a chewy crust.
- Turn the sticky mass out onto a lightly floured wooden cutting board. Press the dough firmly away from you using the heel of your hand and then fold it back over itself. Rotate the dough 90 degrees after each fold and repeat this rhythmic kneading process for exactly 8 to 10 minutes until the surface is completely smooth. The dough will change from a lumpy wet paste into a smooth taut elastic sphere that bounces back when pressed with a finger. You will hear a soft slapping sound against the wood as the dough develops its strength. Shape it into a neat round ball and place it back inside the oiled bowl then cover it with a damp kitchen towel to rest for 45 minutes. Skip this long rest and the gluten networks will stay tight so the crust will snap back like a rubber band when you try to shape it later. Rest the dough until doubled, time relaxes the proteins so you can stretch the dough easily.

- Punch down the risen dough to release the trapped gas. Transfer the dough back to the wooden cutting board and use a bench scraper to divide it into 4 equal pieces. Take one piece and use the palms of your hands to flatten it out into a 5-inch circle with an uneven rustic border. Press gently from the center outward to create a slightly thicker rim around the edges of each circle. Arrange the 4 shaped rounds onto a large aluminum sheet pan lined with parchment paper leaving about 2 inches of space between them. (My first attempt looked like a perfect grid but baking them with irregular rustic edges feels way more authentic.) If you don’t leave enough space between the rounds on the pan they will expand and bake into each other during the par-bake phase. Space the circles unevenly on the pan, room allows the hot air to circulate so the borders crisp evenly.

- Slide the aluminum sheet pan into a preheated oven at exactly 425°F. Bake the plain dough rounds for exactly 5 to 6 minutes without any toppings. Use a heavy oven mitt to rotate the pan 180 degrees halfway through the baking time to ensure even heat distribution. You’ll see the pale dough puff up slightly and the surface will turn from wet and shiny to a dry matte finish. The kitchen will fill with the comforting aroma of baking bread as the outer crust sets. Remove the pan from the oven using your mitts and place it on a heat-safe surface. If you skip this step and top raw dough with sauce the moisture will soak deep into the starch and create a gummy layer. Bake at 425°F for 5 minutes, par-baking creates a crisp moisture barrier so the sauce never makes the crust soggy.

- Spoon exactly 2 tablespoons of Mutti pizza sauce into the center of each par-baked crust. Spread the red sauce in a gentle circular motion using the back of the spoon while leaving a half-inch border around the edge. Scatter the shredded low-moisture mozzarella cheese unevenly over the sauce layer. Arrange the mini pepperoni slices over the cheese allowing a few pieces to overlap naturally. Sprinkle the finely grated Kraft parmesan cheese over the top to add a sharp savory finish. The red sauce will contrast sharply against the stark white shreds of cheese. If you pack the toppings too thick in the center the weight will prevent the dough from crisping and the cheese won’t melt evenly. Scatter the ingredients loosely edge-to-edge, thin layers allow the cheese to melt quickly before the bottom crust burns.

- Return the loaded aluminum sheet pan into the hot oven at 425°F. Bake for another 8 to 10 minutes until the cheese is completely melted and bubbly. Watch closely through the oven window during the final 2 minutes so the toppings do not scorch. You’ll see the shredded mozzarella transform into a glossy molten sheet with scattered toasted amber spots. The mini pepperoni slices will curl upward at the edges and release tiny amounts of savory glistening oil. You’ll hear the cheese loudly sizzling as you pull the pan out of the hot oven. Go past 10 minutes in the oven and the delicate dairy fats will separate completely which leaves your pizza greasy and dry. Bake until bubbling and toasted, high heat bubbles the cheese quickly so the mozzarella stays gooey and strings perfectly.

Notes
Nutrition
Common Questions
Yes you can absolutely prepare the dough up to two days in advance. Shape the dough into a ball after kneading and place it inside a sealed plastic container coated with olive oil then store it in the refrigerator. The cold environment slows down the yeast growth while developing a deeper sourdough over 48 hours.
Avoid using the microwave because it traps steam and turns the crust soft and rubbery. Instead arrange the cold leftover pizzas on an aluminum sheet tray and bake them in a preheated oven at 375°F for about 5 to 7 minutes. The direct dry heat crisps the base and remelts the mozzarella perfectly.
This common mistake happens when you skip the essential 5-minute par-baking step or if you apply too much pizza sauce. Piling on wet toppings before the raw dough sets allows moisture to seep deep into the starch layer. Always par-bake the plain rounds until the surface looks completely dry and matte.
Yes you can freeze them easily before the final baking stage. Assemble the pizzas completely on a parchment-lined tray then flash-freeze them for 2 hours until solid. Wrap each frozen pizza tightly in plastic wrap and store them in a freezer bag for up to 3 months before baking from frozen at 425°F.
You can double or triple the ingredient measurements easily by mixing the dough in a larger bowl or using a stand mixer. Divide the dough into 8 or 12 individual pieces instead of 4 and use multiple aluminum sheet pans. Bake the trays in batches so the oven temperature does not drop too low.
Final Thoughts
Every time I make this I think about the first time I tried it, nervous about screwing it up, convinced I’d need more experience. Turns out it’s one of those dishes that forgives you for being a beginner.
You can mess up the timing like I did those first three attempts and it still turns out good. If you love fun finger foods then you should also check out our popular Mini Sliders for your next game day spread.
If you try it, leave me a comment below, I read every single one. And if you enjoyed this, check out some of my other recipes that use similar techniques.
The world’s largest pizza ever baked covered over 13000 square feet but these tiny 5-inch crusts are much easier to handle in a standard home kitchen.