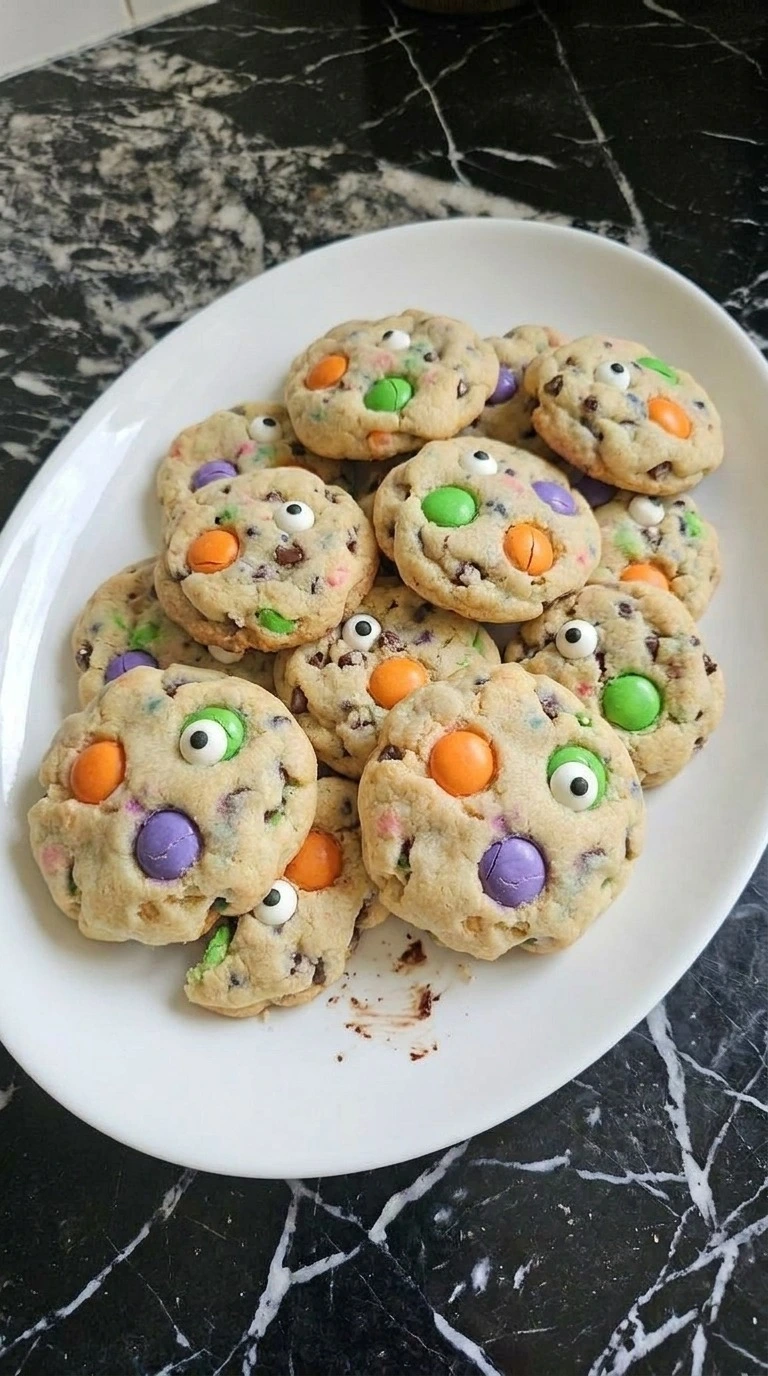
Brown Butter Halloween Candy Cookies
A pan of browned butter changed the way I make Halloween cookies. The first time I made Brown Butter Halloween Candy Cookies was after a Halloween party when we had far too many little candy packs left in the kitchen. I browned the butter a little too dark and baked the first tray almost three minutes too long. Somehow, they were still the first dessert to disappear. That’s when I realized these cookies are much more forgiving than they look.
Since then I’ve made this recipe when candy bowls were overflowing and when friends dropped by with almost no warning. My brown butter halloween candy cookies have crisp edges and soft centers because the dough gets a short chill before baking. And the toasted butter keeps each bite from tasting like plain sugar. The chopped peanut butter cups melt into small pockets while the candy coated chocolates stay more defined. I also like that the dough doesn’t need an overnight rest.
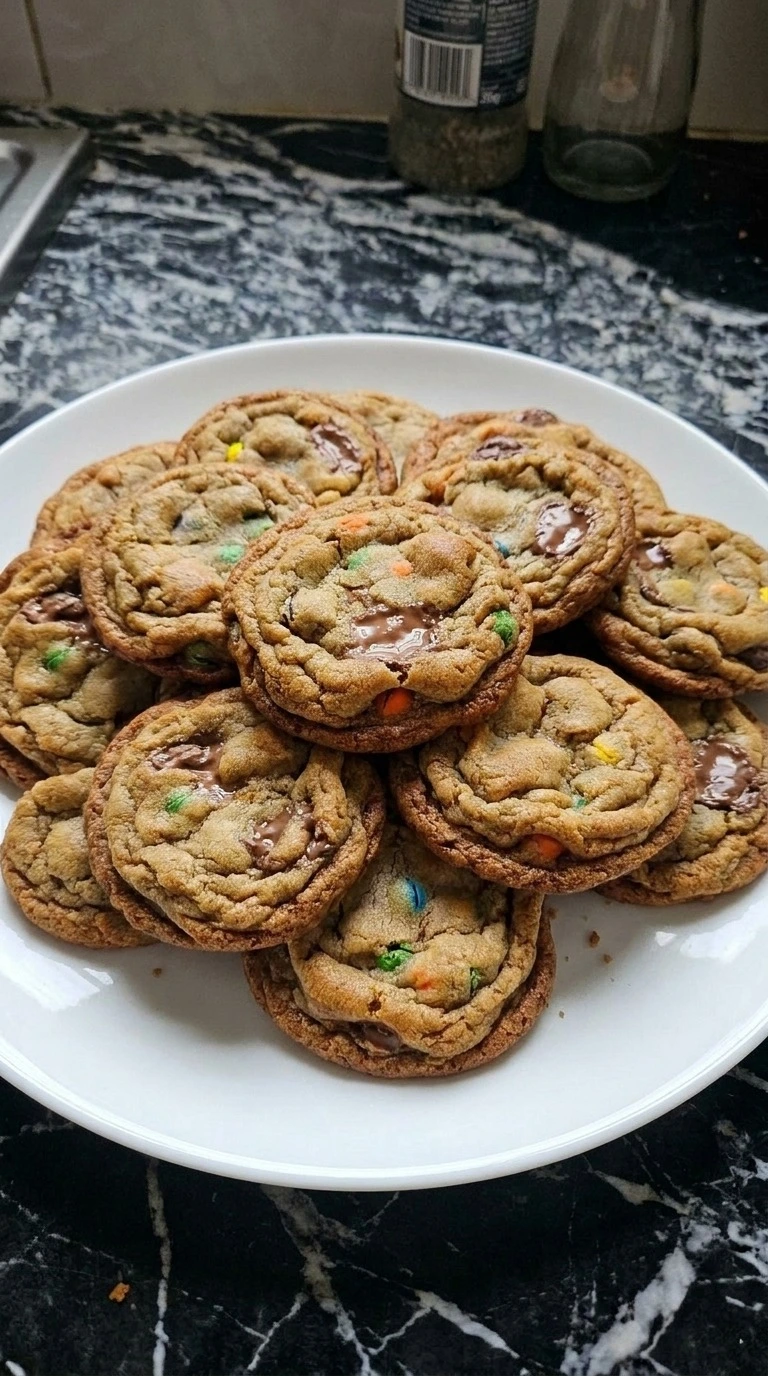
You give the browned butter time to cool and then chill the finished dough for 30 minutes, so the whole process still feels manageable. They’re buttery and chewy and packed with chocolate, but the nutty browned butter keeps the sweetness balanced. A little salt helps too.
Why This Recipe Works
Brown Butter Halloween Candy Cookies get their deeper flavor from cooking the butter until its milk solids turn amber, which creates toasted and nutty notes that plain melted butter can’t give. Cooling that butter to about 85°F to 90°F before mixing keeps it fluid enough to blend while preventing the dough from becoming greasy.
Then a 30 minute chill firms the butter again before the cookies meet a 350°F oven. That short rest limits excess spread, so the brown butter Halloween cookies keep crisp edges while their centers stay thick and chewy.
Ingredients
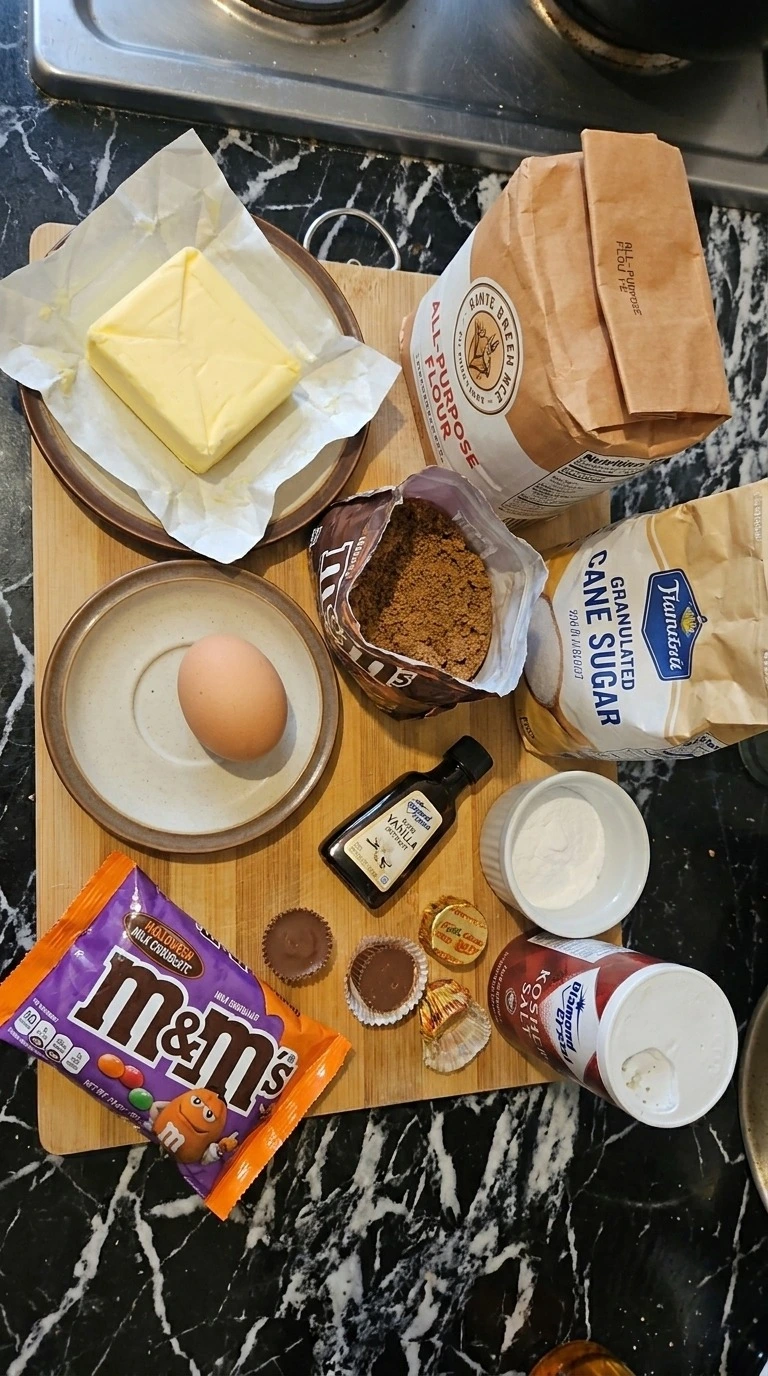
- unsalted butter: Brown until the milk solids turn amber to create the nutty base flavor.
- dark brown sugar: Packed firmly for extra moisture and a deeper caramel flavor.
- granulated cane sugar: Adds sweetness and helps the cookie edges bake crisp.
- large egg: Use at about room temperature so it blends smoothly with the cooled browned butter.
- pure vanilla extract: Adds a warm vanilla note that rounds out the toasted butter.
- all-purpose flour: Spoon into the measuring cup and level it so the dough doesn’t become overly dry.
- baking soda: Provides enough lift and spread for chewy cookies with softly set centers.
- Diamond Crystal kosher salt: Balances the sweetness and sharpens the toasted brown butter flavor.
- Halloween milk chocolate M&M’s: Fold through the dough so colorful chocolate pieces remain visible after baking.
- mini peanut butter cups: Chop into rough pieces so the cookies develop uneven pockets of melted chocolate and peanut butter.
Kitchen Equipment
- 2-quart heavy-bottomed saucepan: A heavy 2-quart saucepan browns the butter evenly so the milk solids don’t scorch, while a very thin pan can create hot spots.
- large mixing bowl: A bowl around 4 quarts gives the thick dough enough room to fold without spilling, while a smaller bowl makes candy distribution awkward.
- rubber spatula: A firm flexible spatula scrapes browned butter and folds thick dough cleanly, while a very soft spatula can bend instead of moving the dough.
- two 18-by-13-inch rimmed baking sheets: Two standard half-sheet pans give 16 cookies enough spacing to spread, while a smaller tray crowds the dough and encourages merged edges.
- parchment paper: Parchment keeps melted candy from sticking to the tray and gives more consistent bottoms, while heavily greased foil can make the cookies spread faster.
- 2-tablespoon cookie scoop: A 2-tablespoon scoop keeps portions close to the same size so they finish together, while random oversized portions need extra baking time.
- instant-read thermometer: A fast thermometer confirms the browned butter has cooled near 85°F to 90°F, while guessing can leave it hot enough to thin the dough.
How to Make It
Step 1: Brown the butter until deeply nutty

Melt the unsalted butter over medium heat, about 5 on a 10-dial, and keep it there for 5 to 7 minutes. Swirl every 20 to 30 seconds so the milk solids move across the bottom instead of collecting in one spot. The foam will rise first and then thin out as small golden flecks appear.
Take the butter off the heat once those flecks turn amber and the liquid smells like toasted hazelnuts. Go much darker and the milk solids can taste bitter. Then let the browned butter cool for 15 to 20 minutes until it reaches about 85°F to 90°F.
It should stay fluid but shouldn’t feel hot. Cool it before mixing because hot butter melts the sugar too fast.
Tip: Pour every browned milk solid into the dough. Those dark specks carry most of the toasted flavor, so don’t leave them behind.
Step 2: Mix the browned butter cookie dough
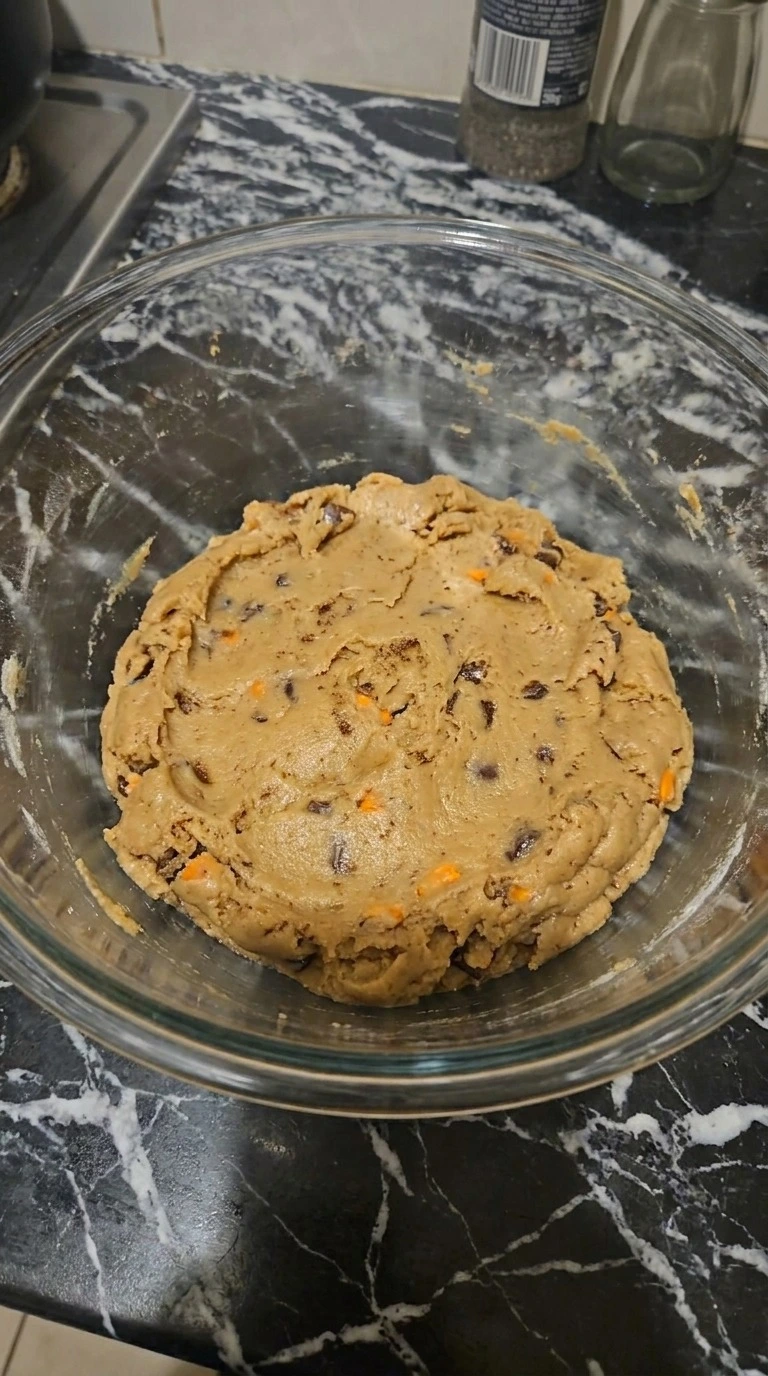
Combine the cooled browned butter with dark brown sugar and granulated cane sugar at about 70°F room temperature. Mix firmly for 45 to 60 seconds until the mixture looks glossy and slightly thick. Then work in the large egg and pure vanilla extract for another 30 seconds.
Add all-purpose flour, baking soda and Diamond Crystal kosher salt. Fold from the bottom upward until only a few dry flour streaks remain, then stop. Overmix here and Brown Butter Halloween Candy Cookies lose their tender centers.
The dough should look thick and slightly tacky with dark butter flecks running through it. No loose flour should remain. Mix only until combined because extra stirring builds more gluten and makes the cookies tougher.
Tip: If the dough looks oily after mixing, let it stand for 5 minutes before adding candy so the flour can absorb more fat.
Step 3: Fold in the candy and chill the dough
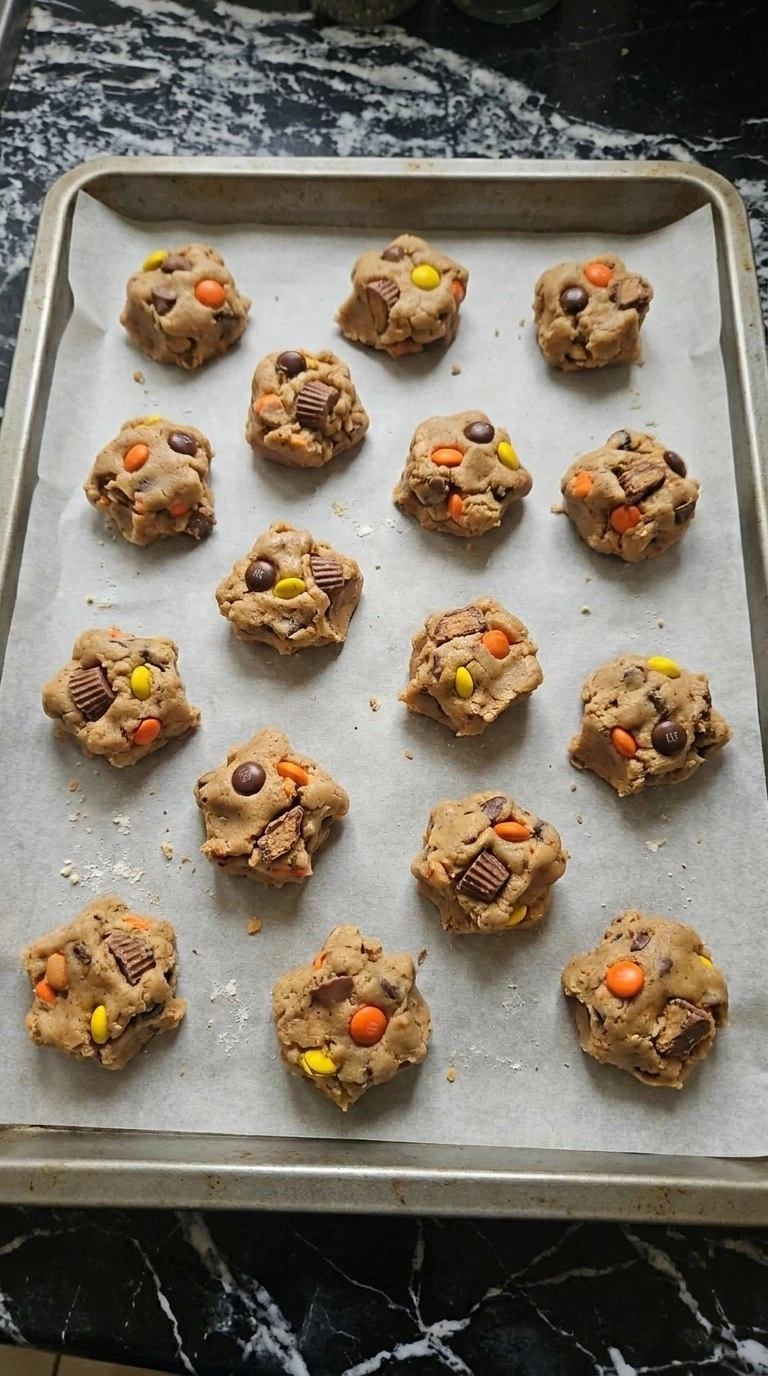
Fold 3/4 cup Halloween milk chocolate M&M’s and 1/2 cup chopped mini peanut butter cups into the dough using broad turns that lift dough from the bottom. Stop after about 8 to 10 folds so the candy stays in visible pockets instead of breaking apart. Cover and chill the dough at 40°F for 30 minutes. Then divide it into 16 rough portions of about 2 tablespoons each and leave the tops uneven.
Skip the chill and the warm fat can make Brown Butter Halloween Candy Cookies spread too thin. The chilled portions should feel firm enough to lift without sticking badly, but they shouldn’t feel hard. You’ll still see bright candy pieces on the rough surfaces. (I once skipped the 30 minute chill.
That batch spread into one nearly solid sheet. ) Chill the dough so the butter firms before oven heat hits it.
Tip: Save about 2 tablespoons of the candy pieces and press them onto the dough tops after portioning for more visible color.
Step 4: Bake until the edges turn golden
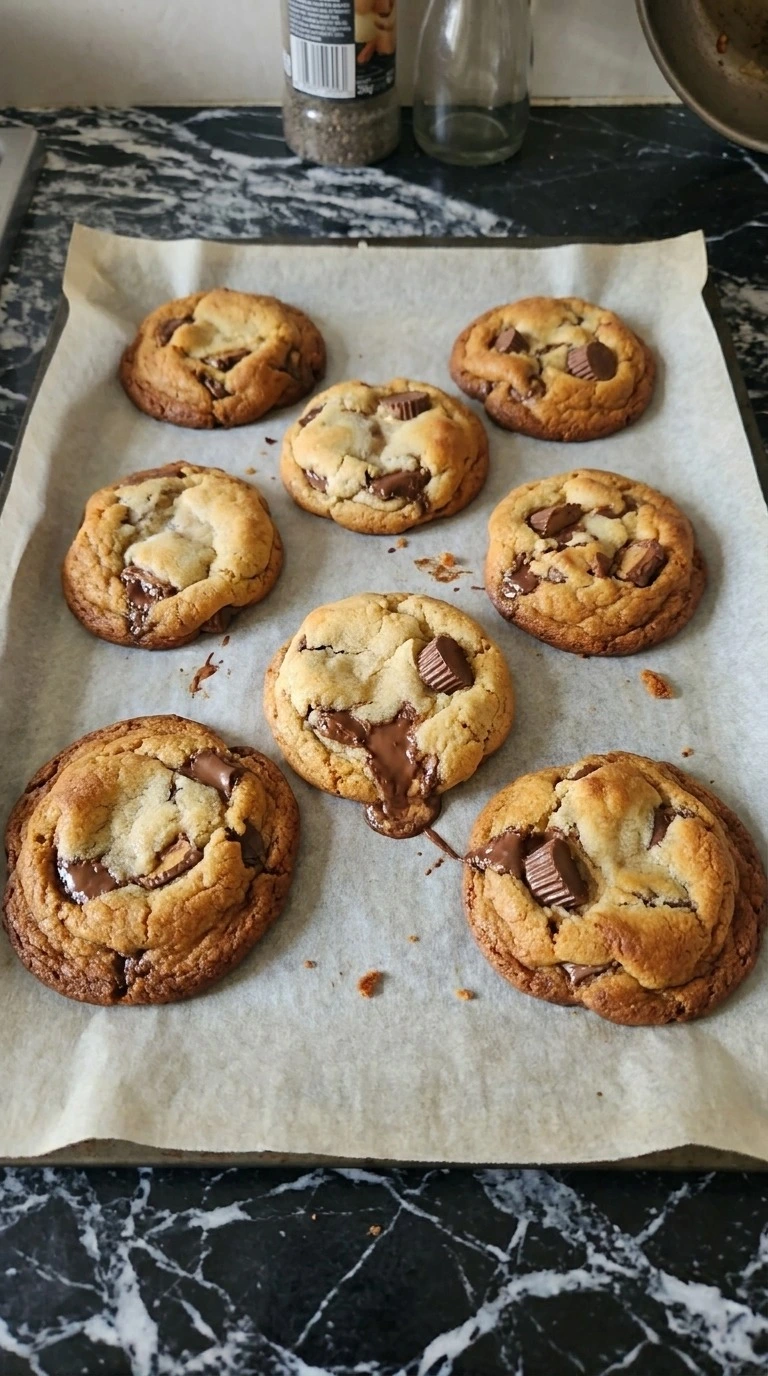
Arrange 8 dough portions on each tray with about 2 1/2 inches between them. Bake one tray at a time at 350°F for 10 to 12 minutes and rotate the tray once at minute 7. The cookies will spread into uneven rounds while the edges deepen from tan to golden brown.
Pull them out when the outer half inch looks set but the middle still appears soft and slightly puffed. Go beyond 12 minutes and the centers lose much of their chew. You’ll smell toasted butter and warm chocolate near minute 9.
The candy shells may crack and the peanut butter cup pieces will look glossy. Bake Brown Butter Halloween Candy Cookies only until the edges set because carryover heat finishes the soft centers.
Tip: For similar baking from tray to tray, let a hot baking tray cool for at least 10 minutes before placing fresh dough on it.
Step 5: Cool the cookies until the centers set
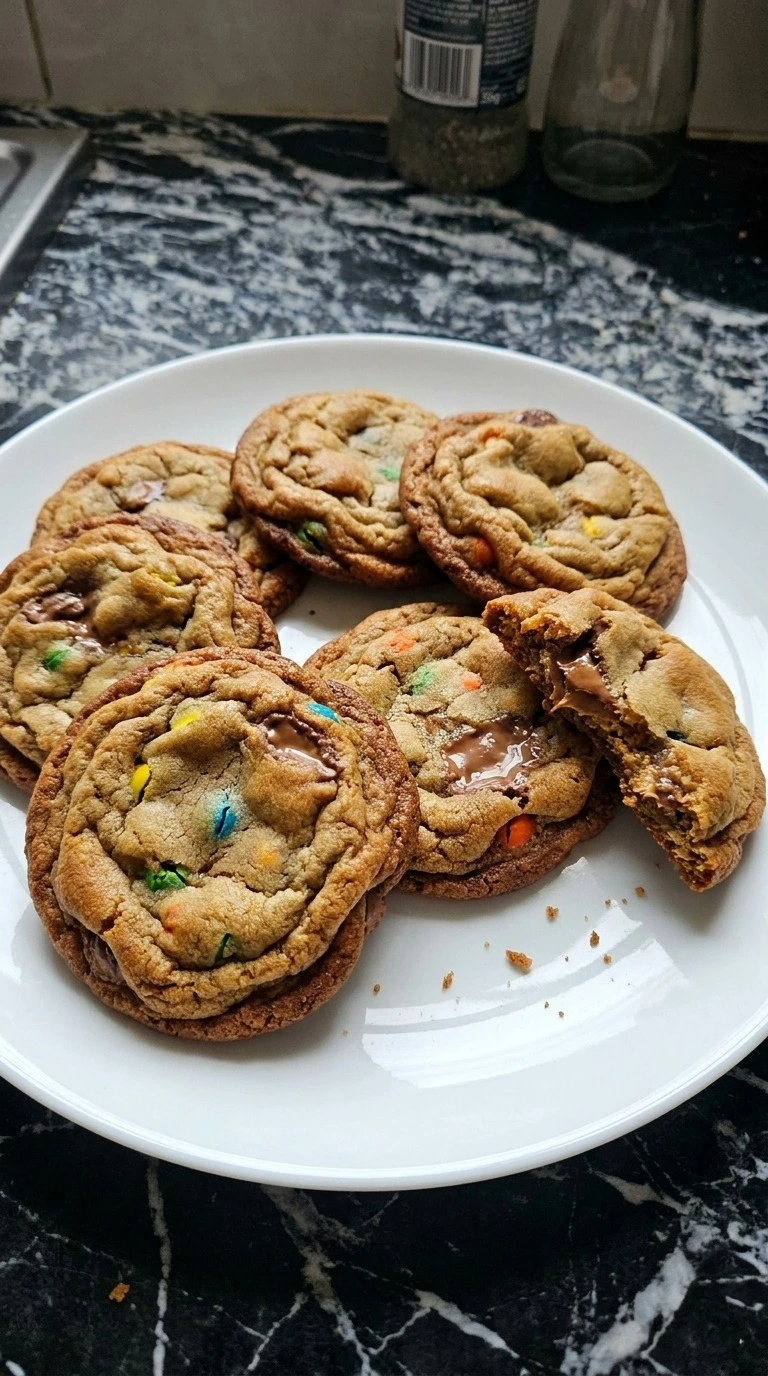
Leave the baked cookies on the tray for exactly 10 minutes at normal room temperature, about 68°F to 72°F. During that rest the soft centers settle and the edges become firmer without turning hard. Then move each cookie carefully and let it cool for another 15 minutes before serving.
Don’t stack them while warm because the softened chocolate and peanut butter candy will smear. This final rest gives Brown Butter Halloween Candy Cookies their chewy middle instead of a fragile underbaked texture. The finished cookies should have crisp golden rims and wrinkled tan centers with small glossy chocolate pockets.
Break one open and the middle should bend before it snaps. Cool before serving because the starches and melted sugars need time to set.
Tip: A few grains of flaky sea salt can go on each warm cookie within 1 minute of baking if you want stronger sweet and salty contrast.
Pro Tips
- Brown the butter over medium heat for 5 to 7 minutes and remove it once the milk solids turn amber, because another 30 seconds can push them toward bitterness.
- Cool the browned butter to about 85°F to 90°F before mixing. If it’s warmer, the sugar can dissolve too fast and the dough may spread thin.
- Weigh the all-purpose flour at about 210 grams if possible. Even an extra 2 tablespoons can make Brown Butter Halloween Candy Cookies dry instead of chewy.
- Chill the dough for a full 30 minutes at about 40°F before portioning. That short rest firms the butter and helps the cookies keep thicker centers.
- Bake only 8 cookies on an 18 by 13 inch tray and leave about 2 1/2 inches between portions. Crowding can make their edges merge before they set.
- Pull the tray at 10 to 12 minutes when the outer half inch looks golden but the centers still seem soft. They’ll firm during the 10 minute tray rest.
- Press about 2 tablespoons of reserved candy pieces onto the dough tops before baking. You’ll get brighter color and more visible chocolate without changing the texture.
- Add 1/2 teaspoon ground cinnamon and 1/4 teaspoon ground nutmeg to the flour for a warmer fall spice version that still keeps the brown butter flavor clear.
- Replace half of the 3/4 cup Halloween milk chocolate M&M’s with chopped dark chocolate for deeper cocoa flavor and less overall sweetness.
- Fold in 1/2 cup crushed chocolate sandwich cookies instead of the mini peanut butter cups for a cookies and cream Halloween twist with crisp little crumbs.
- Add 1/3 cup toasted chopped pecans with the candy for extra crunch, then chill the dough 5 minutes longer because the added pieces make portioning looser.
Substitutions & Variations
- unsalted butter: plant based butter with at least 80 percent fat — Use the same 3/4 cup amount for a dairy free version. It won’t brown quite as deeply, so expect less nutty flavor and chill the finished dough for 40 minutes if it feels soft.
- all-purpose flour: 1 to 1 gluten free baking flour with xanthan gum — Replace the 1 3/4 cups all-purpose flour cup for cup. The cookies will be slightly more delicate, so cool them on the tray for 12 to 15 minutes before moving them.
- large egg: 3 tablespoons aquafaba — Use 3 tablespoons aquafaba for the single large egg if you need an egg free batch. The centers will be a little less rich and may spread more, so chill the dough for 45 minutes.
- Halloween milk chocolate M&M’s: chopped milk chocolate bar or candy coated chocolate pieces — Use 3/4 cup of either option. A chopped chocolate bar melts into softer pools, while candy coated pieces keep brighter spots and more distinct texture.
- mini peanut butter cups: chopped chocolate caramel cups or extra Halloween milk chocolate M&M’s — Use the same 1/2 cup amount. Caramel cups make the centers softer and stickier, while extra candy coated chocolate gives a firmer bite without peanut flavor.
Storage Instructions
Store cooled Brown Butter Halloween Candy Cookies in an airtight container at room temperature for 3 to 4 days. For longer storage, freeze fully cooled cookies in a sealed freezer bag with parchment between layers for up to 2 months, then thaw them in the closed bag so condensation stays off the surface.
To refresh them, warm the cookies at 300°F for 4 to 5 minutes and let them sit for 2 minutes before eating. Discard any cookie with visible mold, an unusual sour smell or a damp sticky surface that wasn’t caused by melted candy.
Brown Butter Halloween Candy Cookies
Ingredients
- 3/4 cup unsalted butter Brown until the milk solids turn amber to create the nutty base flavor.
- 3/4 cup dark brown sugar Packed firmly for extra moisture and a deeper caramel flavor.
- 1/2 cup granulated cane sugar Adds sweetness and helps the cookie edges bake crisp.
- 1 large large egg Use at about room temperature so it blends smoothly with the cooled browned butter.
- 2 teaspoons pure vanilla extract Adds a warm vanilla note that rounds out the toasted butter.
- 1 3/4 cups all-purpose flour Spoon into the measuring cup and level it so the dough doesn’t become overly dry.
- 1/2 teaspoon baking soda Provides enough lift and spread for chewy cookies with softly set centers.
- 1/2 teaspoon Diamond Crystal kosher salt Balances the sweetness and sharpens the toasted brown butter flavor.
- 3/4 cup Halloween milk chocolate M&M’s Fold through the dough so colorful chocolate pieces remain visible after baking.
- 1/2 cup mini peanut butter cups Chop into rough pieces so the cookies develop uneven pockets of melted chocolate and peanut butter.
Instructions
- Melt the unsalted butter over medium heat, about 5 on a 10-dial, and keep it there for 5 to 7 minutes. Swirl every 20 to 30 seconds so the milk solids move across the bottom instead of collecting in one spot. The foam will rise first and then thin out as small golden flecks appear. Take the butter off the heat once those flecks turn amber and the liquid smells like toasted hazelnuts. Go much darker and the milk solids can taste bitter. Then let the browned butter cool for 15 to 20 minutes until it reaches about 85°F to 90°F. It should stay fluid but shouldn’t feel hot. Cool it before mixing because hot butter melts the sugar too fast.

- Combine the cooled browned butter with dark brown sugar and granulated cane sugar at about 70°F room temperature. Mix firmly for 45 to 60 seconds until the mixture looks glossy and slightly thick. Then work in the large egg and pure vanilla extract for another 30 seconds. Add all-purpose flour, baking soda and Diamond Crystal kosher salt. Fold from the bottom upward until only a few dry flour streaks remain, then stop. Overmix here and Brown Butter Halloween Candy Cookies lose their tender centers. The dough should look thick and slightly tacky with dark butter flecks running through it. No loose flour should remain. Mix only until combined because extra stirring builds more gluten and makes the cookies tougher.
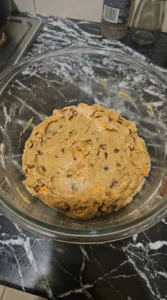
- Fold 3/4 cup Halloween milk chocolate M&M’s and 1/2 cup chopped mini peanut butter cups into the dough using broad turns that lift dough from the bottom. Stop after about 8 to 10 folds so the candy stays in visible pockets instead of breaking apart. Cover and chill the dough at 40°F for 30 minutes. Then divide it into 16 rough portions of about 2 tablespoons each and leave the tops uneven. Skip the chill and the warm fat can make Brown Butter Halloween Candy Cookies spread too thin. The chilled portions should feel firm enough to lift without sticking badly, but they shouldn’t feel hard. You’ll still see bright candy pieces on the rough surfaces. (I once skipped the 30 minute chill. That batch spread into one nearly solid sheet.) Chill the dough so the butter firms before oven heat hits it.

- Arrange 8 dough portions on each tray with about 2 1/2 inches between them. Bake one tray at a time at 350°F for 10 to 12 minutes and rotate the tray once at minute 7. The cookies will spread into uneven rounds while the edges deepen from tan to golden brown. Pull them out when the outer half inch looks set but the middle still appears soft and slightly puffed. Go beyond 12 minutes and the centers lose much of their chew. You’ll smell toasted butter and warm chocolate near minute 9. The candy shells may crack and the peanut butter cup pieces will look glossy. Bake Brown Butter Halloween Candy Cookies only until the edges set because carryover heat finishes the soft centers.
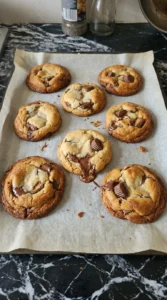
- Leave the baked cookies on the tray for exactly 10 minutes at normal room temperature, about 68°F to 72°F. During that rest the soft centers settle and the edges become firmer without turning hard. Then move each cookie carefully and let it cool for another 15 minutes before serving. Don’t stack them while warm because the softened chocolate and peanut butter candy will smear. This final rest gives Brown Butter Halloween Candy Cookies their chewy middle instead of a fragile underbaked texture. The finished cookies should have crisp golden rims and wrinkled tan centers with small glossy chocolate pockets. Break one open and the middle should bend before it snaps. Cool before serving because the starches and melted sugars need time to set.

Notes
Frequently Asked Questions
Yes. Mix the dough and chill it for up to 24 hours at about 40°F before baking. Let very firm dough sit on the counter for 10 to 15 minutes before scooping so it softens enough to portion without warming completely.
The browned butter was probably too warm or the dough didn’t chill long enough. Cool the butter to about 85°F to 90°F and refrigerate the mixed dough for at least 30 minutes before baking at 350°F.
Yes. Freeze the 2 tablespoon dough portions on a tray until firm for about 1 hour, then store them airtight for up to 2 months. Bake from frozen at 350°F and add about 2 minutes to the usual 10 to 12 minute bake.
Use 1 3/4 cups of a 1 to 1 gluten free baking flour that already contains xanthan gum. Chill the dough for 35 to 40 minutes and let the baked cookies rest on the tray about 12 minutes because they’ll be more fragile while hot.
Yes, double every ingredient exactly and mix in a bowl that holds at least 6 quarts so the candy distributes evenly. Still bake only 8 cookies per 18 by 13 inch tray at 350°F and keep the 10 to 12 minute timing.
Candy coated milk chocolate and chopped peanut butter cups work well because one keeps its shape while the other melts into soft pockets. Keep the total candy near 1 1/4 cups so the dough still holds together and bakes evenly.
Warm one cookie at 300°F for 4 to 5 minutes or microwave it for about 8 to 10 seconds. The chocolate will soften again, but don’t heat much longer because the chewy center can turn dry.
Final Thoughts
A bowl of leftover Halloween candy is usually what sends me back to this recipe. Brown Butter Halloween Candy Cookies have become my favorite way to turn those odds and ends into something that tastes far more planned than it really was.
The toasted butter and short chill make brown butter halloween candy cookies especially chewy without letting all that candy take over. And now that I know exactly when to pull them from the oven, I make them every Halloween season.
Try a batch, share your favorite candy mix and tag your cookies if you post them.
Brown butter gets its toasted aroma when the butter’s milk solids brown and form new nutty flavors. That’s why the same butter can taste dramatically different after only 5 to 7 minutes of careful heating.