Halloween Peanut Butter Spider Cookies
By the time October rolls around, I want real peanut butter flavor in every bite, not a plain sugar cookie wearing a chocolate spider just for show. That sounds simple until Halloween Peanut Butter Spider Cookies start spreading too far or the chocolate bodies sink into soft centers. And nobody wants a spider cookie that looks melted before the party begins. I first thought the obvious route would work.
Make a soft peanut butter cookie, press in a chocolate cup and pipe on a few legs. But cookies that bake too long crack around the candy, while cookies decorated too soon can melt the chocolate into a puddle. Even the legs can disappear if the piping chocolate is too warm. So this version keeps the bake short and uses the warm cookie itself to grip the candy body without turning it runny.
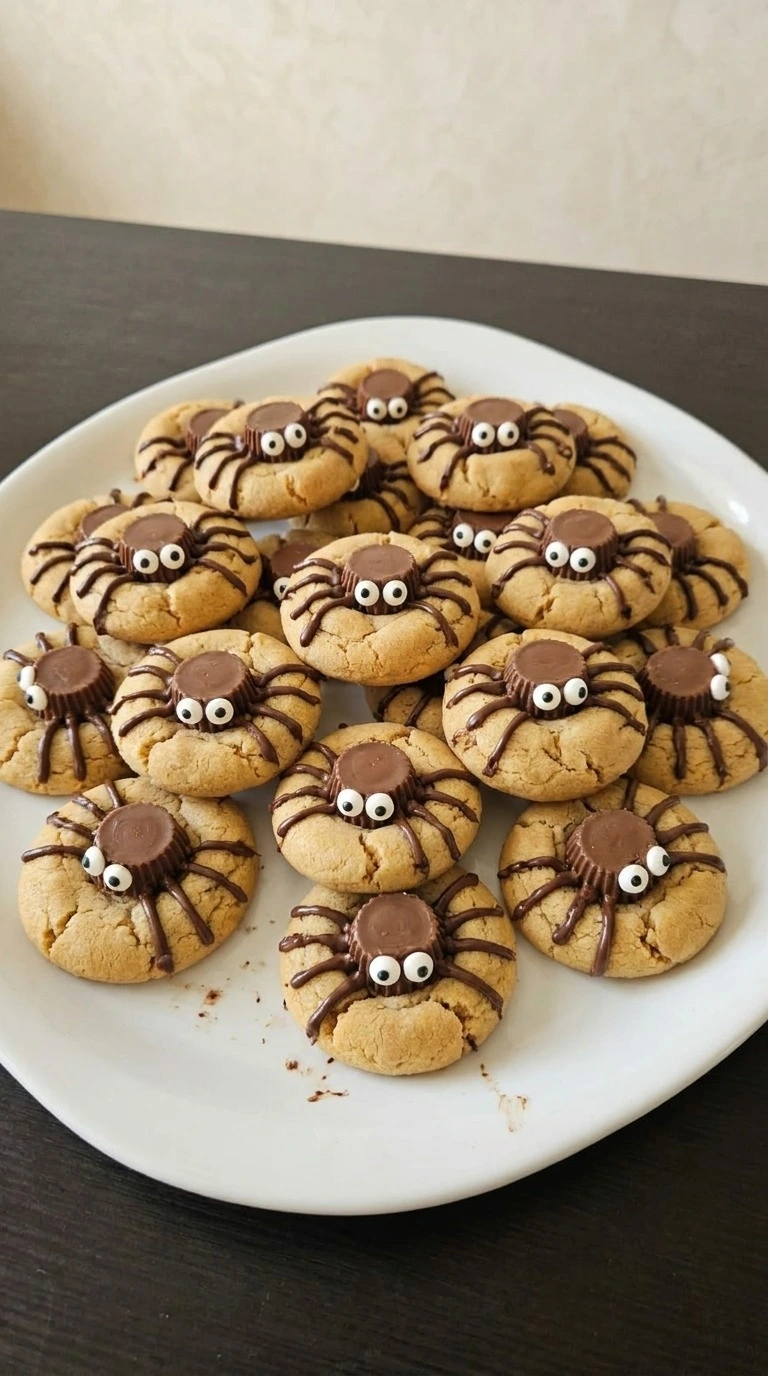
The result is a soft peanut butter spider cookie with crisp edges and a clear chocolate shape. A little wonky is good here. It makes every spider look different.
Why This Recipe Works
Timing matters. Halloween Peanut Butter Spider Cookies bake at 350°F for 9 to 11 minutes, which leaves moisture in the middle while the light golden edge gains enough structure to resist cracking.
Then wait 1 to 2 minutes before pressing in each chocolate cup, because the hot crumb keeps firming after the pans leave the oven and grips the candy gently. That brief pause softens the candy base enough to stick without letting the ridged body slump into the warm cookie.
Ingredients
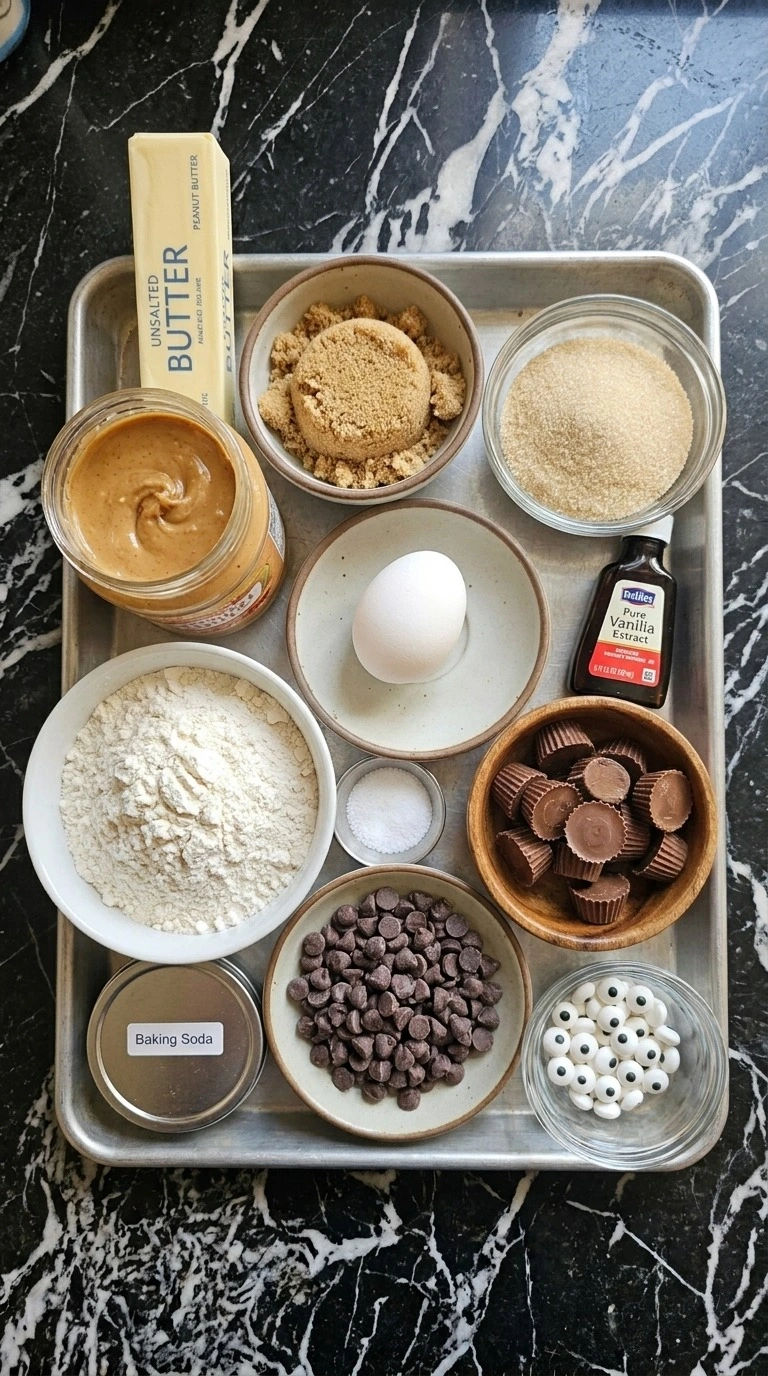
- Unsalted butter: Softened to 68 to 72°F so it creams smoothly without turning greasy.
- Creamy peanut butter: Use a no-stir commercial style for steady spreading and a smooth cookie crumb.
- Light brown sugar: Packed lightly to add moisture, chew and a mild caramel note.
- Granulated cane sugar: Adds crisp edges and helps the cookie surface set around the soft center.
- Large egg: Bring to 68 to 72°F before mixing so it blends into the creamed fat without curdling.
- Pure vanilla extract: Rounds out the roasted peanut flavor and softens the sharper sweetness.
- All-purpose flour: Spoon into the cup and level it so the dough stays soft instead of dry.
- Baking soda: Provides enough lift and spread for soft rounds with fine surface cracks.
- Fine sea salt: Balances the sugar and sharpens the peanut and chocolate flavors.
- Mini milk chocolate peanut butter cups: Unwrap before baking so each warm cookie can receive one spider body quickly.
- Semi-sweet chocolate chips: Melt until smooth and cool to 88 to 90°F for narrow legs that hold their shape.
- Candy eyeballs: Use two per cookie and press them into tacky chocolate before the legs set.
Kitchen Equipment
- Large mixing bowl: A 4-quart bowl gives the dough room to fold cleanly, while a smaller bowl crowds the spatula and leaves dry flour pockets.
- Electric hand mixer: A mixer with at least five speeds creams the butter and peanut butter evenly, while one fixed high speed can add too much air.
- Flexible silicone spatula: A medium flexible spatula scrapes the bowl and folds flour without overworking the dough, while a stiff turner leaves unmixed streaks.
- Rimmed half-sheet pans: Two 13 by 18-inch light-colored pans give 24 cookies enough spacing, while dark thin pans can overbrown the bottoms before the centers set.
- 1-tablespoon cookie scoop: A 1-tablespoon scoop keeps portions near 22 grams, while a larger scoop changes the bake time and makes the spider bodies look undersized.
- Small piping bag: A small piping bag gives control for eight narrow legs per cookie, while a large opening makes the chocolate lines merge into thick blobs.
How to Make It
Step 1: Cream the peanut butter cookie base
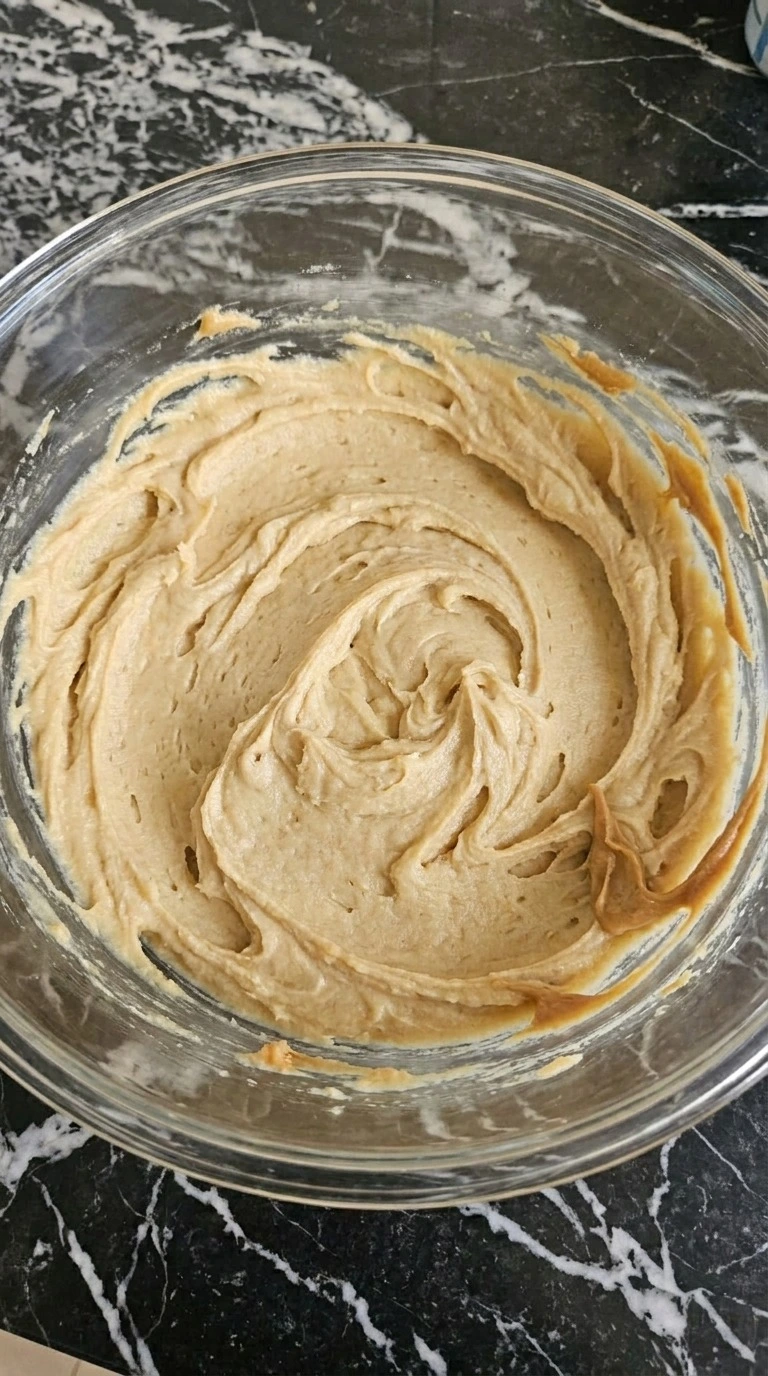
Let the unsalted butter, creamy peanut butter and egg sit until they reach 68 to 72°F. Beat the butter with both sugars and peanut butter for 2 to 3 minutes at medium speed, then scrape the bowl halfway through so no dense streaks hide along the sides. Stop there.
The mixture should turn a shade lighter and look fluffy but still thick. Beat past 4 minutes and too much air can make the cookies spread wider than you want. Next, check the texture with the spatula.
It should hold a soft ridge and smell strongly of roasted peanuts without looking oily. Cream only 2 to 3 minutes because excess air weakens the cookie shape.
Tip: Choose a no-stir peanut butter with peanuts near the top of the label. Runny natural peanut butter can add about 10 minutes of chill time.
Step 2: Mix the dough until just combined
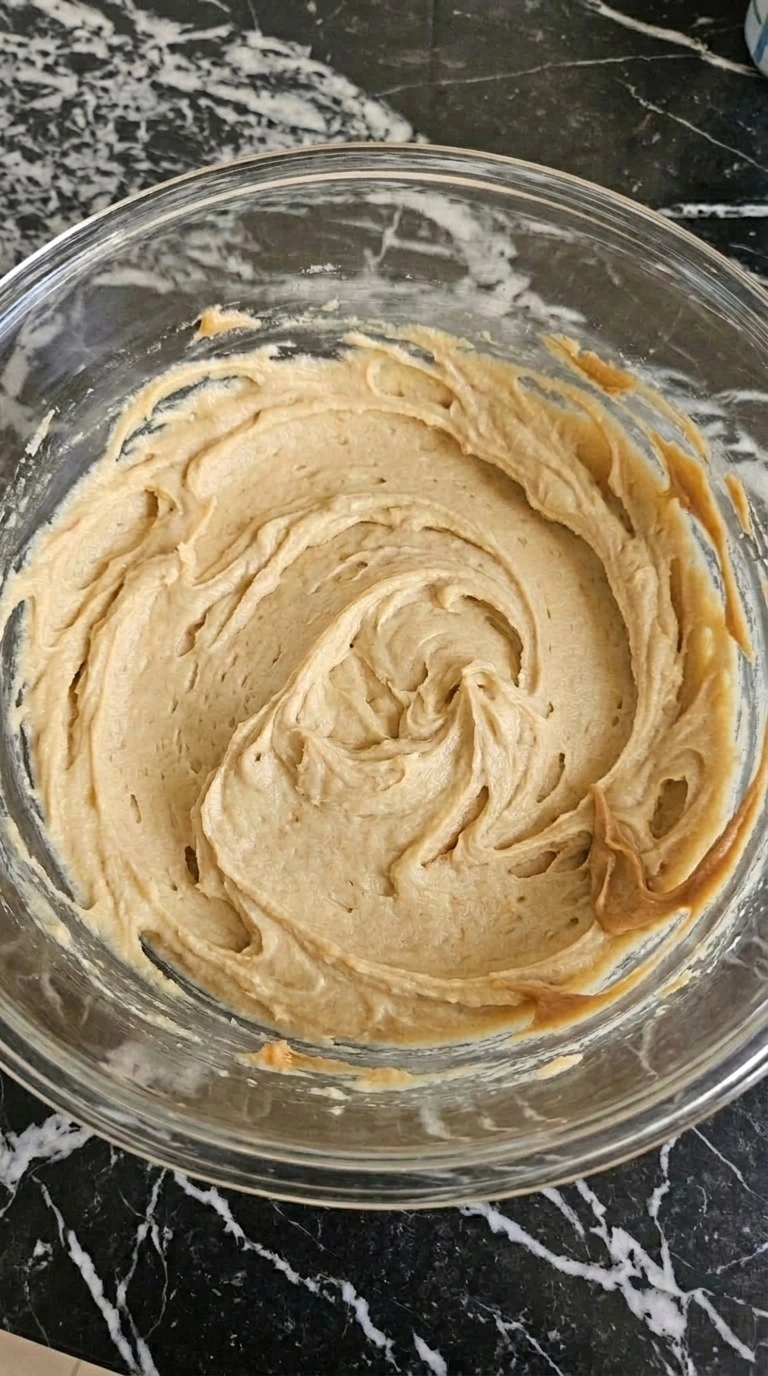
Add the egg and pure vanilla extract to the creamed base and beat for 30 to 45 seconds at 68 to 72°F so the fats blend smoothly instead of looking curdled. Then add the all-purpose flour, baking soda and fine sea salt. Fold with a flexible spatula in broad J-shaped strokes for 45 to 60 seconds and scrape the bottom twice.
Keep it gentle. The dough should turn from glossy and loose to soft, matte and scoopable. Overmix by another minute and Halloween Peanut Butter Spider Cookies can turn tougher.
Meanwhile, heat the oven to 350°F and let the dough stand for 5 minutes. You’ll see clean scoop marks instead of wet smears. Fold only until no dry flour remains because extra mixing firms the crumb.
Tip: If the dough still looks shiny after 5 minutes, chill it for 10 minutes before scooping instead of adding extra flour.
Step 3: Shape and bake the cookie rounds
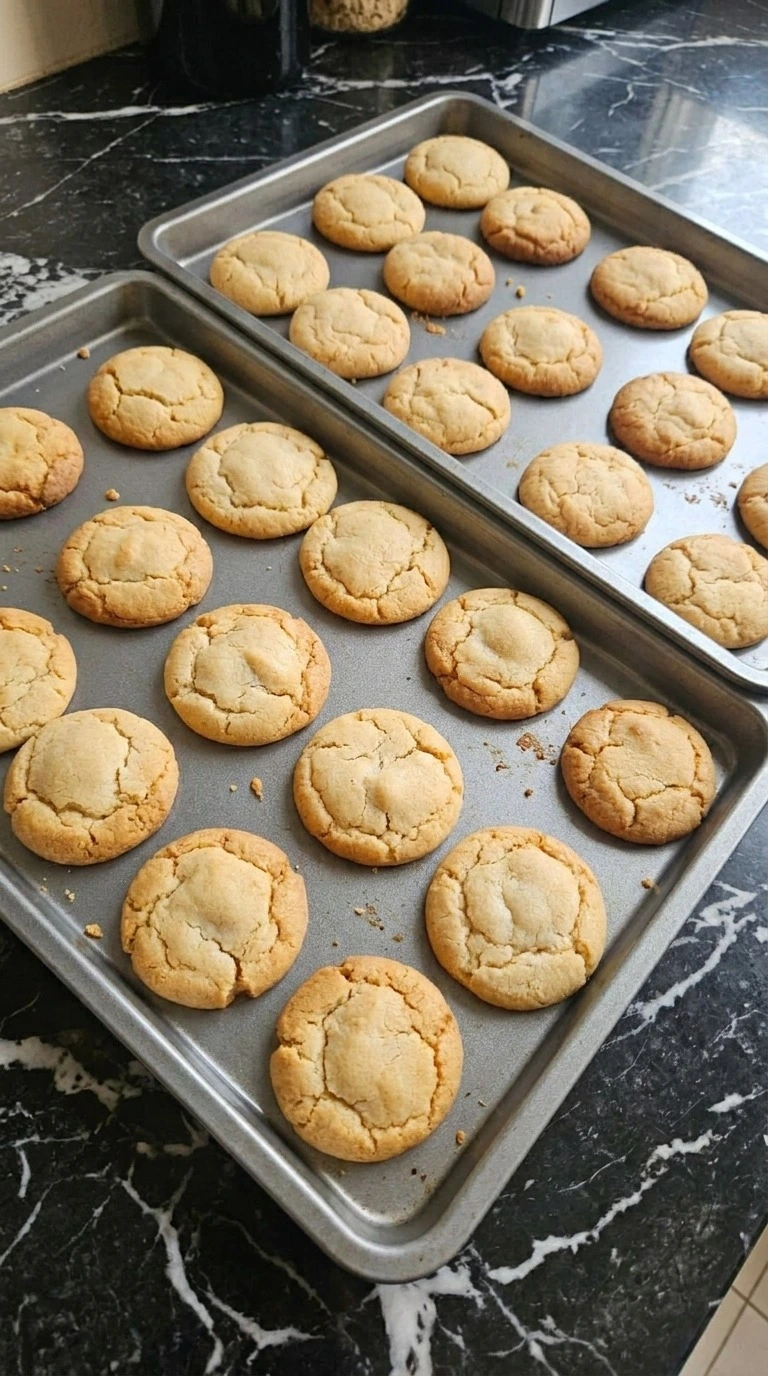
Scoop 1 level tablespoon of dough for each cookie and roll it lightly between your palms for 3 to 4 seconds without squeezing the dough into dense, tight balls. Don’t flatten them. Set 24 rounds about 2 inches apart and bake at 350°F for 9 to 11 minutes.
Rotate the pans front to back at minute 6 so the edges color at the same pace. The cookies should puff slightly and show fine cracks while the centers stay soft and pale. Go past 12 minutes and the centers lose that tender bite.
Look for light golden edges and tops that no longer shine. The middle will still feel soft when touched lightly. Bake 9 to 11 minutes because carryover heat finishes the centers without drying them.
Tip: Weigh one tablespoon of dough at about 22 grams for the first cookie, then match the rest so all 24 finish together.
Step 4: Press in the chocolate spider bodies
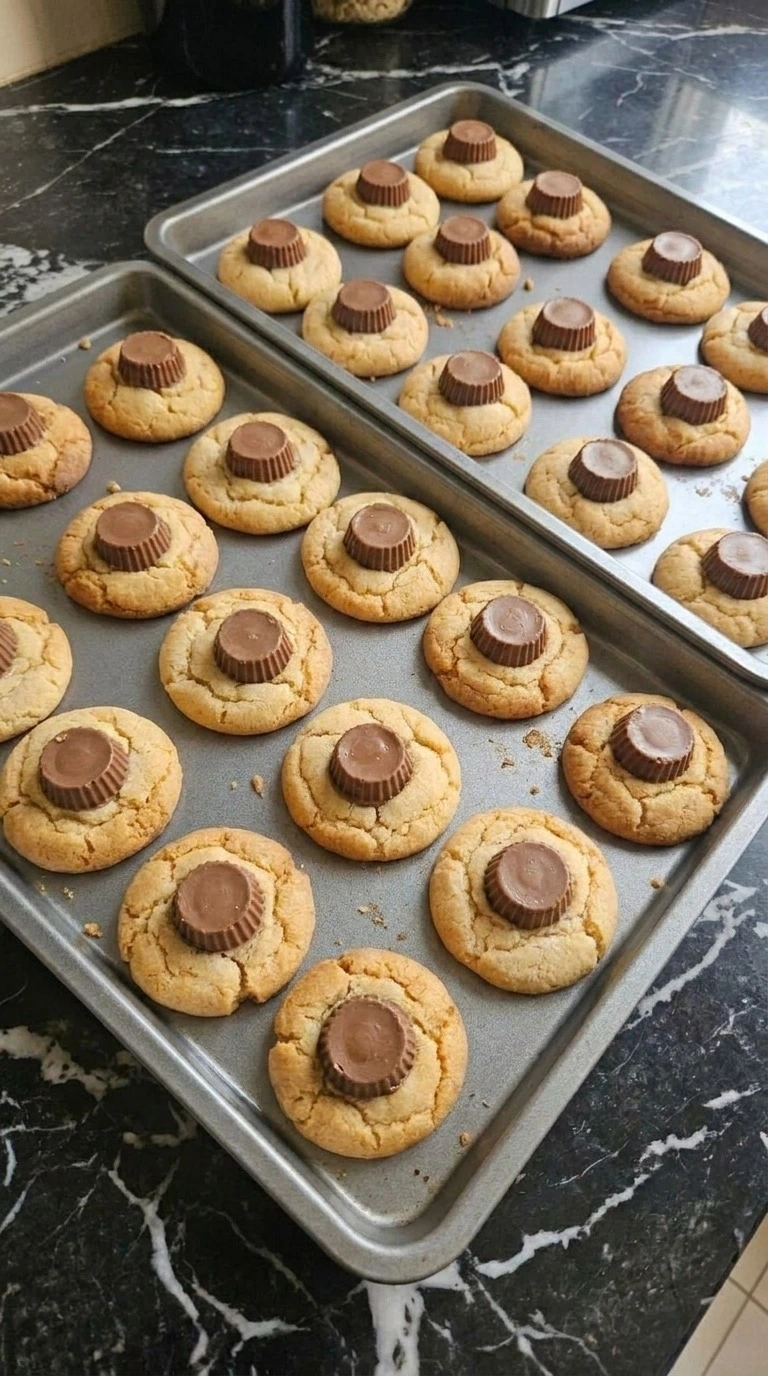
Within 2 minutes of removing the 350°F cookies, press the narrow base of one mini milk chocolate peanut butter cup into each round using one straight downward motion. Press gently. Push only until the candy base sits halfway into the cookie.
Then leave the cookies on the pans for 5 minutes before moving them to cool for 20 minutes. The cups should soften at the base but keep sharp ridges around the sides. Press too hard and Halloween Peanut Butter Spider Cookies can split around the center.
(I pressed the candy in immediately on one batch. The cups slumped, so the 1 to 2 minute pause matters. ) That short pause lets the crumb firm enough to hold the spider body.
Tip: Unwrap all 24 chocolate cups before baking starts so you can press them in during the narrow 1 to 2 minute window.
Step 5: Pipe the legs and add candy eyes
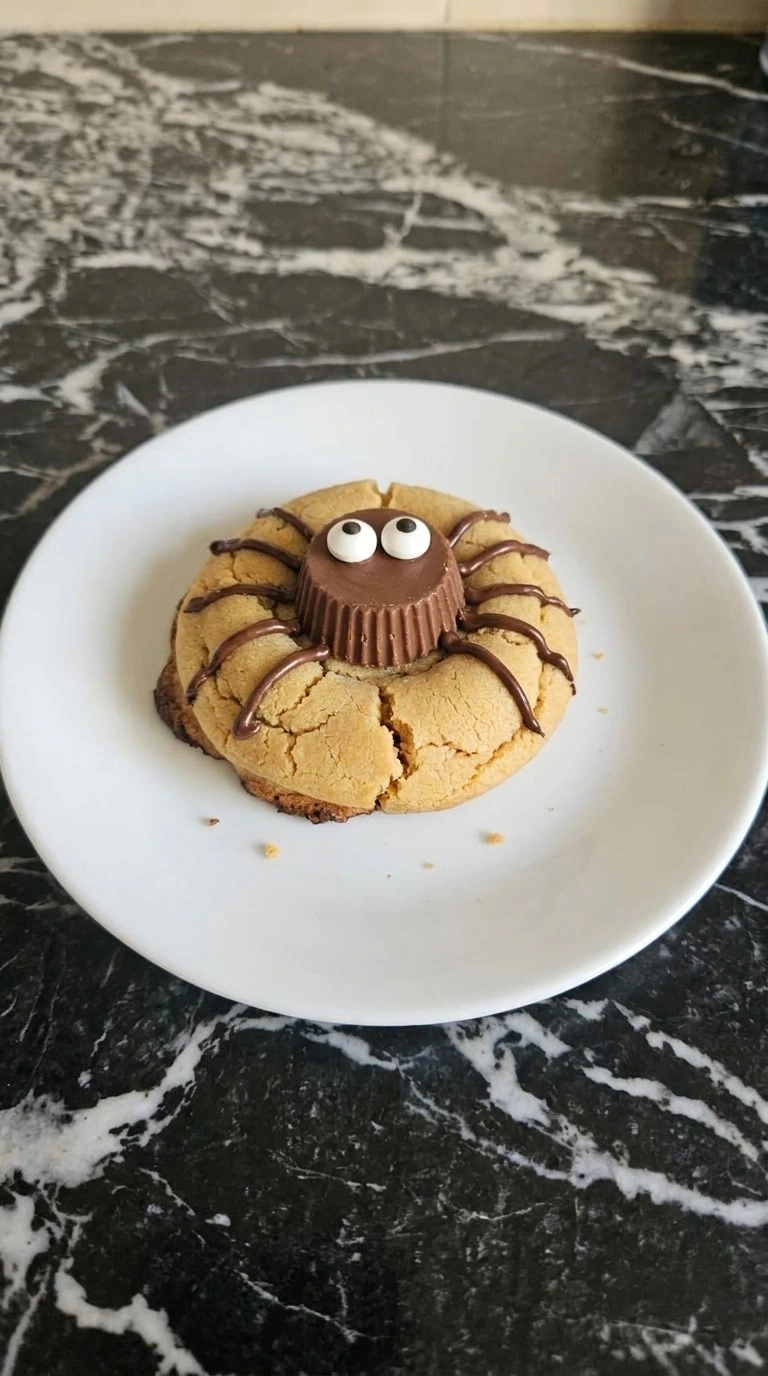
Melt the semi-sweet chocolate chips until smooth and let the chocolate cool to 88 to 90°F before decorating. Pipe four uneven legs from each side of every chocolate cup, then add two tiny chocolate dots on the front and press on two candy eyeballs. Keep the lines thin.
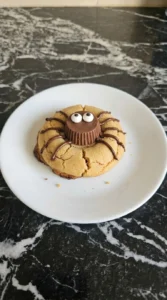
Let the spiders set for 10 to 15 minutes at 68 to 72°F, then move them to a serving platter with loose natural spacing. Use chocolate above 95°F and it can soften the candy bodies and blur the legs. The finished Halloween Peanut Butter Spider Cookies should have set glossy legs, crisp candy eyes and softly cracked golden tops.
Cool the chocolate below 90°F because thicker piping holds the leg shape.
Tip: Snip a piping opening about 1/16 inch wide so each leg stays narrow enough to bend cleanly without merging into the cookie body.
Pro Tips
- Use peanut butter at 68 to 72°F so it blends smoothly with the butter. Cold peanut butter can leave dense streaks in the dough.
- Measure each dough portion at about 22 grams. Even portions help all 24 cookies reach golden edges within the same 9 to 11 minute window.
- Bake one test cookie first if your oven runs hot. If its edge darkens before minute 9, lower the oven by 10°F for the remaining trays.
- Leave at least 2 inches between dough balls because the cookies spread as they bake. Crowding can make neighboring cookies merge before the edges set.
- Wait 1 to 2 minutes before pressing in the chocolate cups. You’ll see fewer cracks because the hot centers have started to firm.
- Cool the melted semi-sweet chocolate to 88 to 90°F before piping. Warmer chocolate runs too fast and can blur the spider legs.
- Pipe legs through an opening near 1/16 inch wide. Eight thin legs look cleaner than thick lines that merge around the chocolate body.
- Let the decorated cookies stand for 10 to 15 minutes before stacking. The chocolate should feel firm when touched lightly and shouldn’t leave a smear.
- Add 1/2 teaspoon ground cinnamon to the flour for a warmer fall flavor that still keeps the peanut butter at the front.
- Replace the semi-sweet chocolate chips with 3 ounces of dark chocolate for deeper cocoa flavor and a less sweet spider design.
- Press one mini caramel-filled chocolate cup into each warm cookie for a richer center, but let the cookies cool 5 extra minutes before moving them.
- Mix 1/3 cup finely chopped roasted peanuts into the dough for extra crunch, then increase the baking time by about 1 minute if the centers look very soft.
Substitutions & Variations
- Unsalted butter: Plant-based baking butter — Use a firm plant-based baking stick at a 1:1 ratio for a dairy-free batch. Soft tub spreads contain more water and can make the cookies spread wider.
- All-purpose flour: 1-to-1 gluten-free baking flour — Replace the flour cup for cup with a blend containing xanthan gum. The cookies may feel slightly more tender, so chill the dough for 15 minutes before shaping.
- Large egg: Flax egg — Mix 1 tablespoon ground flaxseed with 3 tablespoons water and rest it for 10 minutes. The cookies become softer and less crisp around the edges, but the spider shape still holds.
- Creamy peanut butter: Creamy almond butter — Use the same 1/2 cup amount and choose a no-stir almond butter. The flavor becomes milder and the dough may need an extra 5 minutes of chilling if it feels loose.
- Mini milk chocolate peanut butter cups: Mini dark chocolate cups — Use 24 mini dark chocolate cups in the same way. They give a less sweet finish and stay slightly firmer when pressed into the warm cookies.
Storage Instructions
Keep cooled cookies in an airtight container at room temperature for 4 days or refrigerate them for up to 7 days if your kitchen is warm. For freezing, place parchment between layers and freeze for up to 2 months so the chocolate legs stay protected.
To refresh the cookie texture, warm an undecorated cookie at 275°F for 4 to 5 minutes. Decorated cookies are better brought to room temperature for 20 minutes because reheating can melt the spider details.
Discard cookies with a sour smell, damp surface or visible mold.
Halloween Peanut Butter Spider Cookies
Ingredients
- 1/2 cup Unsalted butter Softened to 68 to 72°F so it creams smoothly without turning greasy.
- 1/2 cup Creamy peanut butter Use a no-stir commercial style for steady spreading and a smooth cookie crumb.
- 1/2 cup Light brown sugar Packed lightly to add moisture, chew and a mild caramel note.
- 1/3 cup Granulated cane sugar Adds crisp edges and helps the cookie surface set around the soft center.
- 1 large Large egg Bring to 68 to 72°F before mixing so it blends into the creamed fat without curdling.
- 1 teaspoon Pure vanilla extract Rounds out the roasted peanut flavor and softens the sharper sweetness.
- 1 1/4 cups All-purpose flour Spoon into the cup and level it so the dough stays soft instead of dry.
- 3/4 teaspoon Baking soda Provides enough lift and spread for soft rounds with fine surface cracks.
- 1/4 teaspoon Fine sea salt Balances the sugar and sharpens the peanut and chocolate flavors.
- 24 pieces Mini milk chocolate peanut butter cups Unwrap before baking so each warm cookie can receive one spider body quickly.
- 3 ounces Semi-sweet chocolate chips Melt until smooth and cool to 88 to 90°F for narrow legs that hold their shape.
- 48 pieces Candy eyeballs Use two per cookie and press them into tacky chocolate before the legs set.
Instructions
- Let the unsalted butter, creamy peanut butter and egg sit until they reach 68 to 72°F. Beat the butter with both sugars and peanut butter for 2 to 3 minutes at medium speed, then scrape the bowl halfway through so no dense streaks hide along the sides. Stop there. The mixture should turn a shade lighter and look fluffy but still thick. Beat past 4 minutes and too much air can make the cookies spread wider than you want. Next, check the texture with the spatula. It should hold a soft ridge and smell strongly of roasted peanuts without looking oily. Cream only 2 to 3 minutes because excess air weakens the cookie shape.
- Add the egg and pure vanilla extract to the creamed base and beat for 30 to 45 seconds at 68 to 72°F so the fats blend smoothly instead of looking curdled. Then add the all-purpose flour, baking soda and fine sea salt. Fold with a flexible spatula in broad J-shaped strokes for 45 to 60 seconds and scrape the bottom twice. Keep it gentle. The dough should turn from glossy and loose to soft, matte and scoopable. Overmix by another minute and Halloween Peanut Butter Spider Cookies can turn tougher. Meanwhile, heat the oven to 350°F and let the dough stand for 5 minutes. You’ll see clean scoop marks instead of wet smears. Fold only until no dry flour remains because extra mixing firms the crumb.
- Scoop 1 level tablespoon of dough for each cookie and roll it lightly between your palms for 3 to 4 seconds without squeezing the dough into dense, tight balls. Don’t flatten them. Set 24 rounds about 2 inches apart and bake at 350°F for 9 to 11 minutes. Rotate the pans front to back at minute 6 so the edges color at the same pace. The cookies should puff slightly and show fine cracks while the centers stay soft and pale. Go past 12 minutes and the centers lose that tender bite. Look for light golden edges and tops that no longer shine. The middle will still feel soft when touched lightly. Bake 9 to 11 minutes because carryover heat finishes the centers without drying them.

- Within 2 minutes of removing the 350°F cookies, press the narrow base of one mini milk chocolate peanut butter cup into each round using one straight downward motion. Press gently. Push only until the candy base sits halfway into the cookie. Then leave the cookies on the pans for 5 minutes before moving them to cool for 20 minutes. The cups should soften at the base but keep sharp ridges around the sides. Press too hard and Halloween Peanut Butter Spider Cookies can split around the center. (I pressed the candy in immediately on one batch. The cups slumped, so the 1 to 2 minute pause matters.) That short pause lets the crumb firm enough to hold the spider body.

- Melt the semi-sweet chocolate chips until smooth and let the chocolate cool to 88 to 90°F before decorating. Pipe four uneven legs from each side of every chocolate cup, then add two tiny chocolate dots on the front and press on two candy eyeballs. Keep the lines thin. Let the spiders set for 10 to 15 minutes at 68 to 72°F, then move them to a serving platter with loose natural spacing. Use chocolate above 95°F and it can soften the candy bodies and blur the legs. The finished Halloween Peanut Butter Spider Cookies should have set glossy legs, crisp candy eyes and softly cracked golden tops. Cool the chocolate below 90°F because thicker piping holds the leg shape.
Notes
Frequently Asked Questions
Yes. Mix the dough and refrigerate it in an airtight container for up to 2 days. Let it sit for 15 to 20 minutes before scooping, then bake at 350°F for 9 to 11 minutes so the chilled centers cook evenly.
The butter or peanut butter was probably too warm, or the dough was undermeasured with flour. Chill the shaped dough for 15 minutes and bake one test cookie at 350°F. If it still spreads past about 3 inches, add 1 tablespoon flour to the remaining dough.
Yes. Freeze fully cooled cookies in one layer for 1 hour, then transfer them to a freezer container with parchment between layers. Keep them frozen for up to 2 months and thaw at room temperature for 30 to 45 minutes before serving.
Double every ingredient exactly and make 48 cookies, but bake only two trays at a time. Keep the oven at 350°F and rotate both trays at minute 6. Extra crowded racks can block airflow and make one pan pale while another browns too fast.
Yes. Use the same amount of a 1-to-1 gluten-free baking flour that already contains xanthan gum. Chill the dough for 15 minutes before baking because gluten-free dough can spread more quickly, then start checking the cookies at minute 9.
Let the baked cookies rest for 1 to 2 minutes before pressing in the mini chocolate cups. If your kitchen is above 75°F, move the decorated cookies to a cooler room after 5 minutes so the chocolate firms instead of slumping.
Serve two cookies per guest with sliced apples, cold milk or hot cocoa. For a party tray, arrange 12 cookies loosely and refill as needed so the piped legs don’t get crushed under a heavy stack.
Final Thoughts
On a cool October afternoon with music playing, these are the cookies I want spread across the kitchen table. The little trick of waiting before pressing in the chocolate cups makes Halloween Peanut Butter Spider Cookies look cleaner and keeps the soft centers from cracking apart.
That balance of roasted peanut flavor, crisp edges and slightly wonky spiders is what makes this version special. Try a batch for your next Halloween party and share your funniest spider faces.
Someone will always pick the most crooked one first.
Peanut butter cookies became widely popular in American home baking during the early twentieth century. Pressing candy into warm cookies works because the soft crumb firms as it cools.