Raspberry Danish
This Raspberry Danish is the kind of thing I wish I’d learned sooner. The first time I made it was during the holiday season in 2020, when we couldn’t travel, and I accidentally scorched the first pan by almost 10 minutes. It was still the best part of our morning somehow. That’s when I realized this bakery staple is way more forgiving than most people admit.
Since then I’ve made these flaky pastries for weekend breakfasts, random Tuesday mornings when neighbors dropped by, and once for a family potluck where three people asked for the card. If you enjoy cozy morning bakes, you should also try our Pumpkin Cream Cheese Danish for a warm spiced twist on puff pastry. They’re light, packed with tart berry flavor, and genuinely simple even if working with pastry feels intimidating. The buttery dough combined with sweet cream cheese makes every single bite feel extra special without hours of tedious work.
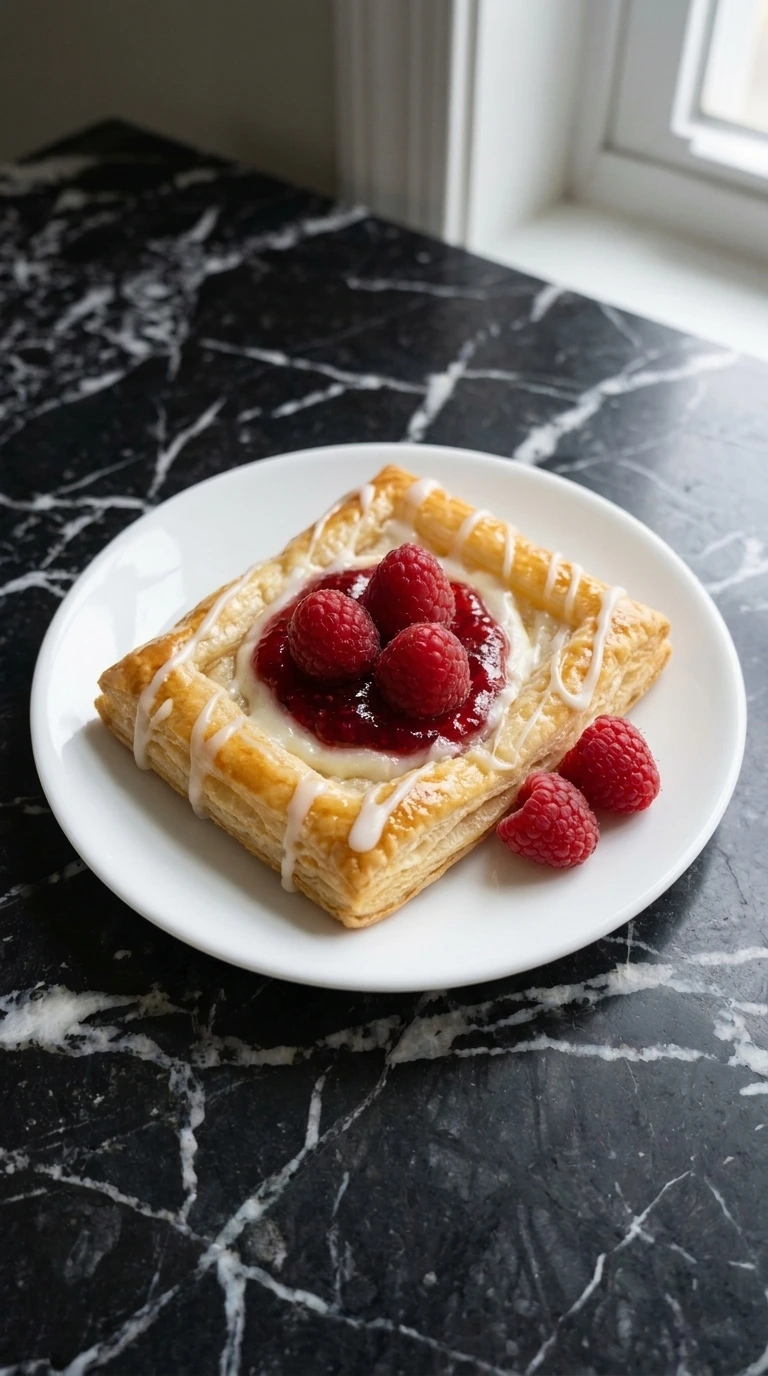
You don’t need a professional bakery background to pull this off flawlessly. Just keep your ingredients cold, follow the simple assembly steps, and watch them rise.
Why This Raspberry Danish Recipe Works
Baking at 400°F triggers rapid steam expansion within the laminated dough layers, driving a high rise before the butter melts out completely. Meanwhile, pairing tangy cream cheese with fruit jam creates a natural flavor balance that cuts through the rich, buttery pastry crust.
If you’re craving more berry breakfast options, you’ll love our Raspberry Ricotta Toast for another quick morning fix. Keeping the pastry cold right up until it hits the hot oven guarantees distinct, flaky layers every single time.
Raspberry Danish Ingredients
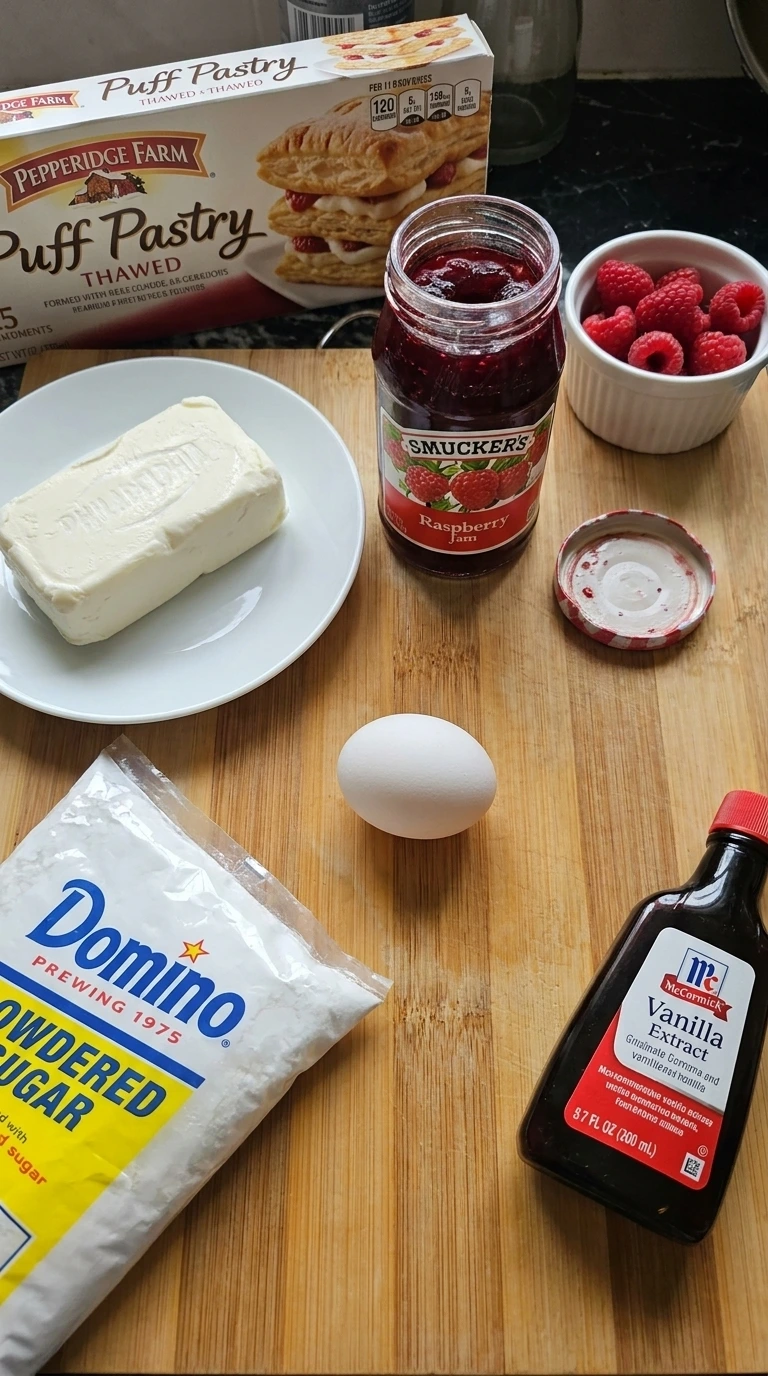
- Pepperidge Farm puff pastry: Thawed according to package directions but kept chilled until assembly so the butter layers stay firm.
- Philadelphia cream cheese: Softened to room temperature for easier blending into a creamy center.
- granulated sugar: Adds mild sweetness to balance the tangy cream cheese filling.
- large egg: One yolk used for filling structure, one whole egg beaten with water for the outer golden shine.
- McCormick vanilla extract: Enhances the sweet bakery aroma in the cheese center.
- Smucker’s raspberry jam: Provides rich berry flavor that holds up well during baking.
- fresh red raspberries: Arranged on top of the jam for a fresh, tart burst in every bite.
- Domino powdered sugar: Sifted to eliminate lumps before whisking into the final glaze.
- whole milk: Thins the powdered sugar into a smooth, drizzlable consistency.
Kitchen Equipment
- Baking Sheet: A heavy-gauge aluminum baking sheet distributes heat evenly so the bottom of your Raspberry Danish doesn’t burn before the top browns — thin sheets cause scorched bottoms.
- Parchment Paper: Parchment paper prevents the sweet fruit glaze from sticking to the pan, ensuring easy release without tearing the delicate pastry.
- Pastry Brush: A soft silicone pastry brush applies a thin, uniform egg wash layer over the pastry borders without flattening the delicate unbaked dough.
How to Make Raspberry Danish at Home
Step 1: Mix the cream cheese filling
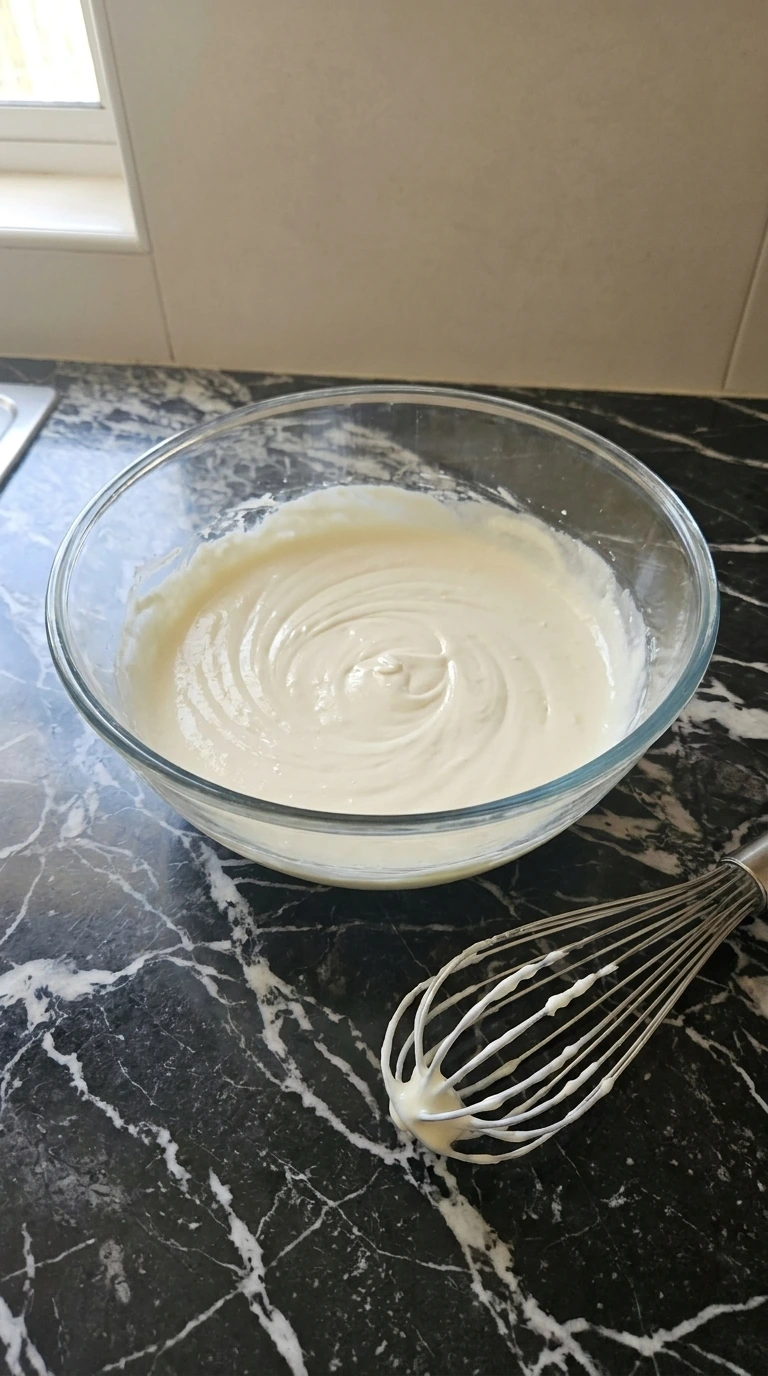
Beat 8 ounces of room temperature Philadelphia cream cheese, 3 tablespoons of granulated sugar, 1 large egg yolk, and 1 teaspoon of McCormick vanilla extract in a medium bowl on medium speed for 2 minutes. The mixture will start clumpy then suddenly turn silky smooth. You’ll smell sweet vanilla right away and see all yellow streaks vanish as the egg yolk blends fully.
Make sure you scrape down the sides with a rubber spatula halfway through so no dense cream cheese pockets remain at the bottom. (I tried skipping the egg yolk once, the filling melted completely and ran all over the pan. Don’t skip it.
) Don’t overbeat or air bubbles will cause the filling to puff and collapse. Preheat the oven to 400°F now so it’s fully hot by the time the pan goes in.
Tip: Use brick cream cheese, not the spreadable tub style, for a firm center.
Step 2: Cut and score the pastry
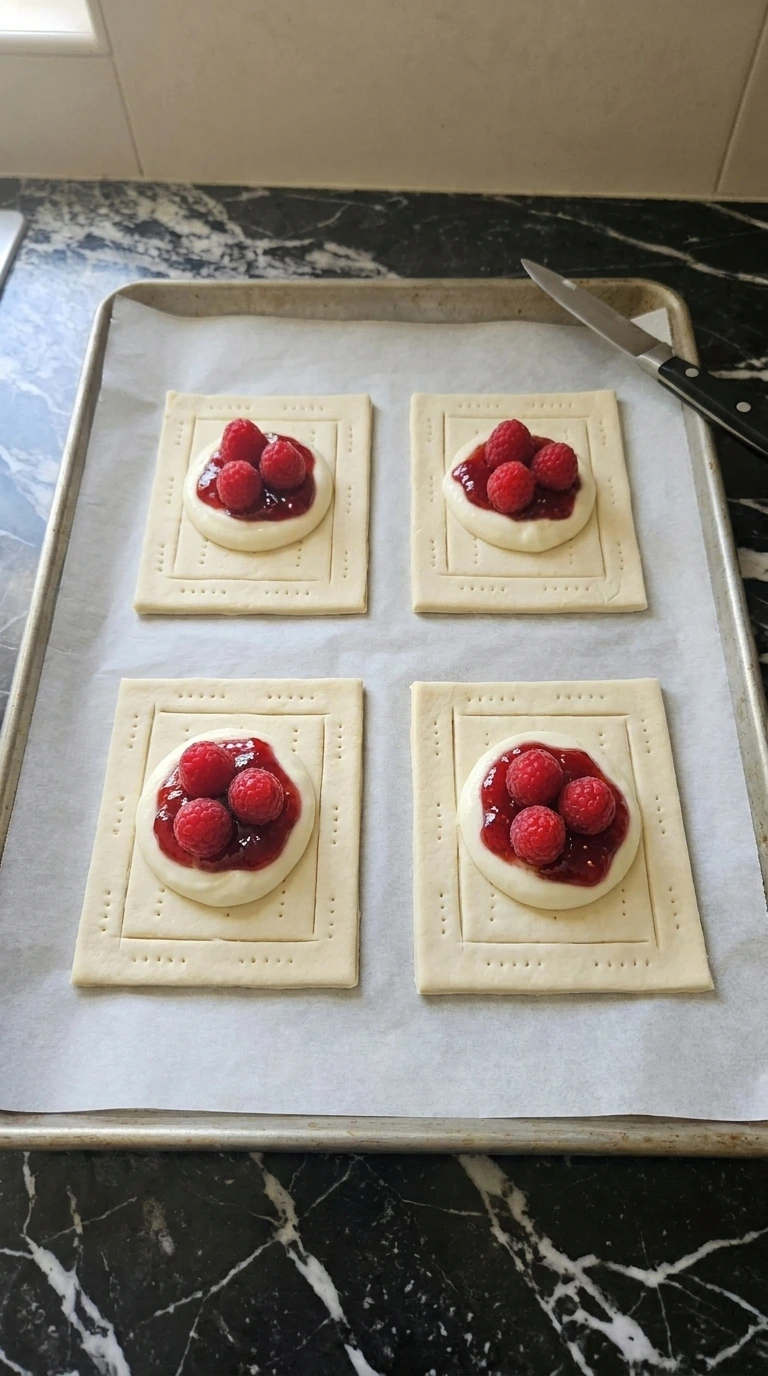
Unroll 1 sheet of thawed Pepperidge Farm puff pastry onto a parchment paper sheet lined tray. Cut the sheet into 4 equal rectangles using a sharp knife.
Score a 1/2-inch border inside each rectangle without cutting all the way through. The pastry dough should feel cool to the touch and hold its sharp corner edges without slumping or sticking to your fingers.
Prick the inner rectangle 4 times with a fork so the center stays flat while baking. Cut gently through the top layers, scoring allows the outer edges to puff high while the center holds the filling.
Tip: If the pastry gets soft while cutting, chill it in the fridge for 10 minutes.
Step 3: Layer cream cheese and raspberry jam
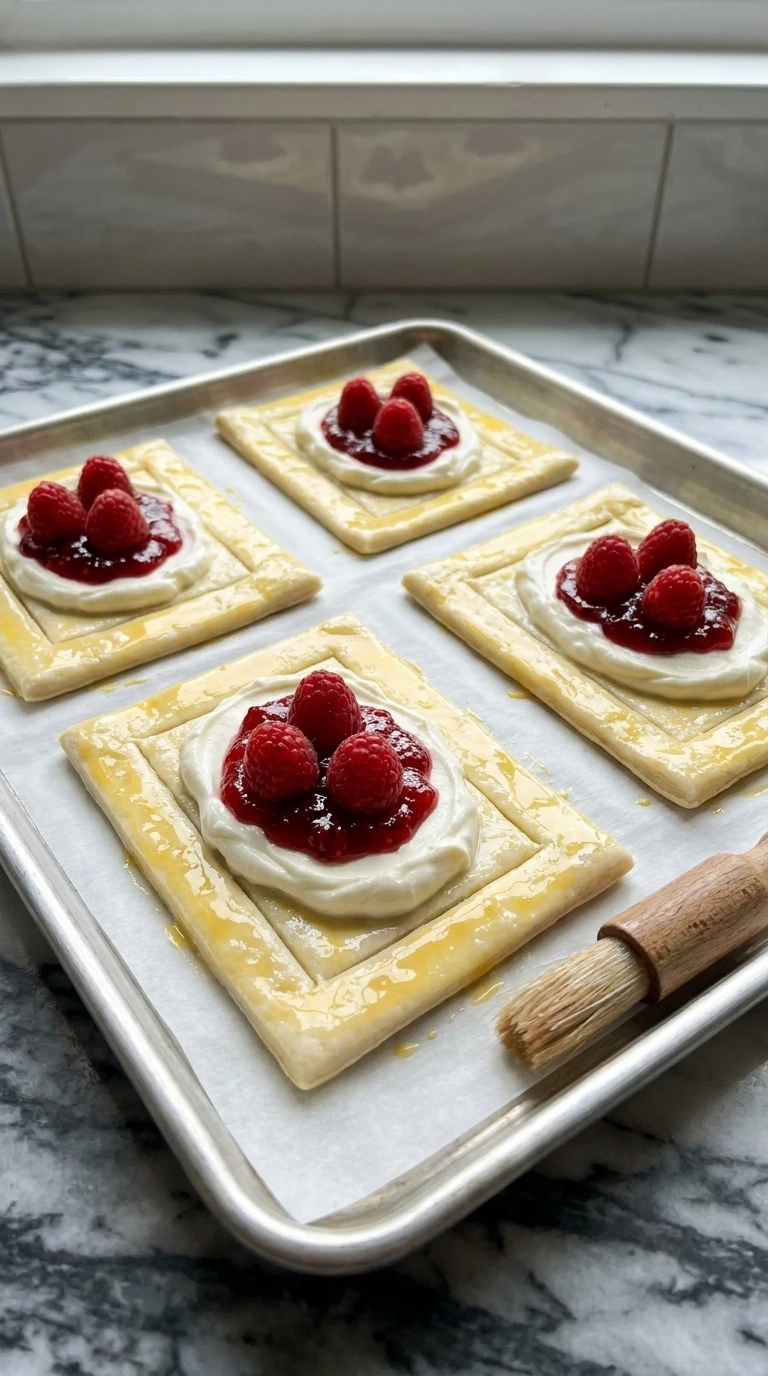
Spoon 2 tablespoons of cream cheese filling into the center of each scored rectangle. Top with 1 tablespoon of Smucker’s raspberry jam and 3 fresh whole red raspberries. Brush the outer pastry borders with a beaten egg wash made from 1 large egg and 1 tablespoon of water.
You’ll see the bright red jam contrast sharply against the pale cream cheese center and the glossy egg wash shine on the outer border. Keep the toppings strictly inside the scored line so the edges can rise freely in the heat. (My first batch overflowed because I heaped 3 tablespoons of jam inside, 1 tablespoon is the goldilocks amount.
) Egg wash seals the outer border so steam builds structure instead of drying out the crust.
Tip: Chill the assembled pastries for 10 minutes before baking to maximize layer rise.
Step 4: Bake until deep golden brown
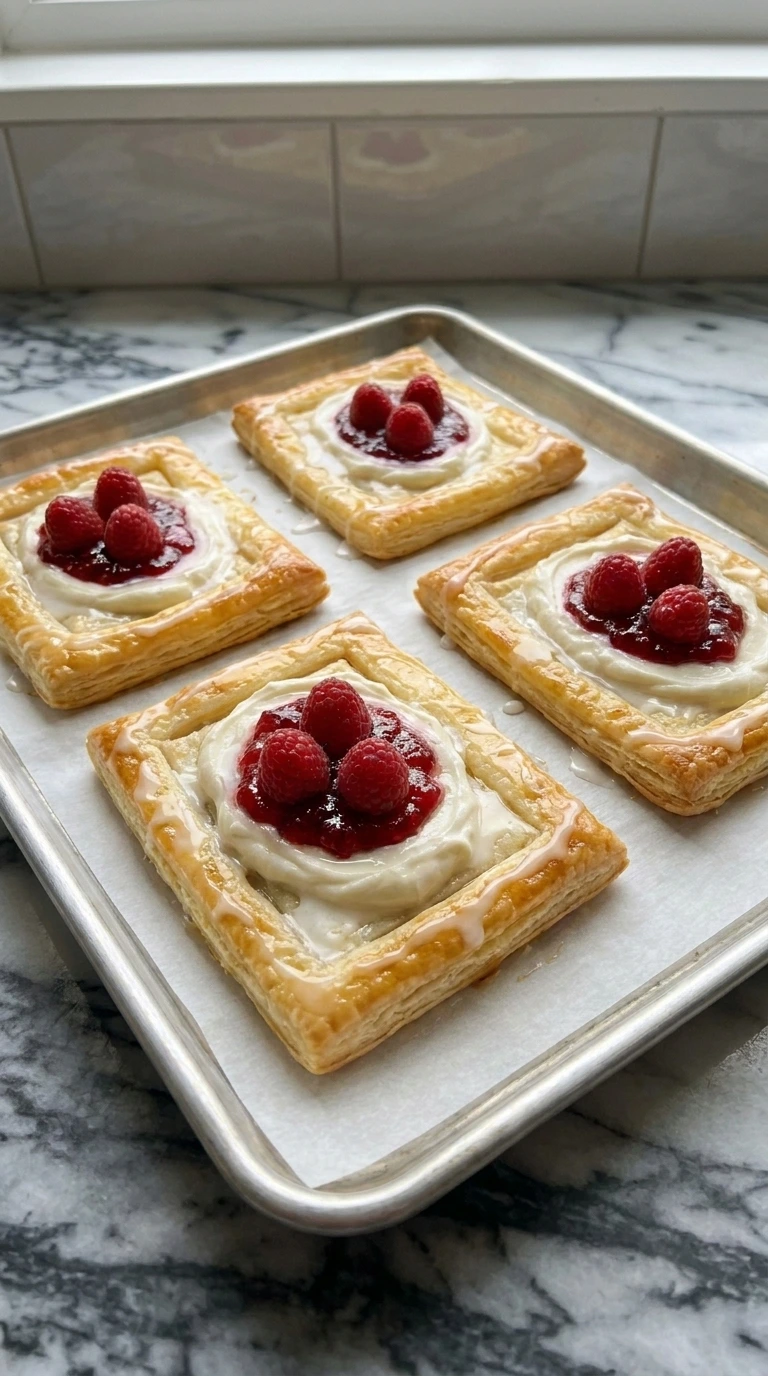
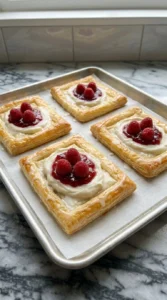
Bake at 400°F on the middle rack for 16 to 18 minutes. The pastry borders will rise dramatically and turn a deep golden brown while the jam center bubbles softly.
You’ll smell toasted butter and sweet fruit filling the room around minute 14. Watch for the bottom edges to brown fully without scorching on the parchment paper.
Bake at 400°F not 350°F, high steam creates high rise in puff pastry layers.
Tip: Rotate the baking sheet at minute 10 for even browning across all pastries.
Step 5: Glaze and serve warm
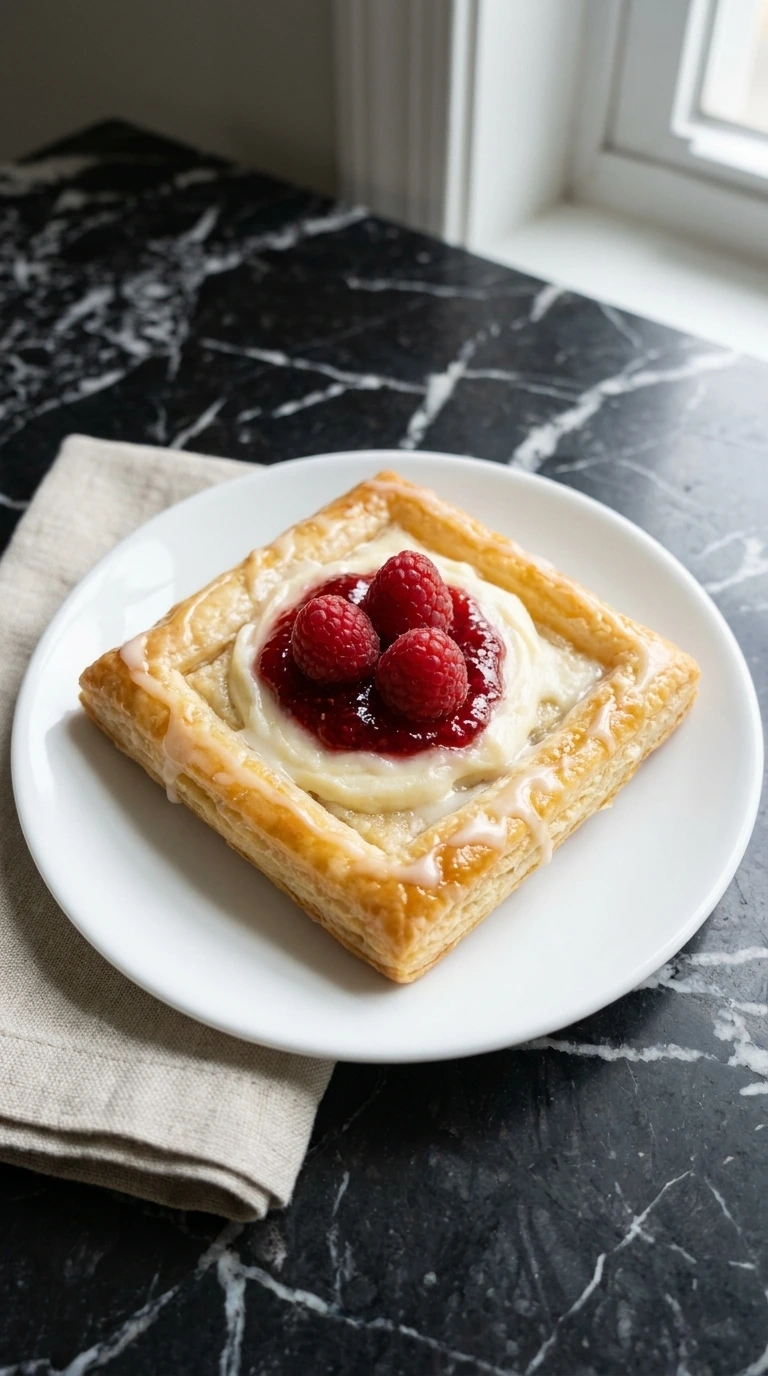
Whisk 1/2 cup of Domino powdered sugar with 2 teaspoons of whole milk in a small bowl until smooth. Drizzle the glaze generously over the warm pastries after they cool for 5 minutes on a wire rack.
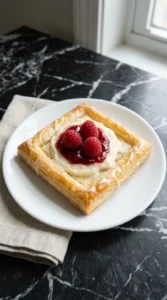
The glaze will set slightly as it hits the warm crust, turning into a semi-translucent shiny finish over the deep red berries. Drizzle while warm, heat sets the glaze into a thin crispy shell instead of a runny syrup.
Tip: Serve within 30 minutes of baking for the absolute crispest texture.
Pro Tips
- Keep the puff pastry chilled until the exact moment it goes into the 400°F oven, cold butter creates maximum steam rise.
- Score the border gently with a paring knife without cutting completely through the bottom layer to keep filling enclosed.
- Prick the inner rectangle four times with a fork so the central pastry floor stays flat under the cream cheese.
- Use seedless jam if you prefer a smooth berry filling texture over natural seed crunch across your pastry.
- Whisk the egg wash thoroughly with a pinch of salt to break up whites for a smooth, shiny golden crust finish.
- Drizzle glaze while the pastry is warm so it sets into a crackly shell rather than soaking into the crust.
- Add 1/2 teaspoon of fresh lemon zest to the cream cheese filling for a bright summer breakfast option.
- Swap red fruit for blueberries and lemon curd to create a citrus version for weekend spring brunches.
- Scatter sliced toasted almonds over the egg-washed borders right before baking for added nutty crunch.
Ingredient Swaps
- Pepperidge Farm puff pastry: Homemade rough puff pastry or crescent dough sheet — Crescent dough cooks faster and creates a softer bread-like texture rather than crisp flaky layers.
- Smucker’s raspberry jam: Seedless blackberry preserve or store-bought cherry jam — Cherry jam makes the center sweeter and less tart. Reduce added sugar in the cream cheese by 1 tablespoon.
- Philadelphia cream cheese: Mascarpone cheese — Mascarpone yields a much richer, milder filling but yields a softer set center.
- whole milk: Heavy cream or lemon juice — Lemon juice adds a bright, tangy citrus kick to the top glaze that cuts through the rich pastry.
Storing and Reheating Raspberry Danish
Keep your leftover pastries in an airtight container in the fridge for up to 3 days, but line it with paper towels first. Those paper towels pull out extra moisture so the bottom crust won’t turn into a soggy mess over time.
When you’re ready to eat, pop cold pastries into a 350°F oven or air fryer for 5 minutes to get that flaky crispness back. Whatever you do, don’t microwave them!
The trapped steam destroys those buttery layers and leaves the pastry completely rubbery. Finally, toss them out if you spot liquid pooling in the container or catch a sour smell.
Raspberry Danish
Ingredients
- 1 sheet Pepperidge Farm puff pastry Thawed according to package directions but kept chilled until assembly so the butter layers stay firm.
- 8 ounces Philadelphia cream cheese Softened to room temperature for easier blending into a creamy center.
- 3 tablespoons granulated sugar Adds mild sweetness to balance the tangy cream cheese filling.
- 2 large large egg One yolk used for filling structure, one whole egg beaten with water for the outer golden shine.
- 1 teaspoon McCormick vanilla extract Enhances the sweet bakery aroma in the cheese center.
- 4 tablespoons Smucker’s raspberry jam Provides rich berry flavor that holds up well during baking.
- 12 whole fresh red raspberries Arranged on top of the jam for a fresh, tart burst in every bite.
- 0.5 cups Domino powdered sugar Sifted to eliminate lumps before whisking into the final glaze.
- 2 teaspoons whole milk Thins the powdered sugar into a smooth, drizzlable consistency.
Instructions
- Beat 8 ounces of room temperature Philadelphia cream cheese, 3 tablespoons of granulated sugar, 1 large egg yolk, and 1 teaspoon of McCormick vanilla extract in a medium bowl on medium speed for 2 minutes. The mixture will start clumpy then suddenly turn silky smooth. You’ll smell sweet vanilla right away and see all yellow streaks vanish as the egg yolk blends fully. Make sure you scrape down the sides with a rubber spatula halfway through so no dense cream cheese pockets remain at the bottom. (I tried skipping the egg yolk once, the filling melted completely and ran all over the pan. Don’t skip it.) Don’t overbeat or air bubbles will cause the filling to puff and collapse. Preheat the oven to 400°F now so it’s fully hot by the time the pan goes in.
- Unroll 1 sheet of thawed Pepperidge Farm puff pastry onto a parchment paper sheet lined tray. Cut the sheet into 4 equal rectangles using a sharp knife. Score a 1/2-inch border inside each rectangle without cutting all the way through. The pastry dough should feel cool to the touch and hold its sharp corner edges without slumping or sticking to your fingers. Prick the inner rectangle 4 times with a fork so the center stays flat while baking. Cut gently through the top layers, scoring allows the outer edges to puff high while the center holds the filling.
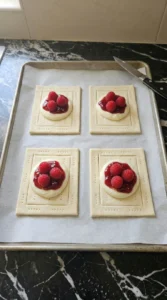
- Spoon 2 tablespoons of cream cheese filling into the center of each scored rectangle. Top with 1 tablespoon of Smucker’s raspberry jam and 3 fresh whole red raspberries. Brush the outer pastry borders with a beaten egg wash made from 1 large egg and 1 tablespoon of water. You’ll see the bright red jam contrast sharply against the pale cream cheese center and the glossy egg wash shine on the outer border. Keep the toppings strictly inside the scored line so the edges can rise freely in the heat. (My first batch overflowed because I heaped 3 tablespoons of jam inside, 1 tablespoon is the goldilocks amount.) Egg wash seals the outer border so steam builds structure instead of drying out the crust.
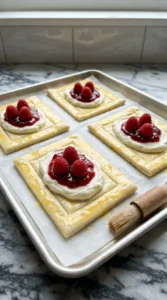
- Bake at 400°F on the middle rack for 16 to 18 minutes. The pastry borders will rise dramatically and turn a deep golden brown while the jam center bubbles softly. You’ll smell toasted butter and sweet fruit filling the room around minute 14. Watch for the bottom edges to brown fully without scorching on the parchment paper. Bake at 400°F not 350°F, high steam creates high rise in puff pastry layers.
- Whisk 1/2 cup of Domino powdered sugar with 2 teaspoons of whole milk in a small bowl until smooth. Drizzle the glaze generously over the warm pastries after they cool for 5 minutes on a wire rack. The glaze will set slightly as it hits the warm crust, turning into a semi-translucent shiny finish over the deep red berries. Drizzle while warm, heat sets the glaze into a thin crispy shell instead of a runny syrup.
Notes
Nutrition
Frequently Asked Questions
Yes, you can assemble the pastry rectangles on parchment paper up to 8 hours ahead. Cover the baking tray loosely with plastic wrap and chill in the fridge. Bake straight from the fridge at 400°F, adding 2 extra minutes to the total baking time.
Bake on the lower-middle rack using a heavy aluminum baking sheet lined with parchment paper. Avoid dark nonstick pans because they absorb too much heat and scorch the bottom crust before the top turns golden.
Overfilling the pastry center causes jam to boil over the scored border. Stick to exactly 2 tablespoons of cream cheese and 1 tablespoon of jam per pastry, keeping everything inside the scored border lines.
Allow baked pastries to cool completely without glaze. Wrap each pastry tightly in plastic wrap and aluminum foil, then freeze for up to 1 month. Thaw at room temperature and warm in a 350°F oven for 5 minutes before glazing.
Reheat leftover pastries in a preheated 350°F toaster oven or standard oven for 5 to 7 minutes. Avoid the microwave because steam makes the flaky layers soggy and soft.
In Conclusion
This Raspberry Danish is the kind of recipe I wish I had found years ago. It would have saved me so many stressful morning prep sessions when hosting family.
But now that I have it, I make it all the time and I think you will too. If you enjoyed this sweet morning treat, check out our Cinnamon Pear Muffins for another delicious weekend baking project.
Leave a comment below, I read every single one and it really makes my day!
Fun fact: classic Danish pastries actually started in Austria! Back in 1850, a major bakery strike hit Denmark, so owners hired Austrian bakers who brought along their awesome layered dough techniques. Local Danish bakers took those methods, tweaked the recipes, and perfected them into the flaky treats we all love today.