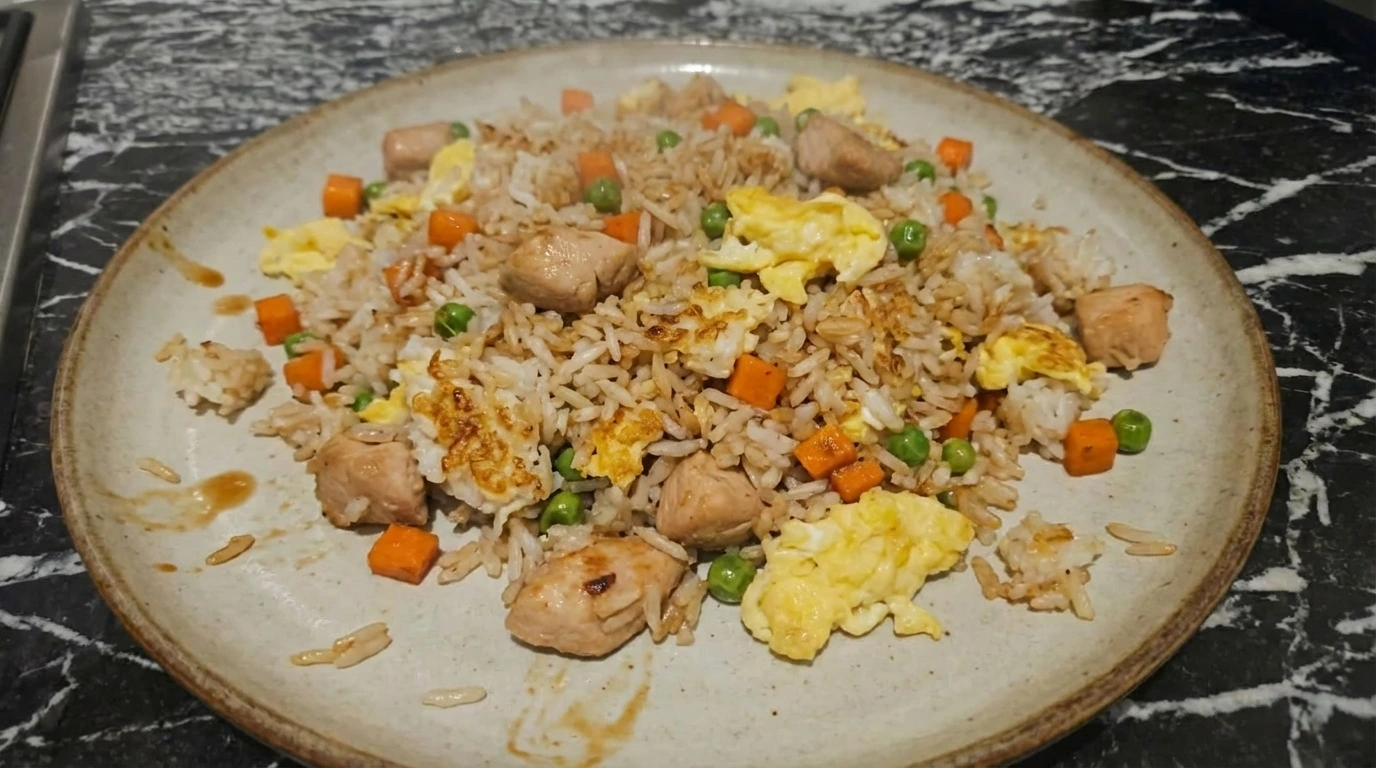
Homemade Chicken Fried Rice
I don’t make fried rice every week, but when I do, it’s this version. It’s simple, uses what I already have, and still hits that takeout-style comfort without leaving the house. What surprised me the first time was how much control you get over the texture.
You’re not guessing. You can keep the rice light, the chicken tender, and the eggs just right. If you like balanced meals, this pairs nicely with something fresh like Healthy Avocado Toast for a lighter combo.
It’s the kind of dish you make once and then repeat without thinking. Quick enough for a busy night, but still feels like you cooked something real.
Why This Recipe Works
Mixing the egg directly into cooled rice before heating helps coat each grain so it cooks evenly at about 350°F without clumping. Using day-old rice keeps moisture low, which prevents steaming and keeps the grains separate. Adding soy sauce in stages avoids oversaturation and gives you better control over color and salt.
What You Will Need
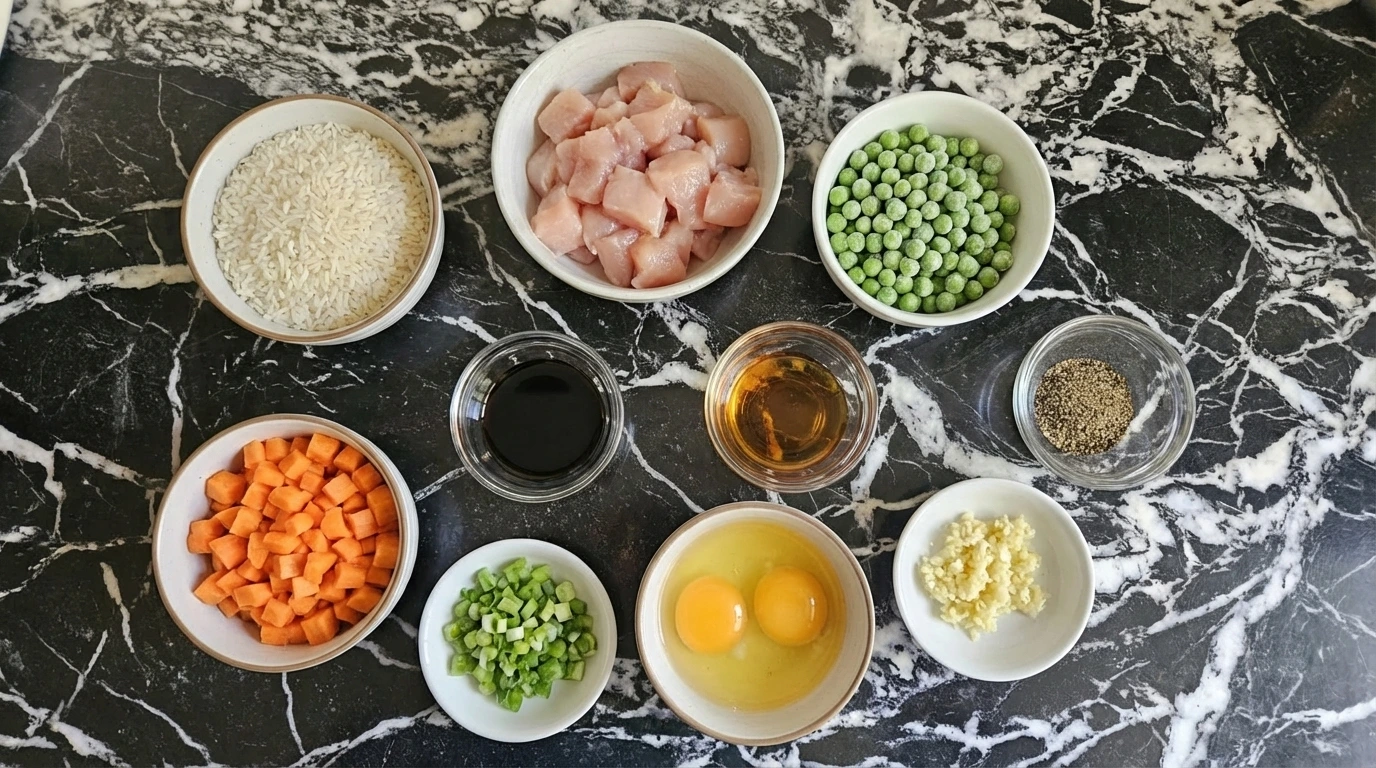
- Cooked white rice: preferably day-old and chilled for separated grains
- Cooked chicken breast: diced into bite-sized pieces for even mixing
- Soy sauce: salty umami seasoning for depth
- Sesame oil: toasted oil for aroma and finish
- Green onions: sliced thin for garnish and freshness
- Carrots: finely diced for quick cooking and slight sweetness
- Peas: small and tender, adds color and softness
- Eggs: lightly beaten for coating and richness
- Garlic: finely chopped for a strong base flavor
- Black pepper: freshly ground for mild heat
Kitchen Equipment
How to Make It
Step 1: Prepare and Separate Ingredients

Set everything out at room temperature, about 68 to 72°F, for 10 to 15 minutes so nothing is ice-cold. Break the rice apart with your fingers using a light rubbing motion until the grains loosen. Keep chicken, vegetables, and garlic in separate piles. Look for rice that falls apart easily with no dense clumps. If you skip this and leave it packed, it steams later instead of frying and you lose texture. (I used to skip this step and always ended up with sticky rice.)
Tip: Use a wide bowl so you have space to separate rice without crushing it.
Step 2: Add Eggs to Rice
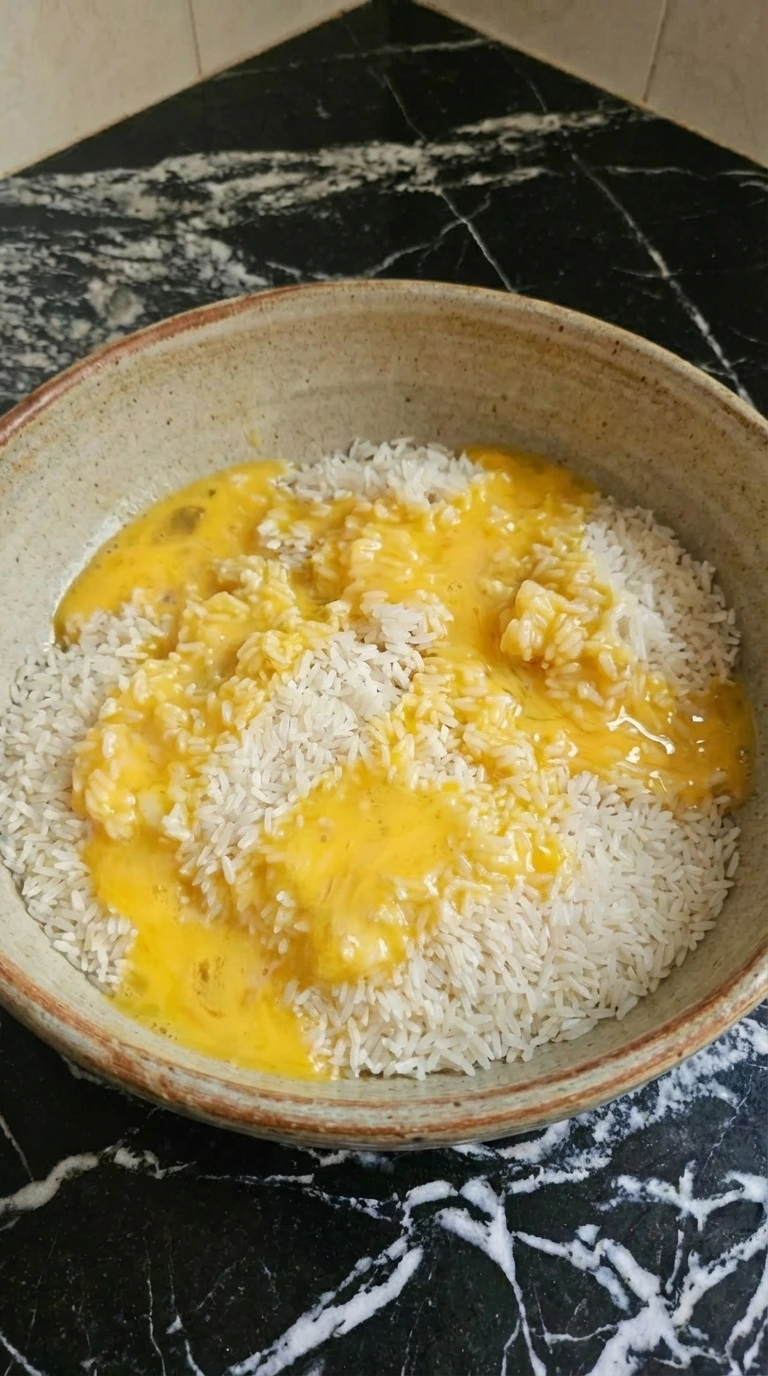
Pour the beaten eggs slowly over the rice at room temp, around 70°F, taking about 30 to 45 seconds. Move your hand in a light drizzle pattern so the egg spreads instead of pooling in one spot. You’ll see glossy streaks forming across the grains. If you dump it too fast, parts get oversaturated and turn mushy once heated, and that’s hard to fix later.
Tip: Tilt the bowl slightly while pouring to help the egg spread naturally.
Step 3: Mix Rice and Egg
Mix gently for about 1 to 2 minutes using a folding motion, almost like scooping from the bottom and turning over. Keep your movements light so the grains stay intact. The rice should turn pale yellow with a soft coating, not wet. If you overmix or press too hard, the grains break and the final texture turns dense instead of fluffy.
Tip: Use your fingertips or a wide spoon instead of a heavy stirring motion.
Step 4: Add Chicken and Vegetables
Scatter the chicken, peas, carrots, and garlic evenly over the rice at room temp, taking about 30 seconds. Drop them from a low height so they spread instead of piling up. You’ll see a colorful layer forming across the surface. If you dump everything in one spot, mixing later takes longer and can crush the rice while you try to distribute it.
Tip: Add in batches if your bowl is small to keep control.
Step 5: Mix Everything Together
Gently combine everything for 2 to 3 minutes using a lift-and-turn motion. Rotate the bowl slightly as you go so you’re not stirring in one place. You want even distribution with visible pieces throughout. If you rush and stir aggressively, the rice compacts and you lose that light, separated feel.
Tip: Stop mixing once everything looks evenly spread, not perfectly uniform.
Step 6: Add Soy Sauce and Sesame Oil

Drizzle soy sauce and sesame oil in stages over 45 to 60 seconds while the mixture is still around room temp. Use a zigzag motion across the surface instead of pouring in one stream. You’ll notice darker streaks forming right away. If you add it all at once, parts get too salty and others stay bland, and fixing that later is tricky. (I tried dumping it once and the flavor was uneven in every bite.)
Tip: Taste after the first drizzle before adding more sauce.
Step 7: Final Mixing and Softening

Transfer to a pan over medium heat, about 5 on a 10-dial or roughly 350°F, and mix for 5 to 7 minutes. Use a flat spatula to fold and press lightly, then lift and turn every 30 seconds. You’ll hear a light sizzle and smell the garlic warming up. The grains should look glossy and slightly toasted. If you go past 8 minutes, the bottom can dry out and start to scorch.
Tip: Give the pan a quick shake every minute to prevent sticking.
Step 8: Plate and Garnish
Scoop onto a plate immediately after cooking, within 1 minute off heat, while still hot around 140°F. Use a loose piling motion instead of pressing it down. Scatter green onions over the top right away. You’ll see steam rising and a slight shine on the rice. If you pack it tightly or wait too long, it traps moisture and turns heavy instead of light.
Tip: Warm the plate slightly so the rice stays hot longer.
Pro Tips
- Day-old rice gives you better separation and texture
- Add sauce in small amounts so you stay in control
- Mix lightly to keep the grains intact
- Keep plating loose so the rice doesn’t compress
Substitutions & Variations
- Cooked white rice: brown rice — adds a nuttier flavor and slightly chewier texture
- Chicken breast: tofu cubes — works for a vegetarian option but the texture is softer
- Soy sauce: tamari — great gluten-free option with a similar taste
- Sesame oil: neutral oil with a drop of toasted sesame — still gives aroma but slightly milder
- Eggs: skip or use scrambled tofu — removes richness and changes texture noticeably
- Chicken breast: leftover grilled chicken — adds extra flavor, try it after making something like Grilled Chicken Salad https://leagueofcooking.com/?p=3219
Storage Instructions
Store leftovers in a sealed container in the fridge for up to 3 days. Let it cool to room temp first before sealing so it doesn’t trap excess moisture. Reheat in a pan over medium heat for about 4 to 5 minutes. Stir occasionally so it warms evenly without drying out.
Homemade Chicken Fried Rice
Ingredients
- 3 cups Cooked white rice
- 2 cups, diced Cooked chicken breast
- 3 tbsp Soy sauce
- 1 tbsp Sesame oil
- 1/2 cup, chopped Green onions
- 1/2 cup, diced Carrots
- 1/2 cup Peas
- 2 , lightly beaten Eggs
- 2 cloves, minced Garlic
- 1/2 tsp Black pepper
Instructions
-
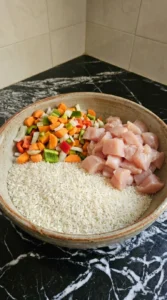
The cooked rice sits loosely in a large bowl, with grains slightly clumped but still fluffy. Nearby, diced chicken pieces appear uneven in size, while carrots and peas are separated with a natural mix of shapes and cuts. Garlic is finely chopped but not perfectly uniform, and green onions are scattered with slight variation in size. Everything looks raw or pre-cooked but not yet combined, clearly staged for mixing.
-
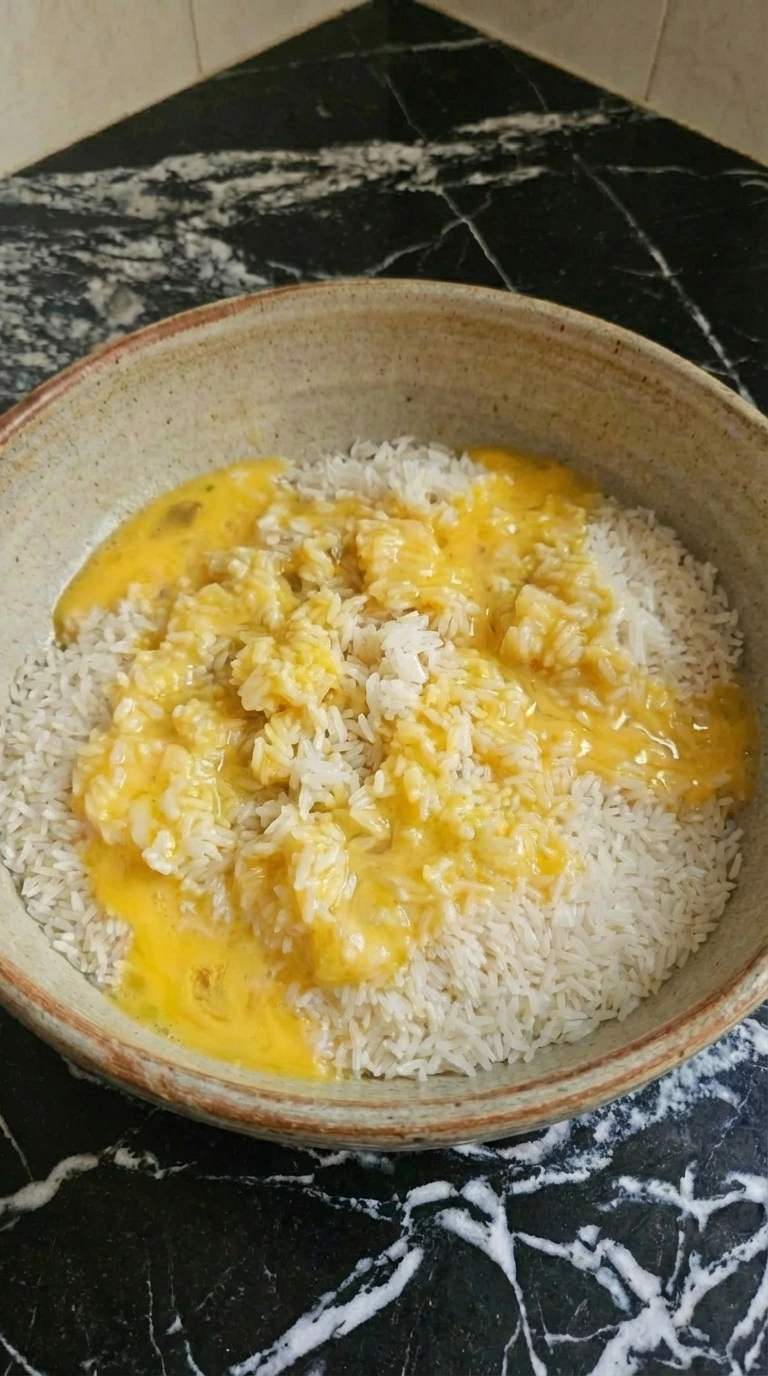
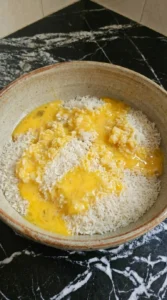
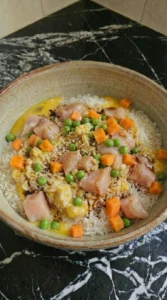
Lightly beaten eggs are poured over the rice, creating glossy yellow streaks that spread unevenly across the surface. Some areas absorb more egg while others remain dry. The rice begins to look slightly coated, with a sticky sheen forming in patches, but still mostly loose and unmixed.
-
The rice is gently mixed, creating soft clumps where egg binds the grains together. Some areas appear more coated than others, forming irregular textures. The color shifts slightly toward pale yellow with occasional white grains still visible, giving a partially blended look.

-
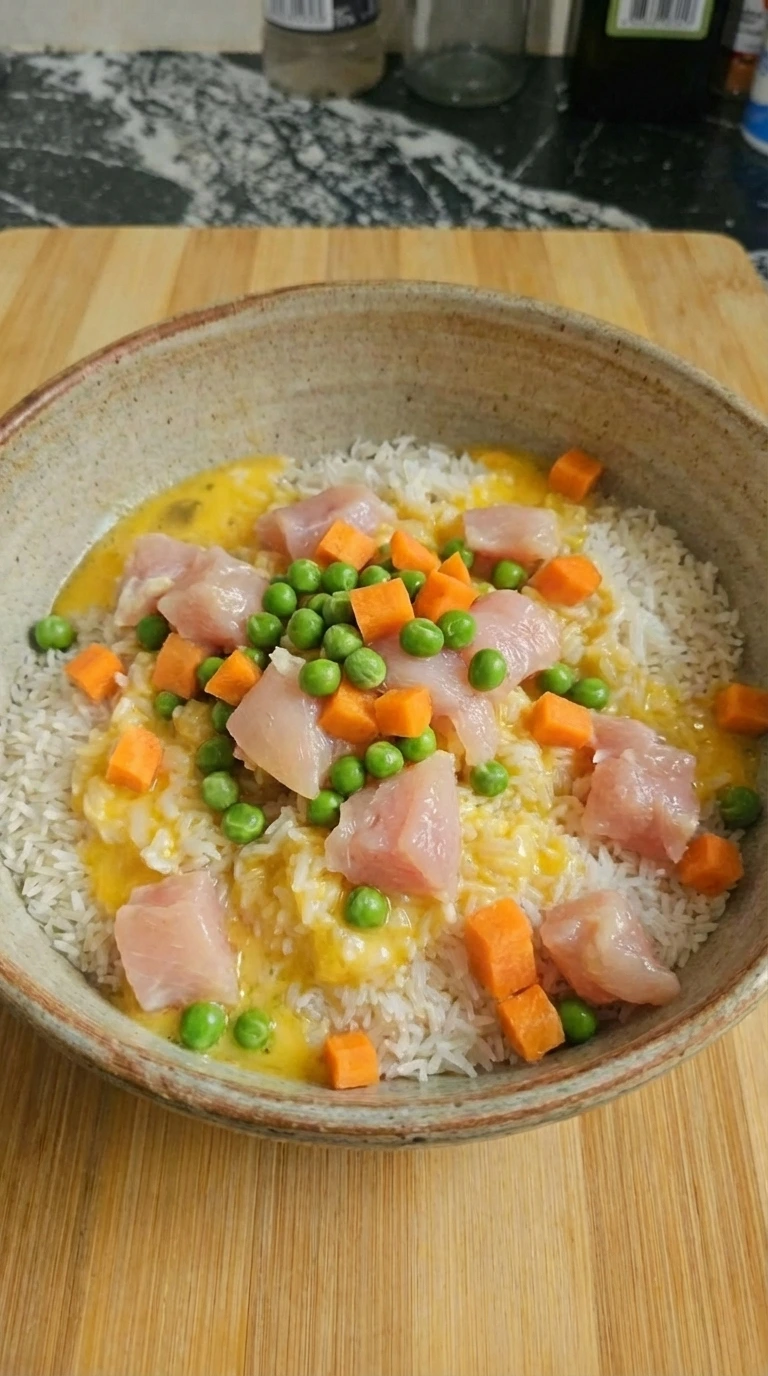
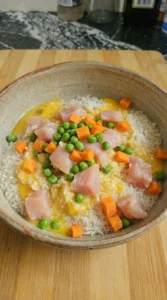
Diced chicken, peas, and carrots are scattered over the rice in a loose, uneven layer. Some vegetables sink slightly while others sit on top. The mixture starts to look fuller and more colorful, but still clearly layered and not fully combined.
-
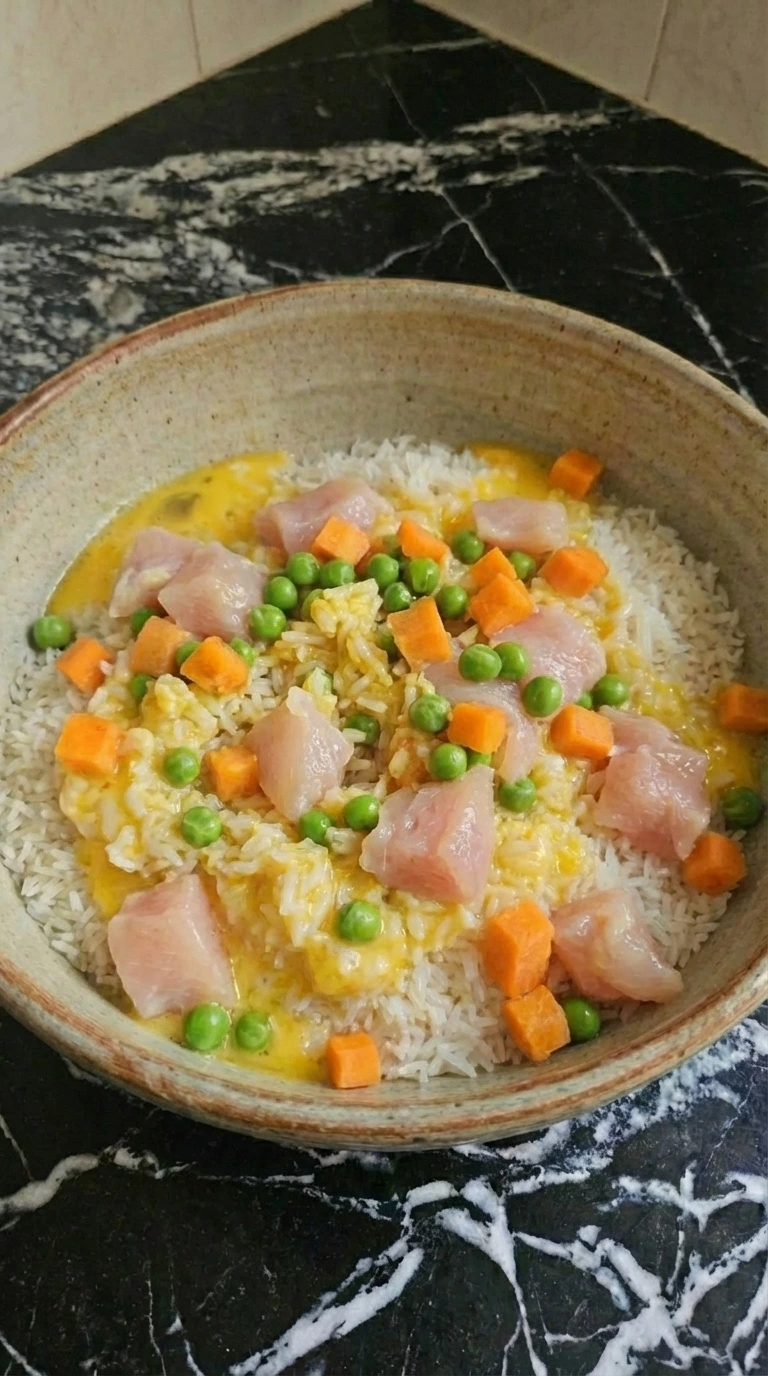
The mixture is stirred, blending chicken and vegetables into the rice. Colors distribute unevenly, with pockets of green peas and orange carrots visible. The texture becomes more cohesive, though some areas appear denser than others, creating a natural homemade look.

-
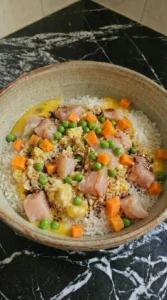
Soy sauce is drizzled over the mixture, creating darker streaks across the rice. Sesame oil adds a glossy finish in patches. Some grains absorb more sauce, turning deeper brown while others remain lighter, giving a marbled appearance.
-
The rice is mixed again, distributing the sauce more evenly. The grains appear softer and slightly glossy, with subtle browning visible in some areas. Chicken pieces look more integrated, and vegetables appear slightly softened, blending naturally into the dish.
-
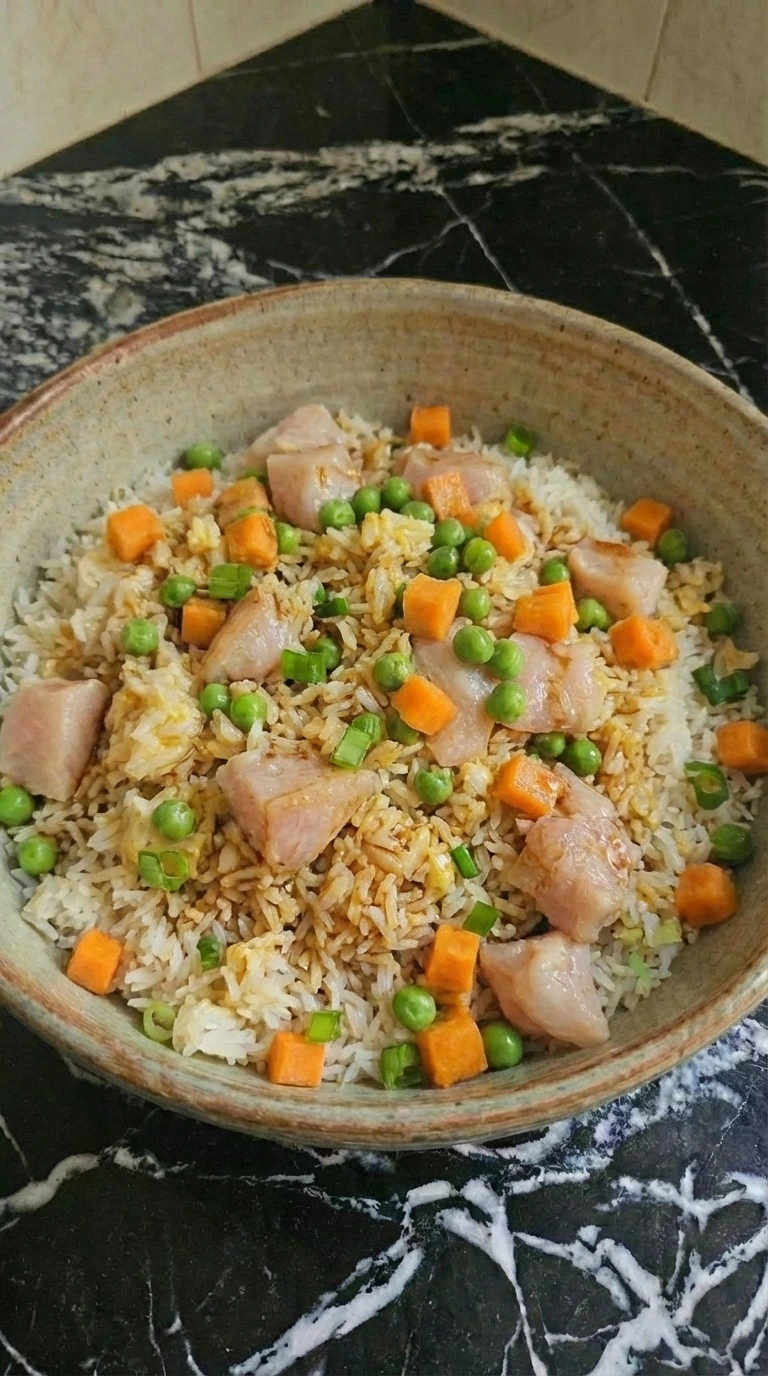
The finished fried rice is scooped onto a plate in a loose mound. Green onions are scattered casually on top, not evenly spread. The dish shows natural variation with golden-brown patches, glossy grains, and visible pieces of chicken and vegetables, looking fully cooked and ready to serve.

Notes
Frequently Asked Questions
You can, but it’s softer and holds more moisture. Let it cool completely for at least 30 minutes first. Otherwise it tends to clump and lose that fried texture.
No, a regular wide pan works fine. Just keep the heat around medium to medium-high so you still get some light browning.
Make sure your pan is preheated and don’t skip the oil. Also avoid overcrowding, which traps steam and causes sticking.
Yes, just keep them chopped small so they cook evenly. Larger pieces take longer and can throw off the texture.
Final Thoughts
This is one of those meals you can rely on when you need something fast but still satisfying. It’s simple, flexible, and easy to repeat once you’ve done it once.
If you’re building out easy meal ideas, this pairs well with something fresh like Quinoa Veggie Bowl https://leagueofcooking. com/?
p=3234 for a balanced spread.
Fried rice was originally made to reuse leftover rice because freshly cooked rice was too soft to fry properly.