Halloween Pumpkin Painting
One October afternoon we were at my in-laws’ house and the kids kept asking to paint pumpkins again because they’d had so much fun the night before. That gave me the idea to turn Halloween Pumpkin Painting into something we could eat. I had been searching for halloween pumpkin painting ideas easy enough for little hands, and edible pumpkin cookies felt like the right answer. I must have watched the kids decorate two trays before I figured out the small trick that made the designs cleaner.
Let the orange icing dry before adding the dark details. Most halloween pumpkin painting ideas use one wet layer after another, but that makes colors bleed fast. So I started treating the cookies like tiny canvases instead. Now this edible pumpkin painting project is on heavy rotation every October.
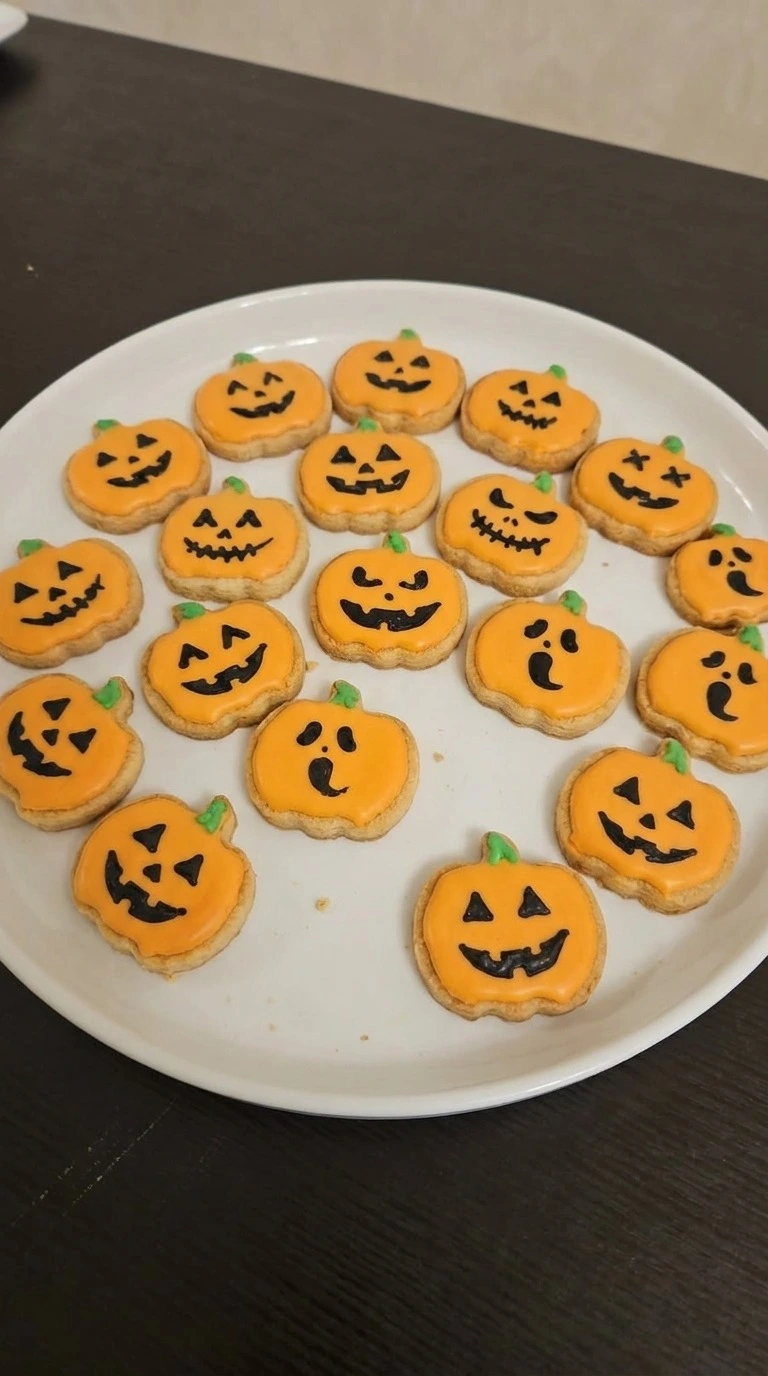
It took me three tries to get the icing balance right because my first batch was too loose and the faces blurred into the orange. The 12-second icing consistency fixed it. And the cookies still taste like something you’d actually want with coffee.
Why This Recipe Works
Halloween Pumpkin Painting works best here because the chilled 1/4-inch dough holds its ridged pumpkin outline when it hits a 350°F oven. Baking for 10 to 12 minutes sets the edges before they darken, so the cookies stay flat enough for a clean icing layer.
Then the 12-second royal icing creates a smooth orange base without running off the sides. A 30 to 40-minute surface rest keeps the black and green details from bleeding into the orange.
Ingredients
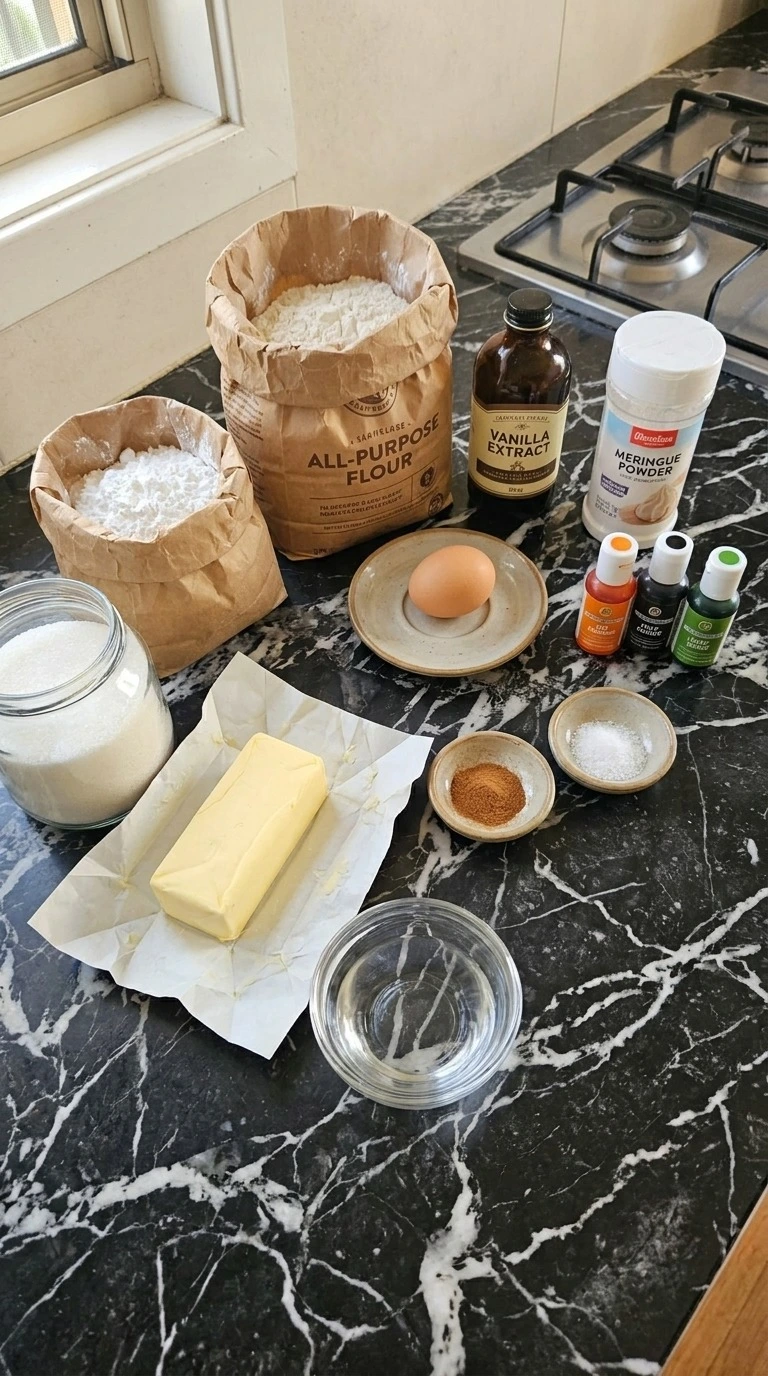
- all-purpose flour: Spoon and level it before mixing so the cutout dough stays tender but firm enough to hold pumpkin ridges.
- baking powder: Use a small amount for a light bite without enough lift to blur the cookie shapes.
- fine sea salt: Distribute it evenly through the dough to balance the sugar and cinnamon.
- ground cinnamon: Mix it through the dry ingredients for a warm flavor and visible fine specks.
- unsalted butter: Soften to about 65°F before creaming so it traps air without turning greasy.
- granulated sugar: Cream it with the butter for sweetness and a crisp edge that still keeps a tender center.
- large egg: Use at room temperature so it blends into the creamed butter without curdling the mixture.
- pure vanilla extract: Add it with the egg for a clean vanilla note that supports the cinnamon.
- powdered sugar: Sift if lumpy so the royal icing dries smooth enough for painted details.
- meringue powder: Whip it with powdered sugar and water to create royal icing that dries firm enough for stacking.
- water: Use 5 tablespoons for the base icing and reserve 1 teaspoon for small consistency adjustments.
- orange gel food coloring: Tint the largest icing portion until it reaches a vivid pumpkin orange.
- black gel food coloring: Tint a smaller icing portion deeply enough to keep the facial details clear over orange.
- leaf green gel food coloring: Tint a small icing portion for stem details that stay distinct from the black faces.
Kitchen Equipment
- Electric mixer: A mixer with medium and low speeds creams the dough and whips smooth icing, while a single-speed high-power model can overwork both mixtures.
- Large mixing bowl: A 4 to 5-quart bowl gives the dough room to combine cleanly, while a smaller bowl tends to throw flour over the rim.
- Rolling pin: A 15 to 18-inch rolling pin keeps the dough close to 1/4 inch thick, while a tiny pin creates uneven pressure and lopsided cookies.
- Pumpkin cookie cutter: A sturdy 3-inch pumpkin cutter gives clear ridges and a manageable bake time, while thin flexible cutters can distort the lobes.
- Rimmed baking trays: Two 13 by 18-inch trays give 18 cookies enough room to bake without touching, while cramped trays encourage uneven edge color.
- Parchment paper: Flat parchment keeps the cutouts from sticking without extra grease, while wrinkled liners can warp the cookie bottoms.
- Cooling rack: A rack at least 12 inches wide lets air reach the cookie bottoms after 5 minutes on the tray, while a solid plate traps heat and softens edges.
- Piping bags: Small 10 to 12-inch bags make the orange flood and black details easier to control, while oversized bags feel bulky for fine painting.
- Food-safe detail brushes: Soft food-only brushes around size 0 to 2 create narrow painted lines, while stiff craft brushes can drag or scratch the icing.
How to Make It
Step 1: Cream the butter and build the cookie dough
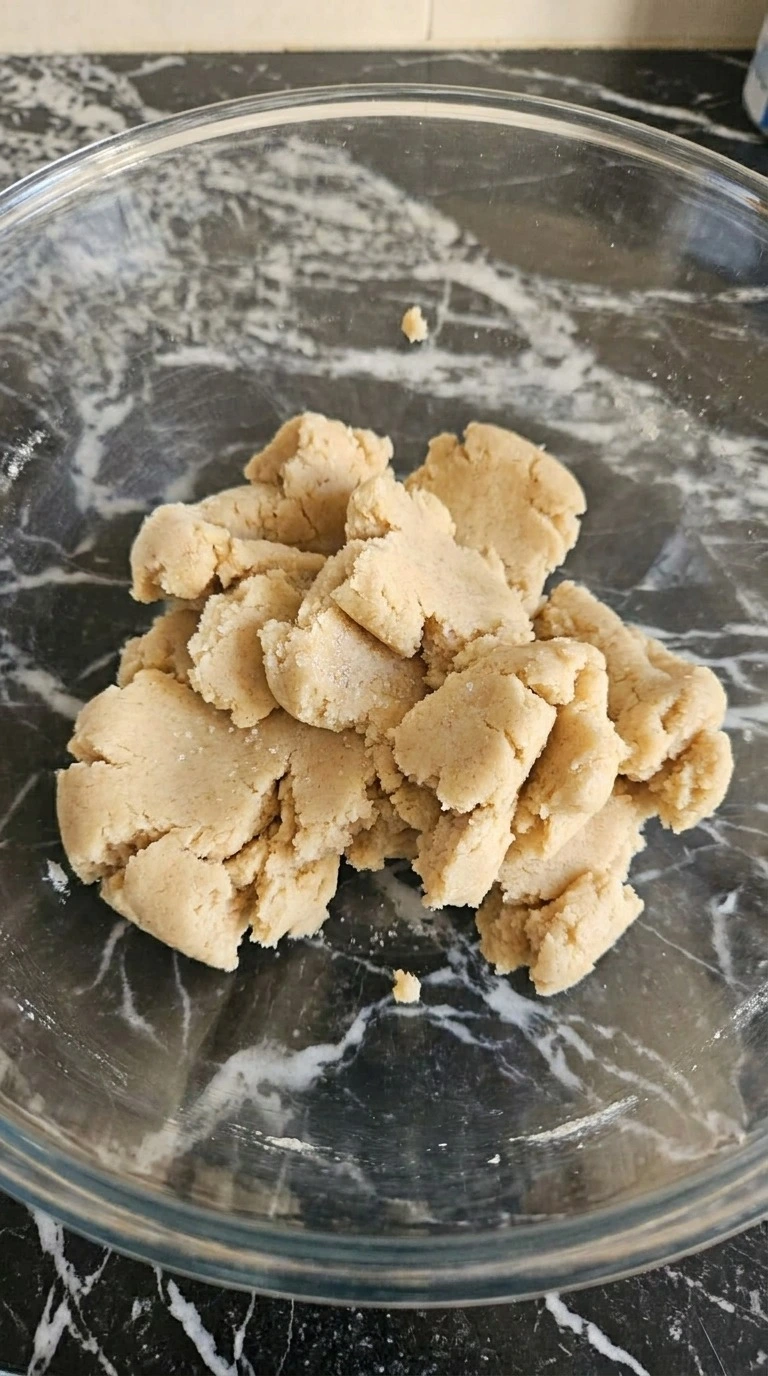
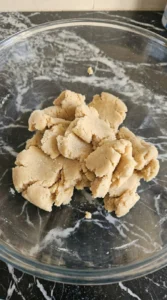
Keep the unsalted butter near 65°F and beat it with the granulated sugar for 2 to 3 minutes until the mixture looks pale and slightly fluffy. Then beat in the egg and pure vanilla extract for 30 seconds. Add the all-purpose flour, baking powder, fine sea salt and ground cinnamon and mix only until no dry streaks remain.
The dough should look soft but hold a clean ridge when pressed. Stop once it gathers into thick clumps because another minute of mixing can make the cookies tougher and less tidy around the edges. Halloween Pumpkin Painting works better when the dough stays firm enough to hold its shape.
Short mixing limits excess gluten.
Tip: Weigh the flour at 270 grams if possible because an extra 1/4 cup can make the painted cookies noticeably dry.
Step 2: Roll and cut the pumpkin shapes
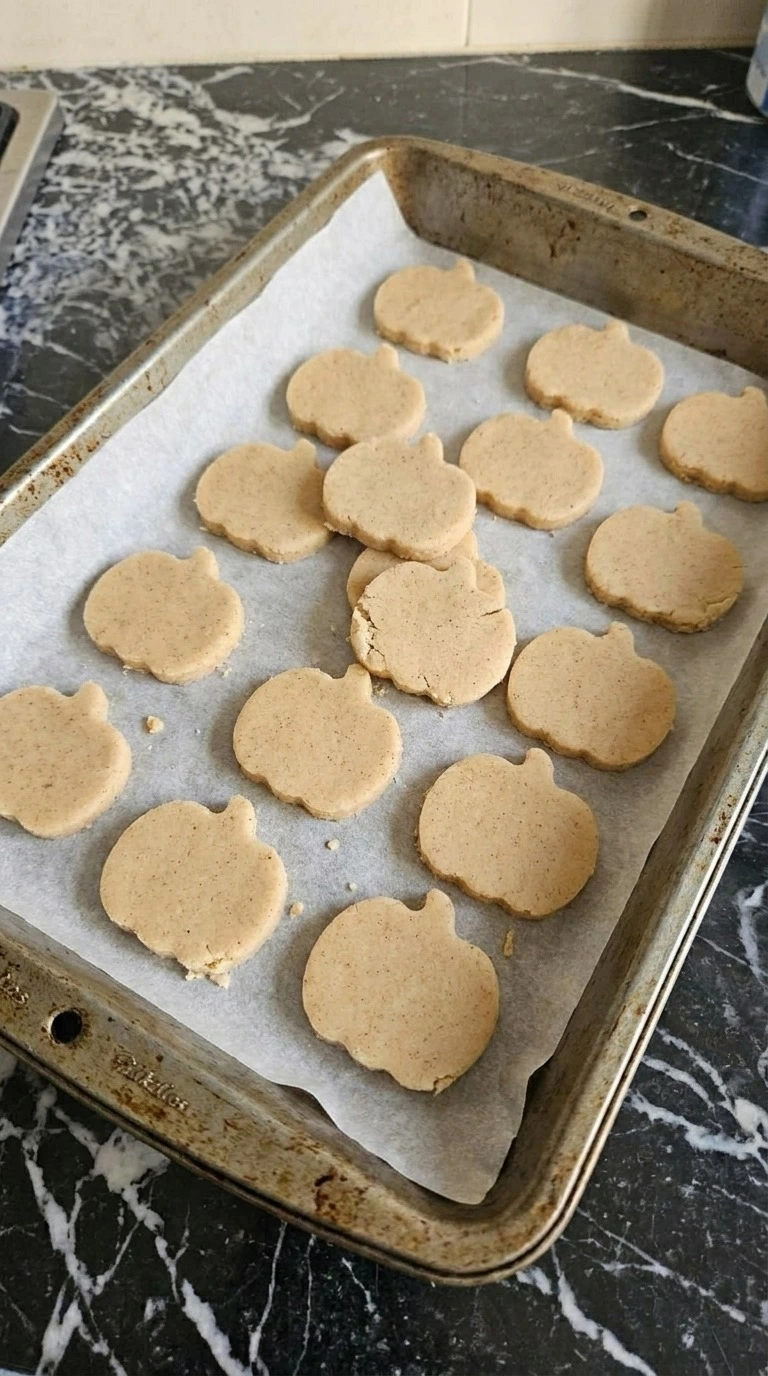
Chill the dough at about 38°F for 30 minutes. Then roll it to an even 1/4-inch thickness and cut 18 pumpkin shapes, lifting each one straight up so the lobes don’t stretch. Place the cut shapes in a single layer and chill them for another 10 minutes before baking.
The chilled shapes should feel firm at the edges and stay flat when moved. If the dough bends or leaves soft fingerprints, give it 5 more minutes in the refrigerator. Go in warm and the cookies spread until the pumpkin ridges blur.
Cold butter holds the silhouette through the first minutes of baking.
Tip: Dip the cutter edge in flour after every 4 or 5 cookies so the narrow pumpkin grooves release cleanly.
Step 3: Bake until the pumpkin edges turn golden
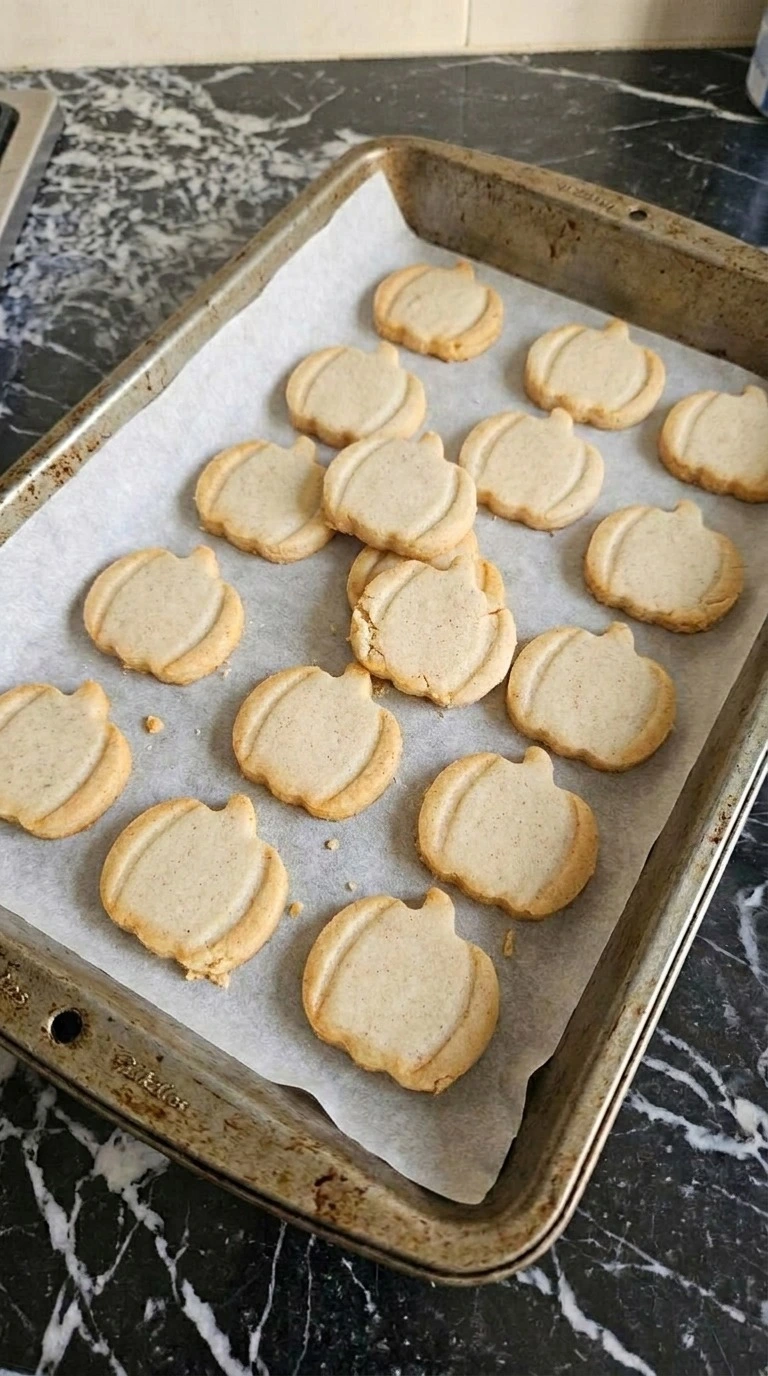
Bake the 18 chilled pumpkin cookies at 350°F for 10 to 12 minutes and rotate the tray once at minute 6. Pull them when the centers look dry and the outer ridges turn light golden. Let them rest on the tray for 5 minutes before moving them to cool completely. You’ll smell butter and cinnamon just before the edges deepen in color.
The centers should stay pale and flat. (My first batch baked 14 minutes and the cookies tasted crisp all the way through. Ten to twelve gives a better bite. ) Go too far and the painted surface becomes brittle.
Halloween Pumpkin Painting needs a flat cookie base. Moderate heat sets the shape before the edges darken.
Tip: Bake one test cookie first if your cutter is larger than 3 inches because a 4-inch shape may need 1 to 2 extra minutes.
Step 4: Mix the royal icing to a 12-second flow
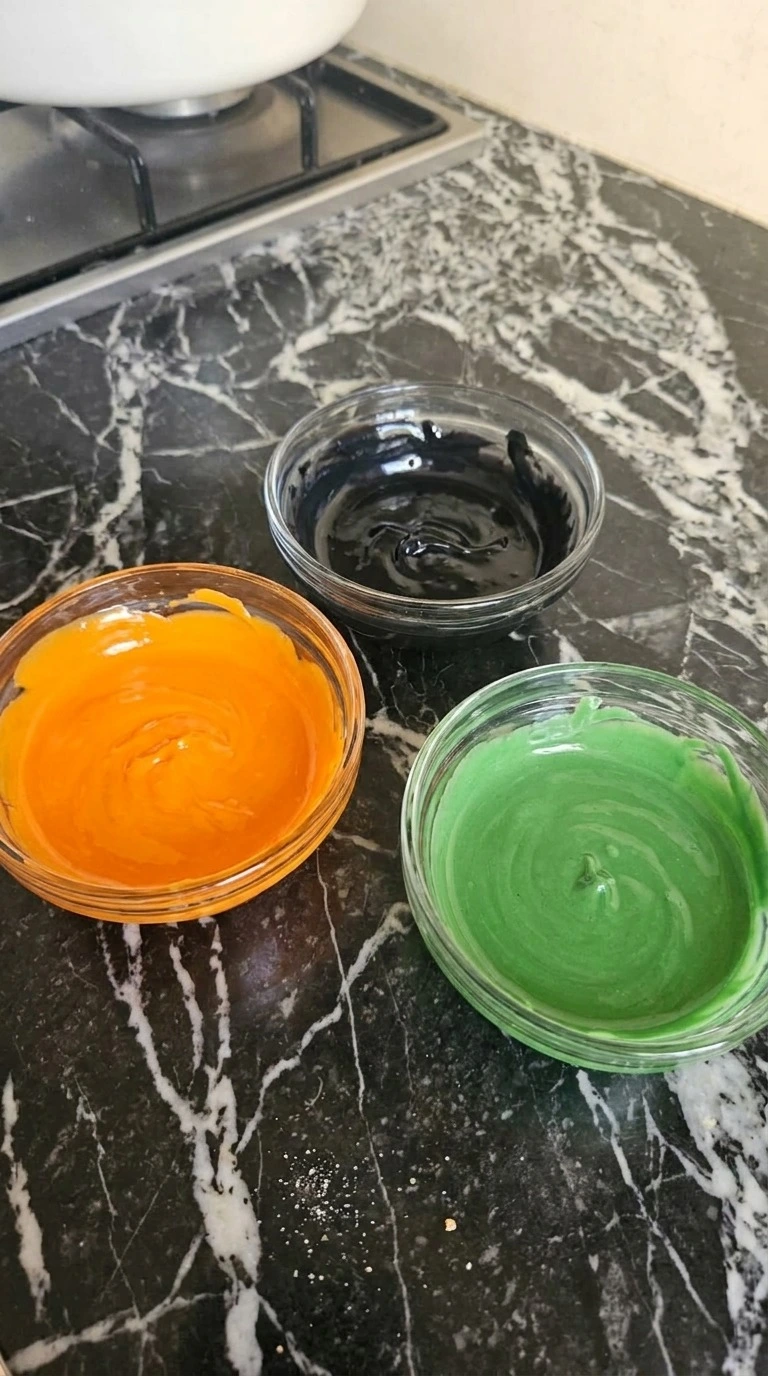
Keep the water near 70°F and mix the powdered sugar with the meringue powder for 20 seconds before adding 5 tablespoons of water. Beat for 3 to 4 minutes until glossy peaks form. Then thin small portions with the remaining water until a ribbon drawn across the surface disappears in about 12 seconds.
The icing should settle slowly without running like milk. Divide it into orange, black and leaf green portions and tint each one with gel food coloring. Stop once the colors look even because overmixing traps bubbles that pockmark the dry surface.
Thick icing leaves ridges. Twelve-second icing levels while still holding a border.
Tip: Cover every unused icing portion within 30 seconds because even a thin surface crust creates little dry flecks in painted details.
Step 5: Flood the cookies with orange icing
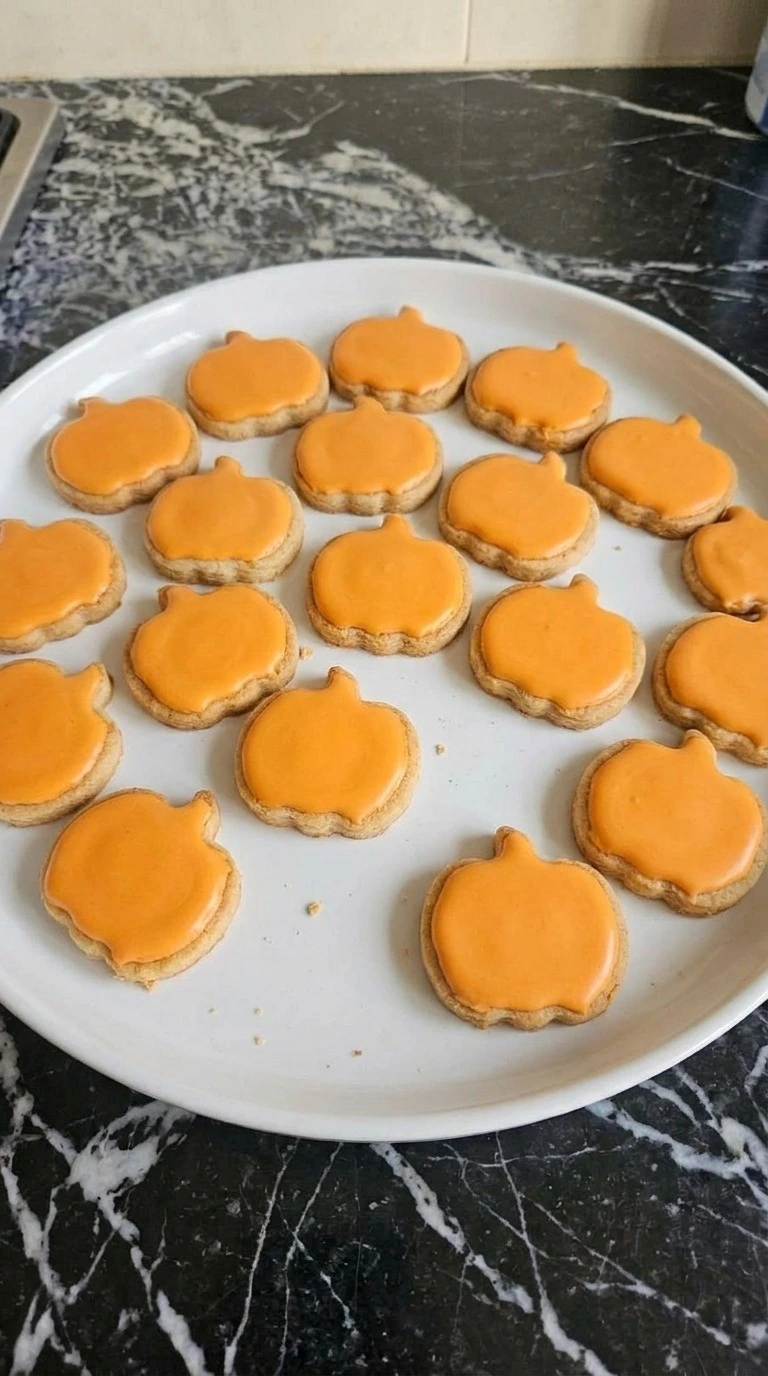
Make sure the cookies have cooled below 80°F. Spoon or pipe orange icing onto all 18 cookies and push it toward the ridged edges in small circular motions, leaving a narrow cookie border visible. Let the orange layer rest at about 70°F for 30 to 40 minutes before adding darker details.
The surface should lose its wet shine and feel set at the outer edge while staying slightly soft underneath. Halloween Pumpkin Painting gets muddy if black icing touches a wet orange base. Start too soon and the colors feather into one another.
A brief surface set keeps each painted line sharp.
Tip: Pop visible air bubbles within the first 2 minutes because they become tiny craters once the royal icing crusts.
Step 6: Paint the Halloween faces and stem details
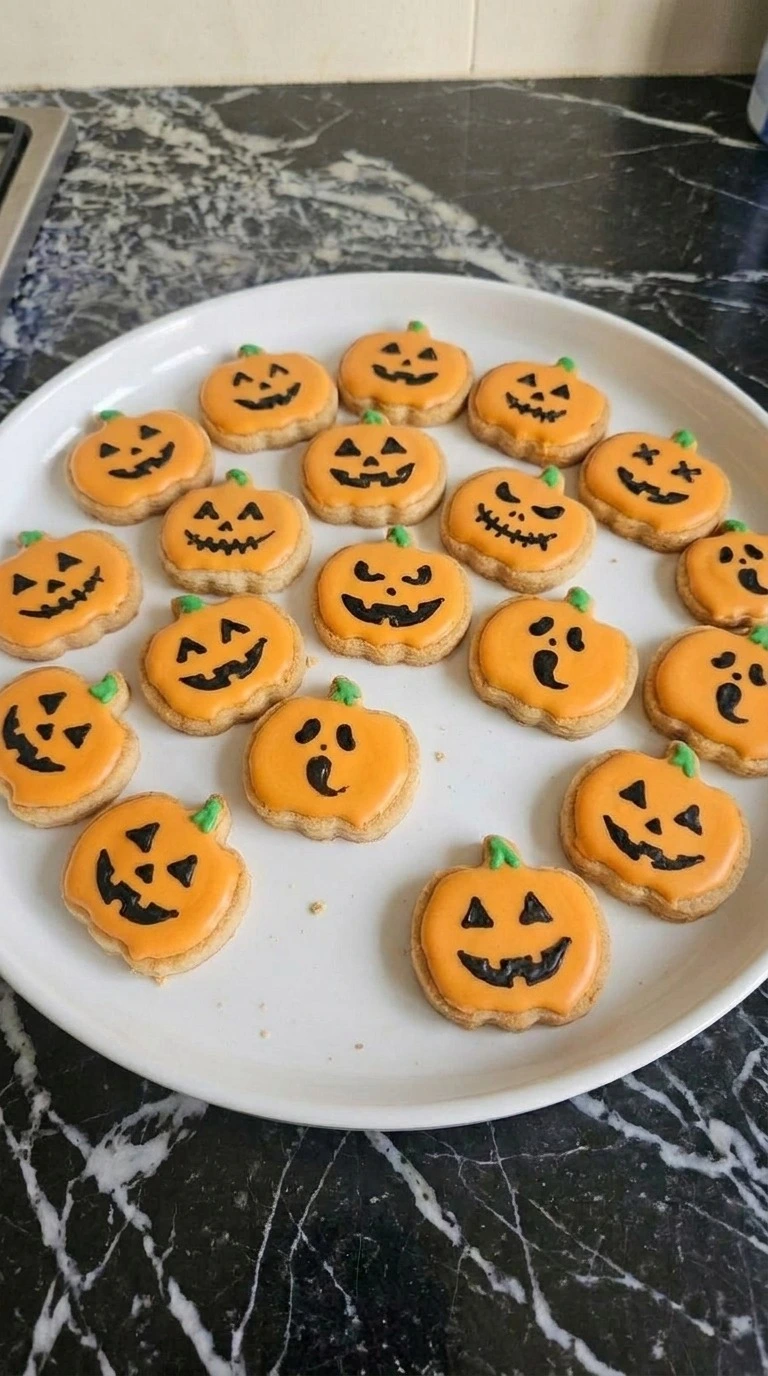
Keep the room near 70°F and use the black icing for eyes, mouths and uneven face details on the 18 orange cookies. Add small leaf green stem marks last. Work for about 20 minutes and vary the expressions so the batch looks hand-painted instead of stamped.
The black lines should sit on top of the orange layer without bleeding at the edges. Let the finished cookies dry for 45 to 60 minutes before stacking or serving. Press too soon and the details dent or smear.
Halloween Pumpkin Painting looks best with small imperfections. Drying sets the sugar structure so the painted surface stays intact.
Tip: Limit each face to 3 to 5 black strokes because crowded designs lose definition once the cookies are viewed on a party tray.
Pro Tips
- Keep the butter near 65°F before creaming. If it looks shiny or greasy after 2 minutes, chill the bowl for 5 minutes.
- Roll the dough to a true 1/4 inch. Thinner cookies can darken before minute 10 and thicker ones may lose their crisp painted surface.
- Chill every tray of cut cookies for at least 10 minutes. The edges should feel firm before they enter the 350°F oven.
- Test royal icing by dragging a line through it. The groove should disappear in about 12 seconds before you flood the orange pumpkin layer.
- Let the orange icing dry for at least 30 minutes before adding black details. A glossy surface still contains enough moisture to make colors bleed.
- Use gel coloring instead of liquid coloring. Start with about 1/8 teaspoon and add more gradually so the royal icing doesn’t become runny.
- For Halloween Pumpkin Painting faces, keep most designs to 3 to 5 black strokes. Fine details stay clearer after the icing dries.
- Leave decorated cookies uncovered for 45 to 60 minutes before stacking. The surface should feel firm and show no fingerprint when lightly touched.
- Make ghost pumpkin cookies by tinting the flood icing white and using black gel icing for simple eyes and uneven smiling mouths.
- Create monster pumpkins by dividing the flood icing into orange and leaf green portions, then add mismatched black eyes after a 30-minute drying period.
- For a warmer spice profile, replace the cinnamon with 3/4 teaspoon pumpkin pie spice and add 1/8 teaspoon ground ginger to the dough.
- Turn the batch into party favors by decorating each cookie differently, drying them for 60 minutes and packing them individually once fully firm.
Substitutions & Variations
- unsalted butter: Use plant-based baking sticks at a 1:1 ratio. — The cookies stay dairy-free but may spread slightly more. Chill the cut shapes for 15 minutes instead of 10 before baking.
- all-purpose flour: Use a 1:1 gluten-free baking flour with xanthan gum at the same volume. — The cookies become a little more delicate and sandy. Chill the dough for 40 minutes so the pumpkin edges hold their shape.
- large egg: Use 3 tablespoons of aquafaba for the single egg. — This makes the cookie base egg-free but slightly less rich. Expect softer dough and chill it 10 minutes longer before rolling.
- meringue powder: Use pasteurized egg white powder at the package’s equivalent ratio. — The icing dries similarly but may taste less sweet. Don’t use raw fresh egg whites when serving young children or other higher-risk guests.
- ground cinnamon: Use 3/4 teaspoon pumpkin pie spice for 1 teaspoon cinnamon. — The cookies gain clove and nutmeg notes and taste more distinctly seasonal. Keep the amount below 1 teaspoon so the spices don’t overpower vanilla.
Storage Instructions
Store finished cookies in a rigid airtight container at room temperature for 4 to 5 days once the icing is completely dry. For longer storage, freeze undecorated cookies for up to 2 months with parchment between layers and wrap the container tightly.
These cookies don’t need reheating. If frozen, thaw them covered for about 2 hours at room temperature and decorate afterward.
Discard cookies if they smell stale, develop moisture spots or the icing becomes unusually sticky.
Halloween Pumpkin Painting
Ingredients
- 2 1/4 cups all-purpose flour Spoon and level it before mixing so the cutout dough stays tender but firm enough to hold pumpkin ridges.
- 1/2 teaspoon baking powder Use a small amount for a light bite without enough lift to blur the cookie shapes.
- 1/2 teaspoon fine sea salt Distribute it evenly through the dough to balance the sugar and cinnamon.
- 1 teaspoon ground cinnamon Mix it through the dry ingredients for a warm flavor and visible fine specks.
- 3/4 cup unsalted butter Soften to about 65°F before creaming so it traps air without turning greasy.
- 3/4 cup granulated sugar Cream it with the butter for sweetness and a crisp edge that still keeps a tender center.
- 1 large large egg Use at room temperature so it blends into the creamed butter without curdling the mixture.
- 2 teaspoons pure vanilla extract Add it with the egg for a clean vanilla note that supports the cinnamon.
- 4 cups powdered sugar Sift if lumpy so the royal icing dries smooth enough for painted details.
- 3 tablespoons meringue powder Whip it with powdered sugar and water to create royal icing that dries firm enough for stacking.
- 5 tablespoons plus 1 teaspoon water Use 5 tablespoons for the base icing and reserve 1 teaspoon for small consistency adjustments.
- 1/2 teaspoon orange gel food coloring Tint the largest icing portion until it reaches a vivid pumpkin orange.
- 1/4 teaspoon black gel food coloring Tint a smaller icing portion deeply enough to keep the facial details clear over orange.
- 1/8 teaspoon leaf green gel food coloring Tint a small icing portion for stem details that stay distinct from the black faces.
Instructions
- Keep the unsalted butter near 65°F and beat it with the granulated sugar for 2 to 3 minutes until the mixture looks pale and slightly fluffy. Then beat in the egg and pure vanilla extract for 30 seconds. Add the all-purpose flour, baking powder, fine sea salt and ground cinnamon and mix only until no dry streaks remain. The dough should look soft but hold a clean ridge when pressed. Stop once it gathers into thick clumps because another minute of mixing can make the cookies tougher and less tidy around the edges. Halloween Pumpkin Painting works better when the dough stays firm enough to hold its shape. Short mixing limits excess gluten.
- Chill the dough at about 38°F for 30 minutes. Then roll it to an even 1/4-inch thickness and cut 18 pumpkin shapes, lifting each one straight up so the lobes don’t stretch. Place the cut shapes in a single layer and chill them for another 10 minutes before baking. The chilled shapes should feel firm at the edges and stay flat when moved. If the dough bends or leaves soft fingerprints, give it 5 more minutes in the refrigerator. Go in warm and the cookies spread until the pumpkin ridges blur. Cold butter holds the silhouette through the first minutes of baking.
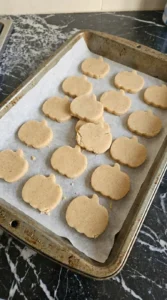
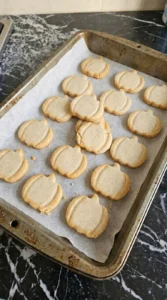
- Bake the 18 chilled pumpkin cookies at 350°F for 10 to 12 minutes and rotate the tray once at minute 6. Pull them when the centers look dry and the outer ridges turn light golden. Let them rest on the tray for 5 minutes before moving them to cool completely. You’ll smell butter and cinnamon just before the edges deepen in color. The centers should stay pale and flat. (My first batch baked 14 minutes and the cookies tasted crisp all the way through. Ten to twelve gives a better bite.) Go too far and the painted surface becomes brittle. Halloween Pumpkin Painting needs a flat cookie base. Moderate heat sets the shape before the edges darken.
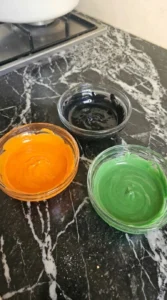
- Keep the water near 70°F and mix the powdered sugar with the meringue powder for 20 seconds before adding 5 tablespoons of water. Beat for 3 to 4 minutes until glossy peaks form. Then thin small portions with the remaining water until a ribbon drawn across the surface disappears in about 12 seconds. The icing should settle slowly without running like milk. Divide it into orange, black and leaf green portions and tint each one with gel food coloring. Stop once the colors look even because overmixing traps bubbles that pockmark the dry surface. Thick icing leaves ridges. Twelve-second icing levels while still holding a border.
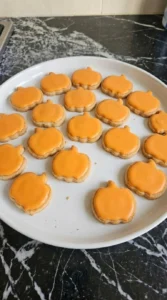
- Make sure the cookies have cooled below 80°F. Spoon or pipe orange icing onto all 18 cookies and push it toward the ridged edges in small circular motions, leaving a narrow cookie border visible. Let the orange layer rest at about 70°F for 30 to 40 minutes before adding darker details. The surface should lose its wet shine and feel set at the outer edge while staying slightly soft underneath. Halloween Pumpkin Painting gets muddy if black icing touches a wet orange base. Start too soon and the colors feather into one another. A brief surface set keeps each painted line sharp.
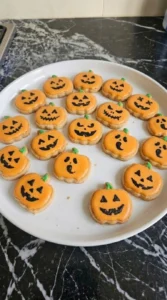
- Keep the room near 70°F and use the black icing for eyes, mouths and uneven face details on the 18 orange cookies. Add small leaf green stem marks last. Work for about 20 minutes and vary the expressions so the batch looks hand-painted instead of stamped. The black lines should sit on top of the orange layer without bleeding at the edges. Let the finished cookies dry for 45 to 60 minutes before stacking or serving. Press too soon and the details dent or smear. Halloween Pumpkin Painting looks best with small imperfections. Drying sets the sugar structure so the painted surface stays intact.
Notes
Frequently Asked Questions
Yes. Bake the cookies up to 3 days ahead and keep them airtight at room temperature after they cool completely. Decorate them the next day, then let the royal icing dry for 45 to 60 minutes before stacking.
They keep well for 4 to 5 days in an airtight container at cool room temperature. Place parchment between layers after the icing has dried completely, and avoid refrigeration because condensation can spot the royal icing.
The dough was probably too warm or the butter was softer than about 65°F. Chill cut cookies for 10 to 15 minutes before baking at 350°F, and don’t place dough on a warm tray.
The orange layer hasn’t formed enough of a crust. Give it 30 to 40 minutes at about 70°F before painting, and wait longer if the surface still looks shiny or feels tacky.
Yes. Double every ingredient and mix the dough in two batches if your bowl holds less than 6 quarts. Bake one tray at a time for 10 to 12 minutes so each batch gets consistent heat.
Freeze undecorated cookies for up to 2 months with parchment between layers and a tight outer wrap. Thaw them covered for about 2 hours, then decorate only after they reach room temperature and the surface feels completely dry.
Serve them with warm apple cider, hot chocolate or cold milk at a Halloween party. The cinnamon and vanilla flavors pair especially well with cider warmed to about 160°F and finished with a small cinnamon stick.
Final Thoughts
By the time October rolls around, this is the kind of project I wish I’d discovered years ago because Halloween Pumpkin Painting turns decorating into dessert too. It would’ve saved me plenty of messy pumpkin nights, and now these halloween pumpkin painting ideas easy enough for kids come out every season.
If you’re collecting pumpkin painting ideas halloween parties can actually use, try a batch and make every face a little different. And leave a comment or share your cookies because I genuinely love seeing what everyone paints.
Royal icing starts forming a surface crust within minutes because water evaporates while the sugar and meringue proteins create a firm shell.