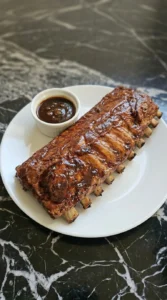
Bbq Ribs
There’s nothing quite like the smell of slow-cooked meat wafting through the house on a Sunday afternoon. I’ve spent years trying to get that perfect balance of tender meat and sticky glaze without needing a professional smoker in the backyard. These ribs are my go-to because they’re consistently juicy and packed with flavor every single time.
Getting that classic BBQ texture actually starts in the oven where low heat does all the heavy lifting. While the ribs are roasting away you can whip up some sides like a Creamy Potato Salad to round out the meal. It’s a simple process but the results feel like you spent all day hovering over a hot pit.
I really love how the house starts to smell like a smokehouse about two hours in. You don’t need fancy equipment or secret wood chips to get this right because the dry rub and slow bake handle everything. So grab a stack of napkins and get ready for a messy but totally worth it dinner that everyone will ask for again.
The Science Behind It
Roasting the ribs tightly wrapped in foil at 300°F creates a pressurized steam environment that breaks down tough connective tissue without drying out the meat.
This ensures the ribs are tender enough to pull away from the bone but still hold their shape for the final high-heat glaze.
Finishing on a grill or under a broiler at 450°F caramelizes the sugars in the sauce to create that signature sticky bark.
Ingredient List
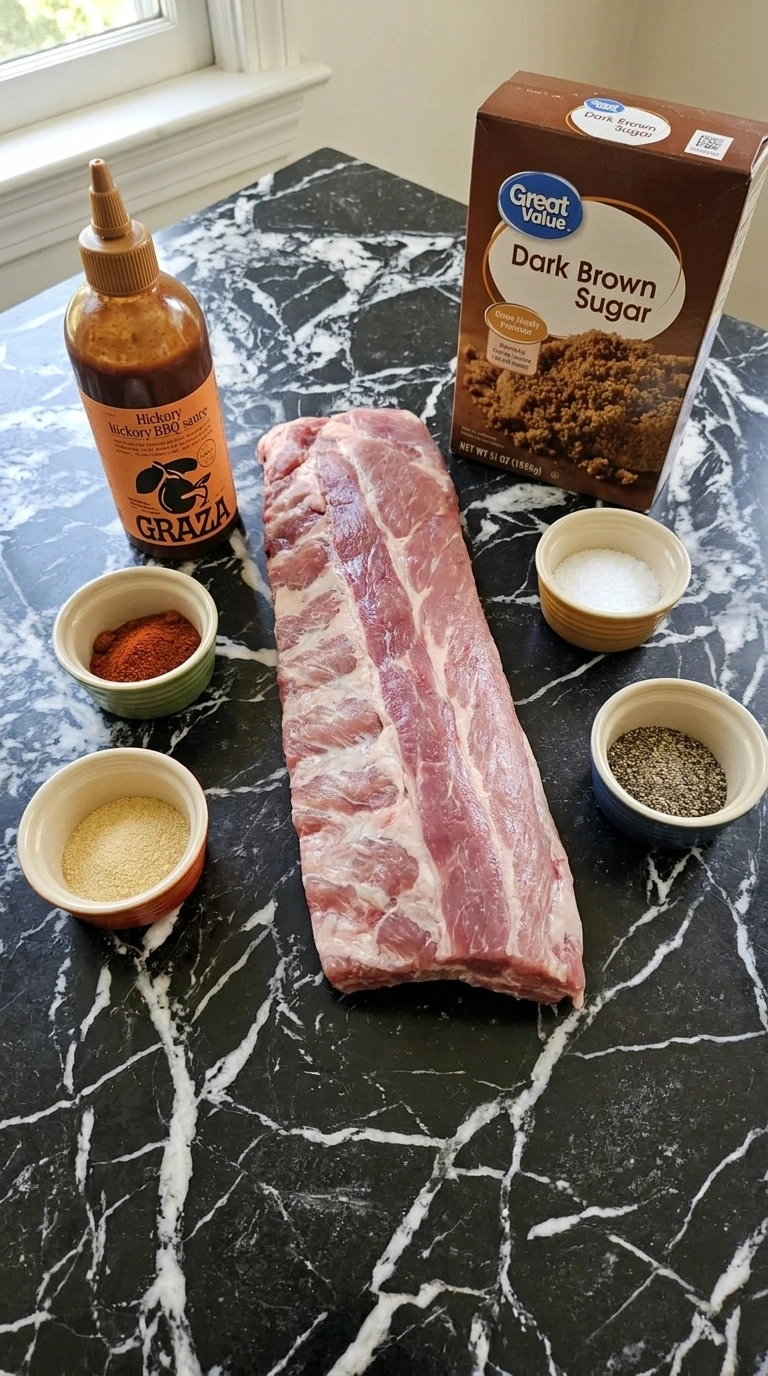
- baby back pork ribs: The primary protein known for being lean and tender.
- dark brown sugar: Provides sweetness and helps form a caramelized crust.
- smoked paprika: Adds a deep smoky flavor and rich red color.
- garlic powder: Infuses the meat with savory aromatic notes.
- kosher salt: Draws out moisture and seasons the meat deeply.
- black pepper: Adds a subtle spicy bite to the rub.
- hickory BBQ sauce: The final glaze for moisture and tang.
What You’ll Use
Method
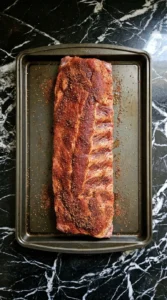
Step 1: Season the racks
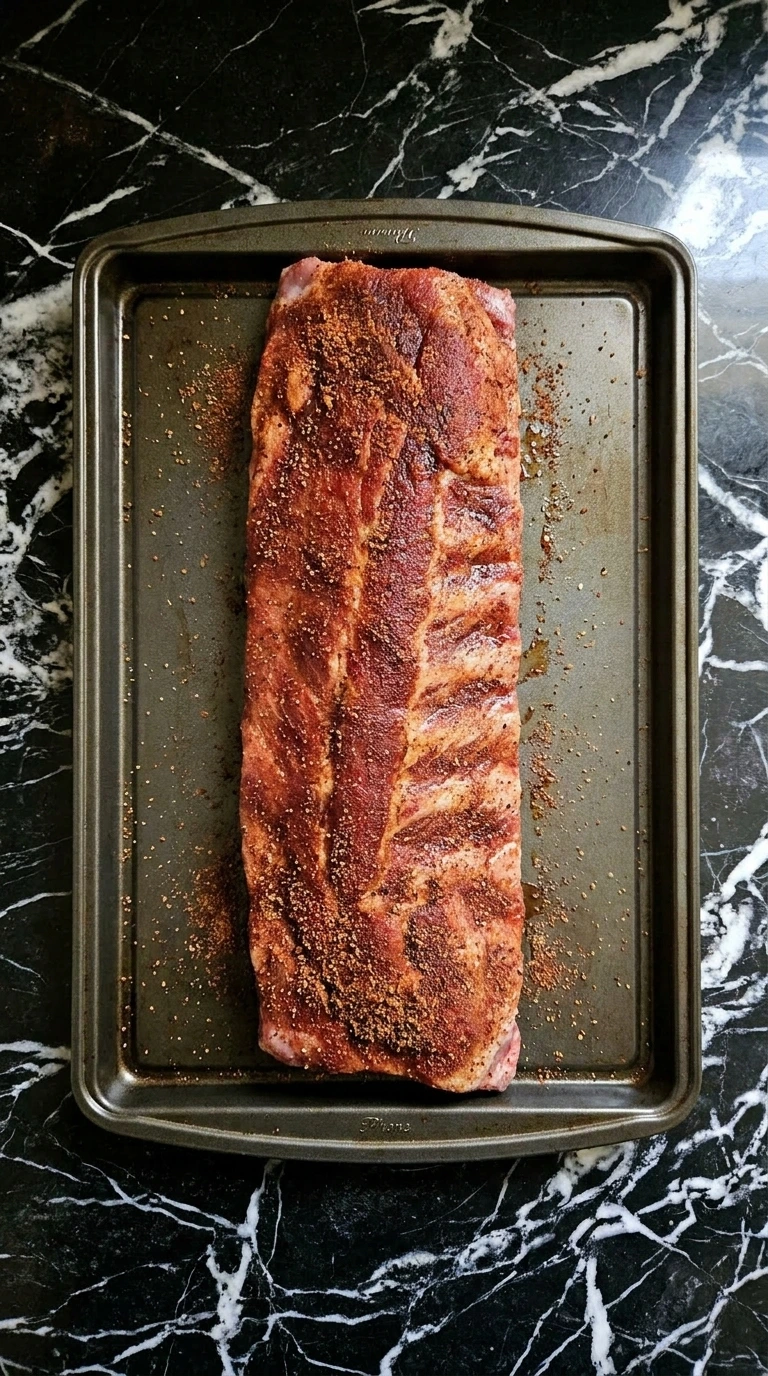
Pat the baby back pork ribs dry with paper towels so the rub sticks better. Mix the dark brown sugar smoked paprika garlic powder kosher salt and black pepper in a small bowl. Use your hands to massage the spice mixture firmly into both sides of the meat.
(I once tried just sprinkling it on but the flavor didn’t penetrate. Rubbing it in makes a massive difference. ) You’ll see the meat change from a pale pink to a gritty red as the spices coat the surface.
Make sure every inch is covered because any bare spots will miss out on the crust. Apply rub with firm pressure, this ensures the seasoning bonds to the surface proteins.
Tip: Remove the thin silvery membrane from the back of the ribs before seasoning so the spices can actually reach the meat.
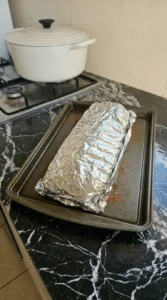
Step 2: Wrap and slow roast
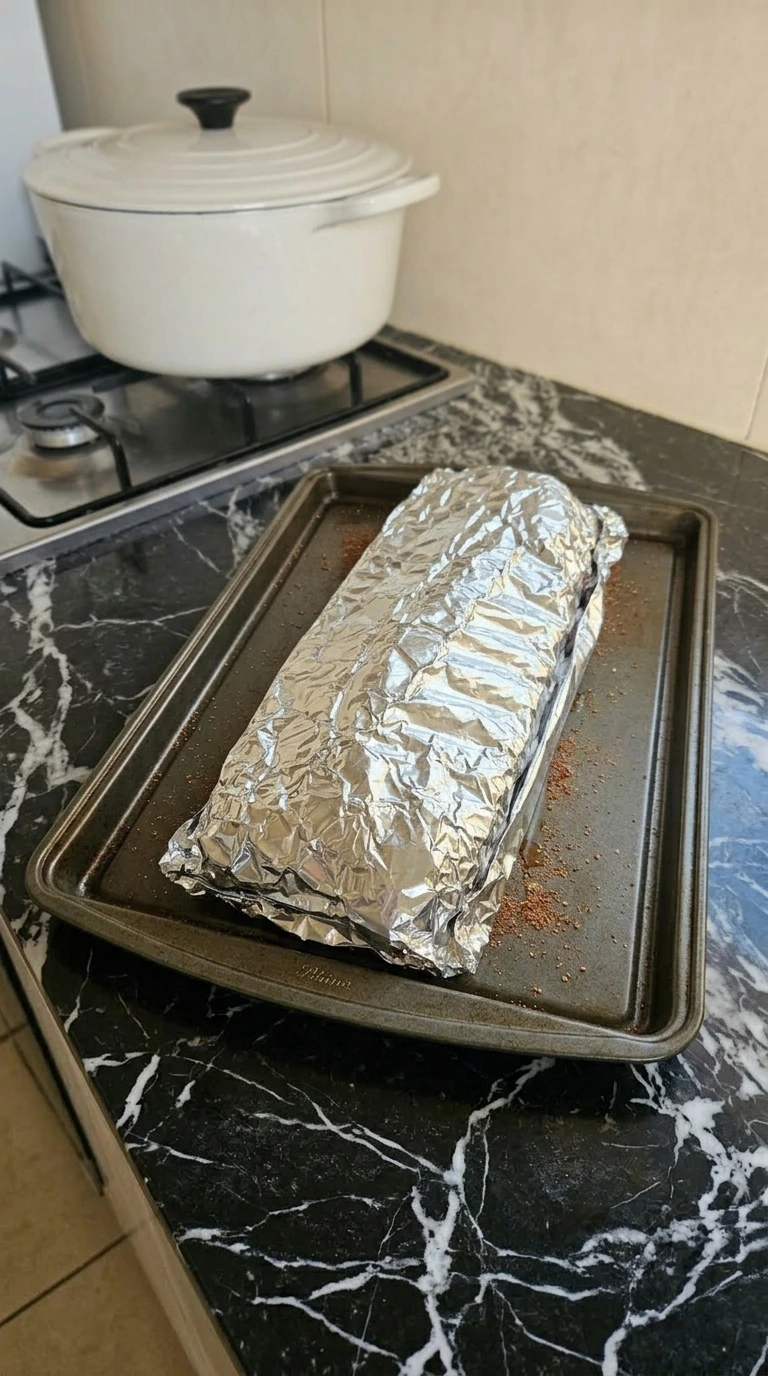
Preheat your oven to 300°F and prepare a large sheet pan with heavy-duty aluminum foil. Lay the ribs on the foil and wrap them tightly so no steam can escape during the long cook.
Place the pan on the center rack and bake for exactly 2 hours and 30 minutes. You’ll know they’re ready when the meat has shrunk back from the bone ends by about half an inch.
If you peek inside the foil the meat should look pale but very soft. Seal the foil packets tightly, trapped steam breaks down collagen into gelatin for tenderness.
Tip: If you have time let the seasoned ribs sit in the fridge for 2 hours before baking to let the salt penetrate deeper.
Step 3: Apply the glaze
Carefully open the foil packets and drain any excess rendered fat into a bowl. Increase the oven temperature to 425°F or prepare your grill to medium-high heat (about 6 on a 10-dial). Brush a thick layer of hickory BBQ sauce over the top side of the ribs using a silicone basting brush.
(I used to drown them in sauce but a medium layer is better. Too much sauce just slides off and makes a mess. ) The sauce will look glossy and wet at first but it’ll soon start to thicken and bubble.
If you love variety you could serve these alongside a Honey Glazed Ham for a big meat-heavy feast. Baste at 425°F for 10 minutes, high heat reduces the sauce into a sticky lacquer.
Tip: Watch the ribs closely during this stage as the high sugar content in the sauce can burn quickly if left unattended.
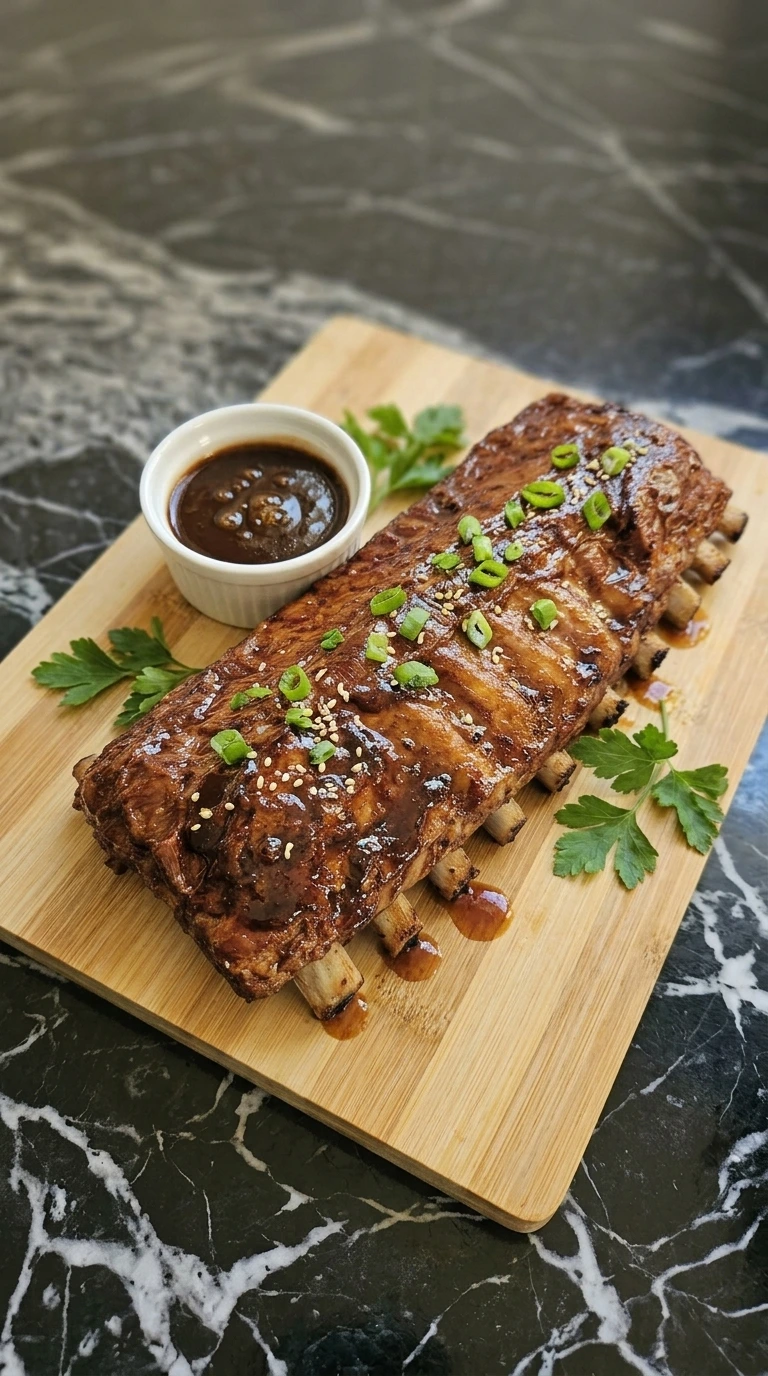
Step 4: Char and caramelize
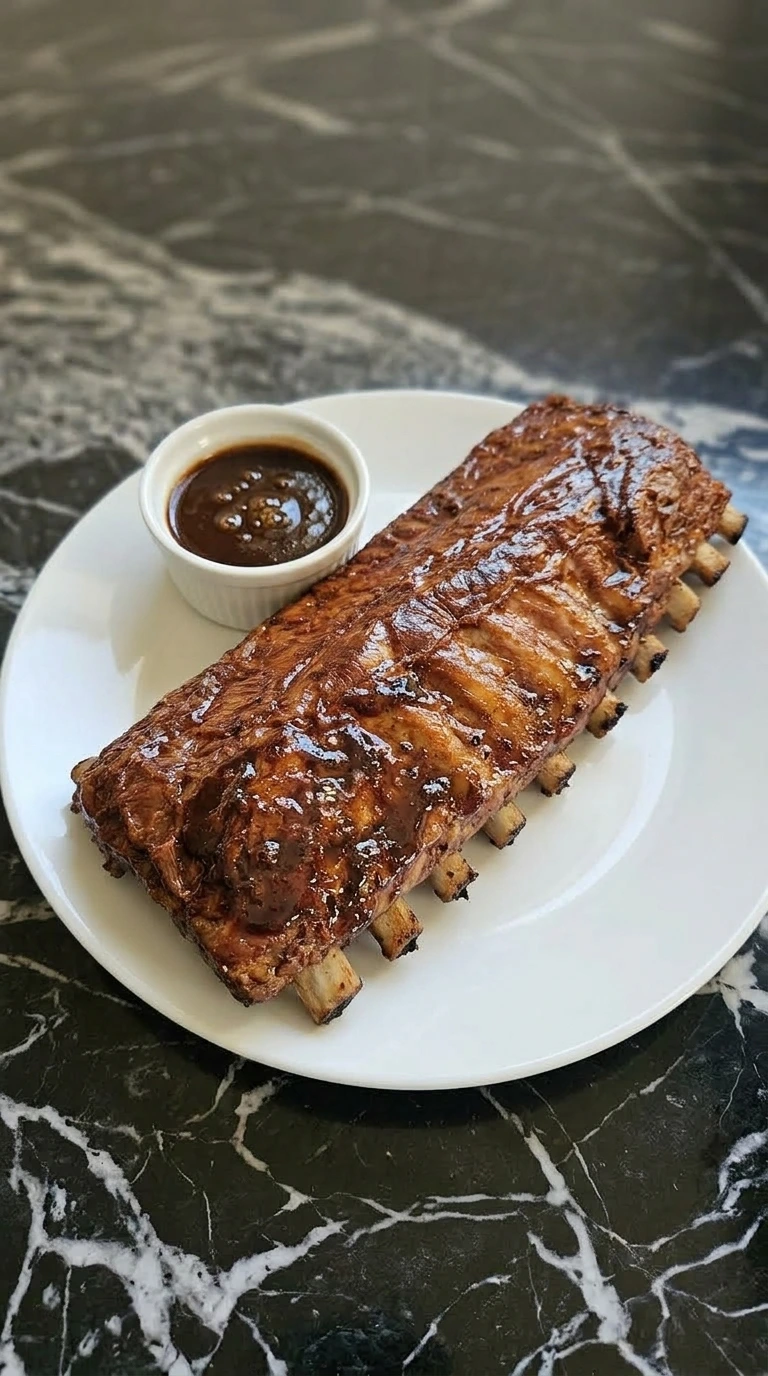
Leave the ribs uncovered and cook for another 8 to 10 minutes until the sauce begins to char. You’ll see dark caramelized patches form on the edges and the sauce will stop being runny.
The ribs should look dark mahogany and feel slightly tacky to the touch. If you take them out too early the sauce stays thin and the flavor won’t be as intense.
Once they look perfect remove the pan from the heat and let them rest on the counter. Rest for 10 minutes off heat, this allows the muscle fibers to relax and retain juices.
Tip: For the best flavor use a sauce with a high vinegar content to balance out the sweetness of the rub.
Tips for Success
- Check the internal temperature with a meat thermometer to ensure it hits 195°F for that perfect fall-off-the-bone texture.
- Always pat the meat completely dry with paper towels before applying the dry rub to ensure a better crust formation.
- Double wrap the ribs in two layers of heavy-duty foil to prevent any bones from poking holes and letting steam escape.
- Let the ribs rest for at least 10 minutes before slicing so the juices don’t immediately run out onto the board.
- Use a high-quality brand of BBQ sauce like Sweet Baby Ray’s for a consistent balance of sugar and vinegar tang.
- If you’re cooking for a crowd you can easily stack the foil-wrapped ribs on a single large baking sheet.
- Apply the sauce in two thin layers during the final charring phase for a much thicker and stickier lacquer finish.
- Sprinkle a little extra smoked paprika over the finished ribs right before serving to give them a professional pop of color.
Substitutions
- Baby back pork ribs: St. Louis style ribs — These are fattier and thicker so you’ll need to increase the bake time by about 30 minutes.
- Dark brown sugar: Coconut sugar — A great lower-glycemic option that still provides a deep molasses-like flavor for the rub.
- Hickory BBQ sauce: Sugar-free BBQ sauce — Works well for keto needs but won’t caramelize as deeply as standard corn syrup based sauces.
- Smoked paprika: Chili powder — Gives a more traditional Southwestern heat rather than the earthy wood-smoke flavor of paprika.
- Kosher salt: Table salt — If using table salt cut the measurement in half because the grains are much finer and saltier by volume.
Storage Tips
Store any leftovers in an airtight container in the fridge for up to 4 days. These actually taste even better the next day as the spices continue to settle into the meat.
To reheat wrap the ribs in foil with a splash of water or extra sauce to keep them moist. Put them in a 300°F oven for 15 minutes until they’re warmed through.
Avoid the microwave if you can because it tends to make the meat rubbery and the sauce oily.
Bbq Ribs
Ingredients
- 2 racks baby back pork ribs The primary protein known for being lean and tender.
- 1/2 cup dark brown sugar Provides sweetness and helps form a caramelized crust.
- 2 tablespoons smoked paprika Adds a deep smoky flavor and rich red color.
- 1 tablespoon garlic powder Infuses the meat with savory aromatic notes.
- 1 tablespoon kosher salt Draws out moisture and seasons the meat deeply.
- 1 teaspoon black pepper Adds a subtle spicy bite to the rub.
- 1 cup hickory BBQ sauce The final glaze for moisture and tang.
Instructions
- Pat the baby back pork ribs dry with paper towels so the rub sticks better. Mix the dark brown sugar smoked paprika garlic powder kosher salt and black pepper in a small bowl. Use your hands to massage the spice mixture firmly into both sides of the meat. (I once tried just sprinkling it on but the flavor didn’t penetrate. Rubbing it in makes a massive difference.) You’ll see the meat change from a pale pink to a gritty red as the spices coat the surface. Make sure every inch is covered because any bare spots will miss out on the crust. Apply rub with firm pressure, this ensures the seasoning bonds to the surface proteins.
- Preheat your oven to 300°F and prepare a large sheet pan with heavy-duty aluminum foil. Lay the ribs on the foil and wrap them tightly so no steam can escape during the long cook. Place the pan on the center rack and bake for exactly 2 hours and 30 minutes. You’ll know they’re ready when the meat has shrunk back from the bone ends by about half an inch. If you peek inside the foil the meat should look pale but very soft. Seal the foil packets tightly, trapped steam breaks down collagen into gelatin for tenderness.
- Carefully open the foil packets and drain any excess rendered fat into a bowl. Increase the oven temperature to 425°F or prepare your grill to medium-high heat (about 6 on a 10-dial). Brush a thick layer of hickory BBQ sauce over the top side of the ribs using a silicone basting brush. (I used to drown them in sauce but a medium layer is better. Too much sauce just slides off and makes a mess.) The sauce will look glossy and wet at first but it’ll soon start to thicken and bubble. If you love variety you could serve these alongside a Honey Glazed Ham for a big meat-heavy feast. Baste at 425°F for 10 minutes, high heat reduces the sauce into a sticky lacquer.
- Leave the ribs uncovered and cook for another 8 to 10 minutes until the sauce begins to char. You’ll see dark caramelized patches form on the edges and the sauce will stop being runny. The ribs should look dark mahogany and feel slightly tacky to the touch. If you take them out too early the sauce stays thin and the flavor won’t be as intense. Once they look perfect remove the pan from the heat and let them rest on the counter. Rest for 10 minutes off heat, this allows the muscle fibers to relax and retain juices.
Notes
Nutrition
Reader Questions
Before You Go
I hope this recipe becomes a staple in your house just like it has in mine. It’s the perfect mix of low-effort and high-reward that makes weekend cooking so fun.
If you have any room left for dessert you should definitely try these Red Velvet Cupcakes for a sweet finish. Let me know how yours turn out in the comments!