Halloween Spider Chocolate Chip Cookies
The first batch of Halloween Spider Chocolate Chip Cookies I made looked a little wild. Chocolate legs went in every direction and one spider had only six. But the cookies tasted so good that nobody cared. What saved that batch was letting the warm cookies cool a little before I drew the legs. Since then I’ve kept the same simple method every October.
There’s something fun about turning a plain chocolate chip cookie into a tiny spider without spending hours on icing or buying a cupboard full of decorating supplies. The cookie stays soft in the middle with golden edges and the chocolate spider adds another rich bite. If you’d rather start with ready-made dough, my Halloween Chocolate Chip Cookies Pillsbury recipe is another handy option. These spooky chocolate chip cookies take a little over an hour from start to finish when you include the chilling and decorating time. No tricky shapes.
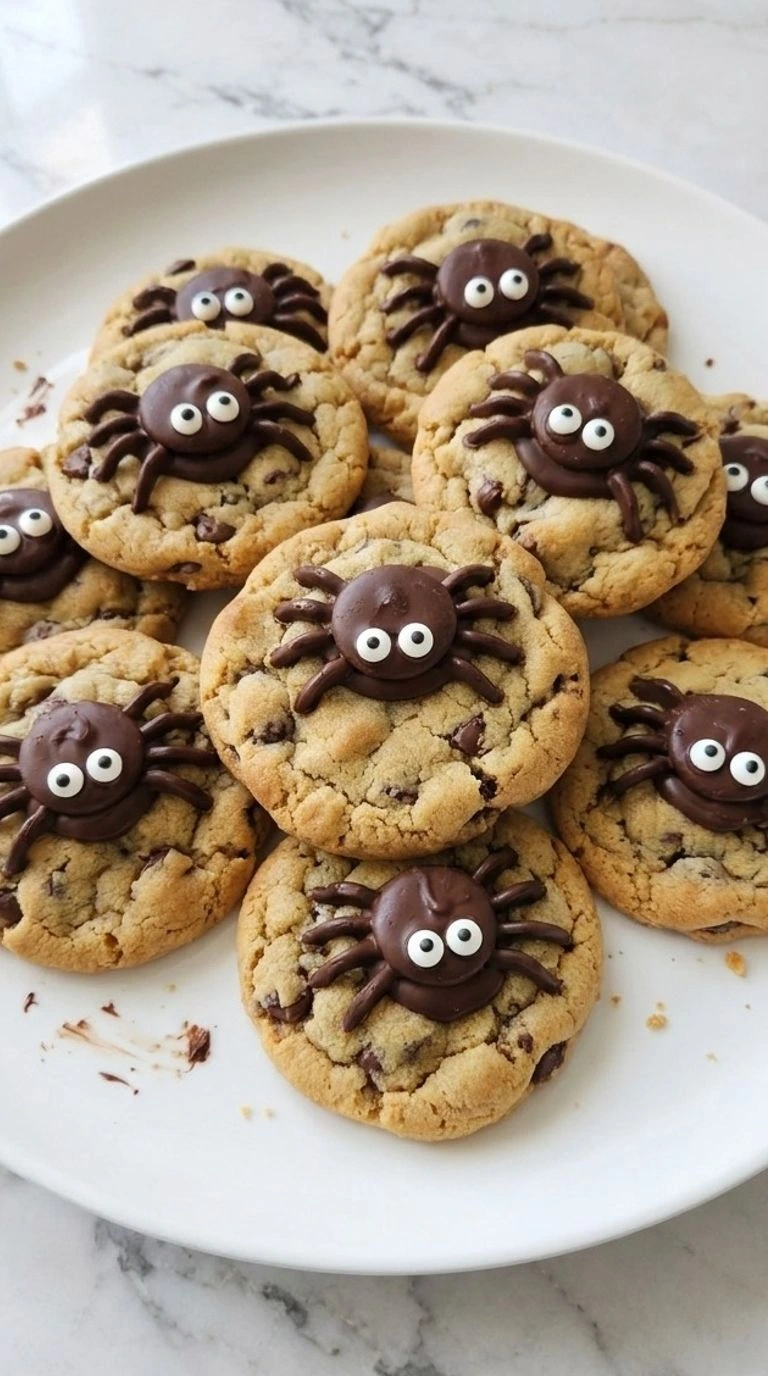
No fancy skills. And each spider has its own funny little personality. They’re the kind of treat that gets people smiling before they’ve even taken a bite, which is exactly what I want from Halloween baking.
Why This Recipe Works
Halloween Spider Chocolate Chip Cookies hold their shape better when you chill the scooped dough for 15 minutes. That brief rest firms the butter so the cookies don’t spread too fast in the 350°F oven.
Pressing chocolate buttons into the warm cookies also helps each spider body stay in place without extra icing. The second trick is waiting until the cookies cool before piping because hot cookie tops make melted chocolate run.
If you enjoy edible spiders, try our Halloween Peanut Butter Spider Cookies for a nutty version.
Ingredients
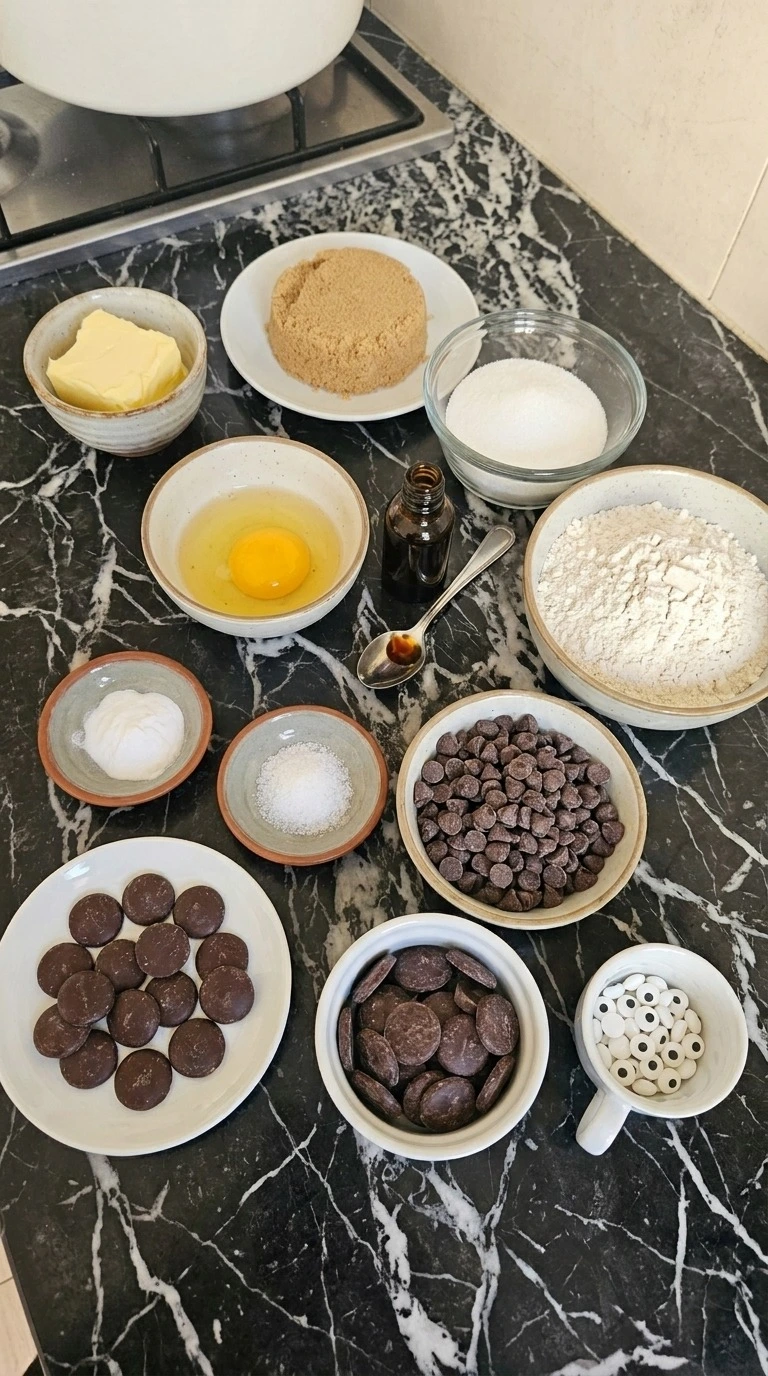
- unsalted butter: Softened to about 68°F to 70°F to create a rich and tender cookie base.
- light brown sugar: Packed into the measuring cup to add moisture and a soft caramel flavor.
- granulated white sugar: Adds sweetness and helps the cookie edges turn lightly crisp.
- large egg: Used whole to bind the dough and give the cookies structure.
- pure vanilla extract: Adds a warm vanilla flavor that balances the dark chocolate.
- all-purpose wheat flour: Measured by spooning into the cup and leveling to form a tender cookie structure.
- baking soda: Helps the dough rise slightly and encourages golden brown edges.
- fine sea salt: Balances sweetness and brings out the chocolate flavor.
- semi-sweet chocolate chips: Folded through the dough to create soft pockets of chocolate.
- large dark chocolate buttons: Pressed onto warm baked cookies to form round spider bodies.
- dark chocolate melting wafers: Melted until smooth and piped into thin spider legs and tiny eye adhesive dots.
- small white candy eyes: Attached two per spider to give each cookie a playful Halloween face.
Kitchen Equipment
- Large mixing bowl: A 3-quart mixing bowl gives you room to fold the dough without spilling, while a smaller bowl makes even mixing harder.
- Electric hand mixer: A hand mixer with at least three speed settings creams the butter evenly, while a sturdy wooden spoon works if you mix carefully.
- Rubber spatula: A flexible silicone spatula scrapes the sides and folds in chocolate chips without excessive mixing, so choose one with a firm core.
- Measuring cups and spoons: Standard dry measuring cups and a 1-teaspoon measuring spoon keep the flour and leavening accurate, while a kitchen scale offers better precision.
- Baking sheet: A flat 13-by-18-inch rimmed baking sheet gives the cookies room to spread, while a smaller tray may cause touching edges.
- Parchment paper: Oven-safe parchment rated to at least 425°F prevents sticking at 350°F, while wax paper isn’t suitable for baking.
- Cookie scoop: A 2-tablespoon cookie scoop makes evenly sized dough mounds, while two measuring spoons can portion dough if you don’t have one.
- Microwave-safe bowl: A small microwave-safe bowl holds 1/3 cup chocolate melting wafers for short heating bursts, while an oversized bowl spreads the chocolate too thin.
- Small piping bag: A disposable piping bag with a tiny opening creates thin spider legs, while a sturdy food-safe zip bag works if its corner stays tightly sealed.
- Cooling rack: A wire rack at least 12 inches wide allows air to move beneath the cookies, which helps the bottoms stay crisp during cooling.
- White serving plate: A flat 7-inch white plate supports an individual spider cookie without bending its chocolate legs, while a curved bowl can damage the decoration.
How to Make It
Step 1: Cream the butter and sugars into a soft base
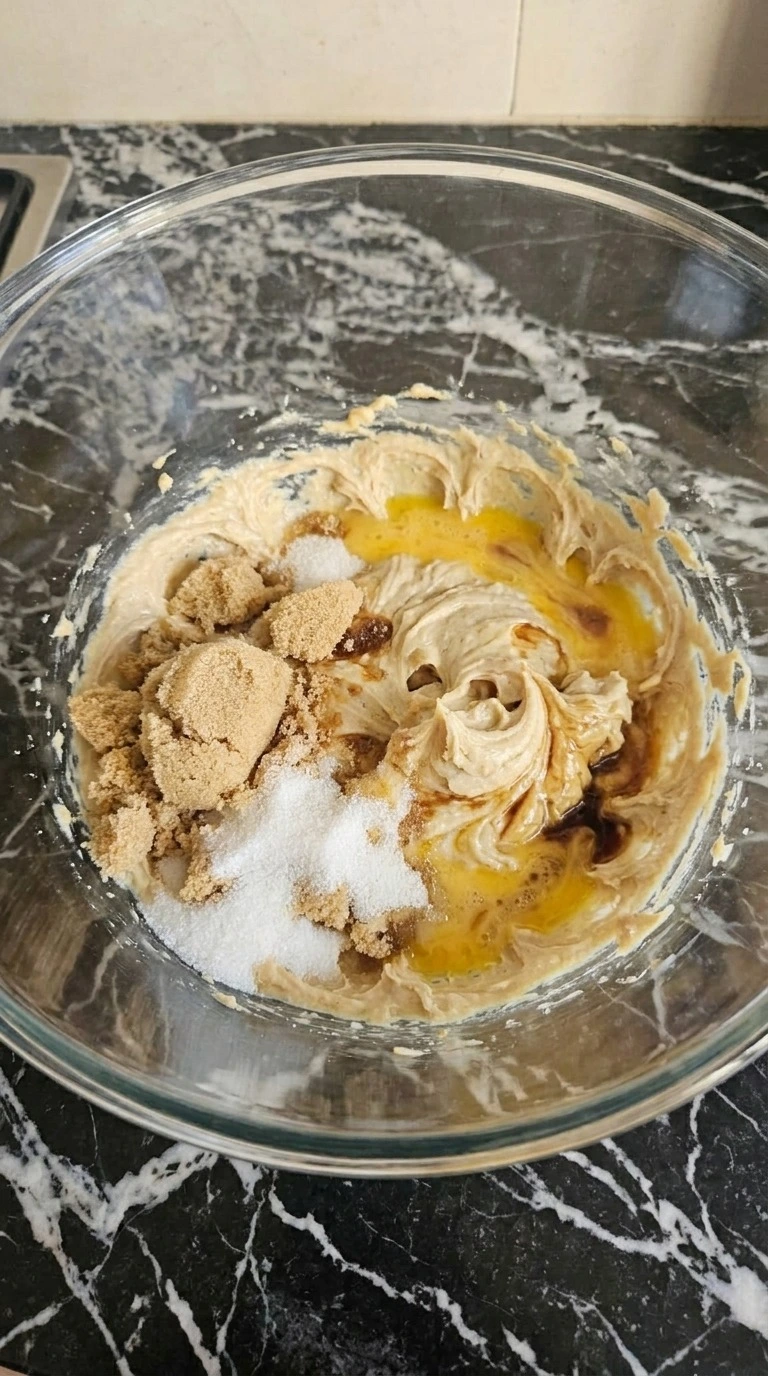
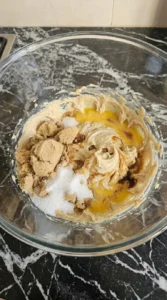
Let 1/2 cup unsalted butter soften at about 68°F to 70°F for 20 to 30 minutes. It should yield when pressed but shouldn’t look oily. Add the butter to a large mixing bowl with 1/2 cup packed light brown sugar and 1/4 cup granulated white sugar. Beat at medium speed for 2 to 3 minutes and scrape the sides halfway through.
Then add 1 large egg and 1 teaspoon pure vanilla extract. Beat for another 30 seconds until the mixture looks smooth and a shade lighter. Keep the motion steady rather than whipping in lots of air. Next, check the texture.
The sugar should look well blended with no large butter lumps or greasy streaks. If the butter gets too warm, the dough may spread too much. Cream just until fluffy because excess air can make cookies rise and fall.
Tip: Cut the butter into eight small pieces before softening so the center reaches the same temperature as the edges.
Step 2: Fold in the flour and chocolate chips

Add 1 1/2 cups all-purpose wheat flour with 1/2 teaspoon baking soda and 1/4 teaspoon fine sea salt to the butter mixture. Keep the dough near 68°F to 72°F while you work. Fold with a rubber spatula for about 60 to 90 seconds and scrape from the bottom so no dry patches hide there. Stop when you can barely see a trace of flour.
Then fold in 3/4 cup semi-sweet chocolate chips with 8 to 10 broad strokes. You want the chips spread through the dough but you don’t want to knead it. The dough should look thick and a little rough with dark chips poking through. It shouldn’t pour or run.
Mix too long and the cookies can turn tough. Stop when the flour blends in because less mixing keeps the crumb tender.
Tip: Reserve 2 tablespoons of the measured chocolate chips to press into bare spots on the cookie dough before baking.
Step 3: Scoop twelve thick cookie dough portions

Divide the dough into 12 mounds of about 2 tablespoons each and set them on a parchment-lined baking sheet. Leave about 2 inches between mounds so the cookies can spread without touching. Keep each scoop tall rather than pressing it flat. Then place the tray in the fridge at about 38°F for 15 minutes.
Meanwhile, heat the oven to 350°F and set a rack in the middle. The dough should feel firmer when you touch the side of a mound. Don’t pack the dough too tightly because dense scoops won’t spread as well. You’ll see 12 small uneven mounds with chocolate chips showing on the outside.
They should hold their shape when the tray moves. Skip the chill and the butter can melt too soon. Chill the scoops because firm butter slows early spreading.
Tip: Use a 2-tablespoon cookie scoop for similar portions and rotate the scoop between mounds to keep the shapes naturally rounded.
Step 4: Bake until the cookie edges turn golden

Slide the chilled tray into the 350°F oven and bake for 11 to 13 minutes. Start checking at minute 11 because every oven runs a bit differently. Look for pale golden centers with deeper golden edges and small cracks across the tops. The middle can still look a touch soft.
That’s fine. Take the tray out and leave the cookies on it for 3 minutes. They’ll keep setting as they cool. Don’t wait for the whole top to turn dark brown because that can leave you with dry centers.
The smell should turn warm and buttery while the chocolate chips soften into dark glossy spots. The cookies will spread into uneven rounds. (I once left a tray in too long and lost those soft middles. ) Pull them while the centers look slightly soft because residual heat finishes setting the crumb.
Tip: Use the middle oven rack and bake one tray at a time for more even color across all twelve cookies.
Step 5: Add chocolate spider bodies and pipe the legs

After the cookies rest for 3 minutes, press one large dark chocolate button into the center of each cookie. Use 12 buttons in all. Let them cool for another 12 to 15 minutes until they no longer feel warm. Meanwhile, melt 1/3 cup dark chocolate melting wafers in 15-second microwave bursts at 50% power while stirring between bursts.
Stop when the coating looks smooth and reaches about 90°F. Transfer it to a small piping bag and cut a tiny opening. Pipe four curved legs on each side of every chocolate button. Then attach two small white candy eyes to each body with tiny dots of melted chocolate.
You’ll use 24 eyes. The legs should hold their curves instead of spreading. Chocolate that’s too hot can run. Cool the cookies first because warm surfaces blur thin chocolate lines.
Tip: Cut the piping opening about 1/16 inch wide and practice a short chocolate line before decorating the full batch.
Step 6: Let the chocolate set and serve the cookies
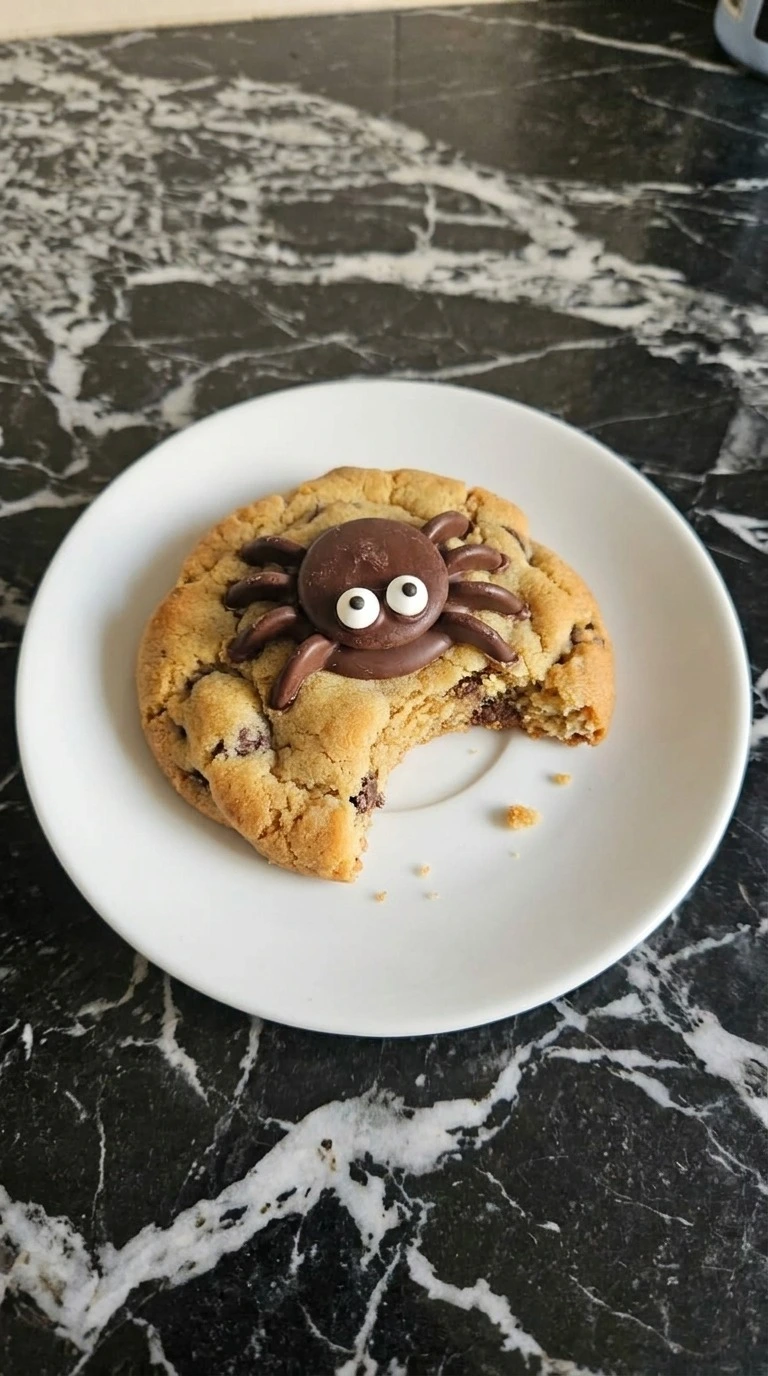
Leave all 12 decorated cookies undisturbed at about 68°F to 72°F for 15 to 20 minutes. Gently touch the end of one chocolate leg to check that the coating has set. It should feel firm rather than tacky. Then lift one cookie from the baking sheet and place it on a white serving plate.
Choose one with clear chocolate legs and visible chocolate chips. The middle should feel soft while the edge holds its shape. If you move the cookies too soon, the legs can smear across the tops. The finished cookie should show a light golden center and darker crisp edge with a chocolate spider sitting on top.
Slightly crooked legs are part of the charm. Let the chocolate set fully because firm decorations stay intact during serving.
Tip: Place the remaining cookies in a single layer on your party platter so neighboring spider legs don’t press against each other.
Pro Tips
- Weigh the all-purpose wheat flour if possible and aim for about 180 grams. Too much flour makes the cookies dry and limits spreading.
- Choose semi-sweet chocolate chips with around 45% to 55% cocoa for balanced flavor. Very bitter chocolate can overpower the sweet dough.
- Bake one tray at a time on the middle rack at 350°F to help the cookie edges brown evenly.
- Keep each dough mound close to 2 tablespoons and leave about 2 inches between portions so neighboring cookies won’t merge.
- Cut the piping opening about 1/16 inch wide and test one chocolate line before decorating the full batch.
- Press one large chocolate button gently into each cookie after its 3-minute rest. A shallow indentation helps the body stay in place.
- For Halloween Spider Chocolate Chip Cookies with clear facial details, attach two candy eyes while the chocolate adhesive is still soft.
- Choose a flat serving platter and leave at least 1/2 inch between decorated cookies to keep the delicate spider legs intact.
- Make double chocolate spider cookies by replacing 2 tablespoons of the all-purpose wheat flour with 2 tablespoons unsweetened cocoa powder.
- Create peanut butter spider cookies by replacing 2 tablespoons unsalted butter with 2 tablespoons creamy peanut butter for a mild nutty flavor.
- Try orange chocolate spider cookies by adding 1 teaspoon finely grated orange zest to the dough for a brighter citrus flavor.
- Make white chocolate spiders by replacing both dark chocolate decoration ingredients with equal amounts of white chocolate and using candy eyes with dark pupils.
Substitutions & Variations
- unsalted butter: Use 1/2 cup firm dairy-free baking butter. Choose a plant-based butter with at least 75% fat. Softer spreads can make the cookies flatter and slightly greasier. Check that your chocolate decorations are dairy-free too.
- all-purpose wheat flour: Use an equal weight of gluten-free 1-to-1 baking flour containing xanthan gum. Rest the mixed dough for 20 minutes before scooping. The cookies may spread less and feel slightly crumbly. For another gluten-free baking idea, try Soft Gluten Free Pumpkin Cookies with Chocolate Chips.
- large egg: Use 1 tablespoon ground flaxseed mixed with 3 tablespoons water. Let the mixture thicken for 10 minutes before adding it. The cookies will be denser and may brown less than the original version.
- light brown sugar: Replace 1/2 cup light brown sugar with 1/2 cup packed dark brown sugar. Dark brown sugar adds a stronger molasses flavor and softer centers. The dough may look darker before baking, so judge doneness by the edges.
- large dark chocolate buttons: Use 12 large flat dark chocolate melting wafers of similar size. Choose pieces about 3/4 inch wide. Thin wafers soften faster on warm cookies, so allow an extra 5 minutes for the spider bodies to firm.
Storage Instructions
Keep Halloween Spider Chocolate Chip Cookies in an airtight container at room temperature for up to 3 days when your kitchen stays below 75°F. Separate the layers with parchment to protect the spider legs. You can refrigerate them for up to 5 days, although the centers may become firmer.
For longer storage, freeze the fully set cookies in a rigid freezer-safe container for up to 2 months. Freeze them in one layer first so the decorations won’t stick together. For a softer cookie, let refrigerated portions stand for 15 to 20 minutes before serving.
Warm undecorated cookies at 300°F for 3 to 4 minutes if desired. Don’t reheat decorated cookies because their chocolate legs can melt. Discard cookies showing mold, unusual odors or visible moisture damage.
Halloween Spider Chocolate Chip Cookies
Ingredients
Method
- Let 1/2 cup unsalted butter soften at about 68°F to 70°F for 20 to 30 minutes. It should yield when pressed but shouldn’t look oily. Add the butter to a large mixing bowl with 1/2 cup packed light brown sugar and 1/4 cup granulated white sugar. Beat at medium speed for 2 to 3 minutes and scrape the sides halfway through. Then add 1 large egg and 1 teaspoon pure vanilla extract. Beat for another 30 seconds until the mixture looks smooth and a shade lighter. Keep the motion steady rather than whipping in lots of air. Next, check the texture. The sugar should look well blended with no large butter lumps or greasy streaks. If the butter gets too warm, the dough may spread too much. Cream just until fluffy because excess air can make cookies rise and fall.
- Add 1 1/2 cups all-purpose wheat flour with 1/2 teaspoon baking soda and 1/4 teaspoon fine sea salt to the butter mixture. Keep the dough near 68°F to 72°F while you work. Fold with a rubber spatula for about 60 to 90 seconds and scrape from the bottom so no dry patches hide there. Stop when you can barely see a trace of flour. Then fold in 3/4 cup semi-sweet chocolate chips with 8 to 10 broad strokes. You want the chips spread through the dough but you don’t want to knead it. The dough should look thick and a little rough with dark chips poking through. It shouldn’t pour or run. Mix too long and the cookies can turn tough. Stop when the flour blends in because less mixing keeps the crumb tender.

- Divide the dough into 12 mounds of about 2 tablespoons each and set them on a parchment-lined baking sheet. Leave about 2 inches between mounds so the cookies can spread without touching. Keep each scoop tall rather than pressing it flat. Then place the tray in the fridge at about 38°F for 15 minutes. Meanwhile, heat the oven to 350°F and set a rack in the middle. The dough should feel firmer when you touch the side of a mound. Don’t pack the dough too tightly because dense scoops won’t spread as well. You’ll see 12 small uneven mounds with chocolate chips showing on the outside. They should hold their shape when the tray moves. Skip the chill and the butter can melt too soon. Chill the scoops because firm butter slows early spreading.

- Slide the chilled tray into the 350°F oven and bake for 11 to 13 minutes. Start checking at minute 11 because every oven runs a bit differently. Look for pale golden centers with deeper golden edges and small cracks across the tops. The middle can still look a touch soft. That’s fine. Take the tray out and leave the cookies on it for 3 minutes. They’ll keep setting as they cool. Don’t wait for the whole top to turn dark brown because that can leave you with dry centers. The smell should turn warm and buttery while the chocolate chips soften into dark glossy spots. The cookies will spread into uneven rounds. (I once left a tray in too long and lost those soft middles.) Pull them while the centers look slightly soft because residual heat finishes setting the crumb.

- After the cookies rest for 3 minutes, press one large dark chocolate button into the center of each cookie. Use 12 buttons in all. Let them cool for another 12 to 15 minutes until they no longer feel warm. Meanwhile, melt 1/3 cup dark chocolate melting wafers in 15-second microwave bursts at 50% power while stirring between bursts. Stop when the coating looks smooth and reaches about 90°F. Transfer it to a small piping bag and cut a tiny opening. Pipe four curved legs on each side of every chocolate button. Then attach two small white candy eyes to each body with tiny dots of melted chocolate. You’ll use 24 eyes. The legs should hold their curves instead of spreading. Chocolate that’s too hot can run. Cool the cookies first because warm surfaces blur thin chocolate lines.

- Leave all 12 decorated cookies undisturbed at about 68°F to 72°F for 15 to 20 minutes. Gently touch the end of one chocolate leg to check that the coating has set. It should feel firm rather than tacky. Then lift one cookie from the baking sheet and place it on a white serving plate. Choose one with clear chocolate legs and visible chocolate chips. The middle should feel soft while the edge holds its shape. If you move the cookies too soon, the legs can smear across the tops. The finished cookie should show a light golden center and darker crisp edge with a chocolate spider sitting on top. Slightly crooked legs are part of the charm. Let the chocolate set fully because firm decorations stay intact during serving.

Notes
Frequently Asked Questions
Yes. You can mix the dough up to 48 hours ahead and refrigerate it covered at 40°F or below. Let firm dough sit for about 5 minutes before scooping. You can also bake the cookies a day before your party and add the spiders after the bases cool.
Your butter may have been too warm or your dough may not have chilled long enough. Refrigerate the scooped portions at about 38°F for 15 minutes before baking. Also check the flour measurement because too little flour can make the cookies spread into thin rounds.
Let the cookies cool until they no longer feel warm before piping the legs. Melt the dark chocolate wafers in 15-second bursts and allow the mixture to reach about 90°F. Leave the finished cookies untouched for 15 to 20 minutes so the lines can firm.
Yes. Double every ingredient to make about 24 cookies and divide the dough into equal 2-tablespoon portions. Bake at 350°F for 11 to 13 minutes per tray. Let the baking sheet cool before adding the next batch because warm metal encourages early spreading.
Yes. Mix 1 tablespoon ground flaxseed with 3 tablespoons water and let it stand for 10 minutes. Use this mixture instead of the large egg. The cookies will have slightly denser centers and may need close attention during the final 2 minutes of baking.
Yes. Freeze fully set cookies in a single layer for about 45 minutes before moving them into a rigid freezer-safe container. Keep parchment between layers and store for up to 2 months. Thaw inside the closed container for 1 to 2 hours to limit moisture on the chocolate.
Arrange the twelve cookies in one layer so their chocolate legs don’t overlap. Serve them around 68°F to 72°F because the decorations hold their shape better in a cool room. Pair them with Halloween Oreo Cookies for a dessert platter with contrasting textures.
Final Thoughts
Seeing those little chocolate spiders lined up reminds me how nervous I was about piping the first batch. It turns out Halloween Spider Chocolate Chip Cookies are much more forgiving than they look.
Even crooked legs can’t spoil their soft centers and rich chocolate flavor. So give them a try and tell me how your spiders turned out.
Real spiders have eight legs, so piping four on each side gives these treats their familiar shape. Slightly crooked chocolate lines make each cookie look more playful and homemade.