Holiday Sugar Cookie Bars
The first batch of Holiday Sugar Cookie Bars almost disappeared before I could finish cutting them! My family kept coming back for another piece and my mom said the soft centers reminded her of the sugar cookies we used to bake together. I have to say, these are now one of my favorite Christmas desserts. A simple afternoon baking idea turned into easy holiday sugar cookie bars that I can’t stop making. They’re thick and buttery with a soft vanilla frosting and plenty of festive sprinkles on top.
I’ve always loved traditional sugar cookies, but rolling dough and cutting out dozens of little shapes can take forever. These Christmas sugar cookie squares give you that same sweet vanilla flavor without all the extra work, and you don’t even need to chill the dough. I’ve made plenty of holiday cookies over the years and I still love our Gluten Free Gingerbread Cookies when I want something with warm spices. But these bars have a special place on my Christmas baking list. One pan makes 24 generous squares, so there’s enough to share with family or bring to a holiday gathering.
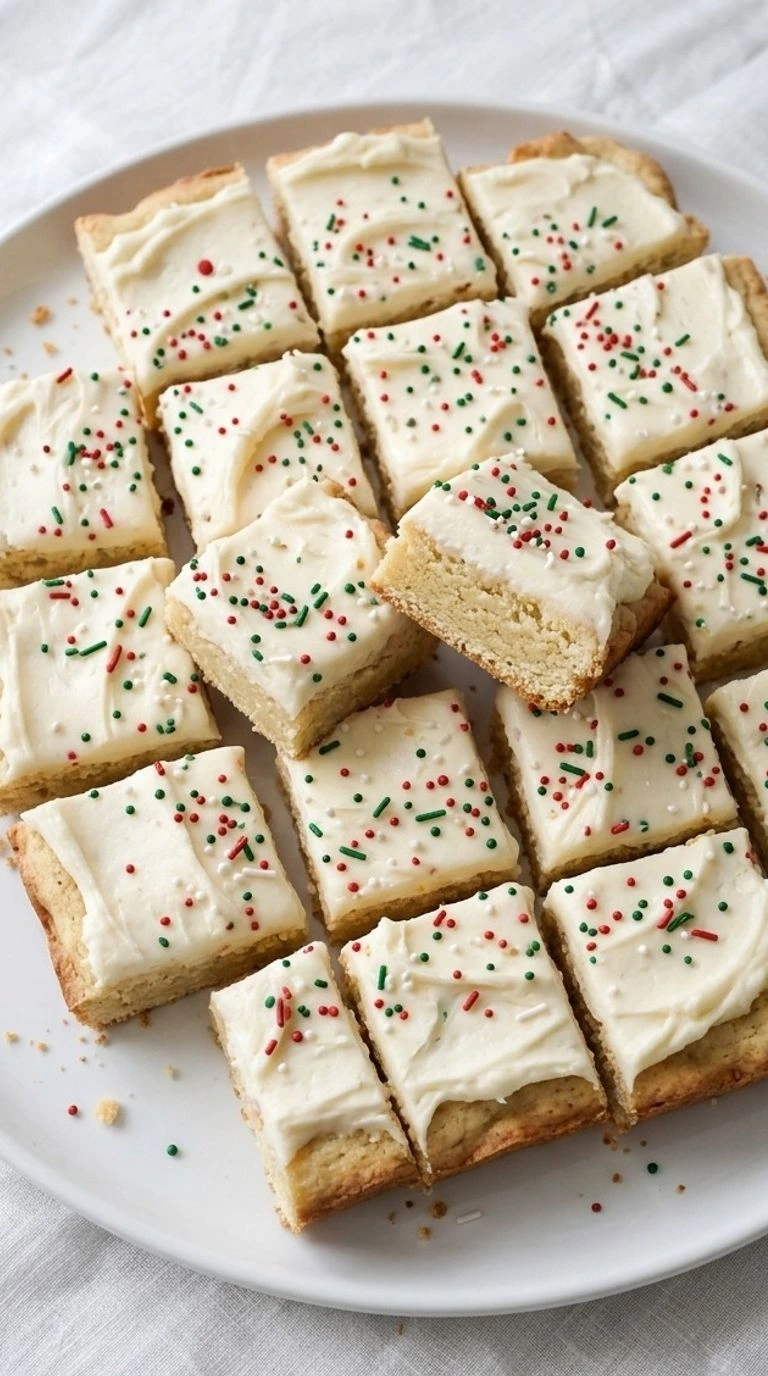
These frosted sugar cookie bars are great for Christmas parties and cookie exchanges because they travel well and look so cheerful on a dessert tray. You can bake the base a day ahead and add the frosting when you’re ready. I usually make a batch during the weekend and keep a few pieces in the fridge for an afternoon sweet treat. And if you’re putting together a big holiday dessert table, these colorful little squares always make it feel more festive.
Why This Recipe Works
Holiday Sugar Cookie Bars stay soft because the dough contains plenty of butter and just enough baking powder for a gentle rise. Baking the thick layer at 350°F for 20 to 24 minutes gives the edges time to turn pale gold without drying the middle.
Next, cooling the slab for at least 60 minutes keeps the buttercream firm instead of letting it soak into the cookie. If you enjoy soft cookie bases with creamy toppings, our Halloween Fruit Pizza with Sugar Cookie Crust is another fun one to try.
Ingredients
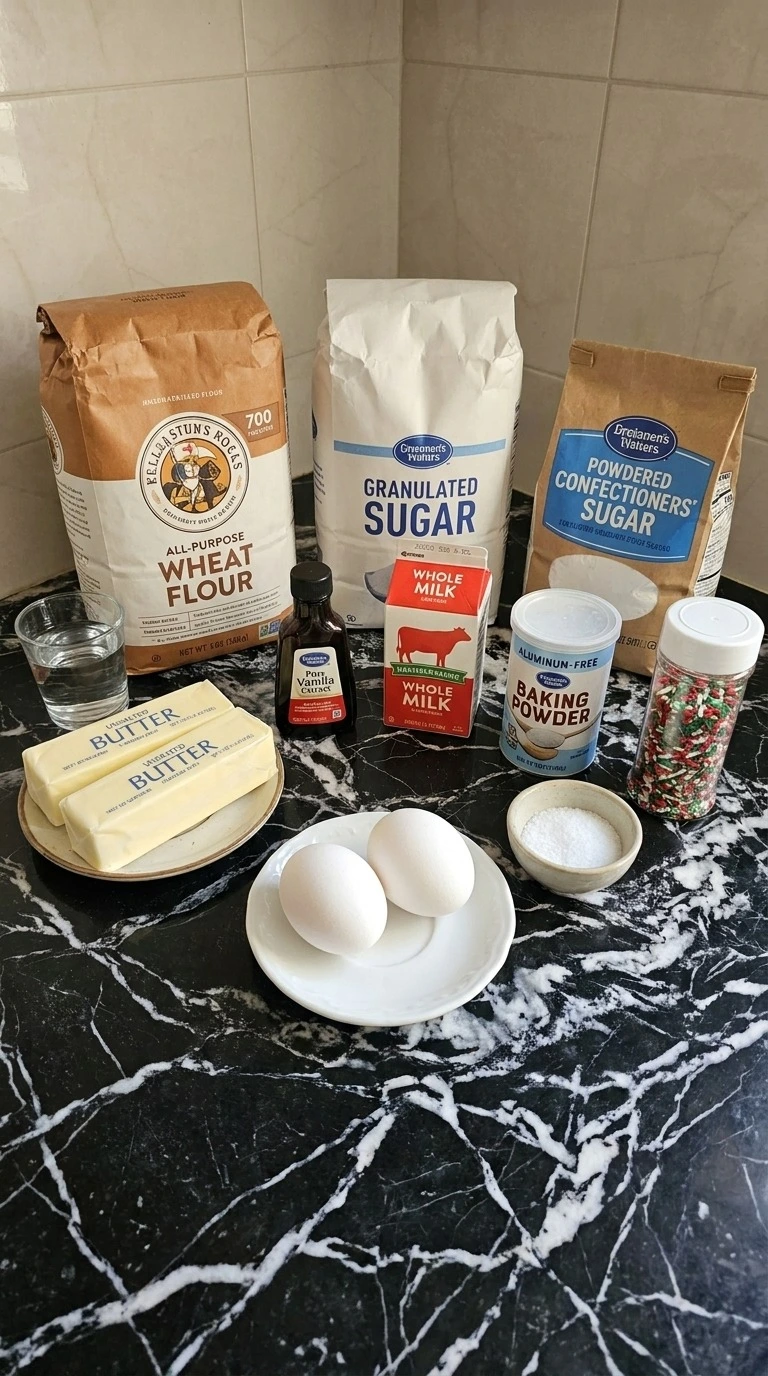
- unsalted butter: Use 1 cup for the cookie dough and 1/2 cup for the frosting. Soften to about 68°F so it creams smoothly without becoming greasy.
- granulated white sugar: Cream with the butter to add sweetness and help create a tender sugar cookie crumb.
- large eggs: Bring close to room temperature before mixing so they blend evenly into the butter and give the cookie base structure.
- pure vanilla extract: Use 2 teaspoons in the cookie dough and 1 teaspoon in the frosting for a clear vanilla flavor in both layers.
- all-purpose wheat flour: Spoon into the measuring cup and level the top rather than packing it down. Provides the structure for the soft cookie base.
- aluminum-free baking powder: Mix with the flour to give the cookie layer a slight lift without making it fluffy like cake.
- fine sea salt: Blend into the dry ingredients to sharpen the vanilla flavor and keep the cookie base from tasting flat.
- powdered confectioners’ sugar: Add gradually to the frosting for sweetness and a smooth spreadable buttercream texture.
- whole milk: Start with 1 tablespoon and add more only if necessary to loosen the frosting without making it runny.
- red, green and white Christmas jimmies sprinkles: Scatter over the freshly spread frosting for festive color and a slight crunch. Jimmies tend to hold their color better than tiny nonpareils.
- water: Use only if needed to lightly dampen your fingertips when pressing sticky dough into the baking pan.
Kitchen Equipment
- 9 by 13-inch rectangular baking pan: A light-colored metal 9 by 13-inch pan bakes the cookie layer evenly. A dark metal pan may brown the base faster, while a smaller pan makes the dough thicker and changes the baking time.
- Parchment paper: A sheet large enough to line the bottom and two long sides of the pan lets you lift out the cookie slab without breaking it. Choose oven-safe parchment rated to at least 425°F.
- Electric hand mixer: A hand mixer with at least three speed settings creams the butter and whips the frosting. A stand mixer with a paddle attachment also works, but a whisk alone will take much longer.
- Large mixing bowl: A bowl holding at least 4 quarts gives the cookie dough enough room to mix without spilling flour. Glass or stainless steel works well, while a narrow bowl makes even mixing harder.
- Medium mixing bowl: A 2-quart bowl holds the vanilla frosting while leaving enough space for the beaters. Choose a bowl with high sides to keep the powdered sugar contained.
- Measuring cups and spoons: Standard US measuring cups and spoons keep the flour, sugar and vanilla ratios accurate. Use a level measuring cup rather than a heaped one because too much flour makes the bars dry.
- Silicone spatula: A flexible spatula folds flour into the dough and spreads frosting without tearing the soft cookie base. Choose a heat-resistant model with a broad flexible head.
- Wire cooling rack: A rack at least 13 inches long allows air to circulate beneath the baked slab while it cools. A flat plate traps moisture underneath and can soften the bottom too much.
- Sharp chef’s knife: An 8-inch sharp knife makes clean cuts through the chilled frosted cookie slab. A dull or serrated blade can pull the topping away from the soft base.
- Cutting board: A stable cutting board at least 15 inches long supports the entire cookie slab during portioning. A smaller board leaves the edges unsupported and increases the chance of cracking.
How to Make It
Step 1: Cream the butter and mix the sugar cookie dough
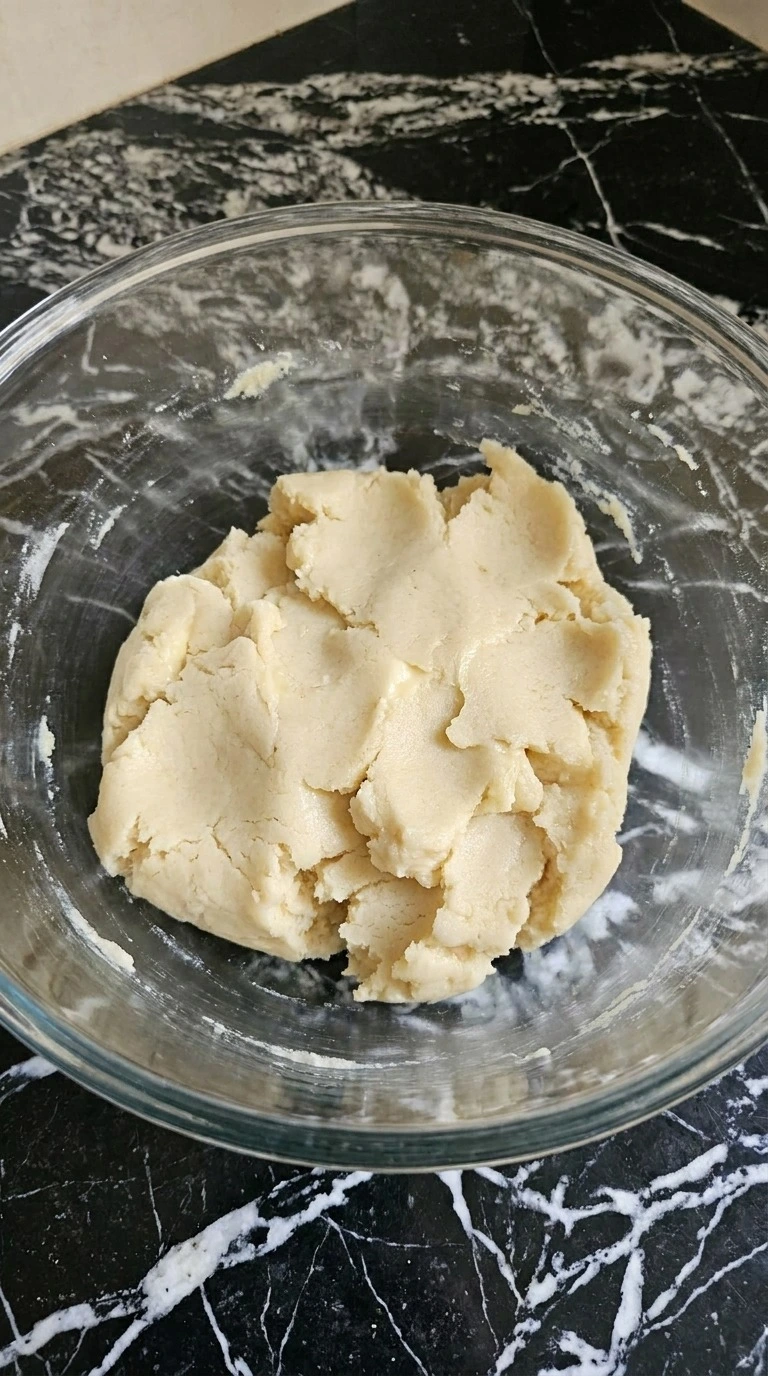
Start with 1 cup of softened unsalted butter and 1 cup of granulated white sugar. Beat them together for 2 to 3 minutes until the mixture turns pale and fluffy. Add 2 large eggs and 2 teaspoons of pure vanilla extract. Then beat for another 30 to 45 seconds until the eggs blend into the butter.
In a separate bowl mix 2 1/2 cups of all-purpose wheat flour with 1 teaspoon of aluminum-free baking powder and 1/2 teaspoon of fine sea salt. Add the dry mix in two batches and fold with a spatula until you can’t see loose flour. The dough should look thick and soft with a pale cream color. It won’t pour like cake batter.
Stop mixing as soon as it holds together because extra stirring makes the bars tough. Keeping the butter near 68°F helps the dough hold its shape while the flour absorbs the moisture.
Tip: Use butter that dents easily under your finger but still holds its shape. Butter warmer than 75°F can make the dough greasy.
Step 2: Press the sugar cookie dough into the baking pan
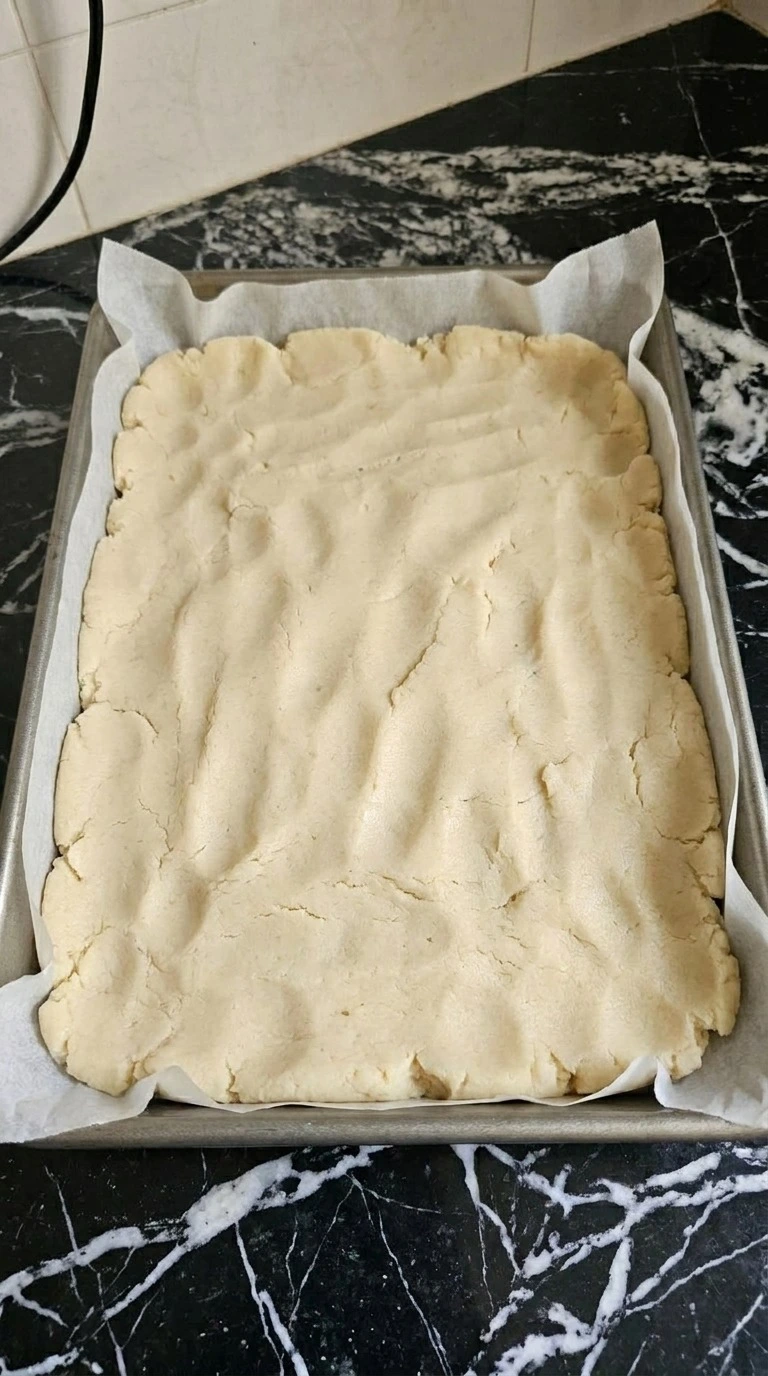
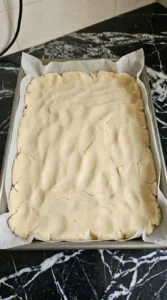
Line a 9 by 13-inch baking pan with parchment paper and leave 2 inches hanging over the long sides. Transfer the thick dough from the bowl into the pan in several large scoops. Then press the dough outward from the center with your fingertips until it reaches all four corners. Work for about 2 to 3 minutes and aim for a layer roughly 1/2 inch thick.
Smooth the top with the flat side of a spatula while keeping the depth as even as you can. Heat your oven to 350°F before baking. You’ll see a pale and slightly uneven sheet of dough filling the pan. Small finger marks are fine.
But don’t leave thick mounds near the corners because they’ll bake more slowly. An even layer lets the heat reach the center before the edges dry out.
Tip: Lightly dampen your fingertips with 1 teaspoon of water if the dough sticks. Keep the water on your fingers instead of pouring it over the dough.
Step 3: Bake until the edges turn lightly golden
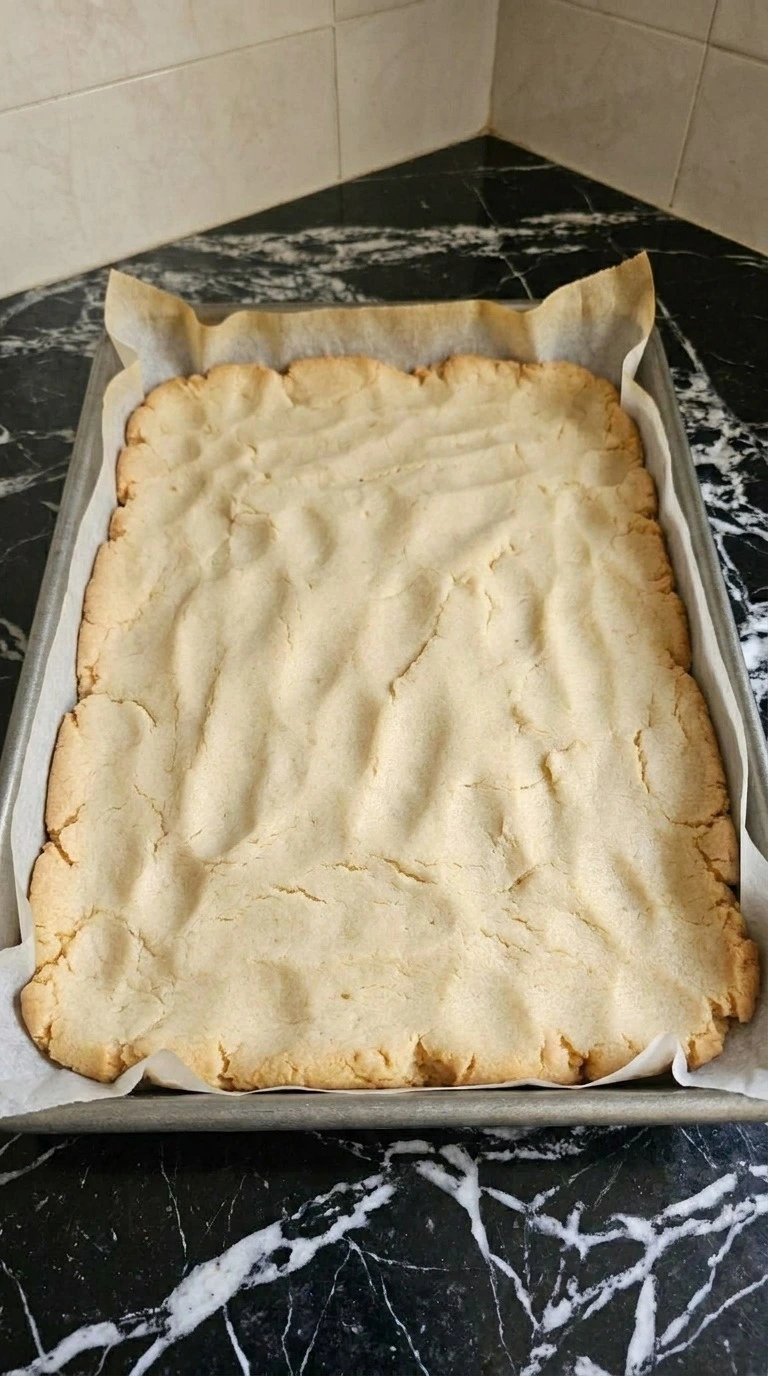
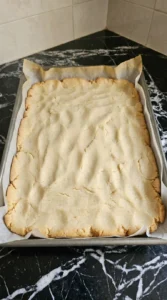
Place the pan on the middle oven rack and bake at 350°F for 20 to 24 minutes. Check the edges at minute 20. They should have a pale golden color while the center looks set and slightly puffed. If the middle still looks wet, give it another 2 minutes before checking again.
Don’t wait for the whole surface to turn brown. Remove the pan once the center stops looking shiny and a toothpick comes out without wet batter. Then let the cookie base cool in the pan for 15 minutes before moving it to a rack for another 45 minutes. The kitchen should smell like butter and vanilla.
The cookie slab will sink slightly as it cools and develop a soft but firm surface. (I once left a batch in for 28 minutes and the corners turned too crisp. ) Don’t frost it warm. Cooling for at least 60 minutes keeps the buttercream from melting into the crumb.
Tip: If your oven runs hot, check its temperature with an oven thermometer. Even a 25°F difference can dry the outer edges.
Step 4: Whip the vanilla buttercream frosting
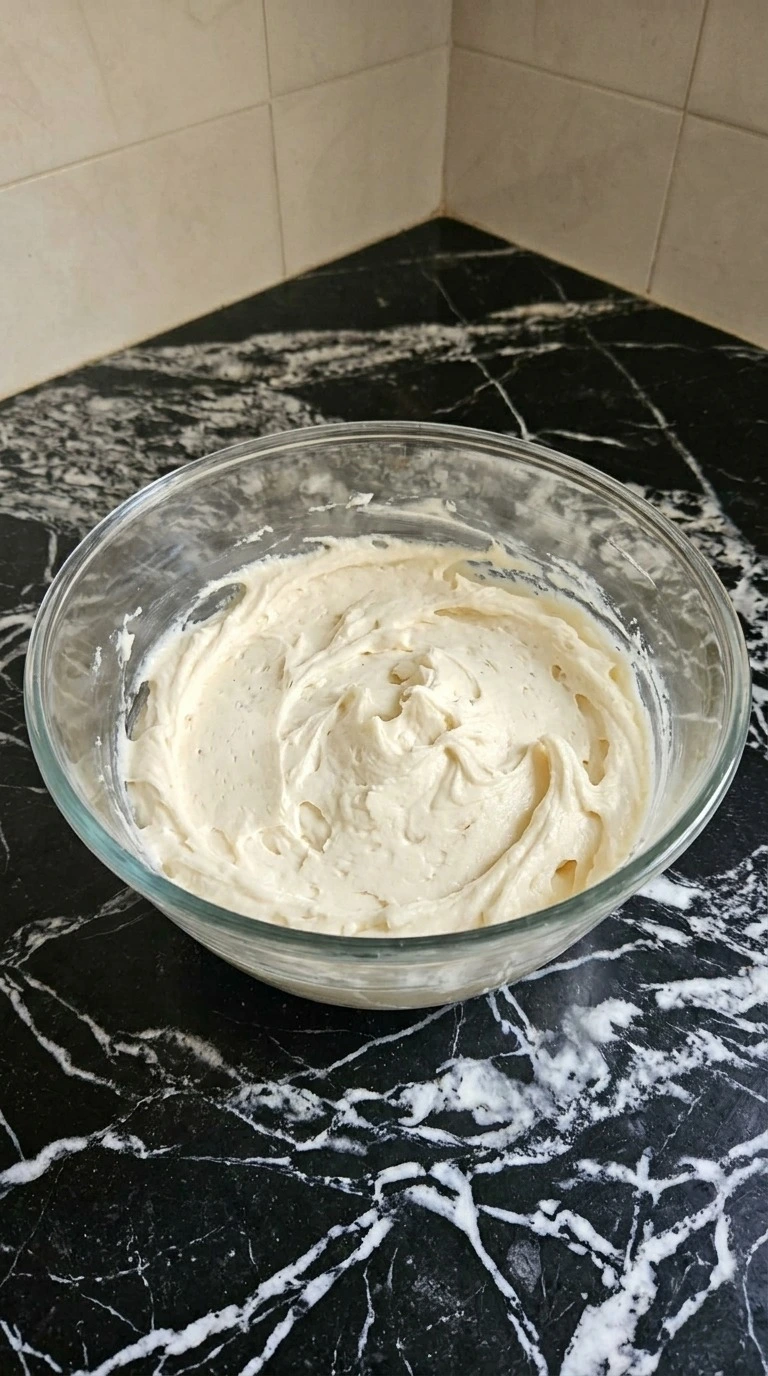
While the baked cookie base cools, put 1/2 cup of softened unsalted butter into a clean mixing bowl. Beat for 2 minutes until the butter turns lighter and looks creamy. Add 2 cups of powdered confectioners’ sugar in two batches and mix slowly so the sugar stays in the bowl. Next pour in 1 teaspoon of pure vanilla extract and 1 tablespoon of whole milk.
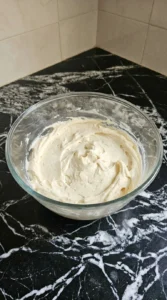
Beat for another 2 to 3 minutes until the frosting feels airy. If it’s too thick to spread, add the remaining tablespoon of milk a little at a time. The frosting should form soft peaks and hold shallow swirls without running. You’ll smell the vanilla as it whips.
If it turns thin or shiny, the butter may be too warm. Keep the butter near 68°F because cool softened fat traps air and holds the frosting’s shape.
Tip: For a less sweet frosting, replace 1/4 cup of powdered sugar with 1 tablespoon of cornstarch. Expect a slightly less creamy finish.
Step 5: Spread the frosting and add Christmas sprinkles
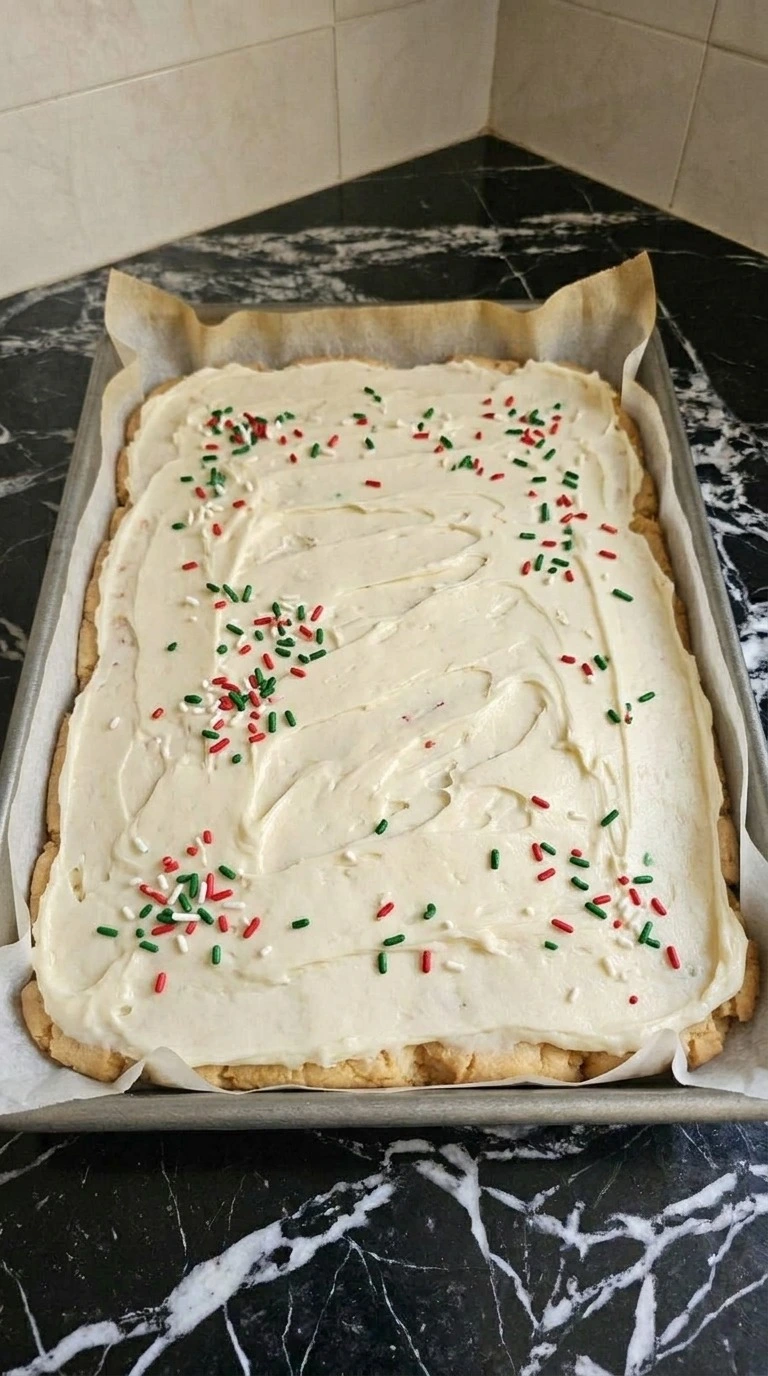
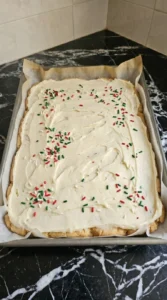
Once the cookie slab feels cool all the way through, leave it in the parchment-lined pan and spoon the vanilla buttercream onto the center. Spread it toward the edges in long gentle strokes while leaving a few shallow swirls across the top. This should take about 2 to 3 minutes. Then scatter 1/3 cup of red, green and white Christmas sprinkles over the frosting.
Add them within 2 minutes of spreading so they stick before the buttercream begins to crust. For a firmer topping, chill the frosted slab at 40°F for 15 minutes. You’ll see a thick ivory layer with patches of bright red and green across the top. Some sprinkles will gather in the frosting ridges.
That’s fine. Avoid pressing them down because the colors can bleed into the cream. The short chill firms the butter so the topping won’t drag during slicing.
Tip: Choose jimmies instead of tiny nonpareils if you’re making the bars a day ahead. Jimmies tend to bleed less into the frosting.
Step 6: Slice into bars and serve
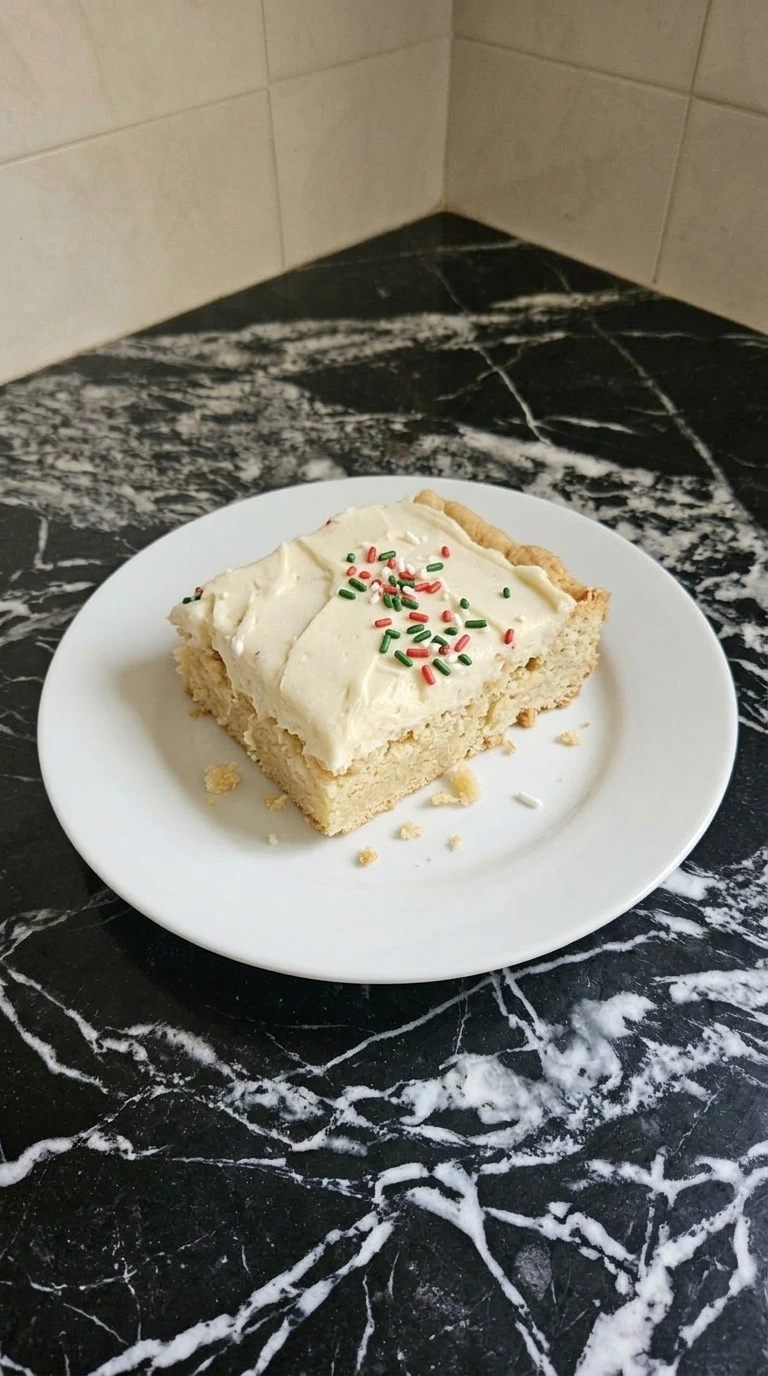
Lift the chilled cookie slab from the pan by holding the parchment overhang. Set it on a cutting board and trim only any very uneven outer edges. For 24 portions, cut the slab into 4 rows across its width and 6 rows along its length. Use a long sharp knife and press straight down rather than dragging it through the frosting.
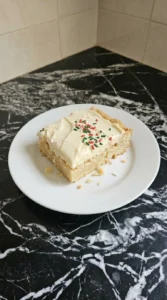
Wipe the blade after every 2 or 3 cuts to keep the colors from smearing. Arrange one portion on a small white serving plate with its freshly cut side visible. Let the portion sit for 10 minutes at about 68°F before serving. The cut piece should show a thick soft pale golden base and a clear layer of ivory frosting.
Small crumbs and uneven sprinkle clusters make it look homemade. If the frosting smears heavily, chill the remaining pieces for 10 more minutes. The brief rest softens the crumb without melting the buttercream.
Tip: For cleaner party portions, mark all 24 cuts with a ruler before slicing. Keep the bars roughly 2 by 2 inches.
Pro Tips
- Weigh your all-purpose wheat flour if possible. Aim for about 300 grams because packing 2 1/2 cups too tightly can make the cookie base dry.
- Keep your unsalted butter near 68°F before mixing. It should dent when pressed but shouldn’t look shiny or oily.
- Use a light-colored 9 by 13-inch metal baking pan because dark pans absorb more heat and can make the bottom edges too brown.
- Check the center at minute 20 instead of waiting for a deep golden top. A soft set center gives these bars their tender texture.
- Cool the baked slab for at least 60 minutes before adding the frosting. Warm cookie bars can melt buttercream and leave greasy patches.
- For a stronger vanilla flavor, choose a pure vanilla extract with no added artificial flavoring. The recipe uses 3 teaspoons across both layers.
- Use 1/3 cup of red, green and white jimmies for the topping. Add them while the frosting is soft so they stick without being pressed down.
- Chill the frosted cookie slab for 15 minutes before cutting. Clean the knife blade after every 2 or 3 slices to reduce frosting smears.
- Make peppermint Christmas cookie bars by replacing 1/4 teaspoon of the frosting’s vanilla extract with peppermint extract and topping the frosting with 2 tablespoons of finely crushed peppermint candy.
- For lemon sugar cookie bars, add 1 tablespoon of finely grated lemon zest to the dough and replace 1 tablespoon of the frosting’s whole milk with fresh lemon juice.
- Turn them into birthday sugar cookie bars by replacing the Christmas sprinkles with 1/3 cup of rainbow jimmies and adding 1/4 teaspoon of almond extract to the frosting.
- Make a chocolate chip version by folding 3/4 cup of mini semisweet chocolate chips into the finished dough before pressing it into the baking pan. Keep the vanilla frosting and use a few extra chips instead of Christmas sprinkles.
Substitutions & Variations
- unsalted butter: Plant-based baking butter. Replace the 1 1/2 cups of unsalted butter with an equal amount of dairy-free baking butter. Choose a firm stick-style product with at least 75% fat because soft spreads contain more water. The cookie base may spread slightly more and the frosting will taste less rich. For a fully dairy-free version, replace the whole milk with unsweetened oat milk.
- all-purpose wheat flour: Gluten-free 1-to-1 baking flour. Use 2 1/2 cups of a gluten-free baking blend that contains xanthan gum. Let the mixed dough rest for 10 minutes before pressing it into the pan so the flour can absorb moisture. The finished bars may crumble more easily and feel slightly grainier. For another holiday baking option, try our Gluten Free Gingerbread Cookies.
- large eggs: Ground flaxseed and water. Replace the 2 large eggs with 2 tablespoons of finely ground flaxseed mixed with 6 tablespoons of water. Let the mixture thicken for 10 minutes before adding it to the dough. The bars will be denser and slightly less tender, with a mild nutty taste. Check the center at 24 minutes because the extra moisture may require another 2 to 4 minutes of baking.
- whole milk: Unsweetened almond milk. Replace the 1 to 2 tablespoons of whole milk with the same amount of unsweetened almond milk. Add it gradually because some plant milks make the frosting softer. The buttercream will taste slightly less creamy, but the vanilla will still come through. Use oat milk instead if you’re avoiding nuts.
- pure vanilla extract: Pure almond extract. For a nutty bakery-style flavor, replace the 3 teaspoons of vanilla extract with just 3/4 teaspoon of pure almond extract. Use 1/2 teaspoon in the cookie dough and 1/4 teaspoon in the frosting. Almond extract is much stronger than vanilla, so a full equal swap would overpower the buttery cookie flavor. This version isn’t suitable for anyone avoiding almonds.
Storage Instructions
Once Holiday Sugar Cookie Bars have cooled and the frosting has set, arrange them in an airtight container with parchment between the layers. Refrigerate for up to 5 days at 40°F or below. For longer storage, freeze individual portions on a tray for 1 hour until firm.
Then wrap each bar tightly in plastic wrap and place it in a freezer-safe container for up to 2 months. Thaw frozen portions overnight in the refrigerator before serving. These bars taste best after sitting at room temperature for 10 to 15 minutes because the buttercream softens and the cookie crumb becomes tender.
If you prefer a warm cookie base, heat an unfrosted portion at 250°F for 4 to 5 minutes and let it cool before adding frosting. Don’t heat fully frosted bars in the oven because the topping will melt. Discard any bars that develop mold, an unusual smell or a slimy surface.
Holiday Sugar Cookie Bars
Ingredients
Method
- Start with 1 cup of softened unsalted butter and 1 cup of granulated white sugar. Beat them together for 2 to 3 minutes until the mixture turns pale and fluffy. Add 2 large eggs and 2 teaspoons of pure vanilla extract. Then beat for another 30 to 45 seconds until the eggs blend into the butter. In a separate bowl mix 2 1/2 cups of all-purpose wheat flour with 1 teaspoon of aluminum-free baking powder and 1/2 teaspoon of fine sea salt. Add the dry mix in two batches and fold with a spatula until you can’t see loose flour. The dough should look thick and soft with a pale cream color. It won’t pour like cake batter. Stop mixing as soon as it holds together because extra stirring makes the bars tough. Keeping the butter near 68°F helps the dough hold its shape while the flour absorbs the moisture.
- Line a 9 by 13-inch baking pan with parchment paper and leave 2 inches hanging over the long sides. Transfer the thick dough from the bowl into the pan in several large scoops. Then press the dough outward from the center with your fingertips until it reaches all four corners. Work for about 2 to 3 minutes and aim for a layer roughly 1/2 inch thick. Smooth the top with the flat side of a spatula while keeping the depth as even as you can. Heat your oven to 350°F before baking. You’ll see a pale and slightly uneven sheet of dough filling the pan. Small finger marks are fine. But don’t leave thick mounds near the corners because they’ll bake more slowly. An even layer lets the heat reach the center before the edges dry out.
- Place the pan on the middle oven rack and bake at 350°F for 20 to 24 minutes. Check the edges at minute 20. They should have a pale golden color while the center looks set and slightly puffed. If the middle still looks wet, give it another 2 minutes before checking again. Don’t wait for the whole surface to turn brown. Remove the pan once the center stops looking shiny and a toothpick comes out without wet batter. Then let the cookie base cool in the pan for 15 minutes before moving it to a rack for another 45 minutes. The kitchen should smell like butter and vanilla. The cookie slab will sink slightly as it cools and develop a soft but firm surface. (I once left a batch in for 28 minutes and the corners turned too crisp.) Don’t frost it warm. Cooling for at least 60 minutes keeps the buttercream from melting into the crumb.
- While the baked cookie base cools, put 1/2 cup of softened unsalted butter into a clean mixing bowl. Beat for 2 minutes until the butter turns lighter and looks creamy. Add 2 cups of powdered confectioners’ sugar in two batches and mix slowly so the sugar stays in the bowl. Next pour in 1 teaspoon of pure vanilla extract and 1 tablespoon of whole milk. Beat for another 2 to 3 minutes until the frosting feels airy. If it’s too thick to spread, add the remaining tablespoon of milk a little at a time. The frosting should form soft peaks and hold shallow swirls without running. You’ll smell the vanilla as it whips. If it turns thin or shiny, the butter may be too warm. Keep the butter near 68°F because cool softened fat traps air and holds the frosting’s shape.
- Once the cookie slab feels cool all the way through, leave it in the parchment-lined pan and spoon the vanilla buttercream onto the center. Spread it toward the edges in long gentle strokes while leaving a few shallow swirls across the top. This should take about 2 to 3 minutes. Then scatter 1/3 cup of red, green and white Christmas sprinkles over the frosting. Add them within 2 minutes of spreading so they stick before the buttercream begins to crust. For a firmer topping, chill the frosted slab at 40°F for 15 minutes. You’ll see a thick ivory layer with patches of bright red and green across the top. Some sprinkles will gather in the frosting ridges. That’s fine. Avoid pressing them down because the colors can bleed into the cream. The short chill firms the butter so the topping won’t drag during slicing.
- Lift the chilled cookie slab from the pan by holding the parchment overhang. Set it on a cutting board and trim only any very uneven outer edges. For 24 portions, cut the slab into 4 rows across its width and 6 rows along its length. Use a long sharp knife and press straight down rather than dragging it through the frosting. Wipe the blade after every 2 or 3 cuts to keep the colors from smearing. Arrange one portion on a small white serving plate with its freshly cut side visible. Let the portion sit for 10 minutes at about 68°F before serving. The cut piece should show a thick soft pale golden base and a clear layer of ivory frosting. Small crumbs and uneven sprinkle clusters make it look homemade. If the frosting smears heavily, chill the remaining pieces for 10 more minutes. The brief rest softens the crumb without melting the buttercream.
Notes
Frequently Asked Questions
Yes, you can bake the cookie base up to 2 days before serving and keep it tightly covered in the refrigerator. Let the slab cool fully for at least 60 minutes before wrapping it. You can also make the buttercream 2 days ahead and refrigerate it separately. Bring the frosting back to a spreadable texture and beat it briefly before decorating.
Store the frosted bars in an airtight container in the refrigerator for up to 5 days at 40°F or below. Put parchment between layers to keep the frosting from sticking. For the softest texture, let each portion stand at room temperature for 10 to 15 minutes before eating. Don’t leave buttercream-covered bars out for more than 2 hours.
You can replace the 2 large eggs with 2 tablespoons of ground flaxseed mixed with 6 tablespoons of water. Let the mixture rest for 10 minutes until it thickens. Bake at 350°F and begin checking after 24 minutes because the bars may need extra time. Expect a denser texture and more delicate edges than the original version.
Too much flour or excessive baking usually causes a dry cookie base. For this recipe, use about 300 grams of all-purpose wheat flour and check the pan after 20 minutes at 350°F. Remove the bars when the edges turn pale gold and the middle looks set without a wet shine. The center will firm further as the slab cools.
Yes, double every ingredient and divide the dough evenly between two 9 by 13-inch baking pans. Bake both at 350°F and switch their rack positions halfway through if your oven has uneven heat. Start checking at 20 minutes and remove each pan when its center looks set. You’ll get approximately 48 bars when you cut each slab into 24 portions.
Cut each 9 by 13-inch slab into 24 pieces for an easy-to-share party dessert. For a Christmas dessert spread, serve them slightly cool alongside our Non Alcoholic Christmas Punch. Arrange the portions in a single layer so the frosting stays neat. If you’re transporting them, refrigerate the bars for 15 to 20 minutes before packing.
Yes, freeze the cut bars in a single layer for about 1 hour until the frosting feels firm. Then wrap each portion tightly and place them in a freezer-safe airtight container for up to 2 months. Thaw them overnight in the refrigerator and let them stand for 10 minutes before serving. Don’t microwave the frosted bars because the buttercream can melt before the centers warm.
Final Thoughts
The moment I cut into my first batch of Holiday Sugar Cookie Bars, I was a little worried the soft centers wouldn’t hold their shape. But after a short chill, the frosting stayed in place and every piece came out with that thick buttery cookie layer I love.
That’s why this easy holiday sugar cookie bars recipe has become one of my favorite Christmas baking ideas. You get all the fun of decorating cookies without spending the afternoon rolling dough.
If you try these christmas holiday sugar cookie bars, leave me a comment below because I love hearing how your baking turns out.
Sugar cookie bars use much of the same dough as classic cutout sugar cookies, but one pan replaces the usual rolling and cutting. A 9 by 13-inch slab gives you 24 portions with just 10 straight cuts. That’s a lot less work when you’re baking for a Christmas party.